17 Curling Wand Hacks for Perfect Waves Every Time
You’ve invested in a beautiful curling wand, watched countless tutorials, and yet… your waves fall flat, look frizzy, or don’t last past your front door. Sound familiar? You’re not alone. The journey from awkward spirals to perfectly tousled, red-carpet-ready waves is often paved with hidden tricks and technique tweaks that make all the difference.
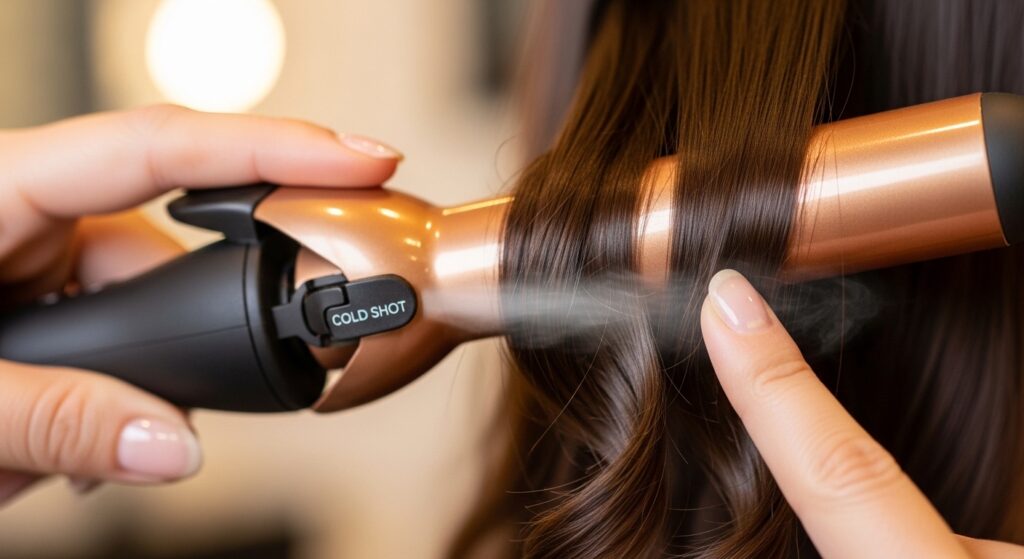
1. The Cold Shot Seal: Lock Waves In Place
This is the oldest trick in the book for a reason: it works. After curling a section of hair, hold the curl in your hand for a few seconds to let it cool slightly, then hit it with the cold shot button on your wand (if it has one). If not, simply hold the curl away from the wand’s heat. The sudden blast of cool air helps to “set” the hair’s shape by closing the cuticle, which was opened by the heat. This results in shinier, much longer-lasting waves with less frizz.
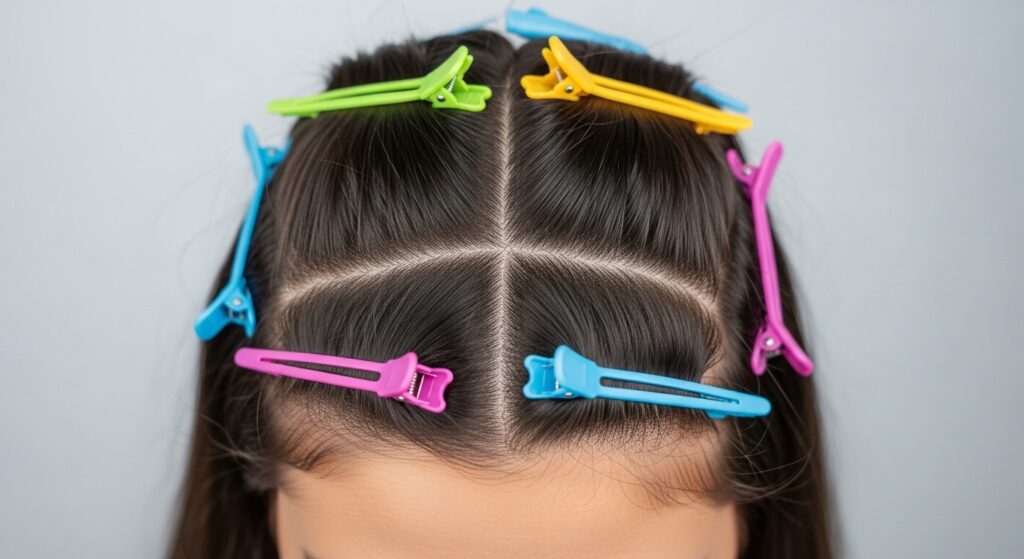
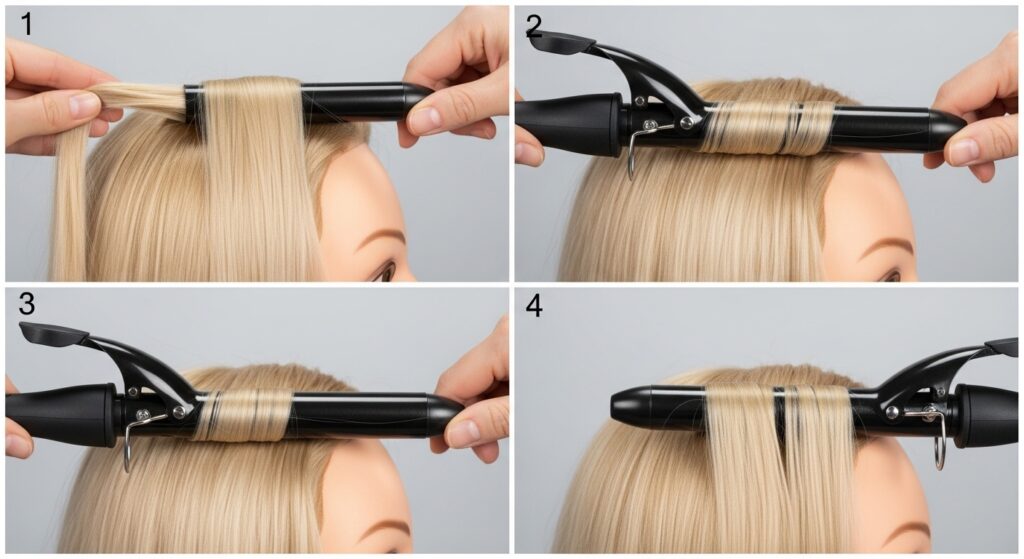
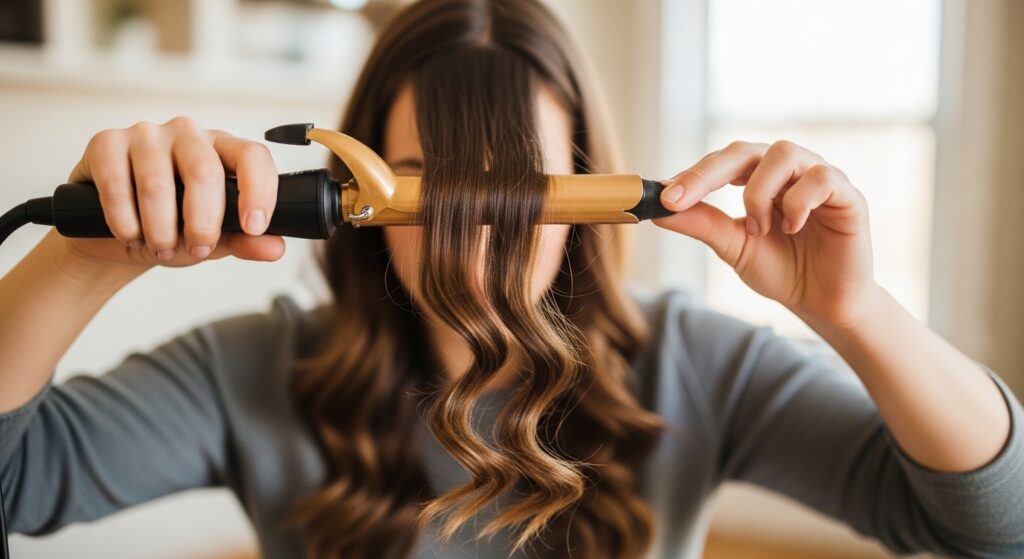
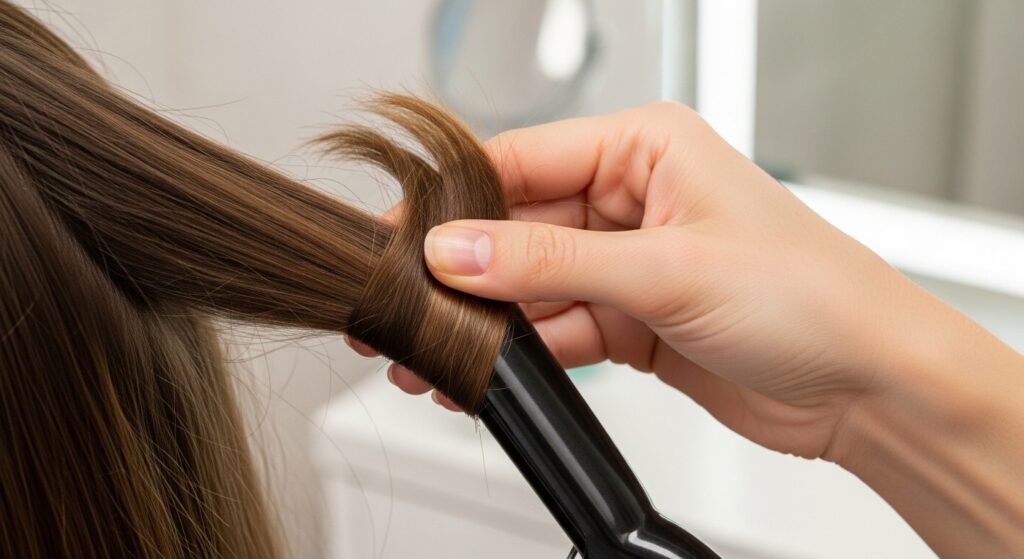
2. Section Like a Pro: The Key to Uniformity
Randomly grabbing sections is a surefire path to patchy, uneven waves. For perfect results, start with clean, dry hair and part it as you normally would. Then, clip your hair into four main sections: two in the back (split horizontally from ear to ear), and one on each side. Work from the bottom back sections upwards. Within each section, take horizontal subsections about 1-2 inches wide. This methodical approach ensures every strand gets heat, creating a uniform, full head of waves.
3. Direction Dictates Vibe: Alternate Your Curls
For natural-looking, beachy waves, avoid curling every section in the same direction. This can look too uniform and “pageant-y.” Instead, alternate the direction of your curls. For example, curl the first section away from your face, the next toward your face, and so on. Once you run your fingers through them, the alternating base directions will create a perfectly imperfect, effortless wave pattern.
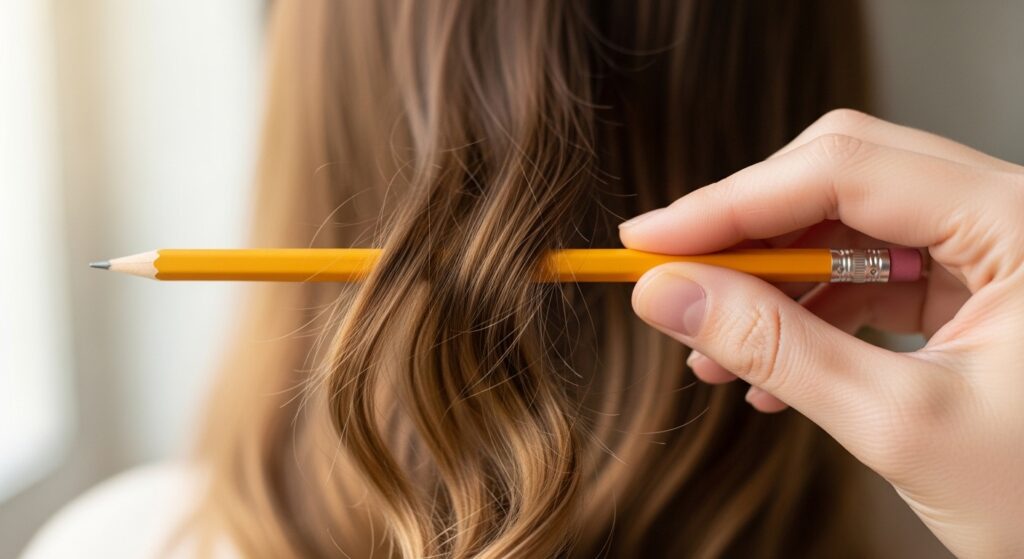
4. The “Pencil Test” for Section Width
Unsure how big your hair sections should be? Use a pencil as a guide. The ideal subsection for curling is roughly the width of the curling wand barrel. A section that’s too thick won’t heat through properly, leading to weak waves. A section that’s too thin can create overly tight, unnatural ringlets. The pencil (or the wand itself) is a perfect visual gauge to ensure consistent, manageable sections every time.
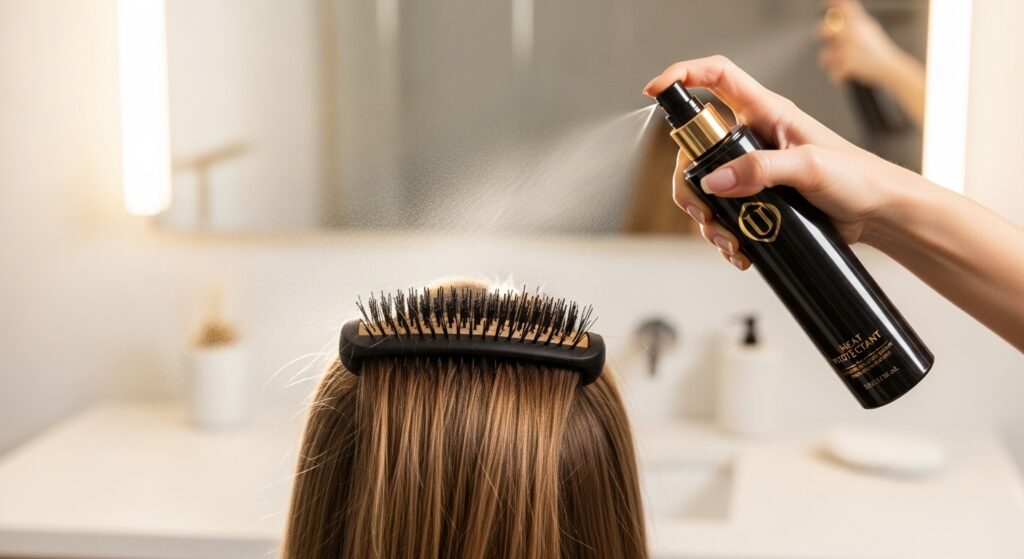
5. Protect & Prep: Heat Protectant is Non-Negotiable
This isn’t just a hack; it’s a hair-saving commandment. Always, always apply a heat protectant spray or cream to dry hair before you even turn the wand on. It creates a protective barrier between your hair and the high heat, preventing damage, reducing breakage, and minimizing frizz. Healthy hair holds style better, so this step is foundational for perfect waves.
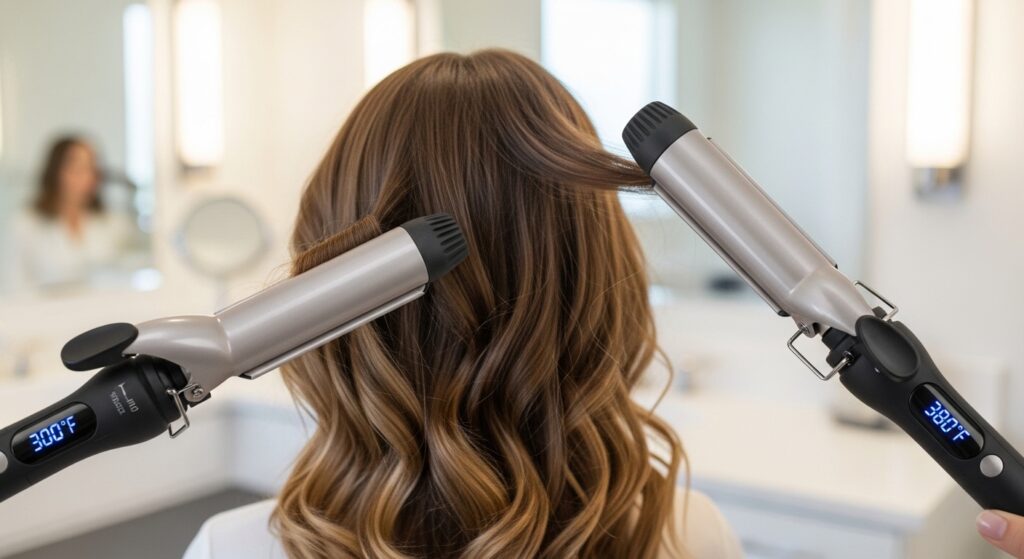
6. Start with Cooler, Finish with Hotter
If your wand has adjustable temperature settings, don’t use the highest heat everywhere. Start with a lower temperature (around 300°F) on the more delicate hair around your face and at the ends. Once you move to the thicker, harder-to-curl hair at the back and crown, you can increase the heat (up to 380°F). This tailored approach protects your most vulnerable hair while still ensuring the style holds.
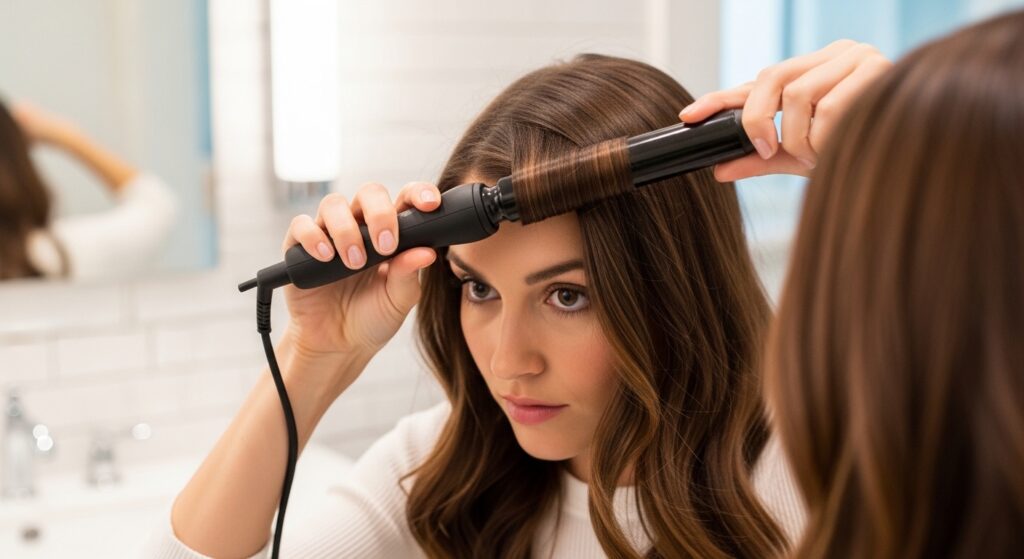
7. The Vertical Curl for Modern, Loose Waves
Forget the traditional horizontal wrap. For looser, more cascading waves, try holding the wand vertically. Wrap your hair around the barrel from top to bottom (or bottom to top). This changes the axis of the curl, creating a wider, more relaxed wave that looks incredibly modern and is less likely to create a crimped effect at the ends.
8. Don’t Curl the Very Ends
To avoid the dreaded “pringle” or “flipping” ends, stop curling about 1-2 inches from the ends of your hair. As you wrap, leave the tips out. This creates a softer, more blended, and lived-in look. When you brush out the waves, the ends will seamlessly integrate instead of sticking out in odd directions.
9. The “Second-Day” Refresh Hack
Your waves are looking flat on day two? Don’t re-curl everything. Spritz a mixture of water and a little leave-in conditioner or texturizing spray on dry areas. Then, take your wand and only curl the very top layer of hair around your face and at the crown. This refreshes the look without over-applying heat or making your hair heavy.
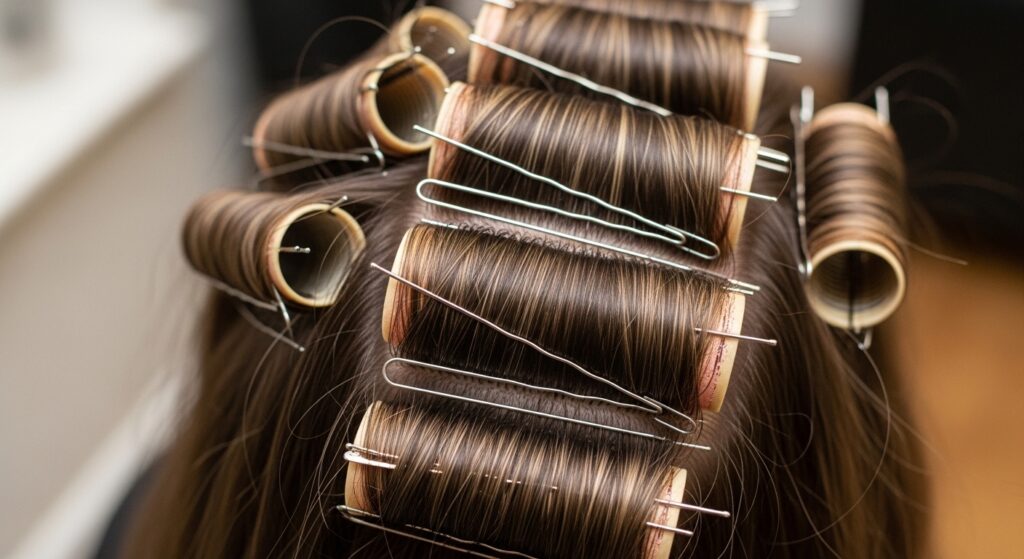
10. Pin Your Curls to Set
For ultimate hold, especially on stubbornly straight hair, try the pin-and-set method. After curling a section and applying the cold shot, roll the curl up into a coil and secure it against your scalp with a bobby pin or clip. Let all your curls cool completely pinned before taking them down. This allows the shape to set fully, resulting in dramatically longer-lasting volume and wave definition.
11. Create Root Volume with a Reverse Grab
Want lift at your roots? When you start to wrap a section around the barrel, lift the wand slightly upward and away from your head for the first turn. This pulls the root area up and creates instant volume. Then, continue wrapping the rest of the length normally. This small motion makes a huge difference in avoiding flat roots.
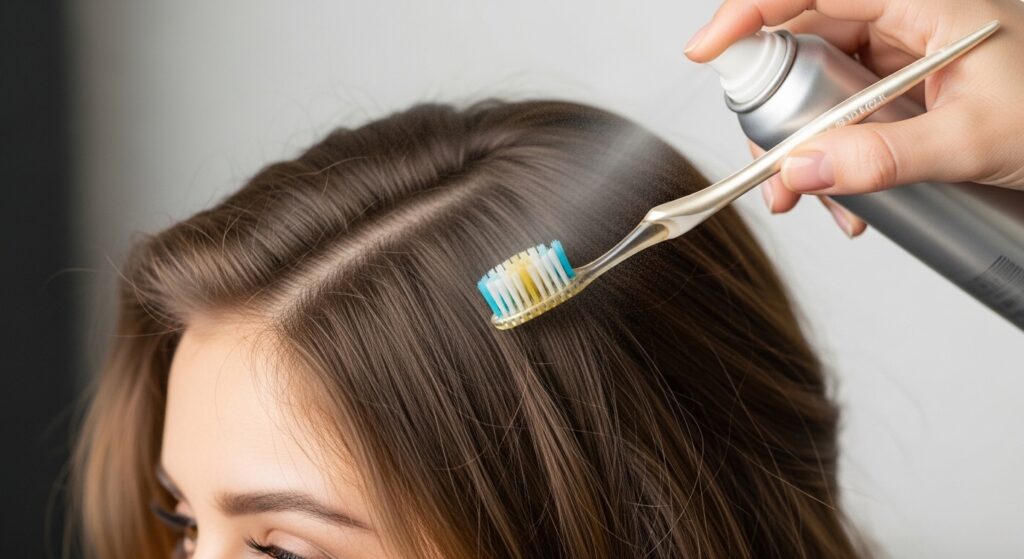
12. Use a Toothbrush for Flyaways
After curling, you might have pesky flyaways or baby hairs that won’t lay flat. Spritz a clean, disposable toothbrush (or a brow spoolie) with a light-hold hairspray and gently brush those hairs into place. The small bristles offer precise control without disturbing your beautiful waves.
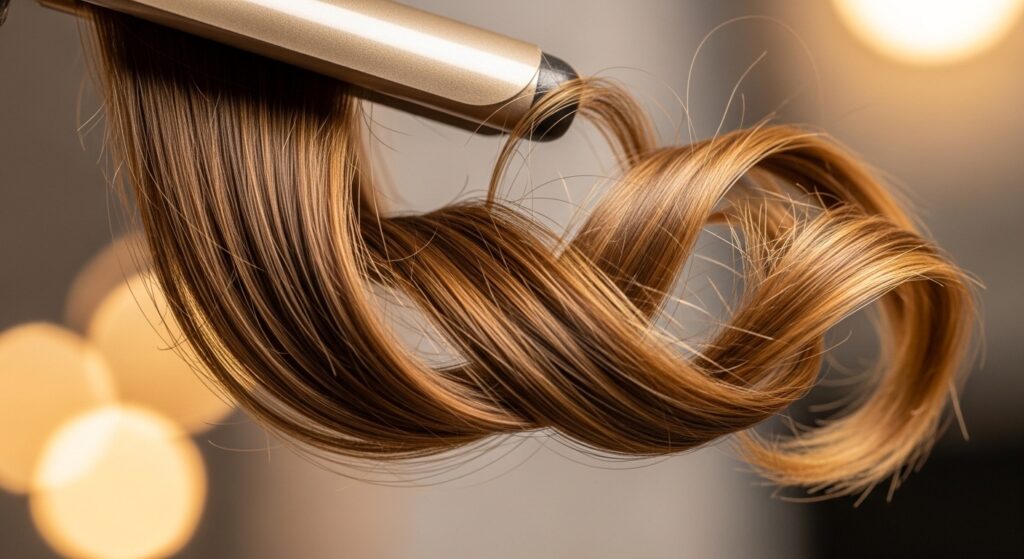
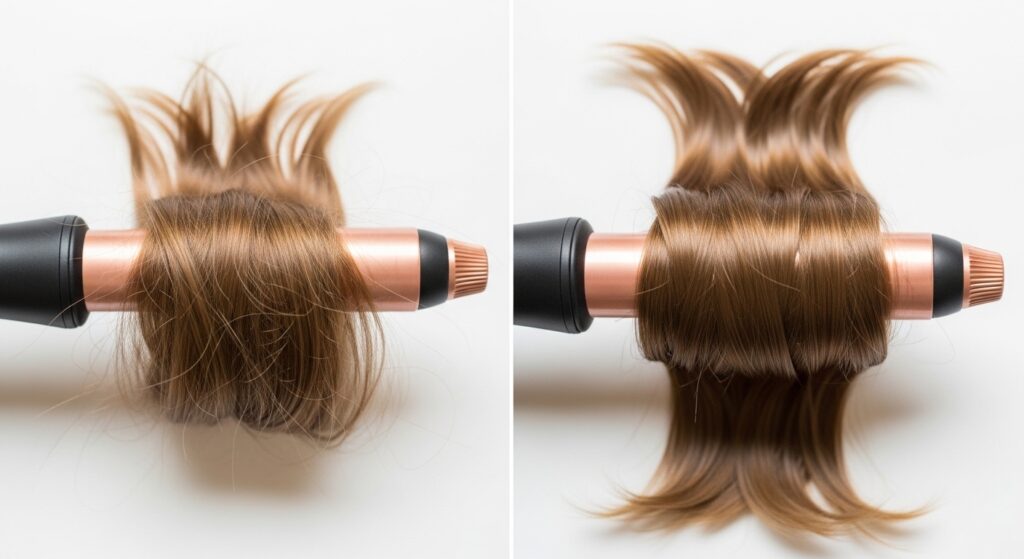
13. The “Ribbon” Technique for Smooth Wraps
To ensure your hair wraps smoothly around the barrel without kinks, imagine you are wrapping a smooth ribbon. Keep slight, even tension on the hair as you wind it, and avoid letting it fold or twist on itself. This technique promotes a smooth, even heat application for a flawless wave shape.
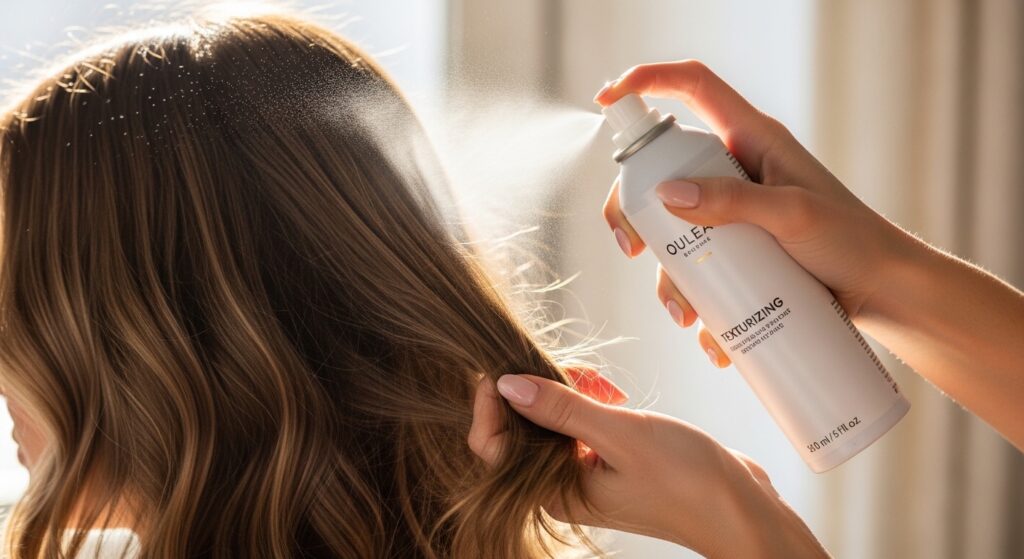
14. Texturizing Spray Before & After
For that perfect, piecey, beach-wave texture, use a texturizing spray in two stages. First, spray lightly on dry hair before curling to add grit and hold. Then, after curling and brushing out, spray lightly on the mid-lengths and ends and scrunch. This enhances separation and gives that “just-back-from-the-shore” look.
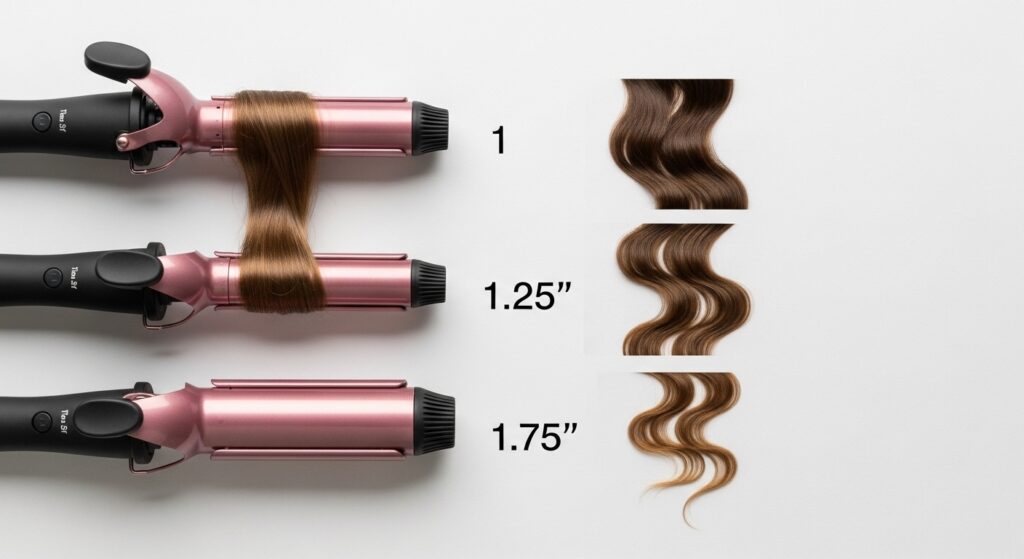
15. Know Your Barrel Size
The barrel diameter dictates your wave size. A 1-inch barrel creates classic curls. For the popular beach wave, opt for a 1.25 to 1.5-inch barrel. If you have very long or thick hair and want loose waves, a 1.75-inch or larger barrel is your friend. Don’t fight your tool—use the right size for your desired result.
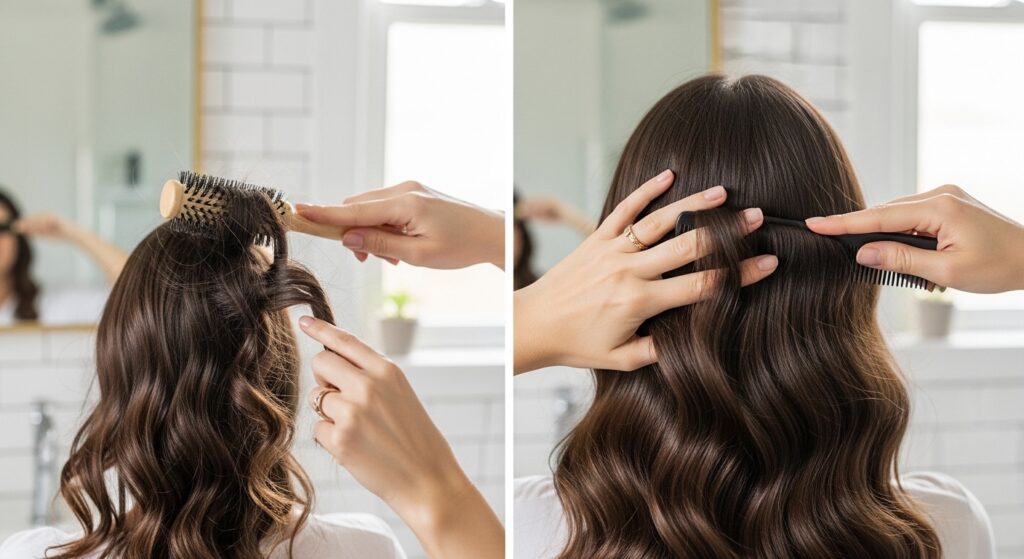
16. The “Wait to Brush” Rule
Resist the urge to brush your curls immediately after curling! Let your hair cool completely first. Brushing hot curls breaks the shape and causes frizz. Once cool, use your fingers, a wide-tooth comb, or a brush with flexible bristles to gently separate and shape the waves into your desired look.
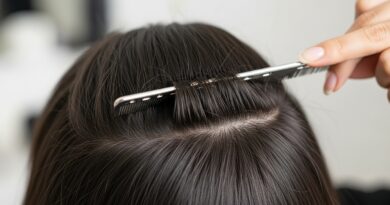
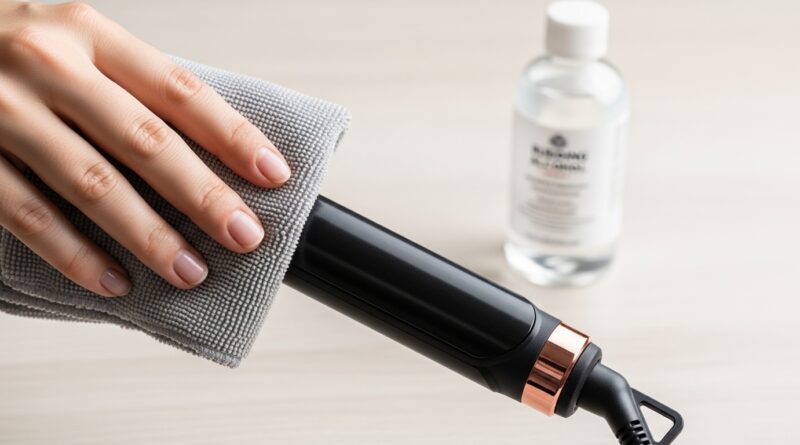
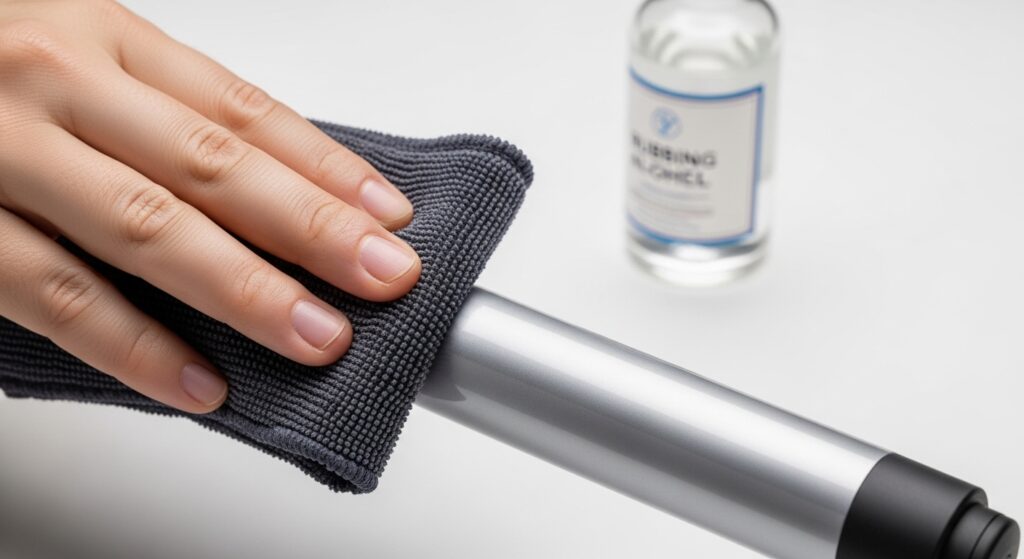
17. Clean Your Wand Regularly
A dirty wand coated in product residue and dust will not perform well. The buildup can cause snagging, uneven heating, and transfer gunk to your clean hair. Once a week, wipe the cooled barrel with a rubbing alcohol-dampened cloth or a specialized tool cleaner. This ensures optimal heat transfer and smooth gliding for perfect waves every time.
Wave Goodbye to Bad Hair Days
Mastering your curling wand doesn’t require magic—just the right knowledge. These 17 hacks are your blueprint, from the essential prep work to the clever finishing touches. The true secret lies in understanding that a great tool is only as good as the technique behind it. By incorporating even a few of these tips—like the cold shot, strategic sectioning, and directional curling—you’ll notice an immediate upgrade in the longevity, shine, and overall perfection of your waves.
So, grab your wand, pick a hack to try first, and get ready to transform your hair routine. Perfect waves aren’t a lucky accident; they’re a crafted result. And now, you have all the tricks to create them on demand.