17 Scrunching Techniques That Add Volume Without Frizz
If you have wavy or curly hair, you know the scrunch is sacred. It’s the magical motion that coaxes out your natural pattern, lifts roots, and creates those coveted, bouncy curls. But for every perfect, frizz-free ringlet achieved, there’s a horror story of a scrunch gone wrong—resulting in a halo of frizz, a crunchy cast, or limp, undefined waves. The dream is volume without the chaos.
The Golden Rules: Pre-Scrunch Fundamentals
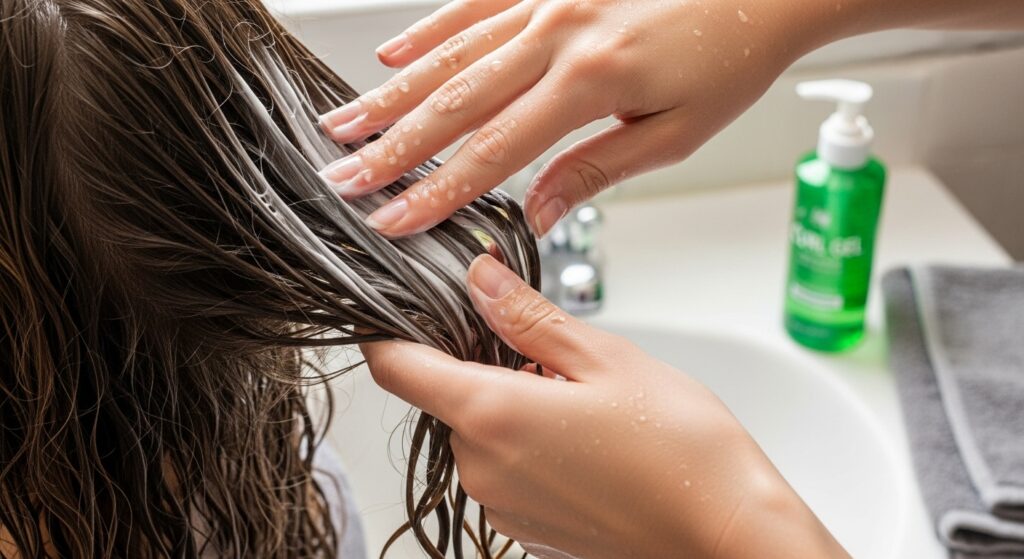
Before your hands even touch your hair, the stage must be set. Skipping these fundamentals is a one-way ticket to Frizz Town. First, hydration is key. Scrunching dry or poorly moisturized hair will separate the cuticle and cause friction, creating frizz. Always start on very wet, conditioned hair. Second, product choice dictates your outcome. A lightweight curl cream or leave-in conditioner provides slip and hydration, while a gel or mousse offers hold and a frizz-fighting cast. Applying in this order—cream then gel—is often called the “curl cocktail” and is a game-changer.
Finally, consider your drying method. Aggressive towel rubbing is the arch-nemesis of frizz-free hair. Instead, always use a microfiber towel or a soft cotton t-shirt to gently squeeze out excess water before you begin your scrunching ritual. With these rules in place, you’re ready for the techniques.
Phase 1: The Soaking Wet Scrunch
This phase is all about initial curl formation and even product distribution on hair that is drenched.
1. The Prayer-Hand Scrunch: After applying your products with raking or praying hands, cup your hair gently from the ends upward towards your scalp, as if in prayer. Let the water and product squish through your fingers. This gentle method encourages clumps without breaking them apart.
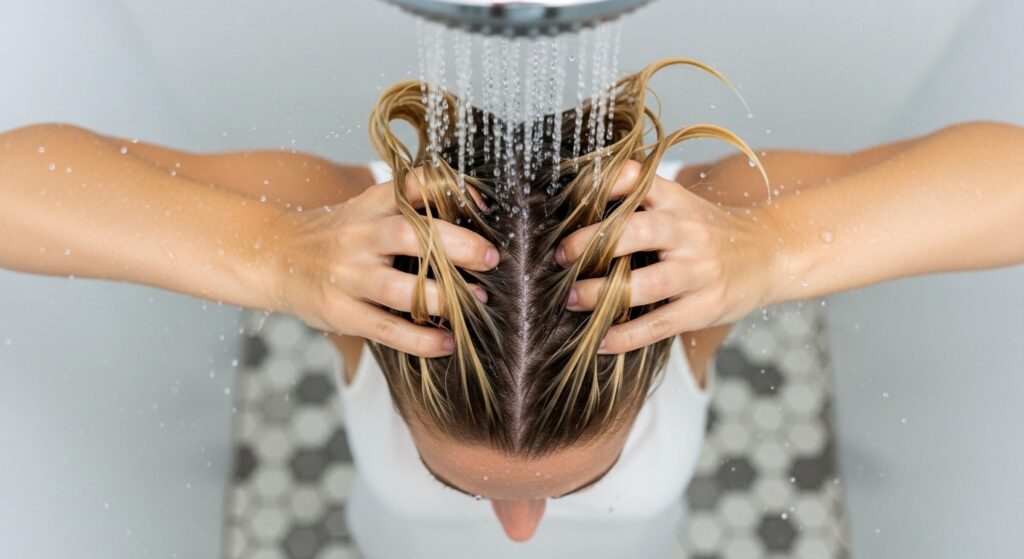
2. The Cup Scrunch: This is the classic. Form a cup with your hand and scoop a section of hair into your palm, closing your fingers to gently squeeze upward. Hold for a second at the roots before releasing. Repeat section by section for even volume.
3. The Head Flip & Scrunch: Bend over at the waist, flipping your hair upside down. Now, use the cup scrunch method on all your hair at once. This instantly adds root volume and helps curls form away from the scalp.
4. The Pulse Scrunch: As you cup your hair, use a gentle, pulsing motion—squeeze, release slightly, squeeze again—2-3 times before letting go. This helps work the product deeper into the curl clump.
Phase 2: The Damp Scrunch (Microfiber/T-Shirt Stage)
Once excess water is removed, your hair is in a prime, malleable state for enhancing definition and starting the drying process.
5. The T-Shirt Plop & Scrunch: Lay a cotton t-shirt flat. After your initial scrunch, lean over and place your hair in the center of the shirt. Gather the shirt around your head and tie it. Leave it for 10-20 minutes. This “plop” scrunches your hair gently against your scalp as it absorbs moisture.
6. The Microfiber Scrunch-Out: With a microfiber towel in hand, gently scrunch sections of your hair to absorb water. The goal is not to dry it completely, but to remove dripping water that can weigh curls down.
7. The Root Lift Scrunch: Focus solely on the roots. Take small vertical sections at your crown, place your fingers at the roots, and gently push upward while giving a slight squeeze. This creates lift without disturbing the defined ends.
8. The Side-to-Side Scrunch: For volume at the sides, turn your head to one side and scrunch the hair against that side of your head, then repeat on the other. This can help create a fuller, wider shape.
Phase 3: The Diffusing Scrunch
Heat can be a major frizz trigger, but diffusing with these techniques locks in volume and definition.
9. The Hover Diffuse: Before touching your hair with the diffuser, turn it on to a medium heat/medium speed setting and simply hover it around your roots and overall head. This starts drying the hair’s surface without agitation, setting a frizz-free foundation.
10. The Cup & Hold Diffuse Scrunch: Place a section of hair into the diffuser bowl, gently bringing it up to your scalp. Hold it there for 30-60 seconds on medium heat, then turn the dryer off before moving to the next section. This “sets” the curl in its scrunched position.
11. The Cold Shot Seal: Once a section is about 90% dry with heat, hit the cold shot button for 10 seconds while still holding the diffuser in place. The blast of cool air seals the hair cuticle, enhancing shine and reducing frizz.
12. The Pixie Diffuse Scrunch: For ultra-volume, dry your hair in small, vertical sections from the roots out. Use the cup method on each tiny section. It takes longer but creates incredible lift and definition.

Phase 4: The Dry & Final Touch Scrunch
Your hair is dry and has a cast. Now, it’s time to break the seal without creating frizz and add the final touches of volume.
13. The SOTC (Scrunch Out The Crunch): This is non-negotiable. Once hair is completely dry and crispy, put a small amount of hair oil or serum on your palms. Gently scrunch your hair upwards to break the gel or mousse cast. The result is soft, defined, frizz-free volume.
14. The Vertical Scrunch: After SOTC, for extra root volume, use a vertical motion. Place your fingers vertically against your scalp and gently push up and scrunch, focusing on the crown area.
15. The “Shake & Scrunch” at the Roots: Gently insert your fingers at the roots of your dry hair and give a little shake to loosen them. Follow with a light, upward scrunch just at the root area to add air and body.
16. The Steam Refresh Scrunch: On day 2 or 3, if curls are flat or slightly frizzy, dampen your hands with water or a curl refresh spray. Gently rescrunch sections, focusing on the ends and mid-lengths. The light moisture reactivates product without overwetting.
17. The Pineapple & Sleep Scrunch: For overnight volume preservation, loosely gather your hair into a high, loose ponytail on top of your head (a “pineapple”) using a silk scrunchie. In the morning, take it down, flip over, and give your roots a gentle shake and rescrunch. The silk prevents friction, and the position preserves your scrunched volume.

Your Anti-Frizz Scrunching Checklist
To ensure every scrunch session is a success, keep this quick checklist in mind:
DO: Start on soaking wet, product-slippy hair. Use a t-shirt or microfiber towel. Apply products in the correct order (liquid to hold). Diffuse with a hover-first method. Always Scrunch Out The Crunch with an emollient like oil. Protect your hair with silk at night.
DON’T: Scrunch dry or product-less hair. Use a terry cloth towel to rub hair. Over-scrunch or aggressively manipulate hair when it’s 50% dry (the frizziest stage). Touch your hair constantly while it air-dries. Skip the hold product—it’s your frizz force field.
Conclusion: Volume and Definition, United
Mastering the scrunch is about understanding that it’s not a single action, but a strategic process applied throughout your styling routine. From the first squeeze on sopping wet hair to the final breaking of the cast, each technique builds upon the last to create a structure that lifts, defines, and—most importantly—protects. Frizz isn’t a curse you have to live with; it’s often just a sign that your technique needs a tiny tweak.
Experiment with these 17 scrunching techniques. Mix and match from different phases to find the perfect combination for your unique curl pattern. Remember, the goal is happy, healthy hair that moves with volume and life. Now, go forth and scrunch with confidence!