17 Triangle Part Braid Patterns for Geometric Precision
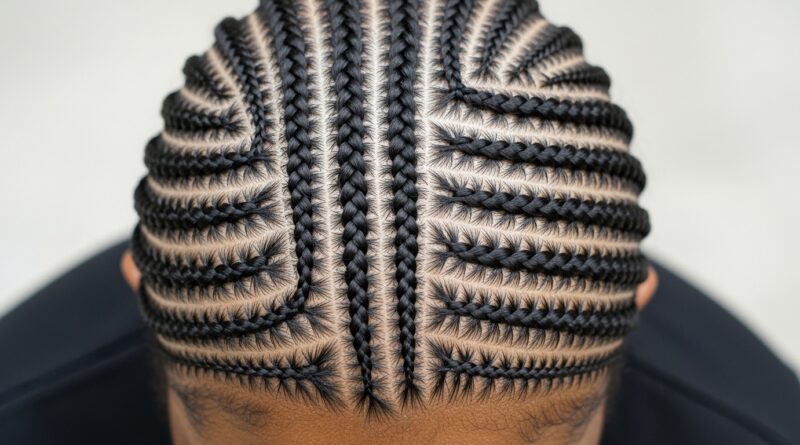
In the world of hairstyling, braids have evolved far beyond simple three-strand plaits. They have become a canvas for artistic expression, where geometry meets craftsmanship. Among the most striking and visually satisfying techniques is the use of triangle part braid patterns. These precise, angular sections create a foundation for braids that are not just hairstyles but wearable art. Geometric precision in parting transforms hair into a structured, modern, and eye-catching statement.
The Foundation: Understanding Triangle Parts
Before diving into the patterns, it’s crucial to understand what sets a triangle part apart. Unlike a traditional straight or curved part, a triangle part is created by making three straight lines that connect to form a triangular shape on the scalp. This section becomes the defined area from which a braid—whether a cornrow, Dutch braid, or flat twist—originates. The key to success lies in precise sectioning and tension control.
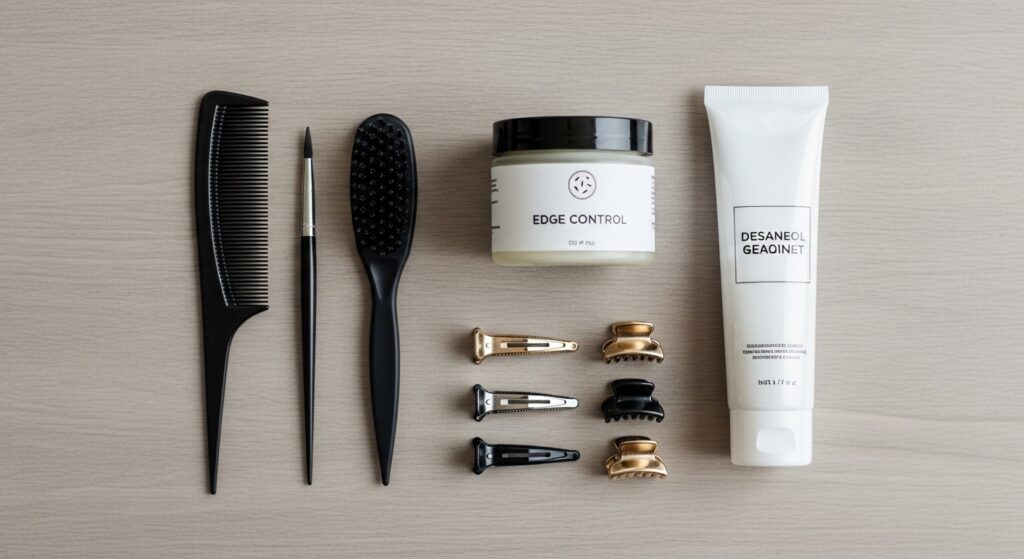
You will need a fine-tooth tail comb, quality hair gel or edge control for clean lines, clips to hold unused hair, and a spray bottle with water. The hair should be detangled and slightly damp for best manageability. Remember, the goal is geometric precision: crisp lines and symmetrical (or intentionally asymmetrical) shapes are what make these styles stand out.

Category 1: Simple & Striking Single Triangles
These patterns use isolated triangle parts for bold, focal-point braids. They are perfect for beginners or for adding a geometric accent to a simpler style.
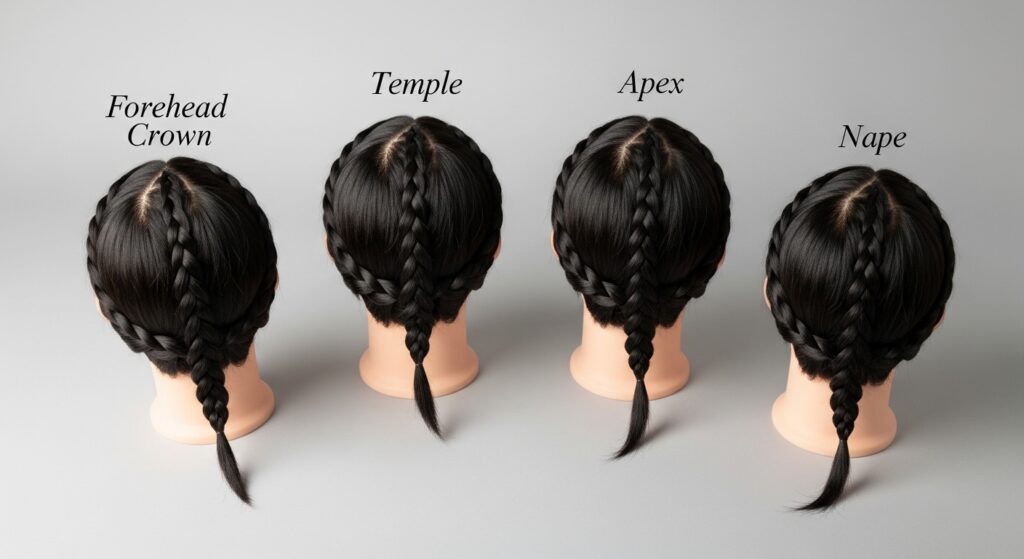
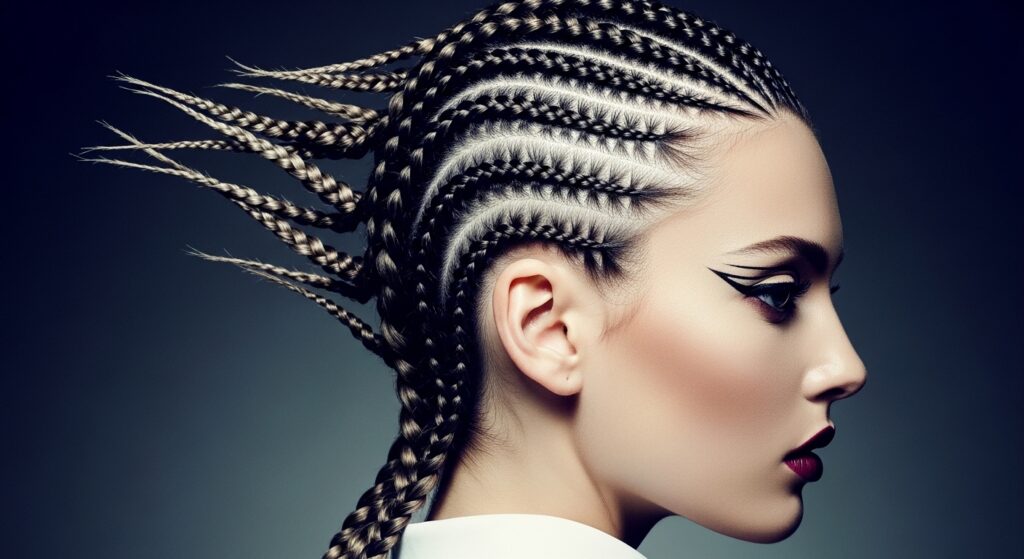
1. The Forehead Crown Triangle: Create a single, centered triangle at the front hairline, pointing towards the crown. Braid the section into a Dutch braid that continues straight back into a ponytail or bun.
2. Temple Triangle Braid: Part a triangle at one or both temples. Braid the section along the hairline towards the back of the ear, incorporating it into a side-swept style.
3. The Apex Triangle: Place a single triangle at the very top (apex) of the head. Braid it straight back as a central anchor braid, then gather the rest of the hair into a high puff or bun at the crown.
4. Nape Triangle: For a subtle detail, part a small, inverted triangle at the nape of the neck. Braid this section into a tiny, delicate braid that can be left alone or incorporated into a larger low braid.
Category 2: Dynamic Duos & Symmetrical Patterns
Symmetry amplifies the geometric impact. These patterns use two or more triangles in mirrored arrangements for balanced, head-turning designs.
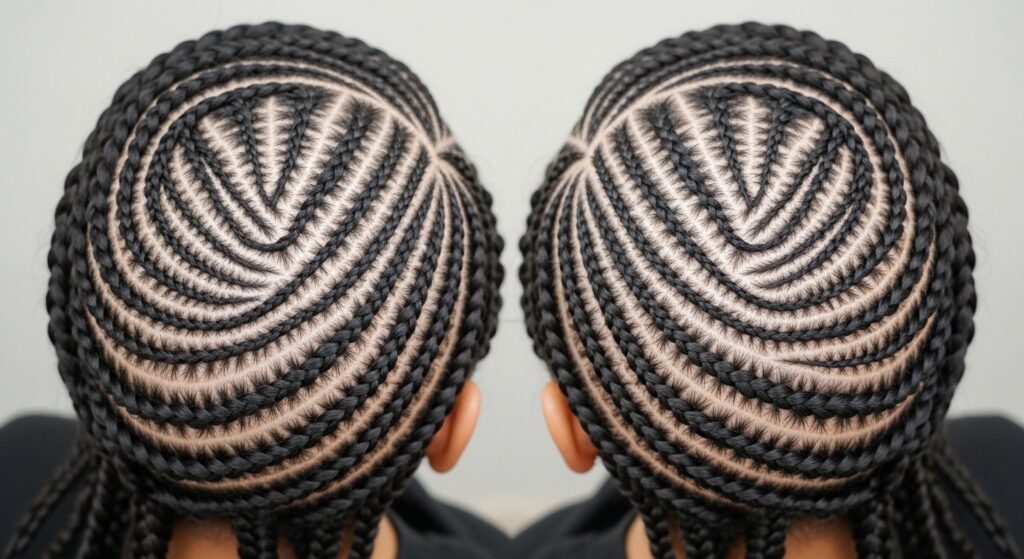
5. Dual Temple Triangles: Mirroring triangle parts at both temples, braided straight back. They can meet at the crown or run parallel into a double ponytail.
6. Chevron Parting: Create a row of connected, inverted triangles along the front hairline (like a chevron pattern). Braid each triangle section individually into cornrows that flow directly back.
7. Triangle Part with Center Braid: Part two large triangles on either side of a central rectangle. Braid the center rectangle, then braid the hair from each triangle section towards the center, gradually incorporating them into one large central braid.
8. Starburst Halos: Part four triangles radiating from a central point at the crown—one facing forward, one back, and one to each side. Braid each triangle outward, creating a stunning sunburst effect.
Category 3: Interlocking & Complex Geometric Grids
This is where hair truly becomes architecture. These advanced patterns interlock triangles to form intricate grids and mosaics across the entire scalp.
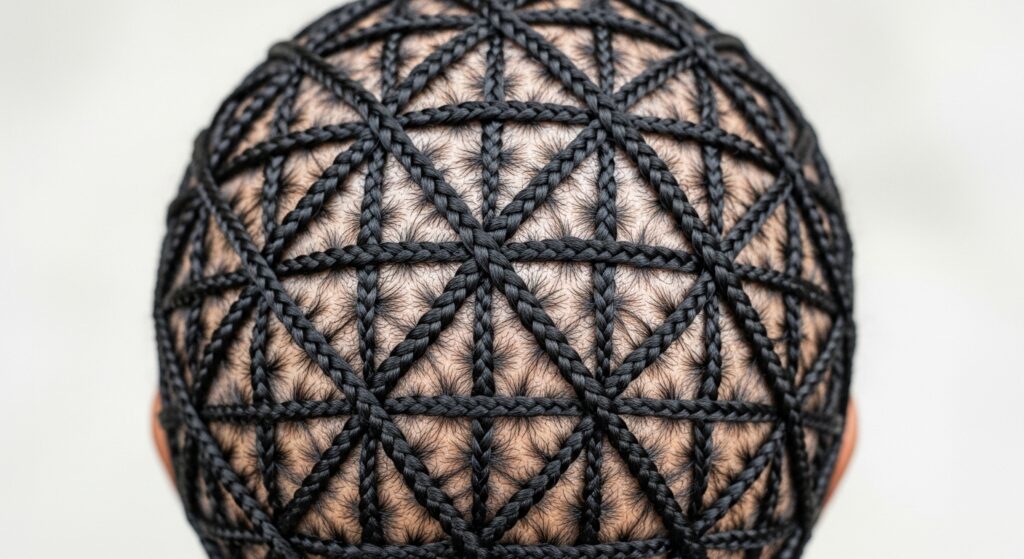
9. Triangle Mosaic Cornrows: The entire head is partitioned into a grid of interlocking triangles (like a mosaic). Each triangular section is then braided in a consistent direction, creating a stunning, textured geometric map.
10. Zig-Zag Triangle Path: Part a continuous path of connecting triangles that zig-zag from the front hairline to the nape. Braid along this path, following the alternating angles for a dynamic, serpentine braid.
11. Diamond Grid (Two Triangles Combined): By combining two triangles base-to-base, you create a diamond. Fill the scalp with a grid of diamond parts, braiding each diamond as its own unit or connecting them with micro-braids.
12. Pyramidal Layers: Part large triangles from the hairline pointing upward. Within each large triangle, part smaller, nested triangles. Braid from the smallest triangle outward, incorporating hair to create a layered, dimensional effect.
Category 4: Asymmetrical & Artistic Statements
Break the rules for high-fashion, editorial looks. Asymmetrical triangle patterns feel modern, unexpected, and deeply artistic.
13. Diagonal Sweep Triangles: Part a series of large, long triangles that sweep diagonally across the head from one side of the hairline to the opposite nape. Braid each triangle along its own diagonal path.
14. Fragmented Triangles: Scatter triangles of different sizes across one side of the head, leaving the other side with sleek, unbraided hair. Braid each triangle into a small, isolated braid for a deconstructed, edgy look.
15. Off-Center Cascade: Start with a cluster of triangles at an off-center point (like above one ear). Part triangles that gradually increase in size and cascade down and across the back of the head, braided into flowing, connected cornrows.
Category 5: Triangle Parts in Updos & Crowns
Incorporate triangle parts into elegant updos and regal crown braids for events where detail is paramount.
16. Geometric Crown Braid: Instead of a standard circular crown braid, use a series of triangle parts around the head to create a angular, geometric halo. Braid each section and pin them to connect in a striking crown.
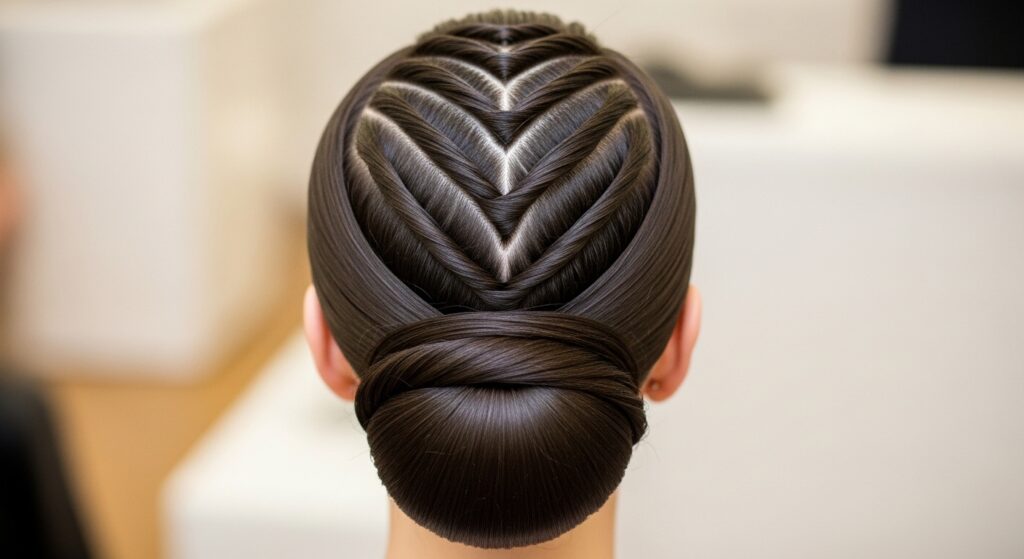
17. Triangle-Backed Bun: Create an elaborate triangle part pattern on the back of the head—visible only from behind. Gather all braids into a sleek, low bun at the nape, making the intricate parting the stunning surprise back view.
Pro Tips for Flawless Geometric Braiding
Mapping is Everything: Lightly sketch your intended pattern with the tail of your comb before applying gel. Plan your design.
Tension Consistency: Maintain even, firm tension as you braid along the edges of the triangle. Inconsistent tension will distort the clean lines.
Gel Application: Apply gel directly to the part line with a small brush or the comb’s tail for surgical precision, not broadly across the section.
Practice on Mannequins: Before attempting complex grids on a client, practice the parting and braiding technique on a mannequin head to build muscle memory.
Conclusion: Your Hair as a Geometric Canvas
Mastering triangle part braid patterns unlocks a new dimension in hairstyling. It moves beyond tradition into the realm of precision art, where each braid is a deliberate line in a larger, breathtaking composition. These 17 patterns provide a blueprint—from the elegantly simple to the breathtakingly complex.
The true beauty of geometric braiding lies in its versatility and impact. It is a style statement that speaks of patience, skill, and modern aesthetics. Start with a single triangle, master the symmetry of a duo, and gradually challenge yourself with interlocking grids. Remember, every expert was once a beginner who dared to make that first, precise part. So pick up your comb, define your angles, and start braiding your masterpiece.