18 Halo Braid Methods That Work on Any Hair Length
Imagine a hairstyle that frames your face like a crown, looks effortlessly elegant, and works whether your hair brushes your shoulders or cascades down your back. That’s the magic of the halo braid. Often perceived as a style reserved for Rapunzel-like lengths, the halo braid is surprisingly versatile. This guide is here to shatter that myth and equip you with 18 unique halo braid methods that truly work on any hair length. From pixie cuts to waist-length waves, you can achieve this ethereal look with the right technique.
Understanding the Halo Braid: More Than Just a Crown
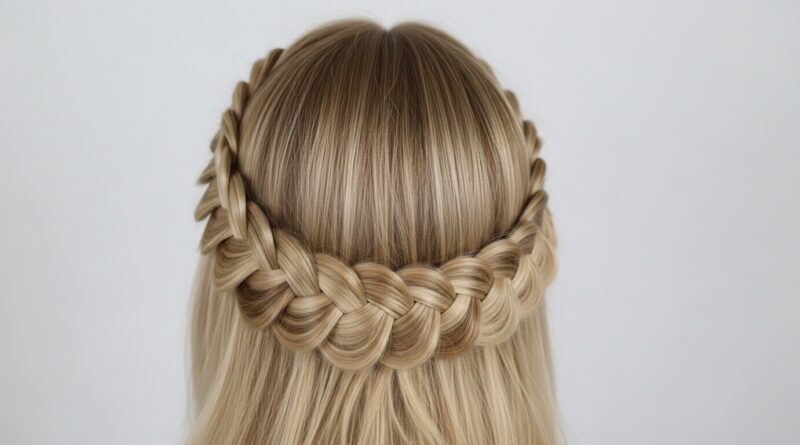
At its core, a halo braid is simply one or more braids that circle the head like a crown, tucking neatly at the nape or intertwining seamlessly. The beauty lies in its adaptability. The key to mastering it on different lengths is understanding that the technique adjusts, not the vision. For shorter hair, we focus on creating the illusion of length and fullness, often using the braid to cover hair ends. For longer hair, the possibilities expand into intricate, woven masterpieces.

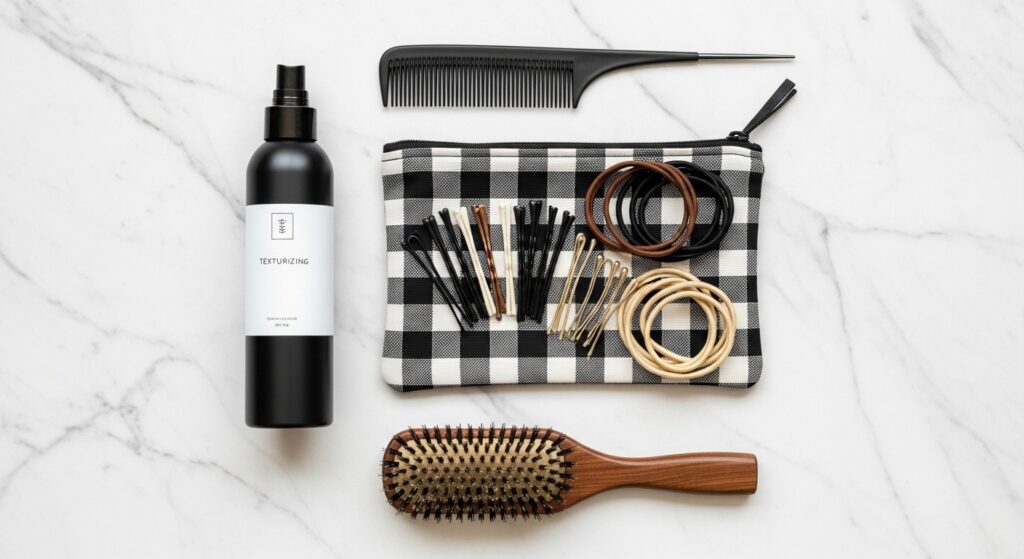
Essential Tools and Prep for Every Method
Before we dive into the methods, let’s set the stage for success. Proper preparation makes all the difference, especially when working with shorter or finer hair.
Tools You’ll Need: A fine-tooth comb, tail comb for sectioning, clear elastics that match your hair color, bobby pins (also in a matching shade), a mirror, and light-hold hairspray or texturizing spray. For added grip and volume, a dry shampoo or texturizing powder is a game-changer.
Preparation is Key: Start with day-old hair or use texturizing spray. Slightly dirty hair has more grip, making it easier to braid and preventing slips. If your hair is very soft or silky, a light mist of texturizing spray will give the braid something to hold onto. Gently backcombing the roots of the sections you’ll be braiding can add crucial volume for shorter styles.
Methods for Short Hair (Chin to Shoulder Length)
Yes, you can absolutely rock a halo braid with short hair! The secret is in strategic placement and sometimes, a little creative illusion.
1. The Front-Halo Faux Crown: This method focuses on the front half of your head. Create a Dutch or French braid starting at one temple, braiding along the hairline, and stopping at the opposite temple. Pin the ends neatly underneath the starting point. This gives the crown effect without needing to circle the entire head.
2. The Twisted Rope Halo: A two-strand rope twist is fuller and easier to manage on shorter hair than a three-strand braid. Create two sections, twist each tightly, then twist them around each other. Wrap this rope around your head, pinning as you go.
3. The Accessorized Clip-In: For a instant halo, use a braided headband or a clip-in hairpiece. Tuck your natural hair behind your ears, place the accessory, and gently pull out a few face-framing pieces to blend. It’s a flawless, 30-second halo.
4. The Mini Braid Halo: Create several small, tight braids around your head—think four or five. Wrap and pin each one individually to form a broken, modern halo crown. This works beautifully on textured short hair.
Methods for Medium Hair (Shoulder to Armpit Length)
Medium hair is the perfect playground for halo braids. You have enough length to work with but not so much that it becomes overly heavy or complicated.
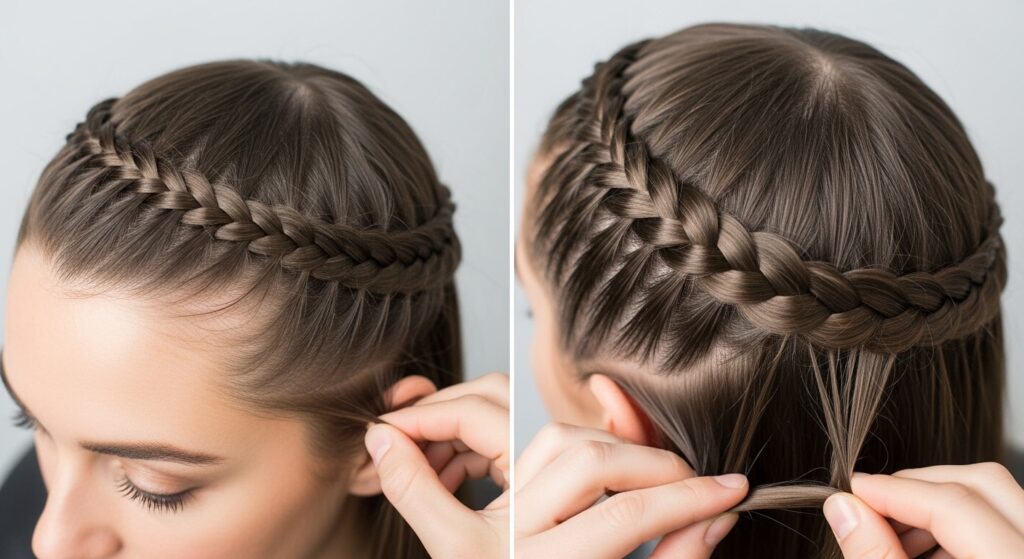
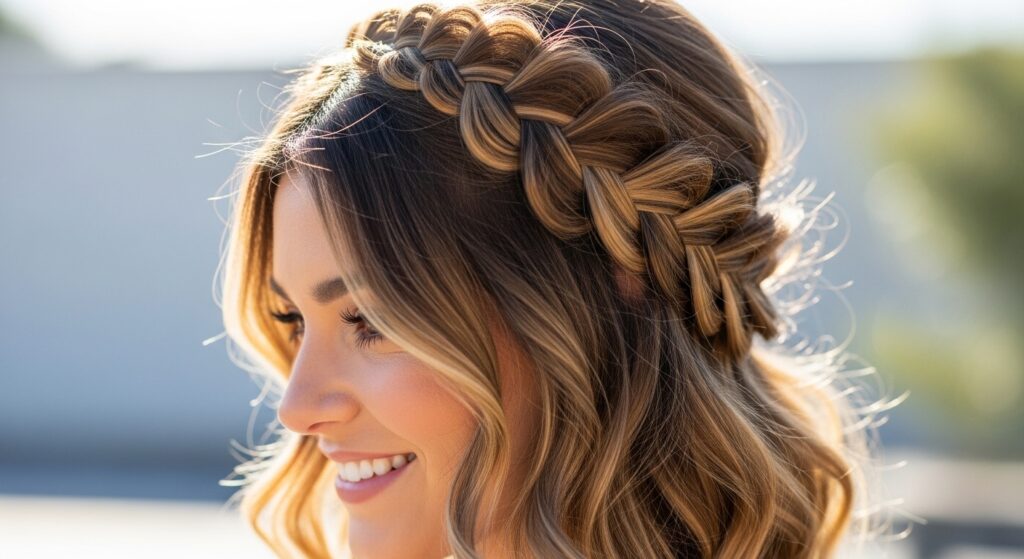
5. The Classic Single Halo: The timeless method. Part your hair down the middle. Create a Dutch braid (braiding under) on one side, starting at the temple and adding hair until you reach the nape. Continue as a regular braid, then wrap and pin it around your head. Repeat with the other side, tucking the ends of the second braid under the first.
6. The Inside-Out French Braid Halo: Similar to the classic, but using a French braid (overhand) for a different texture. This creates a raised, rope-like effect that sits proudly on the head.
7. The Double Braided Halo: Create two regular three-strand braids, one on each side of your part. Wrap the first around the front of your head and pin at the nape. Wrap the second around the back, overlapping the first, to create a double-layered crown effect.
8. The Halo Ponytail Hybrid: Create a halo braid only around the front half of your head. Gather the remaining hair at the back, including the braid ends, into a low ponytail or bun. It’s elegant and secure.
Methods for Long Hair (Chest Length and Beyond)
With long hair, your halo braid can become a true work of art. You can experiment with complexity, thickness, and stunning variations.
9. The Mermaid Halo Braid: Start with a deep side part. Create a thick Dutch braid from the heavier side, circling your entire head and incorporating all your hair. The result is a single, magnificent braid that looks like a woven crown.
10. The Fishtail Halo: A fishtail braid creates a delicate, intricate look. Split your hair into two sections. Fishtail braid each section, then wrap them in opposite directions around your head, intertwining them where they meet.
11. The Waterfall Halo Braid: This creates an ethereal, half-up look. Perform a waterfall braid around your head, letting the cascading strands blend with your loose hair below. It’s romantic and less structured.
12. The 5-Strand Halo Braid: For the advanced braider, a five-strand braid adds incredible detail and volume. Master this braid on a section of hair first, then apply the technique to create a stunning, unique halo.

Creative & Elegant Variations for All Lengths
These methods use the halo concept as a foundation for something even more special.
13. The Boho Halo with Loose Pieces: After creating any halo braid, gently pull on the outer edges of the braid to loosen it and create a softer, wider look. Pull out strategic face-framing pieces and wispy hairs around the neck.
14. The Halo Braid Bun: Create a halo braid with the front section of your hair. Gather all the hair (including the braid ends) into a high or low bun at the crown or nape. The braid acts as a beautiful headband leading into the bun.
15. The Braided Halo Headband: Braid a small section of hair (or use a filler braid if your hair is short). Drape it over your head like a headband, tucking and pinning the ends behind your ears. Leave the rest of your hair down or in loose waves.
16. The Pull-Through Halo: Create a series of ponytails around your head. Split each ponytail and connect it to the next, creating a “pull-through” or chain effect that mimics a braided crown. It’s easier than braiding and looks incredibly complex.

Pro Tips for a Flawless, Lasting Halo Braid
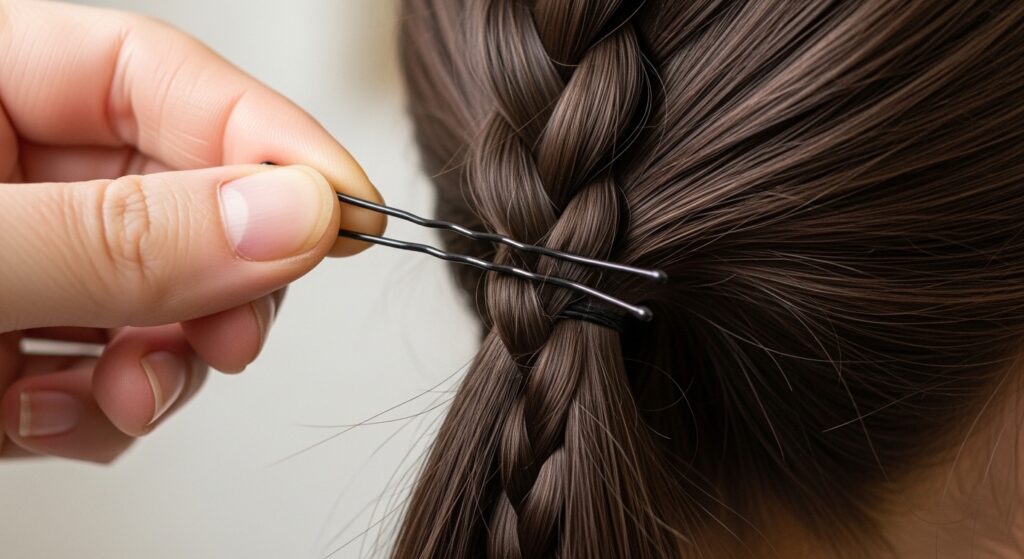
Secure the Ends: The most common halo braid failure is unraveling ends. Always coil the end of your braid into a tiny, flat loop and pin it horizontally with multiple bobby pins, catching hair from the braid and your scalp.
Hide Your Part: If you have a visible part within the braid, use the tail of a comb to gently lift and separate the braid strands near your part to cover it up.
Direction Matters: Always wrap your braid in the direction that feels natural based on where you started. For a front-facing halo, wrapping forward over the hairline often looks best.
Set and Forget: A light mist of flexible-hold hairspray over the finished style will tame flyaways and help it last all day or night.
Your Halo Braid Journey Starts Now
The halo braid is not a one-size-fits-all style, but a one-vision-fits-all style. Whether you’re working with a playful pixie, a sleek lob, or flowing locks, there is a method in this list that will help you create your own crown of braids. Start with the method recommended for your length, practice the basics of Dutch or French braiding, and don’t be afraid to use pins strategically. The goal is not perfection, but a beautiful, wearable expression of style.
Your hair is your canvas, and the halo braid is your crown. So grab your comb, some bobby pins, and let your creativity flow in a perfect circle. Which of these 18 methods will you try first?