20 Smooth Updo Techniques for Glass-Like Finish
Imagine hair so smooth, so impeccably polished, it reflects light like a pane of glass. That sleek, glass-like finish is the holy grail of updo styling—a symbol of elegance, sophistication, and masterful technique. Yet, for many, achieving that flawless look feels just out of reach, lost to frizz, flyaways, or a lack of hold.
The Foundation: Pre-Styling for Ultimate Smoothness
Before you even think about twisting or pinning, the journey to a glass-like updo begins at the washbasin. Preparation is everything. Start with a clarifying shampoo to remove any product buildup that can weigh hair down, followed by a hydrating conditioner focused on your mid-lengths and ends. The real magic, however, happens post-shower.
While your hair is still damp, apply a heat protectant serum or spray religiously. This is non-negotiable for using hot tools later. Follow this with a lightweight smoothing cream or a gel designed for sleek styles. For extra stubborn frizz, a pea-sized amount of anti-frizz oil applied sparingly can work wonders. The key is to blow-dry your hair completely straight and smooth before attempting any updo. Use a paddle brush and direct the airflow down the hair shaft to flatten the cuticle. This initial step creates the perfect, sleek canvas.

Toolkit Essentials for a Flawless Finish
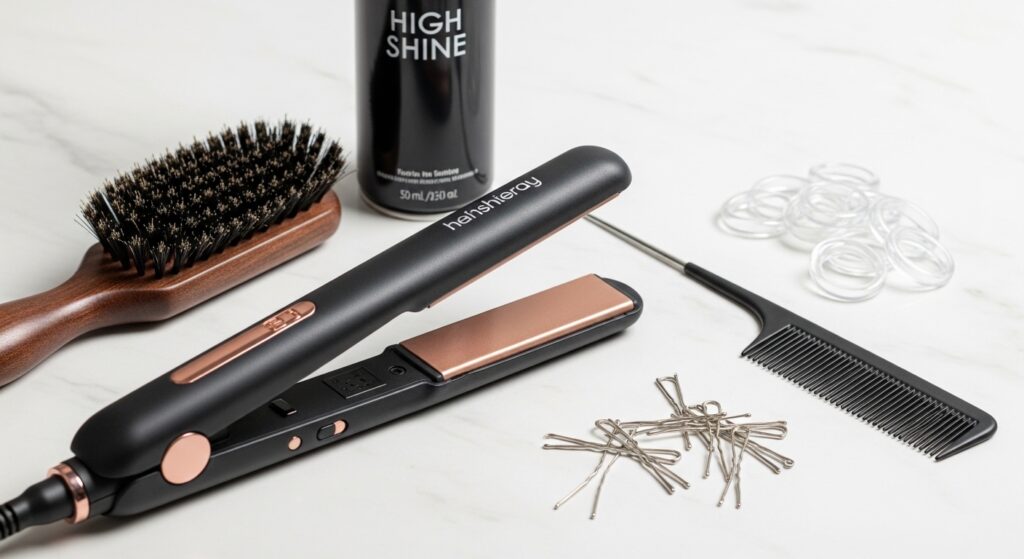
You cannot build a masterpiece without the right tools. For glass-like updos, your arsenal should be precise. A high-quality ceramic or tourmaline flat iron is your best friend for making final passes over sections to eliminate any residual wave or frizz. Fine-tooth combs, both wide and narrow, are crucial for sectioning and creating ultra-sleek parts.
Do not underestimate the power of good pins and elastics. Opt for spin pins or bobby pins that match your hair color for a discreet hold. Clear, elastic bands without metal closures are essential to avoid snagging and creating bumps. A strong-hold, high-shine hairspray is your final sealant, and a boar bristle brush is perfect for applying tension and smoothing the surface layer without creating static.
Techniques 1-5: The Classic Sleek Bun Family
These are the cornerstone styles for achieving a polished look with a glass-like surface.
1. The Classic Low Slick Bun: Create a low, tight ponytail using a brush to ensure zero bumps. Twist the tail tightly until it coils on itself, then wrap it around the base. Secure with pins, then use the tail of a comb or a toothbrush sprayed with hairspray to slick down any baby hairs.
2. The High Ballerina Bun: Brush all hair to the crown for a high ponytail. Smooth the ponytail with a flat iron, then twist and wrap into a neat coil. The high position emphasizes the sleekness from all angles.
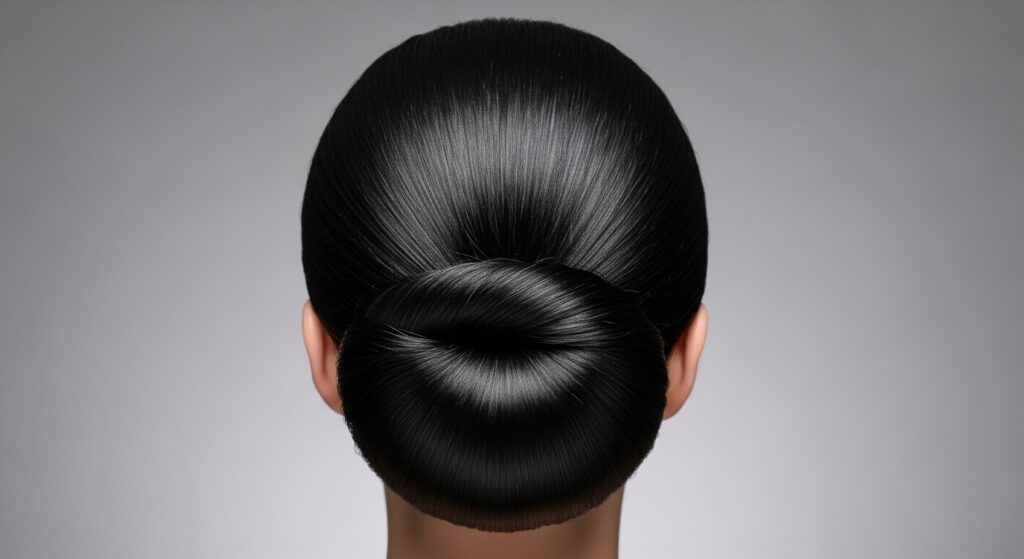
3. The Invisible Seam Bun: After making a ponytail, split it into two sections. Twist each section in opposite directions, then wrap them around each other before pinning. This creates a bun with no visible elastic and an incredibly smooth, rounded shape.
4. The Donut Bun for Amplified Smoothness: Using a hair donut that matches your color, slide it over your ponytail. Distribute hair evenly around the donut, tucking the ends under, and secure with a pin. The donut provides a perfectly round, smooth foundation.
5. The Twisted Rope Bun: Create a low ponytail, then split into two sections. Twist each section tightly to the right, then twist them together to the left. Wrap the resulting rope into a bun. The double twisting compacts hair for an ultra-smooth appearance.
Techniques 6-10: Elegant & Intricate Twisted Styles
These styles incorporate braiding and twisting to add detail while maintaining a sleek overall look.
6. The Sleek French Twist: Gather hair at the nape, slightly off-center. Using a fine-tooth comb, roll the hair inward and upward toward the center of your head. Secure with pins vertically. The result is a timeless, ultra-smooth diagonal line.
7. The Tucked Roll: Perfect for shorter lengths. Blow-dry hair straight, then create a deep side part. Take a section from the heavier side, twist it lightly back, and tuck it behind your ear, pinning securely. Repeat with the next section, creating a cascading, tucked effect.
8. The Halo Braid with Sleek Crown: Flat iron your entire head of hair. Create a Dutch braid (braiding inward) along your hairline, from one temple around to the other. Tuck the end under and pin. The rest of the hair can be left down or in a low bun, with the braid acting as a sleek crown.
9. The Twisted Low Chignon: Part hair down the middle. Take two front sections and twist them back, incorporating more hair as you go (a twist version of a French braid). Join them at the nape with the remaining hair and twist into a low chignon.
10. The Geometric Fold-Over: Create a high ponytail and flat iron it. Instead of twisting, fold the length of the ponytail back up toward the scalp, creating a sleek, folded loop. Secure the ends under the base of the ponytail with pins.
Techniques 11-15: Modern Ponytail Perfection
The ponytail reimagined as a high-art, sleek statement.
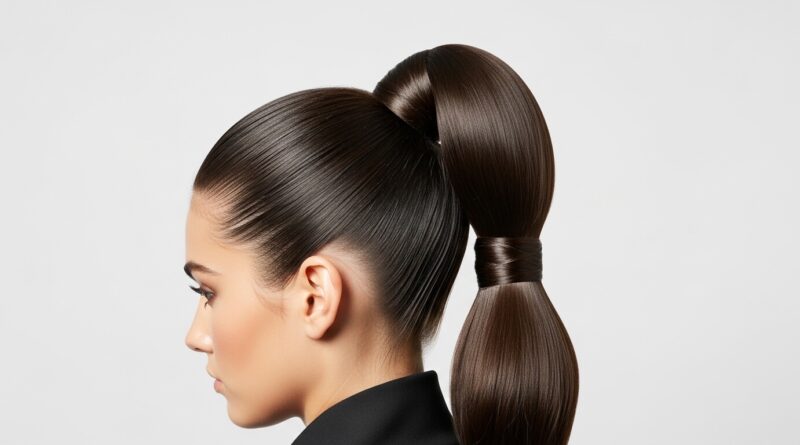
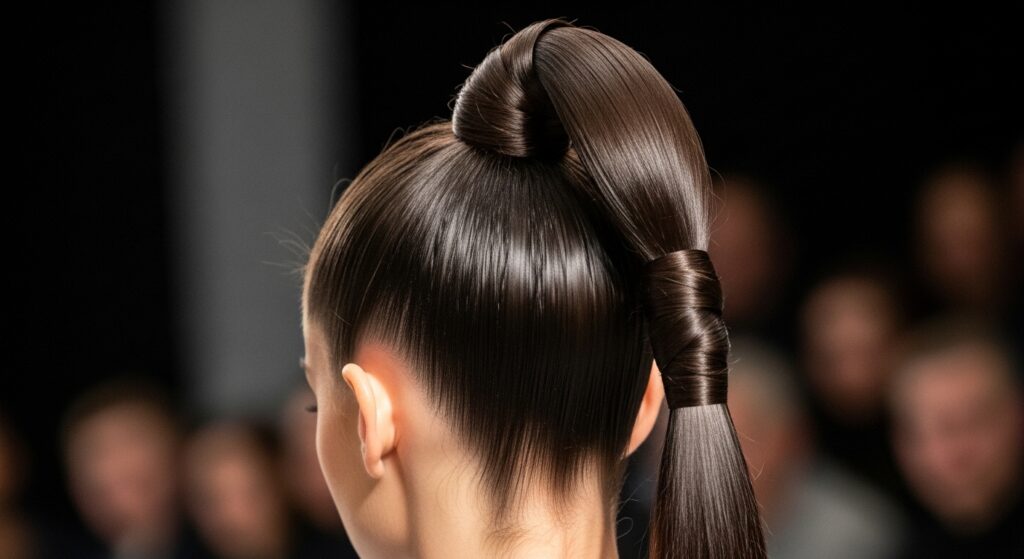
11. The Super Slick High Ponytail: The quintessential glass-hair style. Brush hair up, using your other hand to smooth the crown simultaneously. Secure tightly. Wrap a small piece of hair around the elastic to conceal it, pinning the end underneath.
12. The Low Loop Ponytail: Create a low ponytail. Pull the ponytail through the elastic only halfway on the last loop, leaving the ends out to create a loop. Spread the loop slightly and smooth it with a brush sprayed with hairspray.
13. The Invisible Part Ponytail: Brush all hair forward over your face. Secure with an elastic where you want the ponytail to sit. Then, flip the ponytail back over your head. This method ensures zero bumps at the crown.
14. The Ponytail with Wrapped Sections: Make a mid-height ponytail. Divide it into 3-4 sections. Take one section, wrap it around the base of the ponytail, and pin. Repeat, covering the elastic completely and creating a sleek, wrapped base.
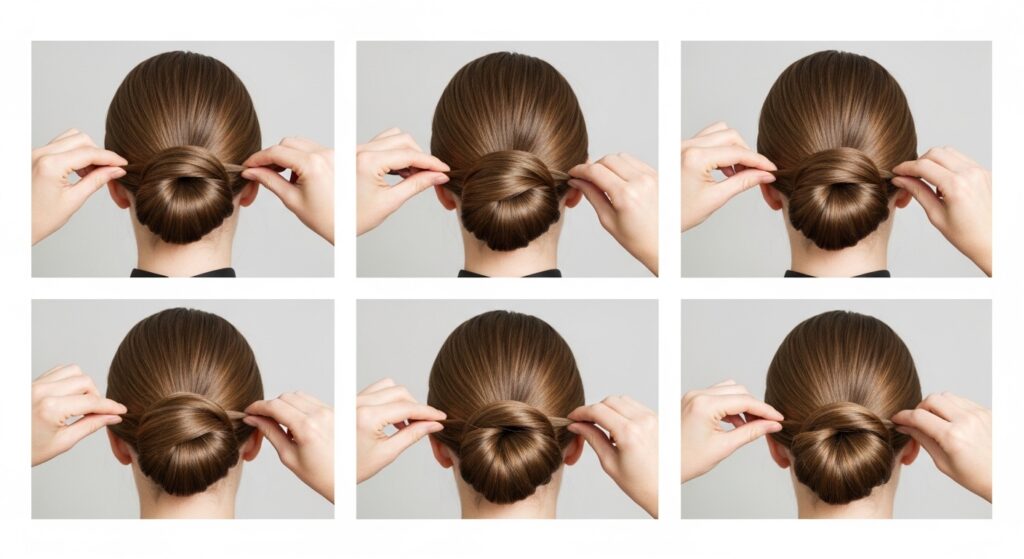
15. The Tucked Ponytail: Create a mid-level ponytail. Take the tail and tuck it under itself, pinning the ends up into the base of the ponytail. This creates a chic, rounded finish at the nape.
Techniques 16-20: Special Occasion Showstoppers
For when you need to make an unforgettable impression with your sleek style.
16. The Sleek Gibson Tuck: Create a loose, low ponytail. Flip the ponytail up and through the opening above the elastic, tucking the ends under. Smooth the resulting roll with your hands and secure with pins. It’s a vintage look with a modern, sleek edge.
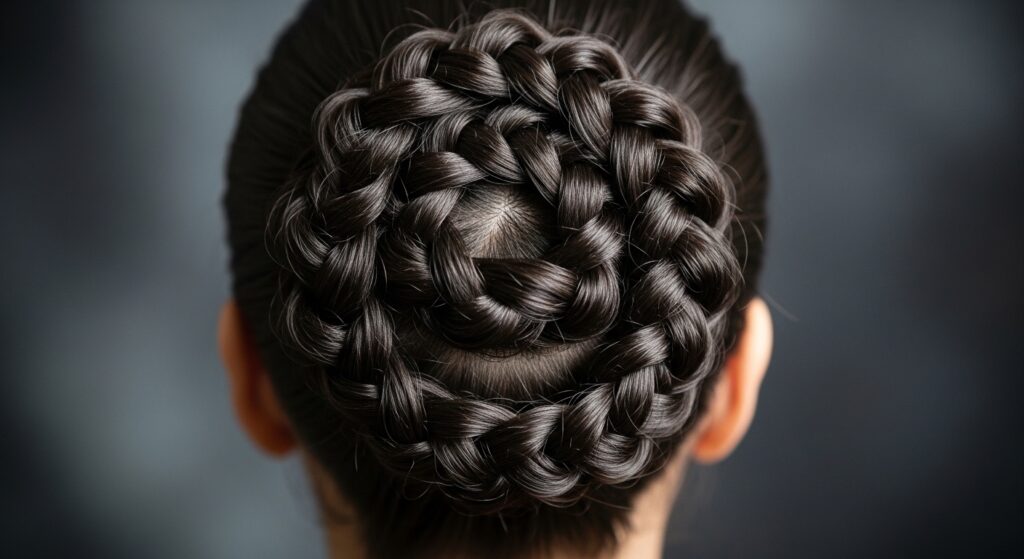
17. The Braided Bun Crown: Create two Dutch braids starting at the temples, going back to the crown. Join them and the remaining hair into a high ponytail, then form a bun. The braids add secure detail while the bun remains polished.
18. The Knotted Updo: Part hair down the middle. Take two front sections and tie them into a single knot at the back. Add more hair to each section and tie a second knot. Continue until all hair is incorporated, then tuck and pin the ends.
19. The Waterfall Twist with Low Bun: Create a waterfall twist along one side of your head, letting pieces fall gracefully. Gather all hair, including the waterfall pieces, into a low, sleek bun on the opposite side.
20. The All-Back Sleek Style with Center Part: The ultimate test of smoothness. Create a razor-sharp center part. Flat iron both sides perfectly. Gather into a low bun or ponytail, ensuring the part remains perfectly defined and the surface is flawless.
Sealing the Deal: Finishing Touches for a Glass-Like Finish
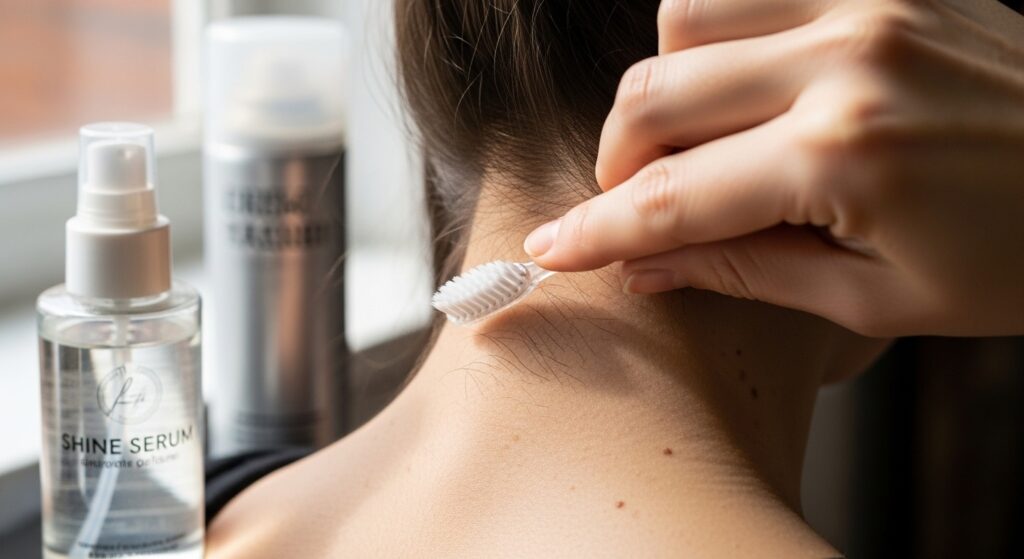
Your updo is pinned, but the work isn’t over. To achieve that true glass-like finish, you must seal and perfect. First, use a toothbrush or a tiny mascara wand sprayed with a light-hold hairspray to gently tame every single baby hair and flyaway along your hairline and nape.
Next, take a very small amount of shine serum or hair gloss on your palms, rub them together, and then lightly glaze over the surface of your updo. Avoid the roots—focus on the visible, smooth areas. This adds a reflective, non-sticky shine. Finally, hold a can of strong-hold hairspray about 10 inches away and give your entire style one final, light mist. Let it dry completely without touching. This final layer sets everything in place while enhancing the shine.
Maintaining Your Masterpiece
A glass-like updo can last through a long day or night with a little foresight. Carry a few extra bobby pins and a travel-size shine spray for touch-ups. If you feel frizz developing, a tiny dab of hand cream (spread thinly between palms) can be used in a pinch to smooth flyaways—though a dedicated anti-frizz product is better.
At night, if you wish to preserve the style, sleep on a silk or satin pillowcase to minimize friction. You can also loosely tie your hair up in a silk scarf. With these 20 techniques and pro tips in your repertoire, that elusive, red-carpet-ready, glass-like finish is now firmly within your grasp. It’s time to practice, experiment, and enjoy the compliments on your impeccably smooth, stunning updos.