21 Creative Nail Art Ideas That Will Spark Your Imagination
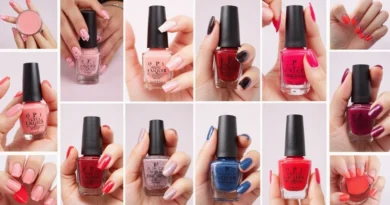
Nail art is not just a trend; it’s a vibrant form of self-expression that allows you to showcase your creativity on the tips of your fingers. Whether you’re headed to a fancy party, a casual brunch, or just want to add some flair to your everyday life, unique nail designs can make a big impact. From intricate patterns to bold colors, there’s no limit to what you can create! Get ready to be inspired by these 30 jaw-dropping nail art ideas that will make your heart race and your fingertips stand out. You won’t believe how creative you can get with just a few tools and colors!
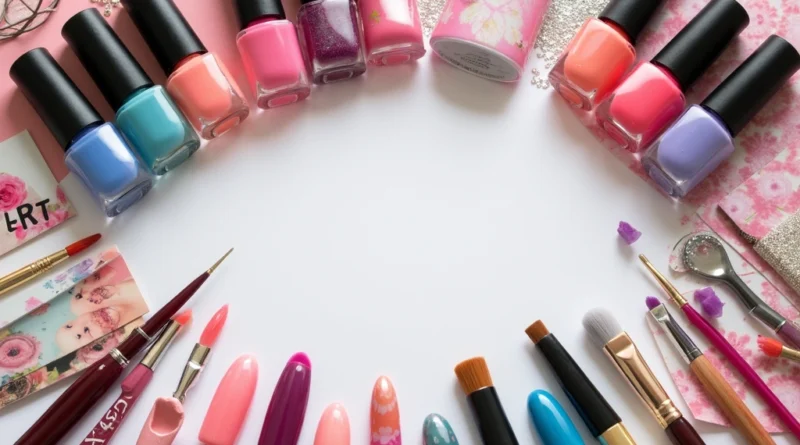
So grab your favorite nail polishes, gather some tools, and let’s dive into a world of nail art inspiration that will leave everyone asking where you got your nails done!
1. Rainbow Ombré Delight

Why choose one color when you can have them all? The rainbow ombré nail art features a seamless gradient from one vivid color to another, and it’s a delightful way to showcase your cheerful spirit. To achieve this look, start with a base coat for a smooth finish. Then, using a makeup sponge, apply stripes of your chosen colors to the sponge and dab it onto your nails until you achieve the desired gradient effect. Finish off with a topcoat to seal the look and add extra shine.
for ombré nails:
– Use a clean sponge for each color for a smoother blend.
– Experiment with pastel colors for a softer look.
– Try it on short nails for a chic effect.
This design is perfect for summer festivals or any occasion where you want to show off your fun side!
2. Minimalist Line Art

Sometimes, less is more! Minimalist line art nails are all about subtle elegance, featuring simple, clean lines that create stunning designs. You can keep it classic with black lines on a nude or white base, or incorporate colored lines for a fun twist. Use a fine brush or nail art pen to draw geometric shapes, abstract designs, or even simple faces on your nails. A topcoat will give it a polished finish!
Why choose minimalist designs?
– They are quick to create.
– Perfect for a professional setting.
– Easy to match with any outfit.
This nail art idea is perfect for those who appreciate simplicity but still want to make a statement!
3. Floral Fantasy

Bring a touch of nature to your nails with beautiful floral designs! Floral nail art can range from delicate daisies to bold roses, making them perfect for any season. Start with a base coat in soft pastel shades, then use a fine brush to paint tiny flowers and leaves. You can also use nail stickers for an easier option. Finish with a glossy top coat to give it a fresh, garden-fresh look!
Considerations for floral designs:
– Use contrasting colors for a striking effect.
– Mix various designs on different nails for a fun variety.
– Opt for a matte topcoat for a trendy finish.
Floral nails are perfect for spring and summer occasions, like weddings or brunch dates!
4. Marble Effect Madness

Marble nails are a gorgeous way to add some texture and sophistication to your manicure. This look mimics the elegant veining found in natural marble stones. To create this look, start with a solid base color (white or light beige works best). Then, using a thin brush or a toothpick, dip it into a contrasting color (like black or gold) and swirl it on top of the base to create the marble effect. Seal it with a top coat for that smooth finish.
Things to note:
– Practice the swirling technique on a nail wheel first.
– Use a matte topcoat for a modern look.
– Try different color combinations for a unique style.
Marble nails are perfect for making a bold statement at formal events or just to stand out on a daily basis!
5. Glitter Galaxy

Channel your inner cosmic being with glitter galaxy nails! This design is all about drama and sparkle, perfect for those who love to shine. Start with a dark base color—like navy or deep purple—and then apply a generous amount of glitter polish or loose glitter sprinkled on top. You can create fun patterns like stars or galaxies using a small brush to apply different shades of glitter.
to make your galaxy nails shine:
– Use a matte base for a unique finish.
– Layer glitters for depth.
– Add tiny silver stars or rhinestones for an extra touch of glam.
Glitter galaxy nails are fantastic for night outings or parties where you want to dazzle!
6. Geometric Shapes

For a trendy and modern look, geometric shapes can elevate your nail game! This design is characterized by sharp lines and bold colors, creating a striking visual impact. Choose a solid base color and use tape to create clean lines and shapes with contrasting colors. You can mix triangles, squares, and stripes for a stylish effect. Finish it off with a top coat for a smooth finish.
Why geometric nails rock:
– They are customizable to your liking.
– Great for the abstract art lover!
– Perfect for any occasion, from work to play.
This design is particularly appealing for those who love contemporary aesthetics and want something a bit different!
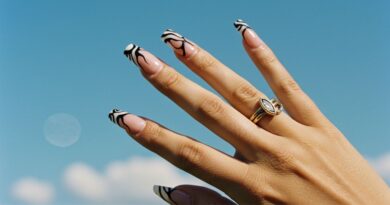
7. Animal Print Perfection

Bring out your wild side with animal print nail art! Whether it’s a subtle leopard print or bold zebra stripes, there’s a style for everyone. Start with a solid base coat in a neutral color, then use a small brush or dotting tool to create your desired animal pattern. To keep it chic, balance out the prints with solid-colored nails. This design can work for any nail length!
for animal prints:
– Experiment with colors: try pastel shades for a fresh take.
– Pair the prints with a glittery topcoat for extra flair.
– Mix different animal prints for a fun twist.
Animal print is an excellent way to add some fun and personality to your nails, making them a perfect choice for parties or casual outings!
8. Abstract Art

If you love art, why not wear it? Abstract art nails are perfect for those who appreciate unique designs that express individuality. Start with a solid base color and use contrasting colors to create swirls, blobs, or lines that don’t necessarily follow a pattern. The beauty of this design is in its imperfection! Use a dotting tool or a fine brush to create your art.
Key points for abstract nails:
– Embrace random designs; the messier, the better!
– Use bright colors to make it eye-catching.
– Consider using a matte top coat for a trendy finish.
This design is perfect for artsy souls who want to showcase their creative side wherever they go!
9. Foil Accents

Foil nails are a fantastic way to add some luxury to your manicure! This technique involves using metallic foil to create stunning accents on your nails. After applying a base coat, you can use a special glue for foil or a top coat while the polish is still wet and apply pieces of foil to create a chic design. It’s a great way to incorporate shine without overwhelming your nails.
Gold and silver foils are classic options, but you can choose colorful foils for a more playful look.
– Pair foil with a matte base for contrast.
– It’s great for accent nails; just foil one or two nails.
Foil nails are perfect for special occasions or when you want to feel a bit extra!
10. Ombre with Glitter Tips

Ombre nails get a glamorous upgrade with glitter tips! Starting with a color gradient from dark to light on your nails, you can finish it off by applying a layer of glitter at the tips. The result is a beautiful blend that catches the light beautifully. This design is perfect for parties or special occasions!
Steps to achieve this look:
– Start with a base coat in a gradient color.
– Apply glitter polish to the tips for that sparkly touch.
– Seal with a top coat to ensure it lasts.
This design combines elegance and fun, making it a perfect choice for anyone looking to stand out!
11. Negative Space Nails

Negative space nails are all about the areas left unpolished to create a stunning design. This minimalist approach emphasizes the natural nail while adding flair with nail polish colors and patterns. You can create geometric shapes or lines that leave sections of the nail bare. This design is both modern and chic!
How to do it:
– Use tape to section off areas of the nail for clean lines.
– Contrast colors with your natural nail for a striking effect.
– Remember to always use a top coat for longevity.
Negative space nails are perfect for any occasion, offering a sophisticated look that works for both casual days and formal nights!
12. Press-On Nail Art

For those who love nail art but may not have the time or skill to do it, press-on nails are a fantastic solution! With many designs available—from intricate patterns to whimsical themes—press-ons offer instant nail glam without the effort. They are easy to apply and can last for weeks with proper care.
A few tips for using press-on nails:
– Choose the right size for each finger for a perfect fit.
– Use nail glue for longer wear.
– Decorate plain press-ons with your own nail art tools for customization.
Press-on nail art lets you switch up your style in no time and is perfect for those spontaneous outings or events!
13. Seasonal Themes

Celebrate the seasons with themed nail art! Whether it’s autumn leaves, winter snowflakes, spring flowers, or summer fruits, seasonal nail designs are a fun way to embrace the vibe of the time of year. Start with a solid base and add your seasonal elements with a fine brush or nail stickers.
How to keep it exciting:
– Use colors that reflect the season.
– Combine different seasonal designs across nails.
– Don’t forget to add glitter for that festive touch!
Seasonal themed nail art keeps things fresh and is a fun way to express your style throughout the year!
14. Color Blocking

Color blocking is a bold nail trend that combines two or more contrasting colors to create eye-catching designs. This technique allows you to play with colors like never before, and it’s super fun to create! Start with a base coat in one color and use tape to section off areas of the nail for your second color. Choose vibrant hues for a striking effect, or go with softer tones for a more elegant look.
for color blocking:
– Use a top coat to seal the design.
– Consider pairing with geometric shapes for a modern touch.
– Don’t be afraid to mix and match colors!
Color blocking nails are perfect for anyone who loves to stand out and make a statement!
15. Custom Nail Stencils

Get creative with custom nail stencils that allow for intricate designs without the hassle! You can easily create patterns like lace, polka dots, or even your favorite symbols using stencils. Paint your nails with a base color, let it dry, and then use the stencil to apply your chosen design with a contrasting color. It’s a simple way to achieve professional-looking nail art!
Things to consider:
– Ensure the base color is completely dry before applying stencils.
– Use nail tape for clean removal after painting.
– Experiment with different stencil designs for unique effects.
Custom stencils make nail art accessible and fun for everyone, allowing for endless creativity!
16. Texture Play

Add dimension to your nails with textures! Textured nail art can include things like sand, foil, or even fabric pieces infused into your design. Start with a base coat, apply the texture with clear polish and add glitter or paint to create patterns. This is a fantastic way to make the nails visually interesting and fun to touch.
How to use textures creatively:
– Combine textures with colors for a dynamic look.
– Use a matte topcoat for a different finish.
– Experiment with different textures on different nails!
Textured nails are perfect for those looking to be bold and unique in their nail choices.
17. Cosmic Nail Art

Take your nails to the universe with cosmic nail art! This design includes elements like stars, planets, and galaxies, creating a stunning celestial effect. Start with a dark base color and use a sponge to blur colors together, adding lighter shades for planets and using a dotting tool for stars. You can also add a shimmer topcoat to enhance the galaxy effect.
Why cosmic designs are fun:
– They spark creativity and imagination.
– Great for night events or parties.
– Use glow-in-the-dark polish for a unique twist!
Cosmic nail art is perfect for anyone looking to express their love for the universe and stand out from the crowd!
18. Surprise Inside Nails

For a playful twist, surprise inside nails involve hidden designs that are revealed when the tips are turned. Start with a solid color at the base and paint a different pattern on the tips of your nails. When your nails are resting, they appear simple, but turn them over, and a fun design is revealed!
How to create:
– Use tape to section off the area for the surprise design.
– Choose colors that contrast for the ultimate reveal.
– Add a topcoat to keep them shiny!
This fun nail art technique is perfect for those who love surprises and want to keep it playful!
19. Metallic Marble Nail Art (You Won’t Believe This!)

This is where sophistication meets creativity: metallic marble nail art! Picture rich colors mixed with metallic accents swirling together to resemble luxurious marble stone. Start with a base of white or a soft pastel, then add a metallic polish and swirl it with a nail art tool. Finish with a high-gloss topcoat to make the design pop.
Why it’s a must-try:
– The metallic sheen makes your nails stand out.
– It combines elegance with a unique twist.
– Perfect for upscale events or when you want to feel glamorous!
Metallic marble nails are truly stunning and will leave everyone asking how you achieved such beauty!
20. Watercolor Effect

Bring art to your nails with a watercolor effect! This design features soft, blended colors that create a dreamy, artistic look. Start with a base coat and apply your chosen colors using a sponge or a brush, allowing them to blend naturally on the nail. Finish with a topcoat to seal the look.
for achieving the watercolor effect:
– Use sheer polishes to allow each color to blend.
– Experiment with different color combinations for unique looks.
– Try adding gold or silver accents for extra charm.
Watercolor nails are perfect for anyone looking to express their artistic side in a subtle, beautiful way.
21. Fun with 3D Nail Art

Take your nail art to the next dimension with 3D designs! Using nail gems, studs, and even small charms can add depth and creativity to your manicure. Start with a solid base coat and add your chosen 3D elements while the polish is still wet to ensure they stick. You can create a variety of looks, from floral to geometric, depending on your accessories.
A few ideas for 3D designs:
– Use studs for a punk rock vibe.
– Add charms or feathers for a playful look.
– Experiment with multiple layers for a unique touch.
3D nail art is not just eye-catching but also a fun way to showcase your personality and creativity!
Conclusion

Nail art is a fantastic way to unleash your creativity and express your style. From vibrant rainbow ombré to intricate metallic marbles, there’s a design to suit every taste and occasion. As you explore these 30 creative nail art ideas, remember to let your imagination run wild and personalize each design to make it uniquely yours! So, grab your nail supplies, try out these inspiration-packed designs, and most importantly, have fun with it!
Share your favorites and don’t forget to tag your creations; we can’t wait to see your artistic flair!
Explore more beauty posts here