24 Rope Twist Crowns for Romantic Evenings
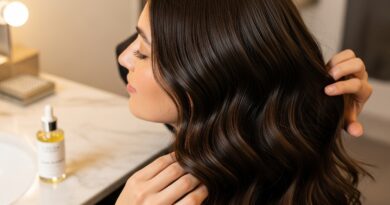
Okay, let’s talk about date night hair that actually lasts. You know the feeling: you spend an hour on a gorgeous updo, only to have it droop by the time the appetizers arrive. I’ve been there. That’s why I’m obsessed with rope twist crowns.
They’re the perfect mix of romantic, elegant, and shockingly secure. Think of them as the ultimate “old money hair” move—effortless-looking but secretly strategic. Whether your vibe is soft and classic or edgy and romantic, this style adapts.
This isn’t just one look. I’m sharing 24 ways to wear it, from super simple to intricately braided. We’re talking five-minute magic to full-on goddess vibes. Get ready to find your new go-to.
Best part? You don’t need to be a pro. I’ll break it all down into simple, scannable steps. Let’s get into it.
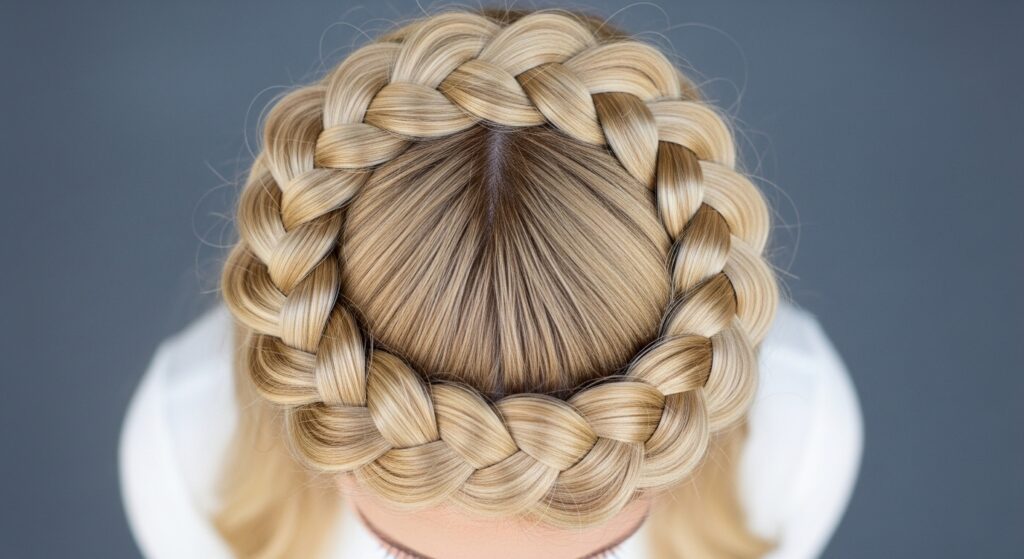
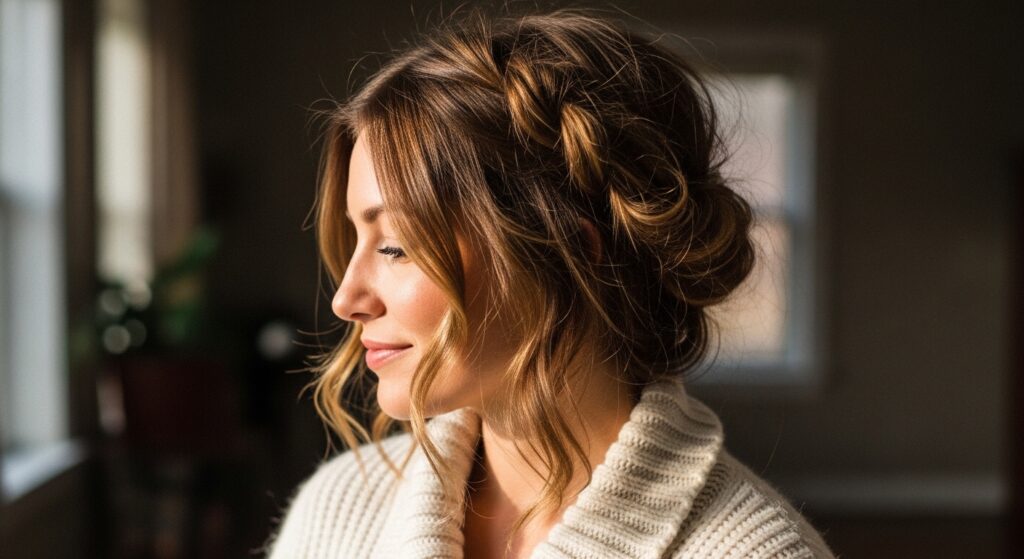
1. The Classic Rope Twist Halo
This is your foundation. Master this, and every other style becomes easy. It’s that soft, romantic look you see everywhere, and for good reason. It frames your face beautifully and works with almost any hair length past your shoulders.
Start with slightly textured hair. Day-old hair or a light mist of texturizing spray works best. It gives the twists something to grip.
- Part your hair down the middle.
- Take a one-inch section above your ear on one side.
- Split it into two strands and twist them away from your face, wrapping one over the other.
- Continue adding in small sections of hair as you twist back toward your crown.
- Secure at the back of your head with a pin. Repeat on the other side and join the ends.
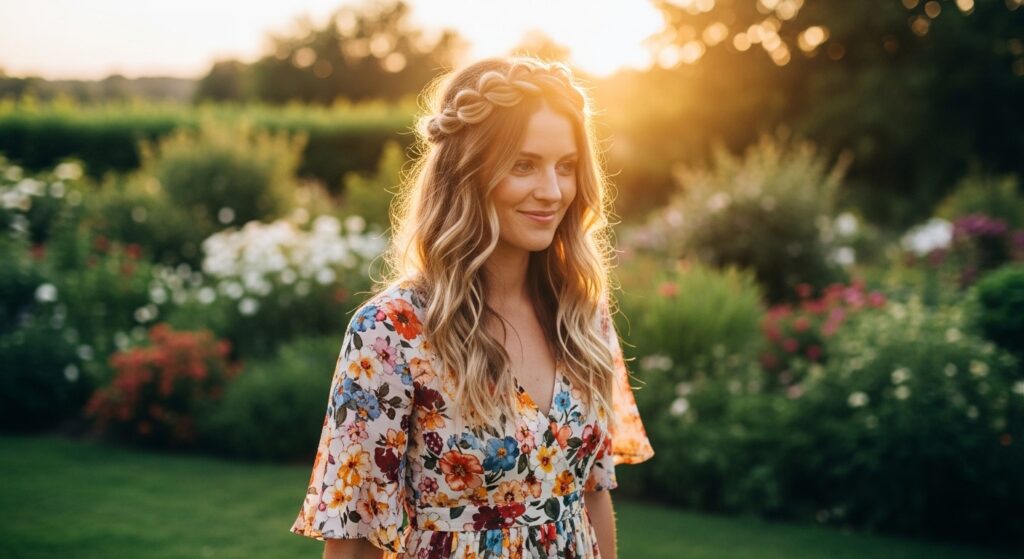
2. The Boho Messy Crown
Perfection is overrated. This version is all about loose, face-framing pieces and a slightly undone finish. It’s ideal if your hair is fine or you want a more casual, “I just threw this together” feel.
Follow the steps for the classic halo, but keep your twists loose. Don’t pull too tight. After securing, gently pull on the edges of the twist to create volume.
- Leave out your baby hairs and some pieces around your temples.
- Spritz with a flexible hold hairspray.
- Use your fingers, not a brush, to smooth any flyaways for a soft effect.
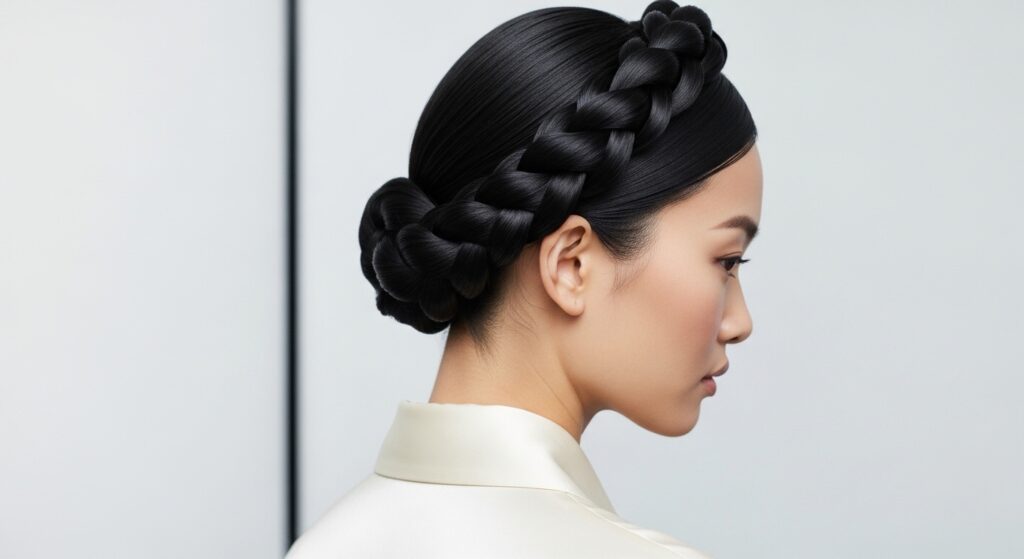
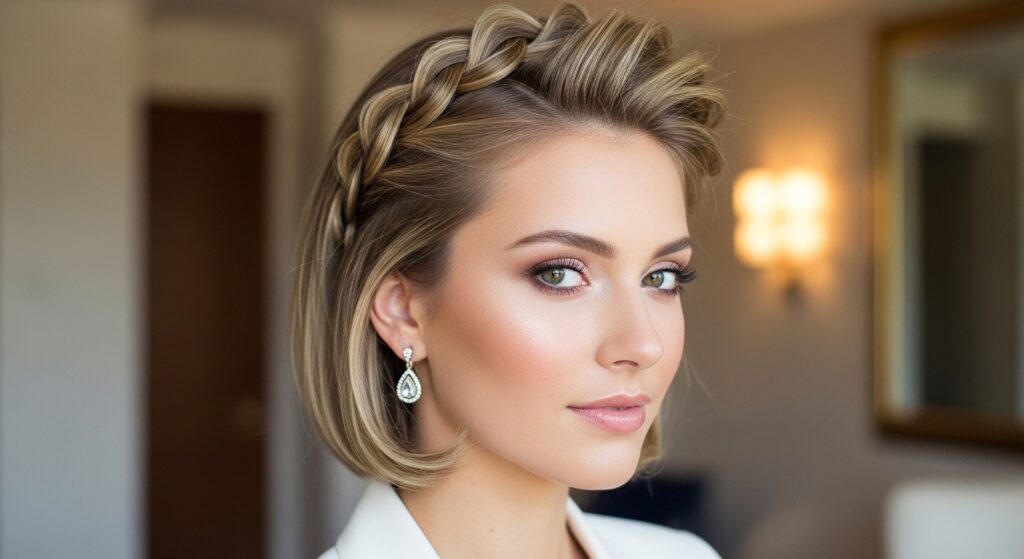
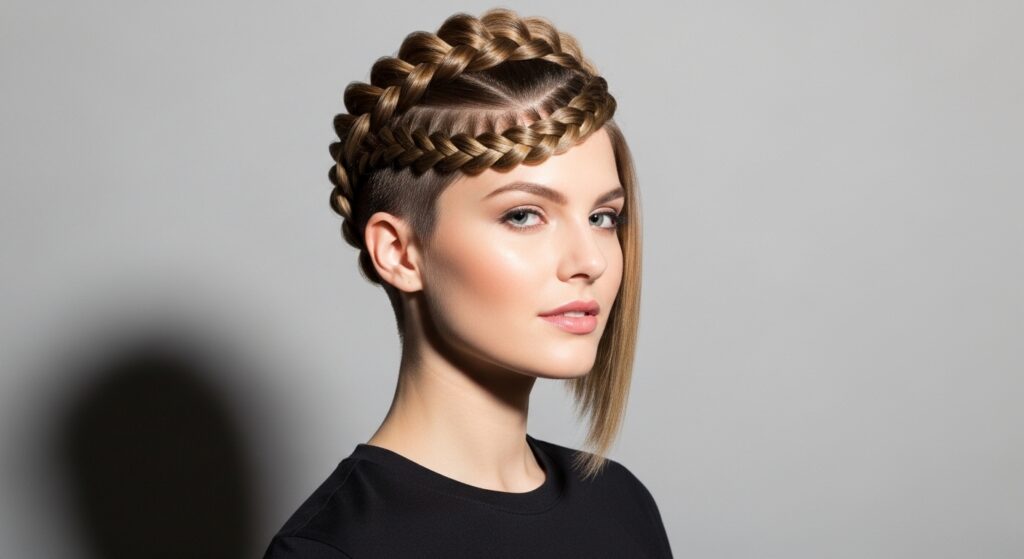
3. The Sleek & Polished Crown
This is your ticket to **quiet luxury hair**. Imagine this with a crisp white shirt and pearls. It’s incredibly chic and works beautifully for formal events or when you want to elevate a simple outfit.
The key is super smooth, well-moisturized hair. Use a smoothing serum or cream before you start. Pull your hair into a low ponytail first if it helps with control.
- Create a deep side part for added drama.
- Use a fine-tooth comb to gather each section.
- Twist tightly and cleanly, avoiding any bumps.
- Secure with bobby pins that match your hair color.
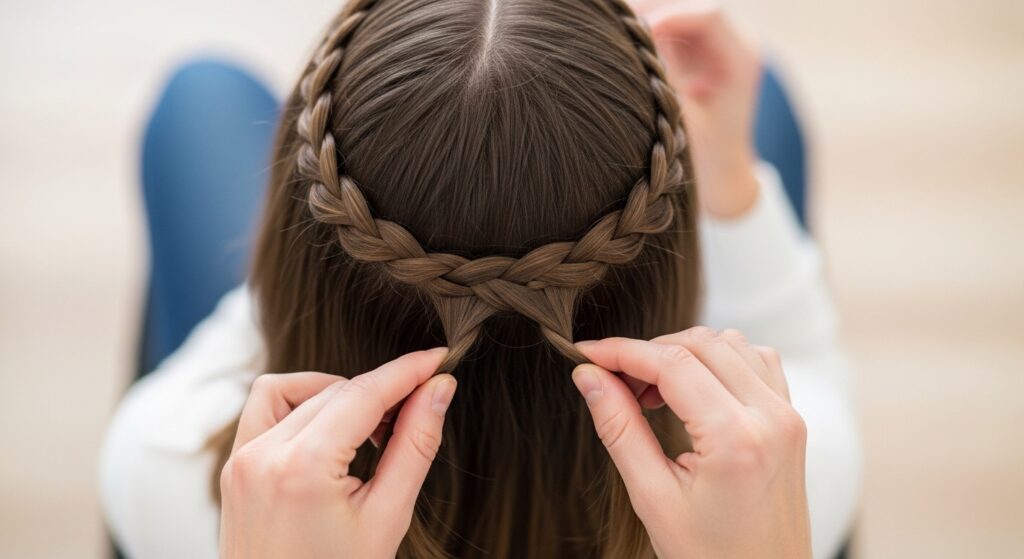
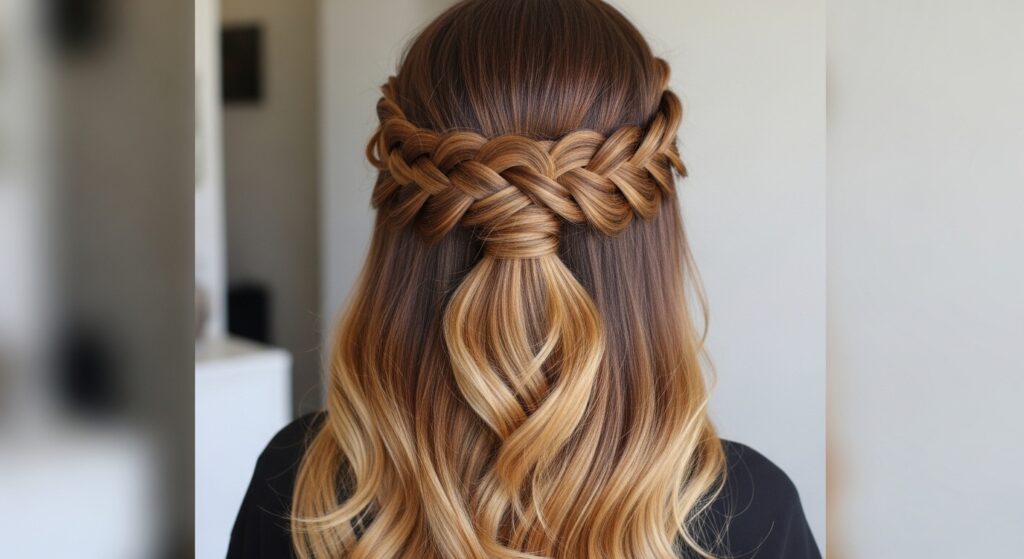
4. The Half-Up Crown Twist
Not ready to commit all your hair? The half-up version is your best friend. It gives you the crown detail while letting your length shine. This is a great way to experiment with the style.
It pairs amazingly with many of the big **2026 hairstyles**, like the **asymmetrical lob** or **vampire haircut**, adding a romantic touch to those edgier cuts.
- Only take hair from the top section of your head, above your ears.
- Create two rope twists that meet at the back.
- Secure them where they meet, leaving the rest of your hair down.
- Curly or wavy hair looks especially gorgeous with this.
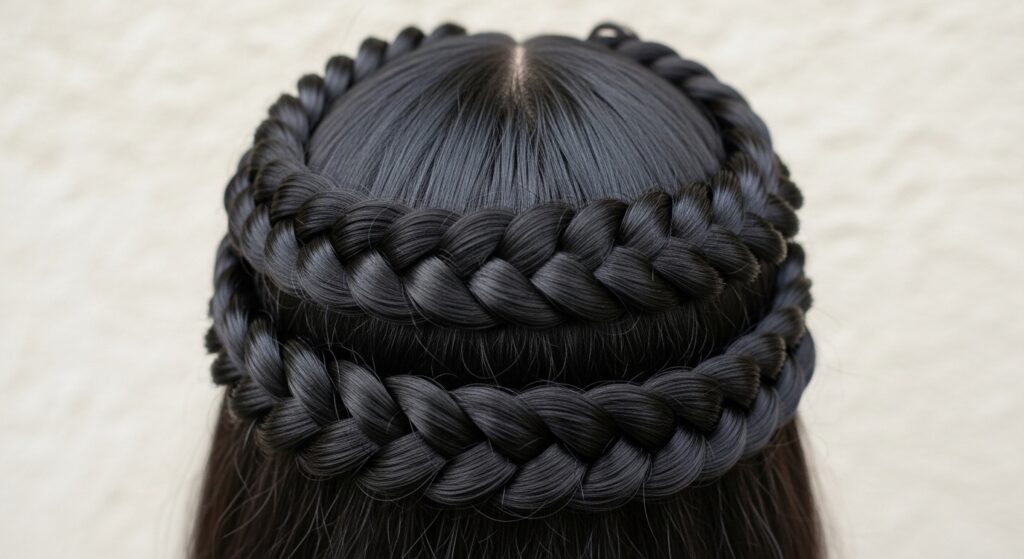
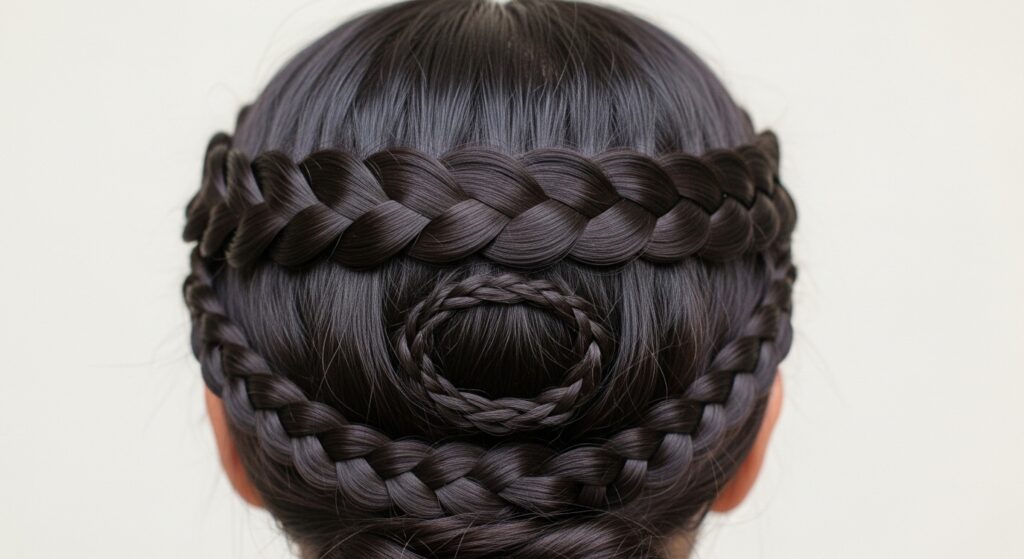
5. The Double Layer Crown
This is for when you want maximum impact. Two layers of twists create a beautiful, intricate look that’s pure romance. It’s easier than it looks, I promise!
Start with the classic halo as your first layer. Then, directly below it, create a second rope twist. You can make the second one slightly thicker or looser for texture.
- Complete the first crown and pin it securely.
- Starting just below where you began the first twist, create a second one, following the same path.
- Intertwine the ends of both twists together at the back for a seamless finish.
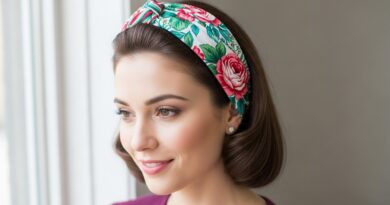
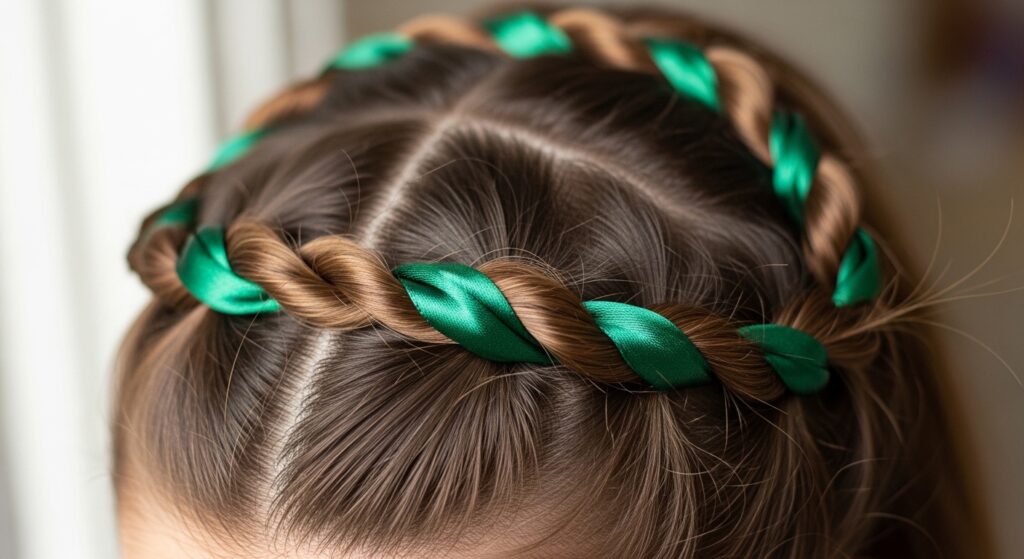
6. The Crown with a Ribbon
Add a timeless, feminine touch by weaving a ribbon into your twist. A satin ribbon screams **old money hair**, while a velvet one leans into **romantic goth hairstyles**. Choose your color to match your mood.
Take a long ribbon (about 1.5 yards). As you start your first rope twist, place the ribbon so it’s part of one of the two strands. Twist it in along with your hair.
- Secure the end of the ribbon at the start with a bobby pin.
- Weave it through the entire twist.
- Tie the ends into a small bow or knot at the back and tuck it in.
7. The Rope Twist Crown for Short Hair
Yes, you can do this with a **quiet luxury bob** or even a pixie! It’s all about using the hair you have. You might not get a full crown, but the effect is just as stunning.
Focus on creating a twist along your hairline. Use tiny, clear elastics if needed. Pull in every tiny piece you can. This style looks incredible with an **asymmetrical lob**.
- Use a strong-hold styling gel or wax to control shorter pieces.
- Create a mini twist from one side to the other, above your ears.
- Pin it at the back. Any leftover ends can be tucked and pinned or left out as a cute curl.
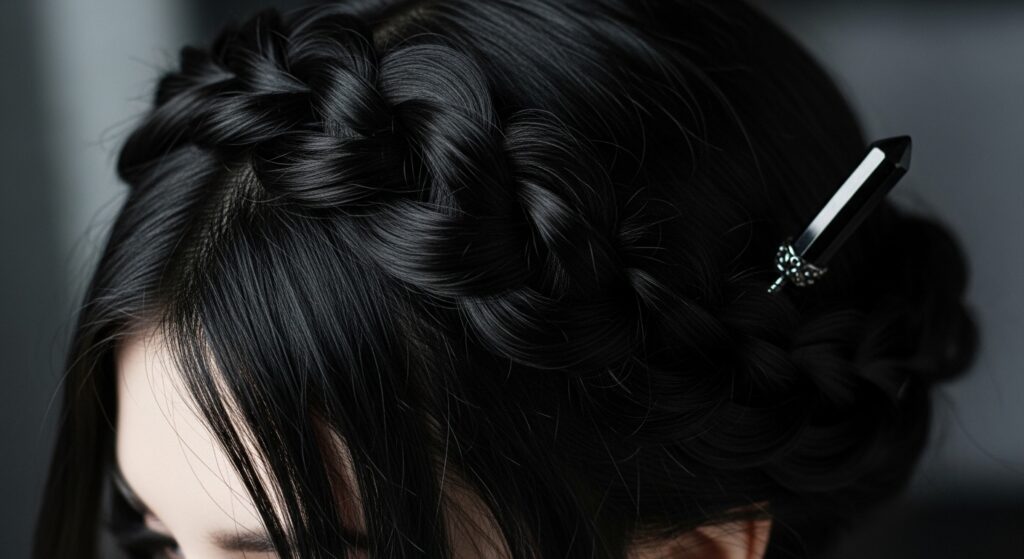
8. The Gothic Romantic Crown
This is for my dark romantic souls. Think **vampire haircut** meets royal elegance. The goal is a crown that’s structured yet soft, with a touch of mystery. Deep, rich hair colors make this pop.
Start with deep side-parted, straight hair. Create a very sleek, tight rope twist. After securing, gently pull at the twist to create deliberate, artful loops—not messy, but dramatic.
- Incorporate a black velvet ribbon or a simple, dark hair jewel.
- Keep the rest of your hair smooth or in soft waves.
- Finish with a high-shine hair spray for a liquid black effect.
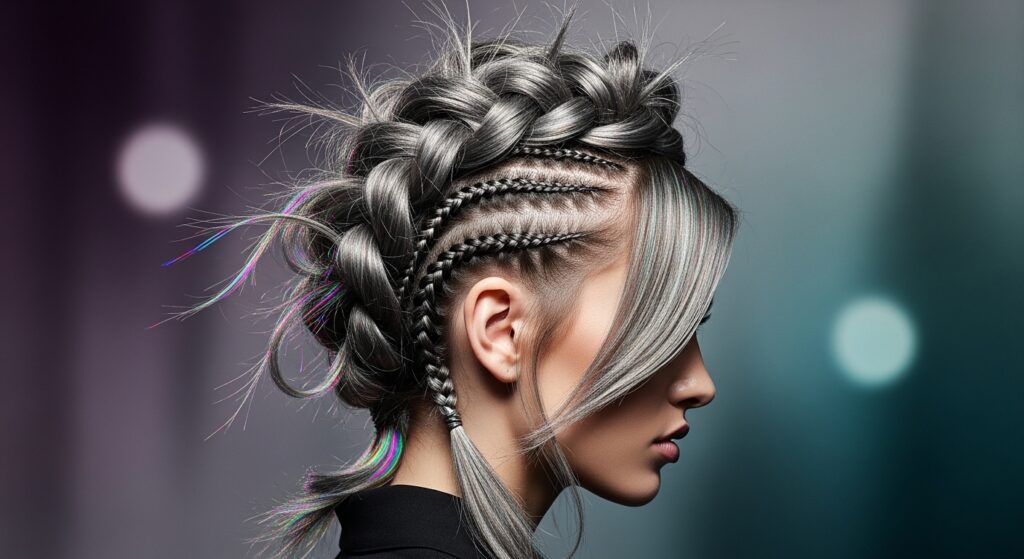
9. The Glitchy Glam Textured Crown
**Glitchy glam hair** is all about intentional imperfection and texture. This crown version uses tiny braids, pieces left out, and a bit of rebellion. It’s cool, editorial, and so fun.
Instead of a clean rope twist, occasionally twist a small section in the opposite direction or add a mini braid into the mix. Let some pieces escape intentionally.
- Use a texturizing paste to create piece-y, separated texture before you start.
- Don’t try to make it symmetrical. Let each side be a little different.
- Finish with a light, matte hairspray to hold the “glitchy” texture.
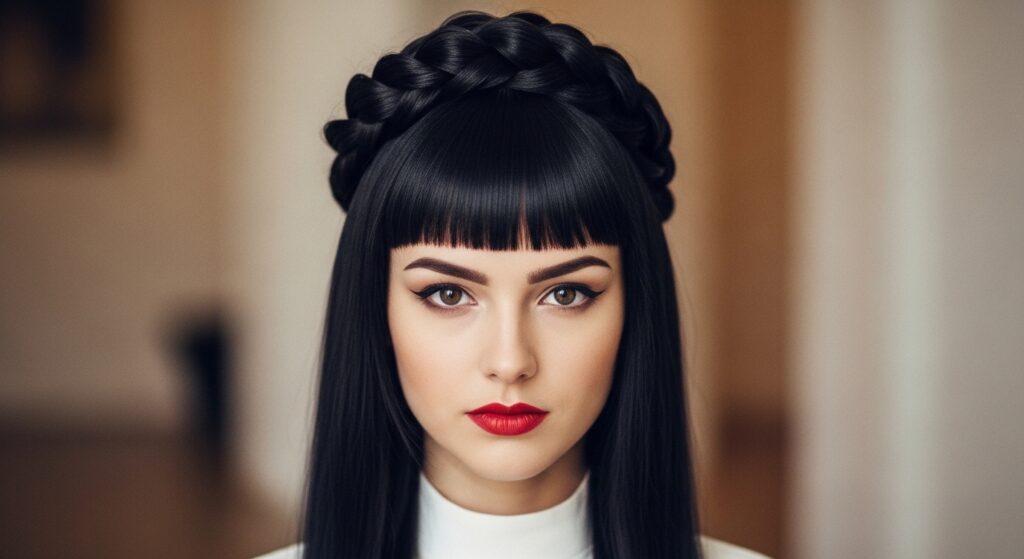
10. The Hime Cut-Inspired Crown
The **hime cut** is dramatic and beautiful. If you have this cut or just blunt bangs with long hair, this crown style complements it perfectly. It highlights the sharp lines of the cut.
Start your rope twists just behind your blunt bangs or face-framing layers. This creates a beautiful frame and keeps your iconic bangs the star of the show.
- If you have full hime bangs, start the twists at your temples.
- Keep the twists neat and close to the head to contrast with the blunt cuts.
- Use a flat iron to ensure your bangs and ends are perfectly smooth.
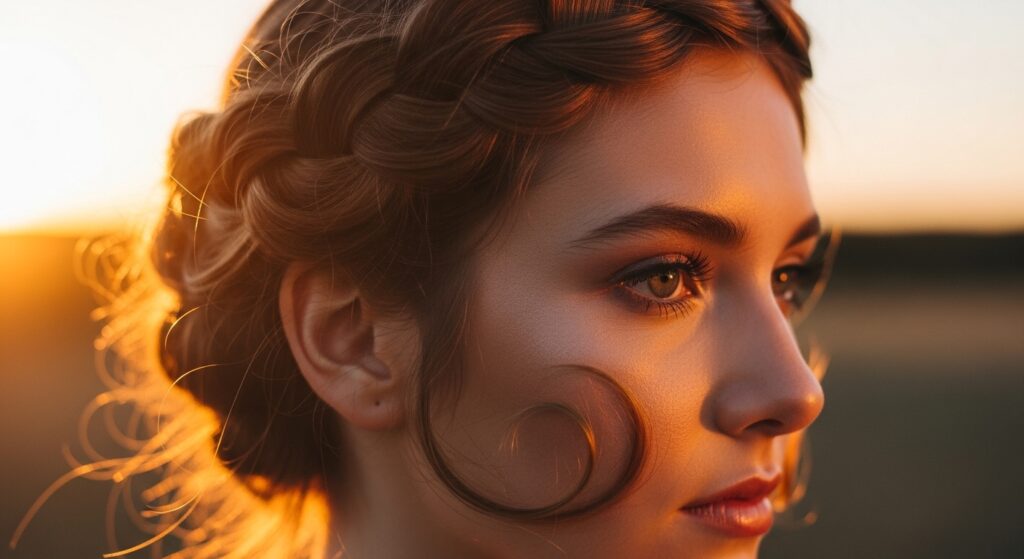
11. The Crown with Face-Framing Tendrils
This is the ultimate softening trick. No matter your face shape, a few soft tendrils make everything more romantic and flattering. It also helps the style feel less “done.”
After creating your crown, choose a few strategic pieces to release. The best spots are near your temples and just in front of your ears.
- Use a small-barrel curling iron to curl these pieces away from your face.
- Use a light-hold gel to smooth them just enough, but not make them stiff.
- This works with every single crown style on this list!
12. The Voluminous Crown for Fine Hair
Fine hair friends, we need strategy. The goal is to create the illusion of a thick, lush crown. The secret is backcombing (teasing) and the right products.
Lightly tease the hair at the roots where you’ll start your twists. Use a volumizing mousse on damp hair before blow-drying for the best base.
- Create smaller, tighter rope twists—they hold better and look fuller.
- After pinning, gently pull the twist upward to create more volume.
- Dry shampoo at the roots before styling adds crucial grit and hold.
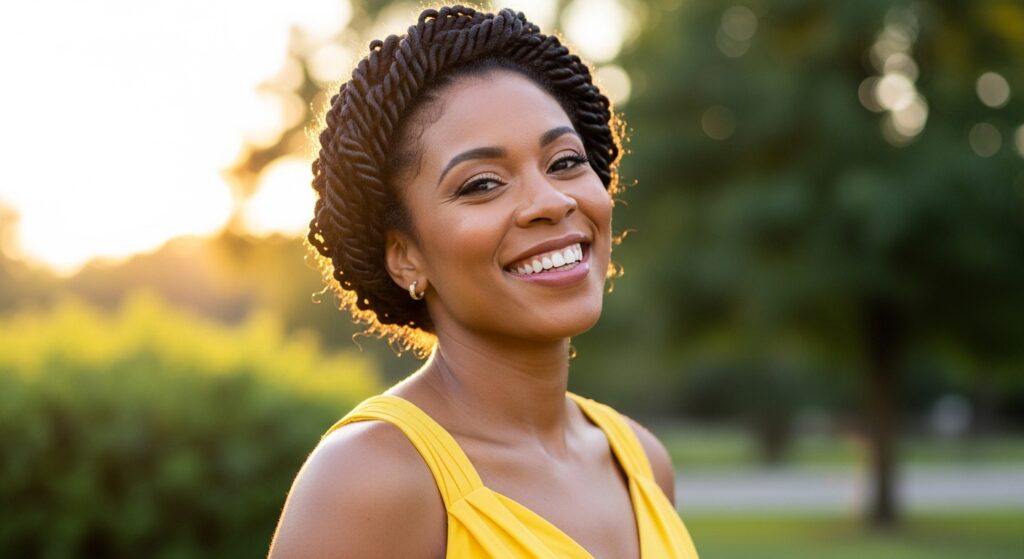
13. The Crown on Natural Curls
This style is a dream on defined curls! It protects your hairline and looks like a regal headpiece. The texture does most of the work for you in terms of beauty.
Style on fully dried and defined curls. Use a curl cream for hold and shine. Gently gather sections without disrupting your curl pattern too much.
- Twist the sections gently—you’re guiding, not pulling tight.
- Use bobby pins that match your hair color to secure at the back.
- Let some curls pop out freely for a joyful, bouncy effect.
14. The Asymmetrical Crown Twist
Why be symmetrical? This edgy take is perfect for an **asymmetrical lob** or anyone who likes a fashion-forward look. It feels modern and cool.
Start with a deep side part. Begin your rope twist on the heavier side of the part, very close to your hairline. Bring it across your forehead like a headband, then down behind your ear.
- Only do one twist, not two that meet.
- Secure it behind your ear, letting the ends blend with the rest of your hair.
- Leave the other side of your hair smooth or down.
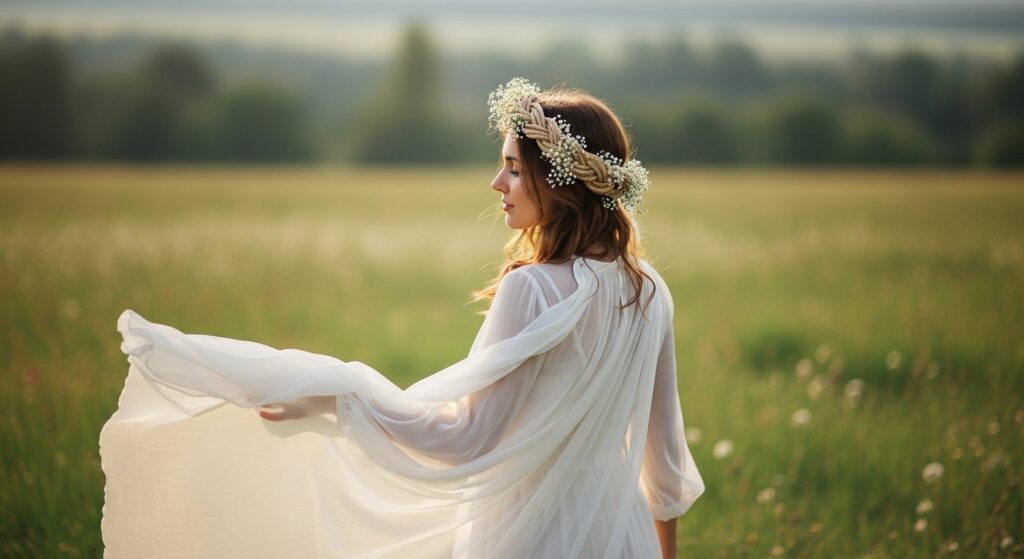
15. The Crown with Fresh Flowers
The ultimate romantic evening look. Weave in small sprigs of baby’s breath, a single gardenia, or tiny roses. Keep it delicate—you’re a goddess, not a parade float.
Create your crown first and secure it firmly. Choose flowers with sturdy stems. Use bobby pins or floral wire to attach them at the intersection of your twists.
- For real flowers, spray them lightly with hairspray first to reduce wilting.
- Silk flowers are a beautiful, lasting alternative.
- Placement is key: one or two clusters at the back or side is enough.
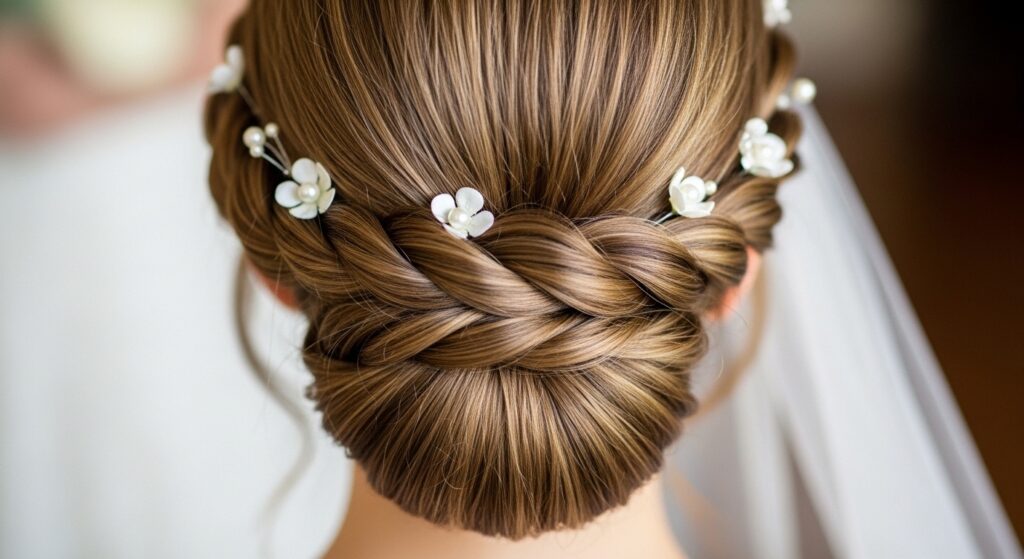
16. The Low Crown at the Nape
This is a subtle, beautiful twist. Instead of placing the crown on top of your head, you create it low, at the nape of your neck. It’s an unexpected detail for an updo.
Pull your hair into a low ponytail or bun first. Then, take two sections from the sides near your ears and create rope twists that meet at the center of your bun.
- Wrap the twists around the base of your bun.
- This style is gorgeous with a low chignon or even a messy bun.
- It keeps hair completely off your face and neck.
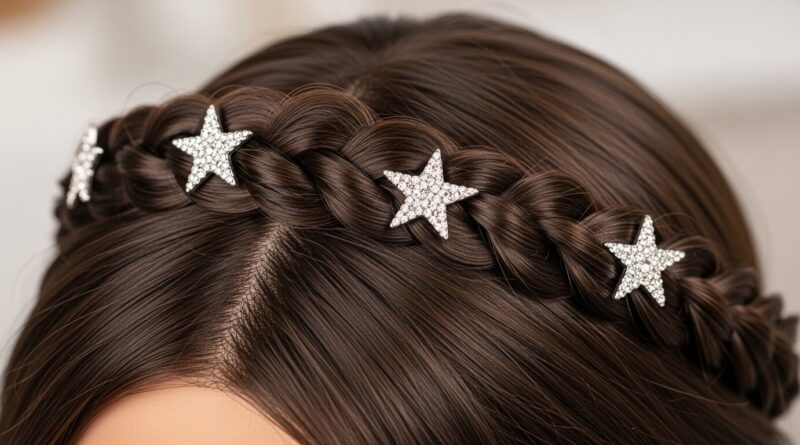
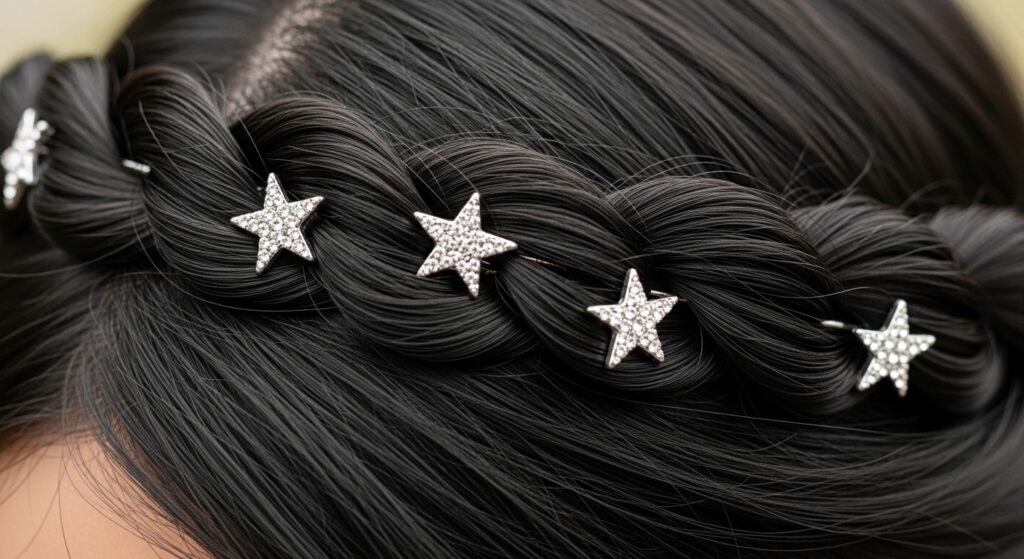
17. The Crown with Sparkly Hair Pins
Instant glamour. After creating a simple crown, add a few strategically placed sparkly pins. It’s less commitment than a full headpiece but just as festive.
Use bobby pins with tiny jewels or small, delicate barrettes. Place them where the twists intersect or at the ends where they’re pinned together.
- Odd numbers are more modern: try one, three, or five pins.
- Scatter them randomly for a “glitchy glam” sparkle effect.
- Make sure they are secure—give them a gentle tug after placing.
18. The Crown for Second-Day Hair
This is my personal favorite hack. Second-day hair has the perfect texture for holding twists. It’s faster, easier, and looks more lived-in and romantic.
Refresh your roots with dry shampoo for volume and texture. Don’t brush it out completely—you want that slightly textured base.
- The natural oils will help the style hold without being crunchy.
- Any flyaways will blend in with the textured vibe.
- This is the fastest way to look polished in under 10 minutes.
19. The Triple Braid Crown
Level up by incorporating different braids. Try a classic three-strand braid into one rope twist, or make both twists from fishtail braids. The texture is incredible.
On one side of your head, create a small three-strand braid near your temple. Incorporate it into your rope twist as you add hair. It creates a beautiful, intricate detail.
- Practice the braids separately first.
- Keep the sections small so the overall crown doesn’t get too bulky.
- This is a great way to use skills you already have in a new way.
20. The Waterfall Rope Twist Crown
A waterfall effect is breathtakingly romantic. Instead of incorporating all the hair, you drop sections as you go, creating a cascading look alongside the crown.
Start a rope twist at your temple. As you add hair from the top, drop the bottom strand of the twist, letting that hair fall free. Pick up new hair from the top to continue.
- This takes a little practice. Go slowly.
- It looks best with curled hair, so the dropped pieces have beautiful wave.
- Secure the end of the twist behind your ear with a decorative pin.

21. The Crown with a Colored Streak
Got a hidden color streak or balayage? Make it the star. Position your rope twist so that your pop of color is featured