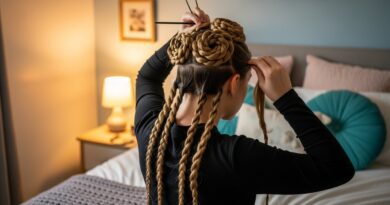
How to Upgrade Your angled ponytail Hair in Just Minutes
Let’s be honest, the ponytail is the undisputed hero of the hair world. It’s our go-to for bad hair days, rushed mornings, and intense workouts. But if you’re still rocking the same basic, high-or-low pony you’ve worn for years, you’re missing out on a world of style. Enter the angled ponytail—a simple yet profound upgrade that instantly adds sophistication, edge, and modern flair to your look.
This isn’t just your average ponytail. The angled ponytail, with its sleek diagonal line from the crown down to the nape of your neck, creates a stunning silhouette that lifts the face and adds incredible volume. The best part? It looks far more complicated than it actually is. With a few insider secrets and a couple of minutes, you can transform this classic style into a red-carpet-worthy masterpiece. Ready to elevate your hair game? Let’s dive in.
Why the Angled Ponytail is Your New Secret Weapon
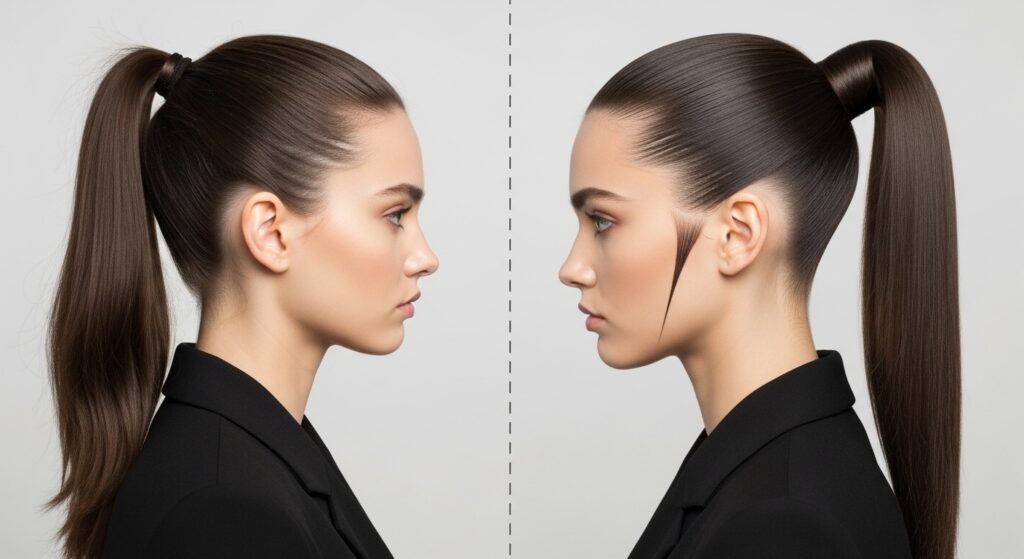
Before we get our hands on the hair ties, it’s worth understanding why the angled ponytail is such a game-changer. Unlike a standard ponytail that sits at a single height, the angled version starts higher on one side of your head and cascades down to a lower point on the other. This diagonal flow does wonders for your overall appearance.
First, it’s a masterclass in creating the illusion of volume. By pulling the hair from the crown area upwards and back, you automatically get a lift at the roots, making your hair look thicker and fuller. Second, it’s incredibly flattering. The angle naturally creates a lifting effect on your facial features, giving you a subtle, non-surgical facelift. It draws the eye upwards, highlighting your cheekbones and eyes. Whether you have straight, wavy, or curly hair, this versatile style adapts beautifully, offering a sleek, polished look or a more textured, bohemian vibe.
The Foundation: Mastering the Basic Angled Ponytail
Every masterpiece needs a solid foundation. Here’s how to create the perfect, clean base for your upgraded angled ponytail.
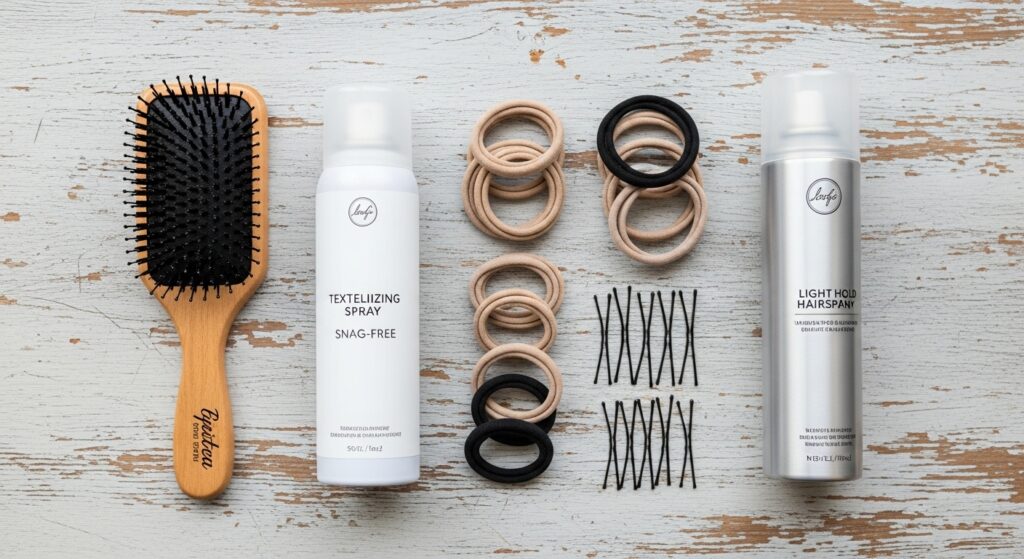
Step 1: Prep and Protect
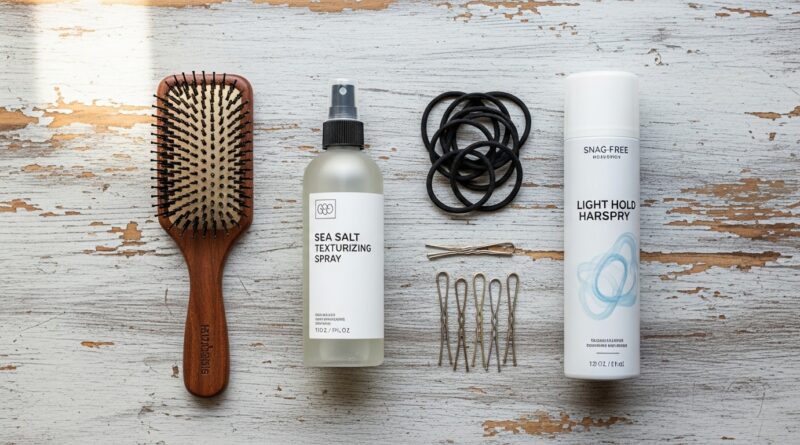
Start with day-old hair or spritz dry shampoo at the roots for added texture and grip. If your hair is freshly washed, it might be too slippery. Apply a light-hold styling cream or a volumizing mousse to damp hair before blow-drying to give your hair some body and control.
Step 2: Create the Angle
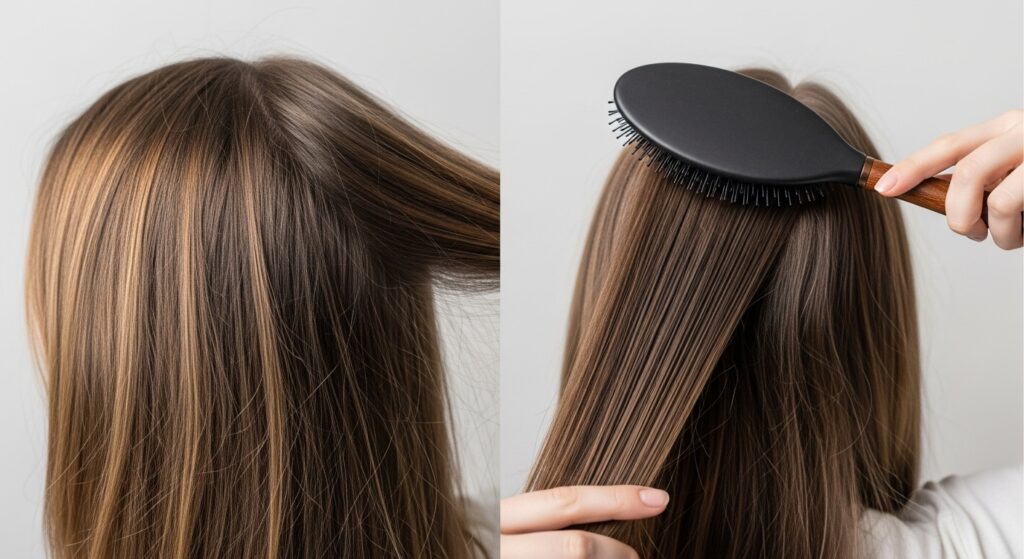
This is the crucial part. Instead of gathering your hair straight back, tilt your head slightly to the side. For a classic angled look, start gathering your hair from the higher point around your crown, above your temple. As you pull it back, guide the hair diagonally downwards towards the nape of your neck on the opposite side. Use a bristle brush to smooth the top and sides, following that diagonal path. The goal is a seamless line from the high starting point to the low endpoint.
Step 3: Secure It Right
Use a snag-free, coil hair tie to secure the ponytail. Wrap it tightly enough to hold, but avoid making it so tight that it creates a headache or pulls uncomfortably at your hairline. For extra security and a seamless look, you can take a small section of hair from underneath the ponytail and wrap it around the base, securing it with a bobby pin hidden beneath.
5 Easy Upgrades to Transform Your Angled Ponytail
Now that you’ve got the base down, it’s time for the fun part—the upgrades! These are quick, easy, and each one creates a completely different vibe.
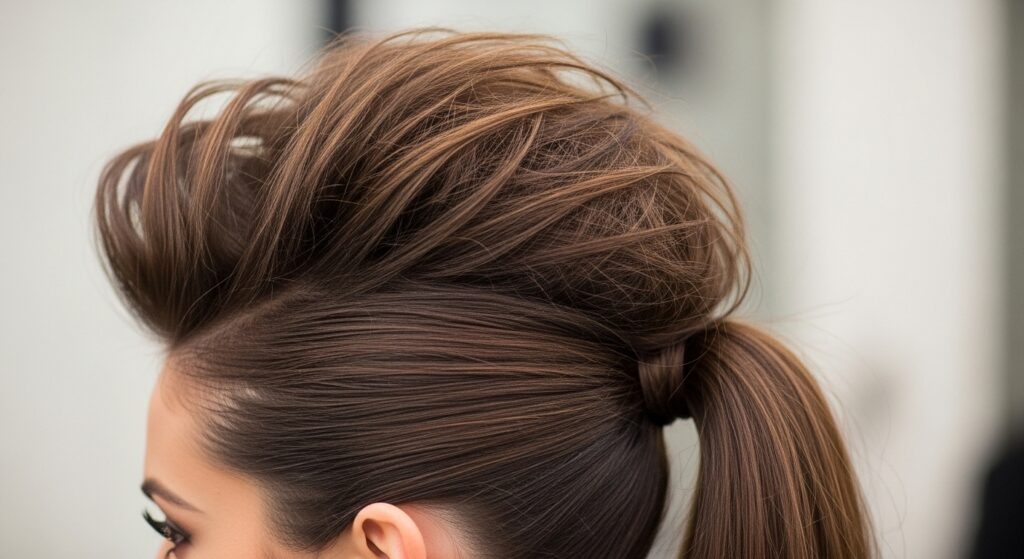
1. The Voluminous Tease
For a dramatic, high-fashion look, backcombing is your best friend. Once your angled ponytail is secure, gently tease the crown section of your hair. Use a fine-tooth comb to backcomb small sections at the roots, focusing on the area directly on top of the ponytail’s base. Be gentle—you can always add more volume, but removing tangles is harder. Once teased, lightly smooth the very top layer with a brush or your fingers to create a polished exterior over a voluminous interior. This adds instant glamour and a touch of old-school Hollywood.
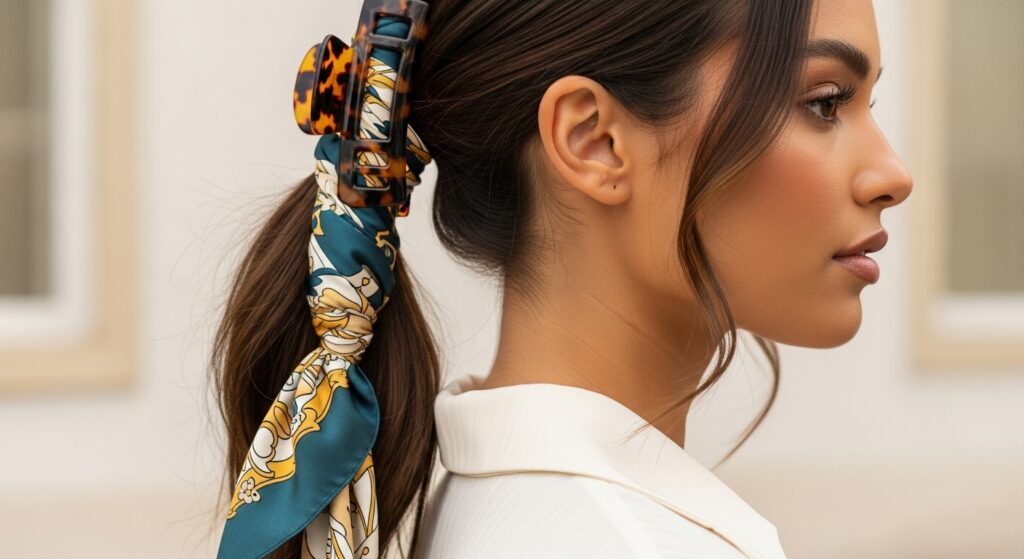
2. The Accessorized Edge
Never underestimate the power of accessories. A simple, chic claw clip can be used to accentuate the angle. Instead of using a hair tie, try gathering your hair into the angled position and then securing it with a stylish claw clip at the base. Alternatively, wrap a silk scarf around the hair tie. Or, for a modern twist, slide a few statement hair cuffs onto the length of your ponytail. These small additions can make your style look meticulously curated with almost zero effort.
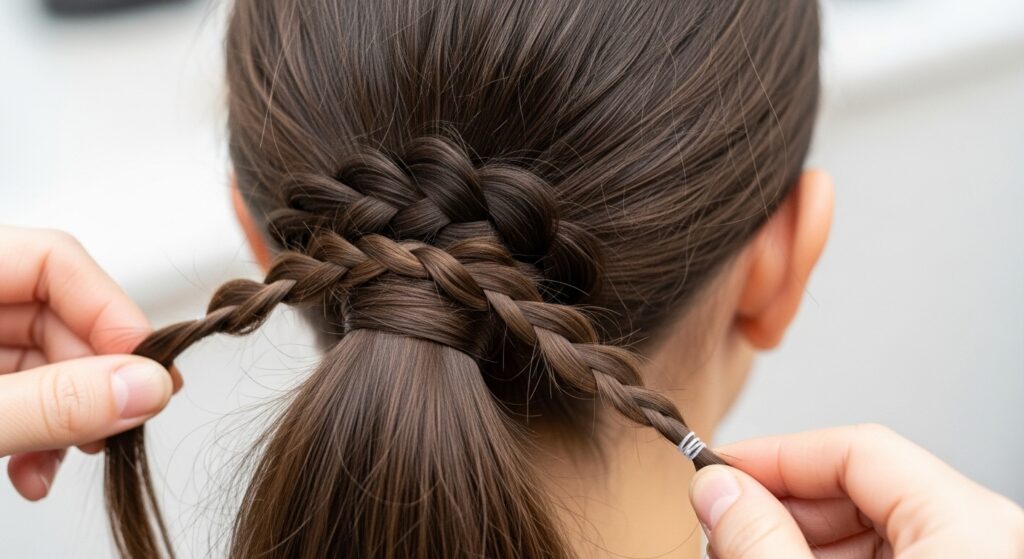
3. The Textured Braid Wrap
This upgrade adds boho-chic texture and hides the hair tie in the most elegant way. After securing your ponytail, create a loose braid with the tail. It doesn’t have to be perfect—a slightly messy, textured braid looks even better. Then, gently wrap the braid around the base of the ponytail, covering the hair tie completely. Secure the end of the braid underneath with bobby pins. This creates a beautiful, intricate-looking bun or wrap that elevates the entire style.
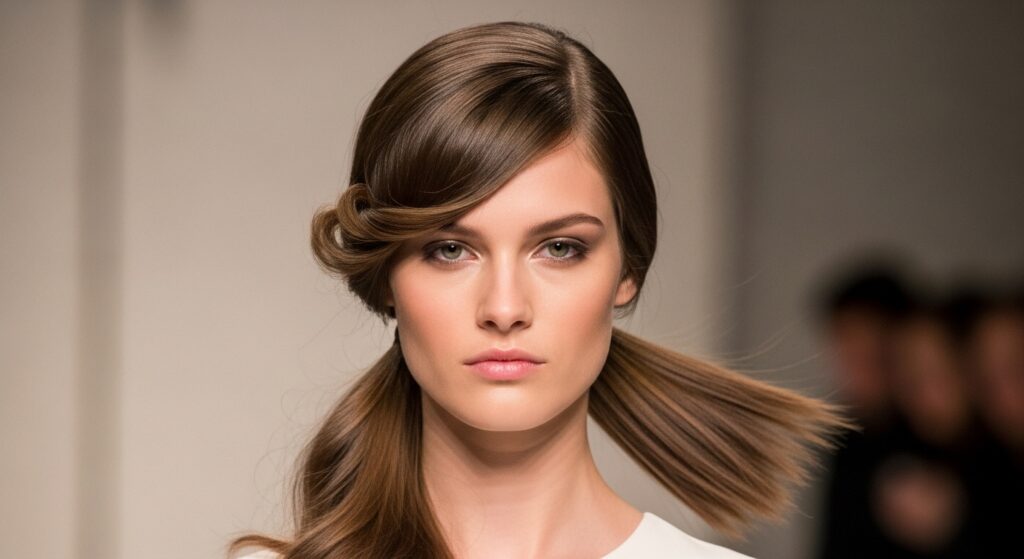
4. The Face-Framing Tendrils
For a softer, more romantic look, intentionally leave out a few face-framing pieces. Pull out two or three small sections of hair around your face—near your temples and cheekbones. Use a curling wand to add a soft wave or bend to these pieces, as well as to the very end of your ponytail. This breaks up the severity of a sleek ponytail, adds movement, and beautifully frames your face, making the style feel effortless and modern.
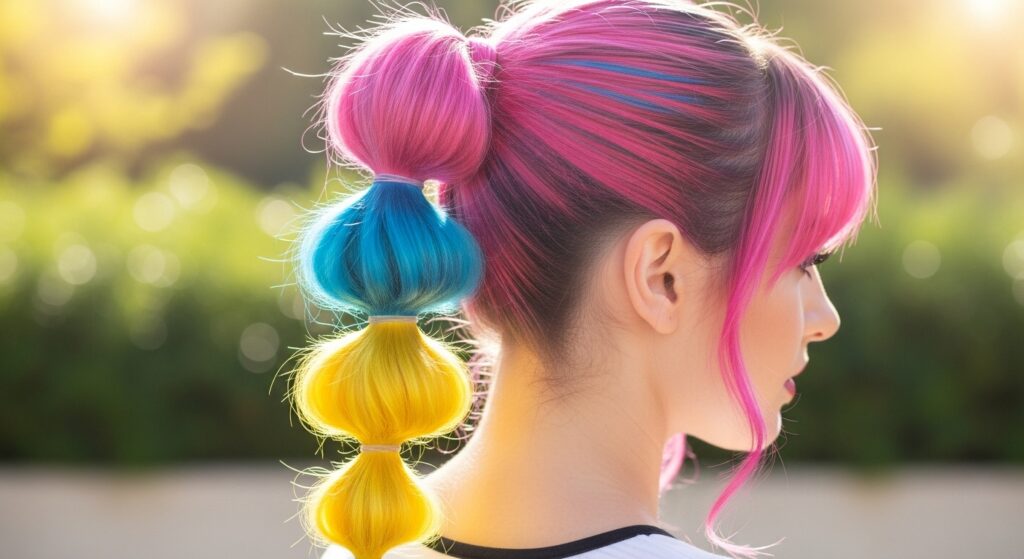
5. The Bubble Ponytail
Inject some playful, futuristic fun into your look with the bubble ponytail. Create your foundation angled ponytail. Then, take small, clear elastic bands and space them out evenly down the length of the tail. Secure each one tightly. Once all the elastics are in, gently tug on the sections of hair between each band to puff them out, creating the “bubble” effect. This is a fantastic way to add visual interest and works especially well on medium to long hair.
Pro Tips for a Flawless Finish Every Time
To truly make your angled ponytail look like it was done by a professional stylist, keep these pro tips in your back pocket.
Embrace Texture Spray: If you’re going for a textured, messy, or braided look, a good texturizing spray is non-negotiable. It adds grit, volume, and hold, making your style last longer and look more dynamic.
Conceal the Hair Tie: We mentioned the braid wrap, but you can also simply take a small, hidden section of hair from the ponytail itself, wrap it around the base, and pin it. For a completely seamless look, apply a light-hold hairspray to the wrapping piece before you wrap it to tame any flyaways.
Flatten Any Bumps: After you’ve brushed your hair into place, use the tail end of a rat-tail comb to gently trace along your part and the hairline, flattening any small bumps or stray hairs for an ultra-sleek finish.
Set It and Forget It: A light mist of flexible-hold hairspray over the entire style will lock everything in place without making your hair look stiff or crunchy.
Conclusion: Your Minutes-to-Glamour Hair Hack is Here
The angled ponytail is more than just a hairstyle; it’s a quick, reliable, and incredibly stylish solution for anyone who wants to look put-together without spending hours in front of the mirror. By mastering the simple diagonal technique and experimenting with our easy upgrades—from voluminous teasing to chic accessories—you can create a multitude of looks that suit any occasion.