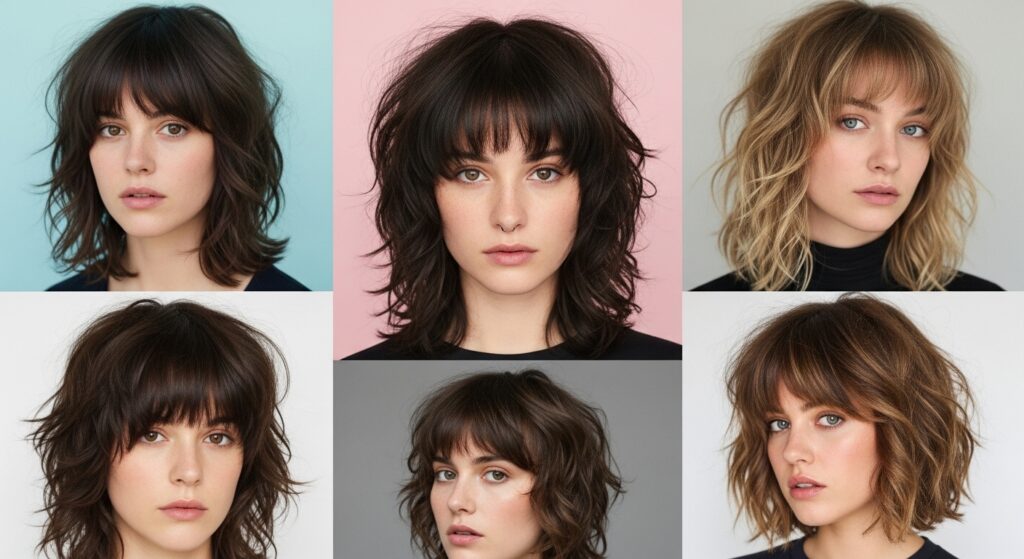
How to Make retro shag Hair Look Expensive on a Budget
The shag haircut is back, and it’s bolder and more beautiful than ever. This iconic 70s style, characterized by its choppy layers, effortless texture, and rock-and-roll spirit, is a dream for those who want a look that’s both low-maintenance and high-impact. But in a world of luxury salons and premium products, you might be wondering: can you really achieve that expensive-looking, salon-fresh shag without a celebrity stylist’s budget?
The answer is a resounding yes. An expensive-looking shag isn’t about how much you spend, but how you spend it. It’s about strategic cuts, smart product choices, and mastering a few key styling techniques. This guide will walk you through every step, from getting the right cut for less to creating that coveted lived-in, glossy texture at home. Get ready to unlock the secret to a shag that looks like a million bucks, without the hefty price tag.
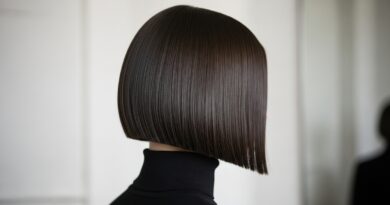
Mastering the Cut: The Foundation of a Luxe Shag
Everything starts with the cut. A cheap-looking shag is often one that’s either too uniform or too chaotic. An expensive-looking shag has intentional, well-placed layers that create movement and frame the face beautifully. You don’t need to spend a fortune to get this foundation right.
First, do your research. Spend time on Pinterest and Instagram saving pictures of shags that you love. Look for styles that suit your face shape and hair texture. Is it a soft, curtain-banged shag? A razor-cut, rocker shag? Having a clear visual reference is the most powerful tool you can bring to a stylist.
When choosing a stylist, you don’t necessarily need the most expensive one in town. Look for someone whose portfolio shows expertise in textured, layered cuts. Consider a senior stylist at a reputable but not overly-priced salon, or even a talented stylist at a beauty school for a significant discount. The key is communication. Show them your pictures and be very specific about the elements you want: choppy ends, face-framing layers, and overall texture.
A pro tip: Ask for “texturizing” or “point cutting” instead of blunt scissor cuts. This technique helps create those soft, piecey ends that are the hallmark of a modern, expensive shag, preventing it from looking like a dated, helmet-like pyramid.
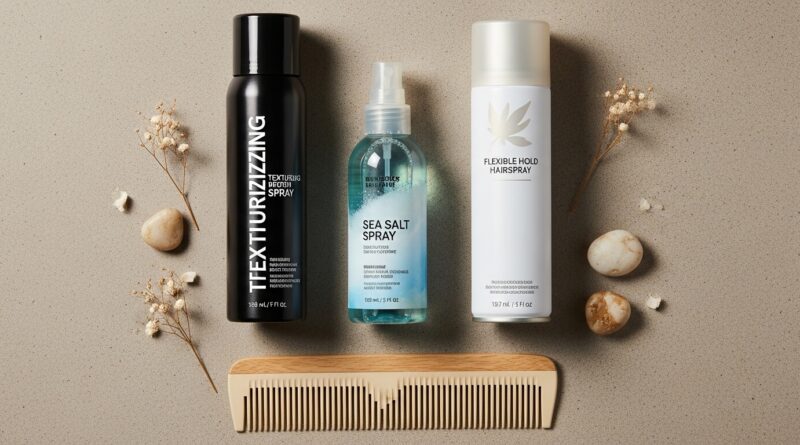
Budget-Friendly Products That Deliver High-End Results
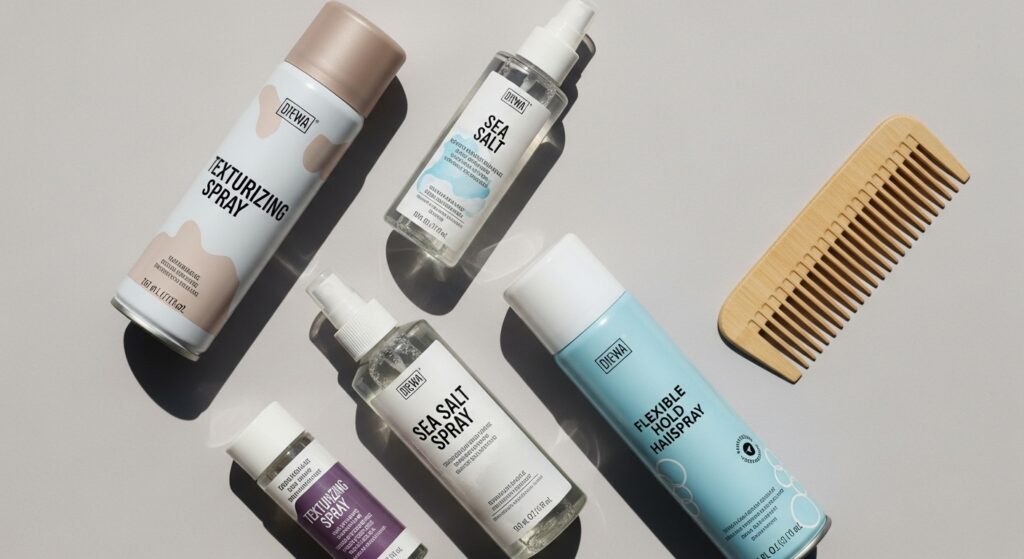
You don’t need a cabinet full of $50 serums to achieve a luxe shag. The goal is to invest in a few key, multi-tasking products that perform like their high-end counterparts. The holy trinity for a shag is: a texturizing spray, a sea salt spray, and a flexible hold hairspray.
Texturizing Spray: This is your secret weapon. It adds grit, volume, and that perfectly imperfect piecey-ness. While high-end brands are great, many drugstore brands now offer fantastic alternatives. Look for keywords like “beach wave,” “texture,” or “volume” on the bottle. A good texturizing spray can double as a dry shampoo, adding lift at the roots on day-two hair.
Sea Salt Spray: This is the product that gives you that effortless, “I just air-dried my hair after a swim in the ocean” wave. It enhances natural texture and provides a light, flexible hold. You can even make a simple version at home with warm water, sea salt, and a bit of conditioner and almond oil.
Flexible Hold Hairspray: Avoid stiff, crunchy hairsprays at all costs. They instantly date the shag. Instead, opt for a flexible hold or “finishing” spray. These allow your hair to move while keeping the layers defined and flyaways at bay. A light mist is all you need to lock in the texture without sacrificing the effortless vibe.
The Art of At-Home Styling: Tools and Techniques
With the right techniques, you can create a red-carpet-worthy shag with minimal tools. Ditch the idea of perfectly smooth, blown-out hair. The shag is all about embracing and enhancing texture.
Your most important tool is a good blow-dryer with a concentrator nozzle. You don’t need the most expensive one, but one with multiple heat and speed settings is crucial. Use it to rough-dry your hair about 80% of the way, flipping your head upside down to maximize volume at the roots.
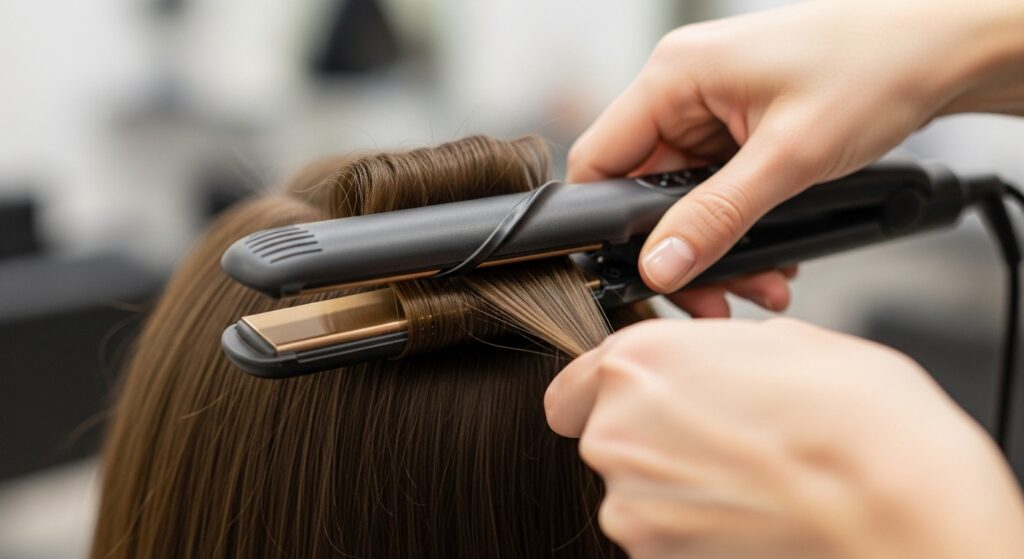
For waves, skip the curling iron. Instead, use a flat iron to create loose, bendy waves. Clamp the iron near the roots, twist it 180 degrees, and gently pull it down the hair shaft, easing the clamp open and closed as you go. This creates an irregular, natural-looking wave that blends perfectly with the shag’s choppy layers. The goal is movement, not uniform curls.
Finally, learn the power of scrunching and twisting. After applying your sea salt or texturizing spray, scrunch your ends with your hands to encourage wave formation. To define face-framing layers, take small sections, twist them lightly, and then gently backcomb the twist at the roots with your fingers for a soft, lived-in lift.
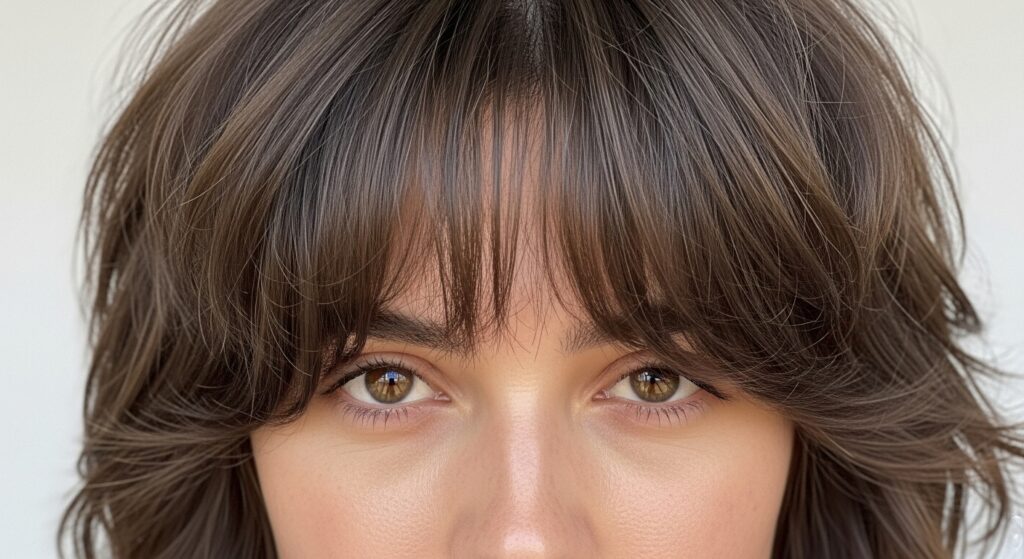
The Devil’s in the Details: Fringe and Face-Framing Layers
What separates an average shag from an expensive one is often the treatment of the fringe and the layers around the face. These elements require a bit of extra attention to look intentional and polished.
If your shag includes bangs—be they curtain bangs, wispy bangs, or full fringe—keeping them trimmed is essential. You can easily learn to trim them yourself at home. The key is to always cut them dry, so you can see their true length and shape. Use sharp hairstyling shears (not kitchen scissors!) and cut vertically into the ends, point-cutting to avoid a harsh, blunt line. Small, conservative trims between salon visits will keep your bangs looking fresh and professional.
For the face-framing layers, use a small, flat iron or a round brush to give them a slight bend away from your face. This simple act adds a touch of polish and opens up your features. A tiny dab of a lightweight serum or oil only on the very ends of these pieces can add shine and tame frizz, making the whole style look healthier and more expensive.
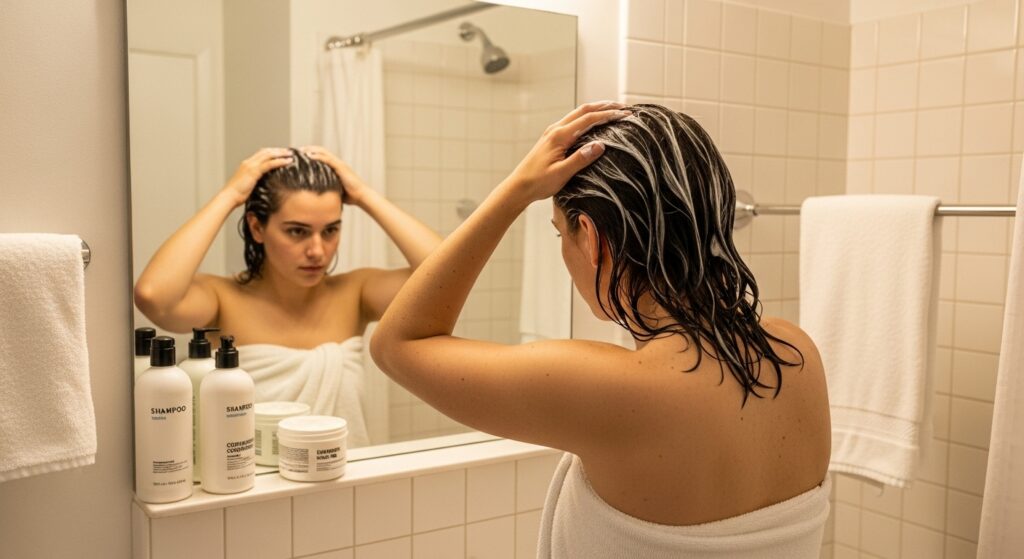
Maintaining the Magic: Health and Upkeep on a Budget
An expensive-looking shag is a healthy-looking shag. Frazzled, dry ends will cheapen even the most expertly cut style. Maintaining your hair’s health is the most crucial long-term budget strategy.
Protect your hair from heat. Always use a heat protectant spray before using any hot tools. This $10 product can prevent hundreds of dollars in damage, keeping your ends smooth and preventing your layers from looking like straw.
Embrace hair masks. Once a week, swap your conditioner for a deep conditioning mask. You don’t need an expensive one; many drugstore brands offer excellent deep conditioners. Look for ingredients like shea butter, argan oil, or keratin. For an even more budget-friendly option, coconut oil or pure aloe vera gel applied for 30 minutes before a shower works wonders.
Extend time between washes. The shag is designed to look better on day two or three. Over-washing strips natural oils, leading to dryness. Use dry shampoo strategically at the roots to absorb oil and add volume. This not only saves you time but also reduces the amount of product you use and the wear-and-tear on your hair from daily styling.
Confidence: The Ultimate Accessory
Finally, remember that the most expensive thing you can wear with any haircut is confidence. The shag is a rebellious, joyful, and expressive cut. It’s meant to be a little messy, a little undone, and completely unique to you. Owning that attitude is what truly sells the look.
Walk with your head high, let your layers bounce, and don’t fret over a few stray hairs. That effortless, “I woke up like this” cool-girl vibe is the entire point. When you wear your shag with self-assurance, no one will question whether you paid a fortune for it. They’ll just be too busy admiring your impeccable, and seemingly effortless, style.
So, embrace the texture, master the techniques, and invest your money wisely. Your dream of a luxurious, retro shag that turns heads and fits your budget is completely within reach.