How to Perfect natural bangs Hair Without a Trip to the Salon
We’ve all been there. You leave the salon with a fabulous, face-framing fringe that makes you feel like a million bucks. But a few weeks later, that perfect curtain of bangs has morphed into an awkward, eye-poking, style-cramping nuisance. The immediate thought? I need a salon appointment, stat. But what if you didn’t?
Mastering your bangs at home is not only possible; it’s a game-changer for your time, your wallet, and your overall hair confidence. With the right techniques, a steady hand, and a little insider knowledge, you can keep your fringe looking fresh and fabulous on your own schedule. This comprehensive guide will walk you through everything from the crucial pre-trim prep to daily styling hacks, empowering you to become the master of your own bangs.
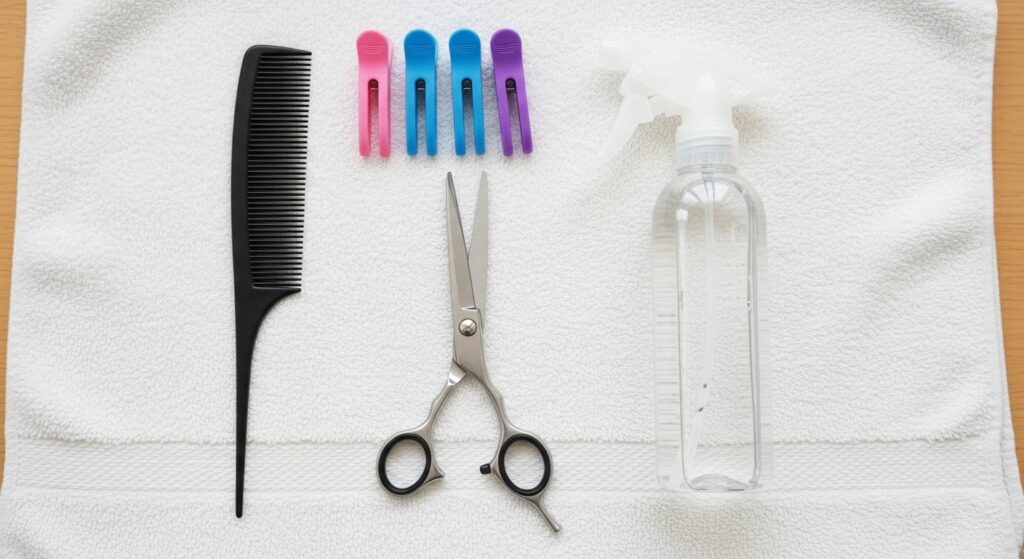
Gathering Your At-Home Bangs Toolkit
Before you even think about making the first cut, you need to assemble your tools. Using the right equipment is what separates a professional-looking trim from a DIY disaster. You don’t need a salon’s entire arsenal, but a few key items are non-negotiable.
Essential Tools:
Sharp Hair Shears: This is the most important rule. Do not use kitchen scissors, craft scissors, or any other blunt instrument. They will crush and fray your hair, leading to a jagged, unhealthy-looking finish. Invest in a decent pair of hair-cutting shears; they don’t have to be astronomically expensive, but they must be sharp and designed for cutting hair.
Fine-Tooth Comb: A fine-tooth comb gives you maximum control, allowing you to section your bangs precisely and guide the hair as you cut.
Hair Clips: You’ll need these to section off the hair you aren’t cutting. This prevents accidents and helps you focus solely on your fringe.
A Good Mirror: A large, well-lit mirror is essential. If possible, use a second handheld mirror to check the back and sides for balance.
Spray Bottle with Water: You should always cut bangs when they are damp. This ensures an even cut and prevents the hair from shifting and shrinking as it dries.
The Pre-Trim Preparation: Setting the Stage for Success
Preparation is 90% of the battle. Rushing into a bang trim is the easiest way to make a mistake. Follow these steps to ensure your hair is in the ideal state for a perfect cut.
First, start with freshly washed hair. Your bangs are the first part of your hair to get oily, and cutting them when they’re greasy can lead to uneven results. Wash and condition your hair as usual. After your shower, gently towel-dry your hair so it’s damp but not dripping wet. If your hair is already dry, use your spray bottle to mist your bangs thoroughly until they are evenly damp.
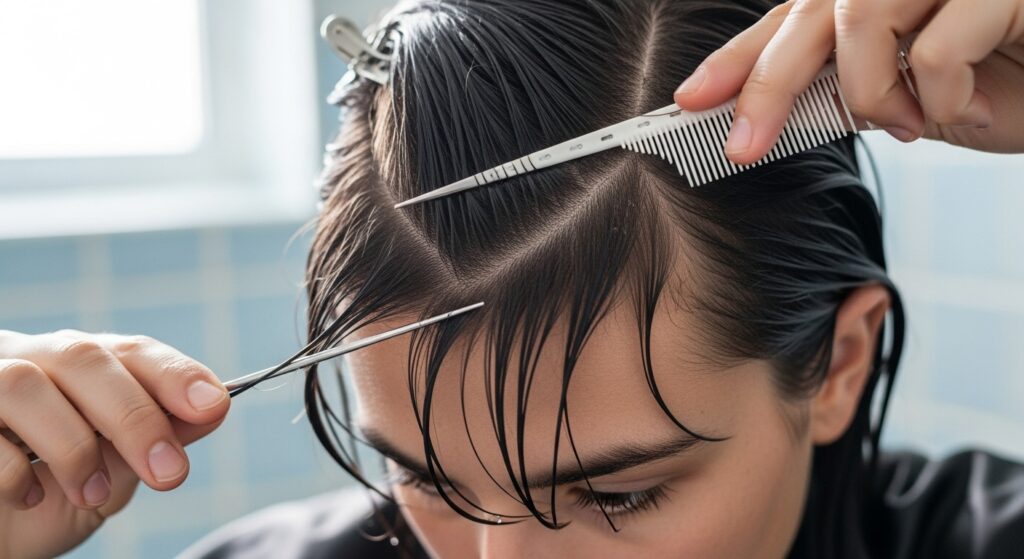
Next, define your bang section. Using the fine-tooth comb, create a clean, triangular section. The point of the triangle should start at the crown of your head, and the base should follow your natural hairline from arch to arch. Be precise here—if your section is too wide, you’ll end up with shorter pieces too far back on your head. Clip the rest of your hair securely out of the way.
Finally, comb your bangs straight down over your forehead. Ensure there are no tangles and that the hair is lying flat and natural against your skin. You are now ready to cut.
The Step-by-Step Guide to Cutting Your Bangs
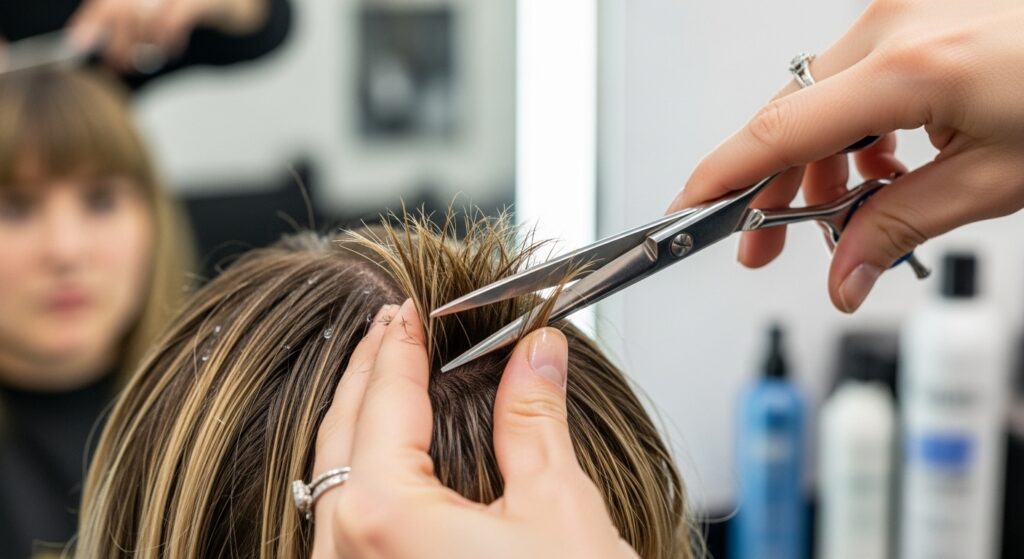
This is the moment of truth. Take a deep breath, go slowly, and remember the golden rule: you can always cut more, but you can’t cut less. It’s better to make multiple small, conservative trims than one big, drastic chop.
Step 1: The Initial Guide. Take a small, central subsection of your bangs—about an inch wide—between your fingers. This will be your guide. Pull it straight down and decide on your desired length. A good starting point is at or just below your eyebrows, accounting for the fact that hair will “spring up” slightly as it dries. Make a single, clean cut on this central section.
Step 2: Work Outwards. Now, incorporating a little bit of the hair you just cut, take the next subsection to the left. Comb it down, and using your initial guide as a reference point, cut to the same length. Repeat this process on the right side, always blending the new section with the previously cut hair. This “point-cutting” or “guide-and-match” technique ensures a seamless, blended line.
Step 3: Check for Balance. Once you’ve cut across the entire section, let your bangs fall naturally. Use your mirrors to check from the front and sides. Is the line even? Do the ends blend well? If you notice any longer, straggling pieces, carefully snip them, focusing only on those individual hairs.
Step 4: Texturizing (Optional but Recommended). To avoid a harsh, blunt line, especially for a more natural, soft look, turn your shears vertically and make tiny, upward snips into the ends of your bangs. This is called point cutting. It removes weight and adds movement, preventing your bangs from looking like a solid, heavy block.
Styling Your Freshly Cut Bangs Like a Pro
The cut is only half the story. How you style your bangs will determine their final look and how they behave throughout the day. The goal is to enhance their shape and control any cowlicks or unwanted volume.
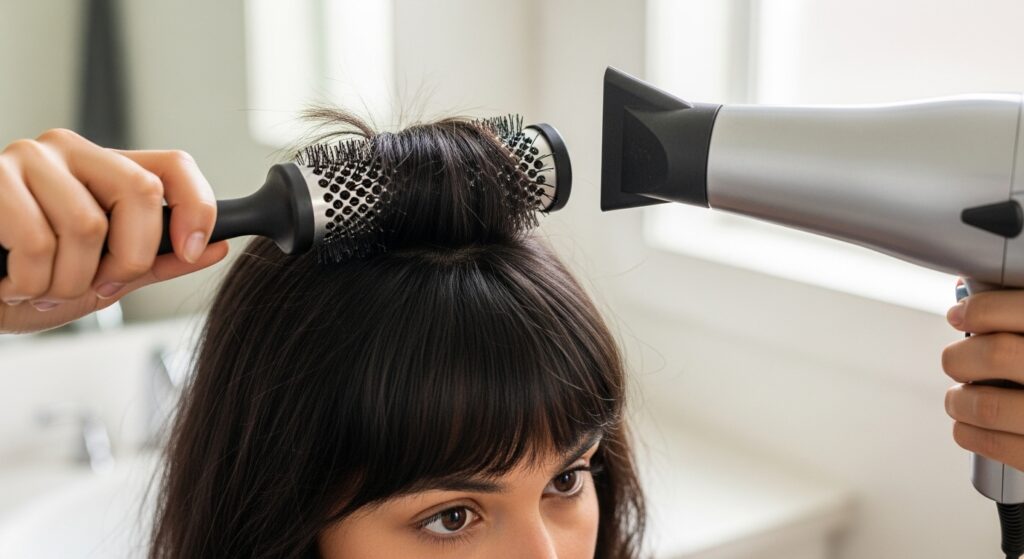
Start by applying a heat protectant spray. Your bangs are fragile and are subjected to frequent styling, so protection is key. Then, using a round brush and a blow dryer, begin to style. Lift the roots of your bangs with the brush and direct the heat downward, following the brush’s path. This smooths the cuticle and adds volume at the root while training the hair to lie flat.
If you have a stubborn cowlick, this is the time to tackle it. Blow-dry your bangs in the opposite direction first (e.g., to the right if it naturally falls left) for a few seconds to break its pattern, then bring them back to the center and finish drying them straight down.
For a final polish, you can use a flat iron on low heat to smooth any kinks or unevenness. Wrap the ends of your bangs around the iron and gently curve them under or over, depending on your preference, to add a soft bend and prevent them from looking too sharp.
Daily Maintenance and Troubleshooting
Keeping your bangs looking perfect between trims requires a simple daily routine and knowing how to handle common problems.
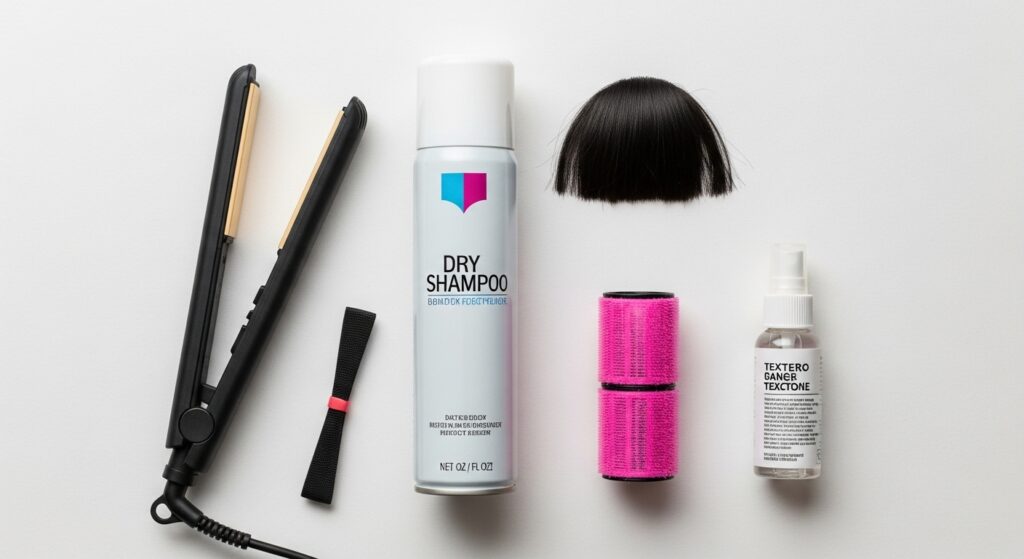
The Quick Refresh: On non-wash days, bangs can get oily or lose their shape. Use a dry shampoo specifically at the roots to absorb oil and add texture. If they’ve lost their style, a quick blast with a blow dryer on a cool setting and a spritz of texturizing spray can bring them back to life.
Taming the Cowlick: A persistent cowlick can be managed with strategic styling. Try using a small, flat iron to “set” the root in the direction you want after applying a light-hold hairspray to the base. Velcro rollers are also a fantastic tool; pop one in your damp bangs for 5-10 minutes while you do your makeup to train them into perfect submission.
Dealing with Greasy Bangs: Since bangs sit on your forehead, they pick up oils from your skin. Dry shampoo is your best friend, but also ensure you are cleansing your face thoroughly and using oil-free skincare and makeup products on your forehead.
Embracing the Grow-Out Phase
Even if you love your bangs, there might come a time when you want to grow them out. This phase doesn’t have to be awkward. With a few clever tricks, you can manage the transition gracefully.
The key is to blend them into the rest of your hair. As they get longer, use a flat iron to curl the ends of your bangs back, away from your face, blending them with the layers around your temples. This creates a soft, face-framing effect.
Headbands, scarves, and cute clips are your allies. A thin, stretchy headband can pull your growing bangs back in a chic, retro style. Small, decorative clips can pin them to the side, keeping them out of your eyes while adding a touch of personality to your look.
When you get your next full haircut, ask your stylist to help blend the length of your bangs into the rest of your hair, creating long, soft layers that make the grow-out process seamless and stylish.

Your Salon-Worthy Fringe Awaits
Perfecting your natural bangs at home is a skill that pays dividends in confidence and convenience. It liberates you from the constant cycle of salon appointments for minor trims and puts you in complete control of your look. By investing in the right tools, following a meticulous preparation and cutting process, and mastering daily styling and maintenance, you can maintain a flawless, face-framing fringe that looks like it was done by a professional.
So, the next time your bangs start to obscure your vision, don’t panic. Take a deep breath, gather your shears, and embrace your inner stylist. With this guide in hand, you have everything you need to keep your bangs looking perfect, natural, and utterly you.