How to Make voluminous updo Hair Look Expensive on a Budget
There’s a certain magic to a voluminous updo. It’s the hairstyle of red carpets, lavish weddings, and those women who just seem to have it all together. It whispers of luxury, effort, and a skilled stylist. But what if we told you that the secret to an expensive-looking updo isn’t a hefty price tag, but a handful of clever techniques and budget-savvy products?
That impossibly chic, effortlessly elegant updo you’ve been coveting is well within your reach. You don’t need a celebrity stylist on speed dial or a bathroom cabinet overflowing with hundred-dollar serums. You just need to know a few insider tricks. This guide is your key to unlocking a world of luxurious-looking hair, proving that true style is born from skill, not just spending.
The Foundation: It All Starts With Your Canvas
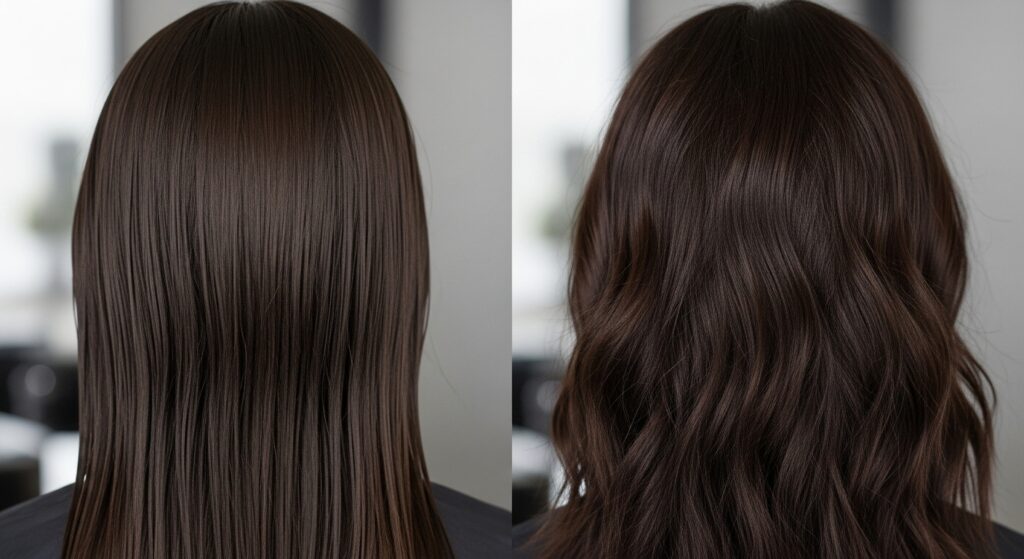
You can’t build a palace on sand, and you can’t build a luxurious updo on limp, lifeless hair. The very essence of an expensive-looking updo is volume and texture. This is the non-negotiable foundation.
Secret Weapon: Second-Day Hair. If you have a big event, wash your hair the day before. Freshly washed hair can be too soft and slippery, making it difficult for styles to hold. The natural oils and slight residue from your previous styling products on second-day hair provide the perfect amount of grit and grip for pins and ties to hold securely.
Master the Texture Spray. This is your best friend. A good texture or dry shampoo spray doesn’t just absorb oil; it adds a matte, rough texture that gives hair “tooth.” This tooth is what allows sections of hair to grip each other, creating a style that looks full and stays put. Don’t just spray it at the roots; lightly mist it throughout your hair before you begin styling.
Volumize at the Roots. Before you even think about putting your hair up, create lift at the crown. Flip your head over and blast the roots with a hairdryer. Alternatively, gently backcomb (tease) the hair at the crown with a fine-tooth comb. The key here is to be gentle—you’re creating a base, not a bird’s nest. A little lift at the roots makes the entire updo appear more dynamic and expensive.
Essential (and Affordable) Tools of the Trade
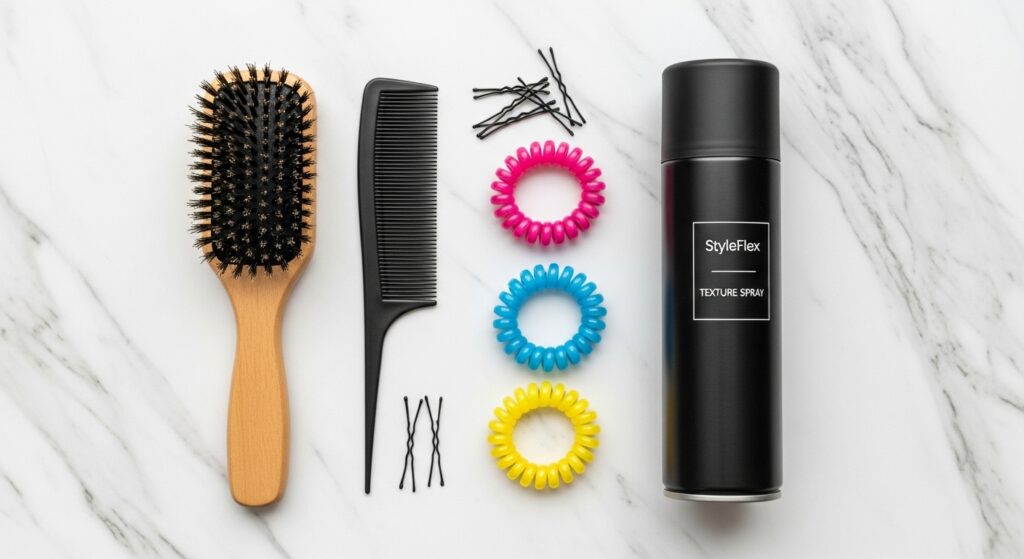
You can achieve 99% of updo magic with a handful of basic, inexpensive tools. Expensive gadgets are fun, but they aren’t necessary.
The Right Brush: A boar bristle paddle brush is excellent for smoothing the surface before creating your updo. A fine-tooth tail comb is indispensable for creating clean parts, sectioning hair with precision, and gently teasing for volume.
Quality Hair Ties: Ditch the thick, bulky elastic bands that create dents and break hair. Invest in a pack of thin, coil-like “telephone cord” elastics or silk scrunchies. They hold securely without leaving a crease, which is crucial for styles you might adjust or take down later.
The Humble Bobby Pin: Not all bobby pins are created equal. Look for pins that have a little grip or texture to them—they hold better. And remember the golden rule: insert your bobby pins with the wavy side down. This simple trick helps them grip your hair and scalp much more effectively, keeping your style secure all day or night.
A Good Mirror: This might seem obvious, but a three-way mirror or a hand mirror used in conjunction with your bathroom mirror is a game-changer. It allows you to see the back and sides of your head, ensuring your updo is polished from every angle.
The Art of the “Undone” Updo: Effortless Elegance
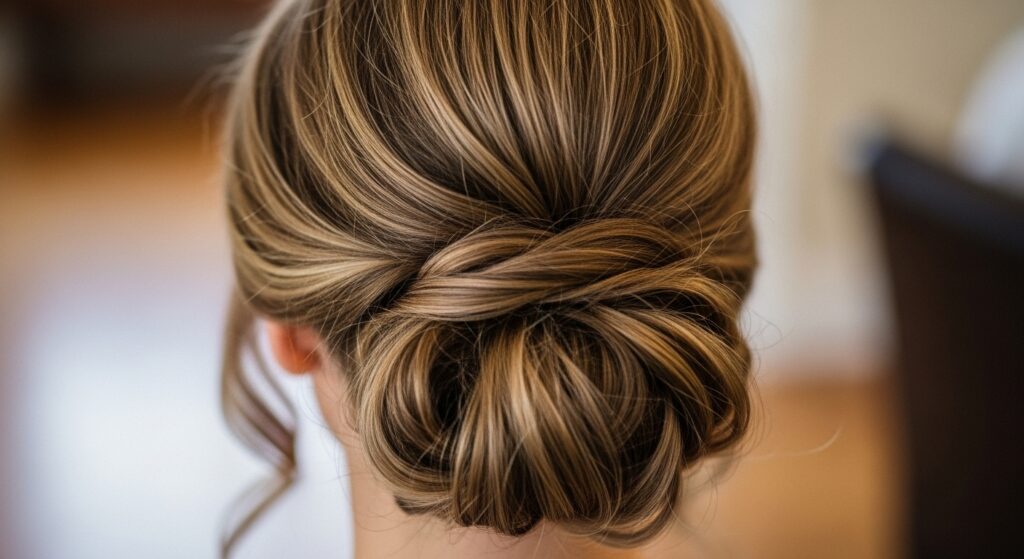
The most modern and expensive-looking updos aren’t slicked-back perfection. They are soft, romantic, and look almost as if they were created by a gentle breeze. This “undone” aesthetic is not only beautiful, it’s also incredibly forgiving and easy to achieve on yourself.
Start with a Messy Bun. Don’t aim for a perfect ballerina bun. Gather your hair as if you’re making a loose, high ponytail, but on the last loop of the hair tie, only pull the hair halfway through, creating a loop. Gently pull apart the loop to loosen and widen it.
Pancake for Volume. This is a stylist’s secret. Once your bun or twist is secured, gently tug at sections of it to “pancake” it—pulling it outward to make it look wider, fuller, and more voluminous. This instantly transforms a sad, tight bun into a luxurious, cloud-like shape.
Pull and Frame. Deliberately pull out a few face-framing pieces around your hairline, at your temples, and at the nape of your neck. Curl these pieces loosely with a curling wand or flat iron for a soft, romantic effect. These wispy pieces break up the hard lines of the updo, softening your entire look and making it appear effortless.
Strategic Embellishments: The Illusion of Luxury
Accessories can elevate a simple updo into something spectacular, but you have to be strategic. More is not always more.
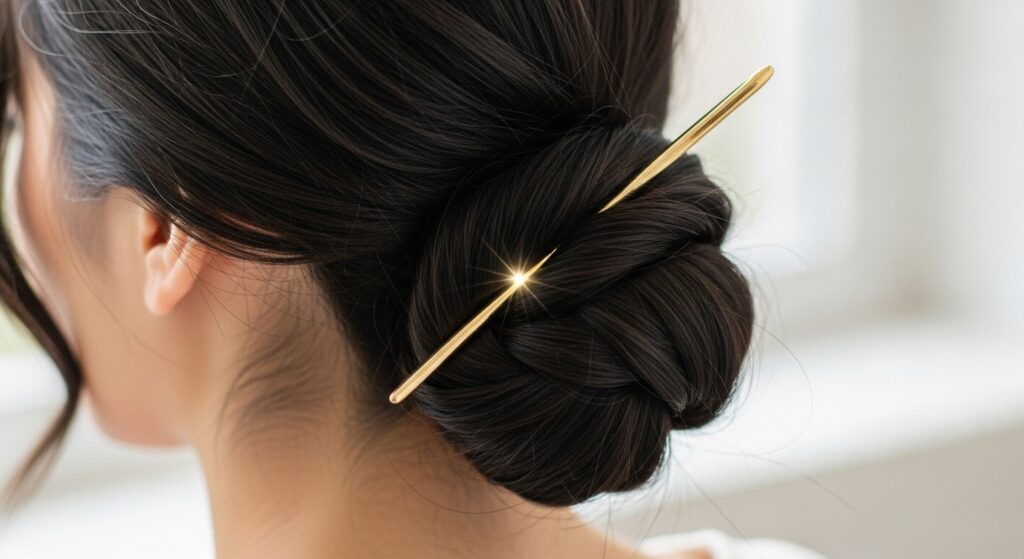
Invest in One Statement Piece. Instead of buying a dozen cheap, plastic clips, save up for one beautiful, well-made hair accessory. Look for a simple metal claw clip, an elegant beaded pin, or a silk scarf. A single, high-quality piece looks infinitely more expensive than multiple flimsy ones.
Use What You Have. A simple black or brown velvet ribbon can be woven through a braided updo for a touch of classic, understated elegance. A pretty scarf from your wardrobe can be tied around a low bun like a headband. Get creative with jewelry—a beautiful, delicate chain can be carefully pinned into an updo for a truly unique and luxurious look.
Placement is Key. Where you place the accessory matters. Slipping a single, elegant pin into the side of a twisted low bun draws the eye and looks intentional. Placing a clip where a bun or twist begins can hide the “starting point” and add a focal point. Think of it as the centerpiece of your hairstyle.
The Finishing Touches: Polishing Your Masterpiece
The difference between a homemade look and a salon-fresh one is often in the finishing details. This is where you finesse your creation.
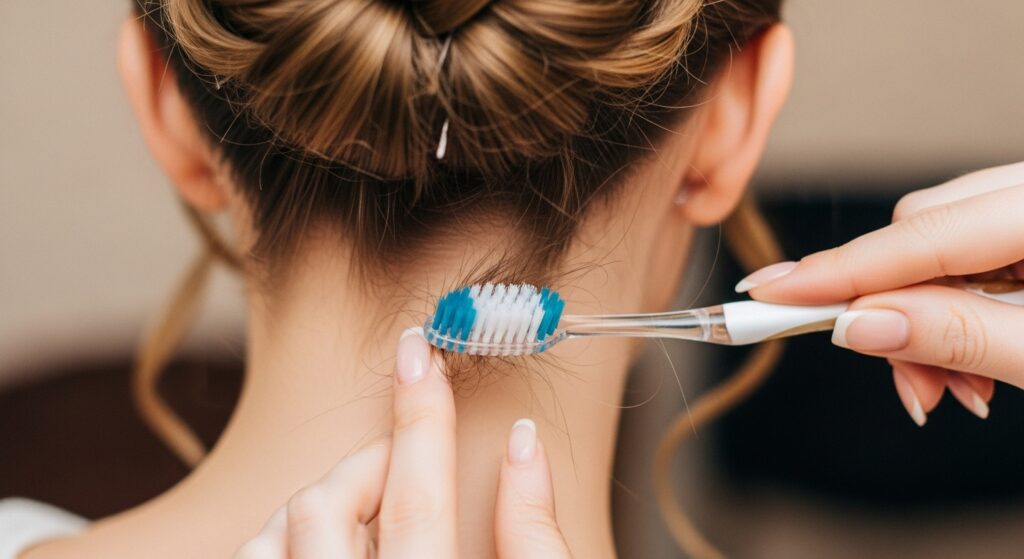
Tame the Flyaways. A few wispy pieces are romantic, but a halo of frizz can look messy. Use a clean, disposable mascara wand or a toothbrush spritzed with a light-hold hairspray to gently smooth down any unruly baby hairs without making the style look stiff or helmet-like.
Lock it In (Gently). Hold your hairspray about 10-12 inches away from your head and mist it lightly over the entire style. Avoid heavy, concentrated sprays that can make hair look wet and crunchy. You want to maintain the movement and softness.
The Final Check. Use your hand mirror to do a 360-degree check. Are there any obvious pin heads showing? Is the volume balanced? Are there any gaps? Tuck in any stray ends and adjust any pieces that aren’t sitting quite right. This final, careful inspection is what makes the style look professionally done.
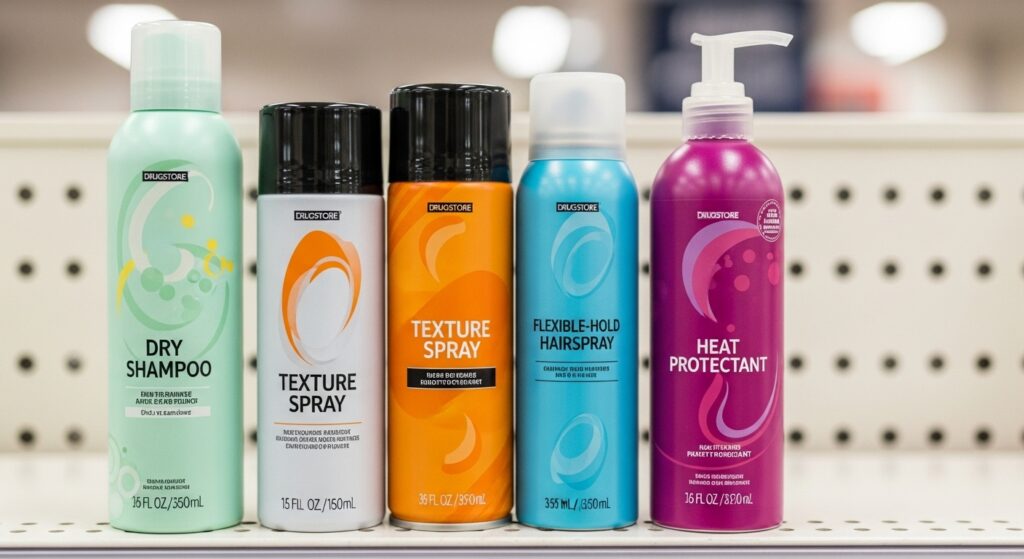
Budget-Friendly Product Swaps for a Luxe Look
You absolutely do not need to break the bank. Many drugstore products perform just as well as their high-end counterparts for creating updos.
Texture Spray: Many affordable brands offer excellent texturizing and sea salt sprays that provide the necessary grit. Look for keywords like “beach wave,” “texture,” or “volume” on the can.
Hairspray: A flexible-hold hairspray from the drugstore is perfect. You don’t need super-mega-ultra hold; you need something that allows for movement while keeping the shape.
Dry Shampoo: This is a two-in-one hero. It creates texture for styling and refreshes your second-day hair, making it the ultimate budget-friendly prep product.
Heat Protectant: If you’re using hot tools on your face-framing pieces, a drugstore heat protectant spray is a must. It prevents damage, ensuring your hair stays healthy and shiny for future styles.
You’ve Got This: Confidence is the Best Accessory
The final, and most important, ingredient in making any updo look expensive is you. Walk with your head held high. Wear your creation with confidence. A simple style worn with self-assurance will always look more expensive than the most intricate updo worn with uncertainty.
Creating a voluminous, expensive-looking updo on a budget is not about magic potions or secret gadgets. It’s about understanding the principles of volume and texture, mastering a few key techniques, and paying attention to the polished, final details. With a little practice and these budget-conscious tips, you can turn an ordinary day into an occasion and feel like a million bucks—without spending it.