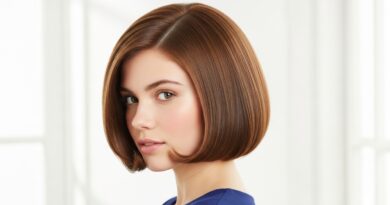
How to Perfect medium shag Hair Without a Trip to the Salon
There’s a reason the shag haircut has clawed its way back into the spotlight, decade after decade. It’s the ultimate symbol of effortless, rock-and-roll cool. That glorious, layered, piecey, and impossibly chic look promises volume, texture, and a personality that a standard blowout can only dream of. But here’s the secret they don’t always tell you at the salon: the shag, in all its perfectly imperfect glory, is one of the most user-friendly haircuts to manage at home.
If the thought of maintaining those coveted layers between pricey salon appointments fills you with dread, fear not. You can absolutely master the art of the medium shag on your own terms. This isn’t about performing a major chop, but about honing, refining, and styling the shag you already have (or are thinking of getting) to keep it looking sharp, healthy, and undeniably fabulous. Let’s unlock the secrets to perfecting your medium shag hair, right from your bathroom.
Understanding Your Shag: The Anatomy of Effortless Cool
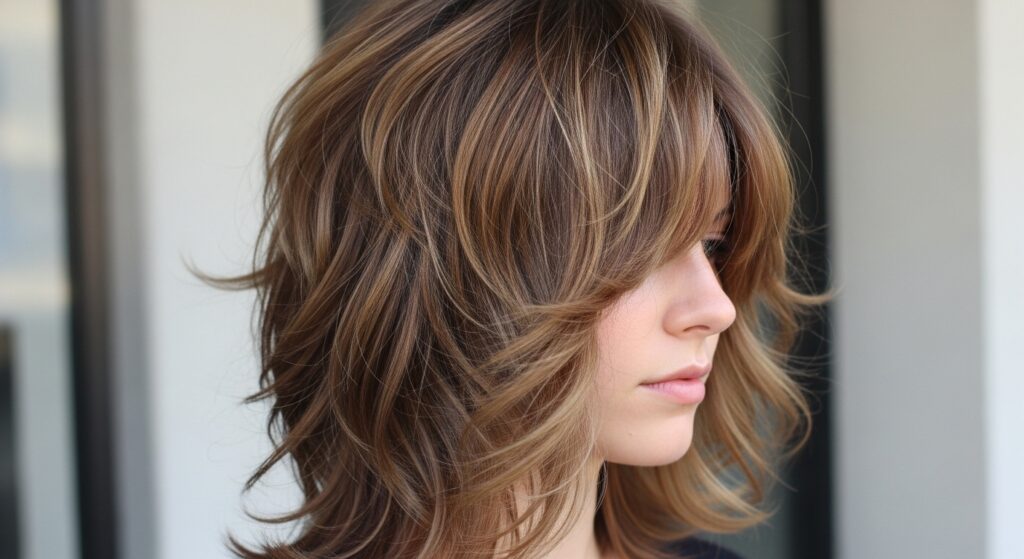
Before you pick up a pair of scissors or any hot tools, it’s crucial to understand what makes a shag a shag. It’s not just a haircut with layers; it’s a specific technique focused on creating movement and texture. The classic medium shag typically hits somewhere between the chin and the shoulders, making it incredibly versatile. Its key components are its heavy, often curtain-style bangs that frame the face, multiple layers throughout the crown to build volume, and choppy, textured ends that defy any notion of a boring, blunt cut.
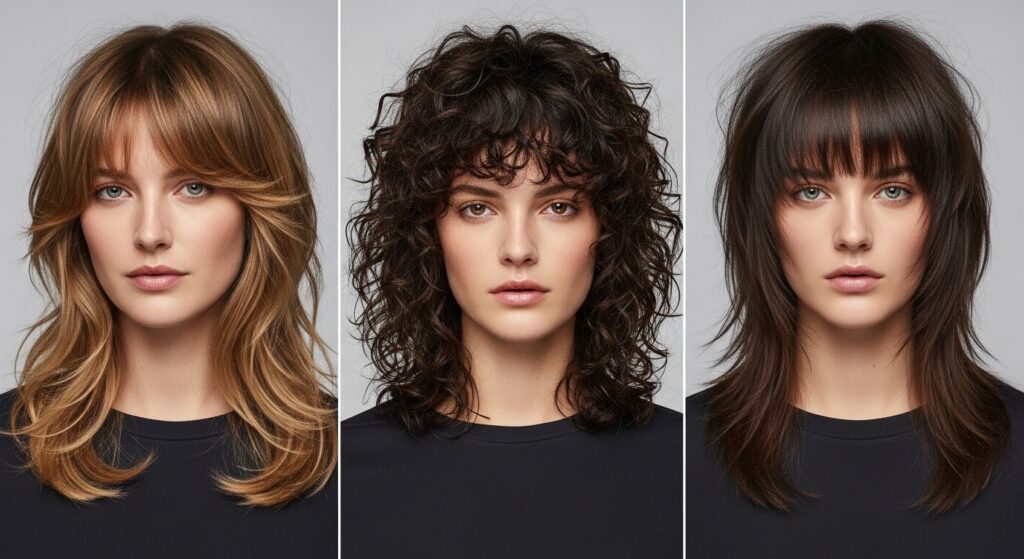
The beauty of this cut lies in its adaptability. Whether your hair is pin-straight, wavy, or a mass of curls, the shag can be tailored to work with your natural texture. The goal isn’t uniformity; it’s controlled chaos. It’s about enhancing what your hair naturally wants to do, giving it a shape that looks better as it gets a little messy. This inherent “lived-in” quality is precisely what makes it so ideal for at-home maintenance.
The At-Home Trim: Taming Your Layers Like a Pro
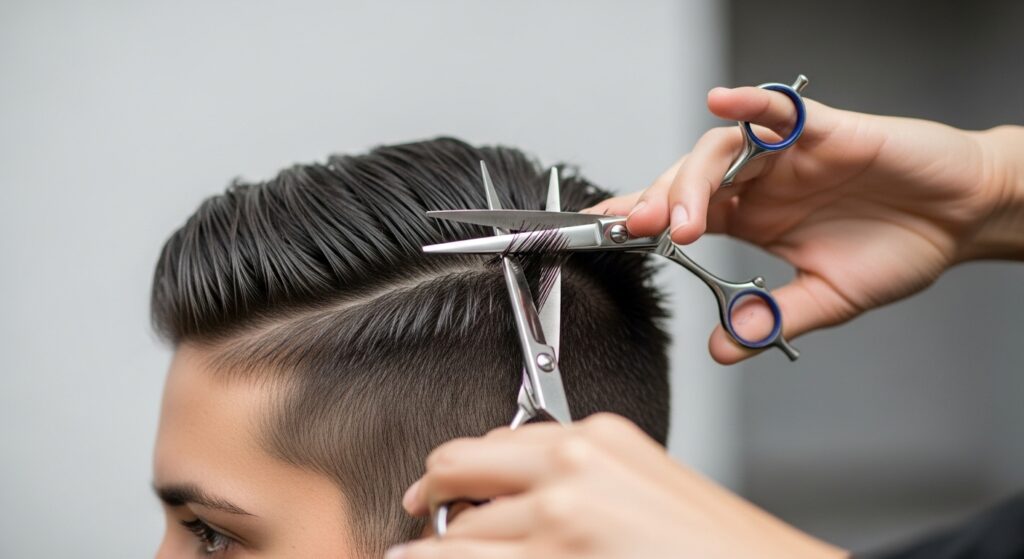
The number one rule for at-home hair care is less is more. You are not giving yourself a whole new haircut; you are merely tidying up the shape and keeping the ends fresh. The primary goal here is to maintain the integrity of the layers and remove any split ends that can make your shag look frayed and tired.
Start with completely dry hair that has been styled as you normally wear it. This allows you to see the true shape and how the layers fall. Invest in a pair of sharp, hair-dedicated scissors—kitchen shears are a definite no-go, as they will crush and damage the hair shaft. Work in a well-lit room with a large mirror.
The Technique:
Focus on the ends and the face-framing layers. Take very small, vertical sections of hair, twist them lightly, and snip into the very ends of the strands. This technique, known as point cutting, creates soft, textured ends that blend seamlessly and prevent the harsh, helmet-like lines that horizontal cutting can cause. For the wispy pieces around your face, hold the scissors vertically and make tiny, upward snips to keep them feathery and light. Remember, you can always cut more, but you can’t put hair back on. Take your time and step back frequently to assess the overall balance.
Mastering the Art of the Shaggy Style
Styling is where the magic of the shag truly comes to life. The right techniques can elevate your haircut from “just woke up” to “stylishly undone” in minutes.
First, embrace texture. A sleek, polished blowout is the enemy of the shag. Start with a texturizing spray or mousse on damp hair to build a foundation of grit and hold. When drying, use a diffuser attachment if you have waves or curls to enhance their natural pattern. If your hair is straight, try scrunching it with your hands as you dry it to create some artificial bend and movement. The goal is volume at the roots and separation at the ends.
Next, wield your tools wisely. A flat iron isn’t just for straightening; it’s your secret weapon for adding piece-y texture. Instead of running it smoothly down a section of hair, create subtle bends and flicks. Wrap random sections around the barrel, bending the ends in alternate directions. A curling wand can also be used to add random, non-uniform waves throughout the mid-lengths and ends. The key is to avoid a uniform, spiral curl pattern.
Finally, finish with product. Once your hair is styled, run a texturizing paste or wax through the ends with your fingertips. This will define the layers, separate the pieces, and give you that iconic, “rockstar” texture. Don’t be afraid to gently pull apart curls and waves to break them up.
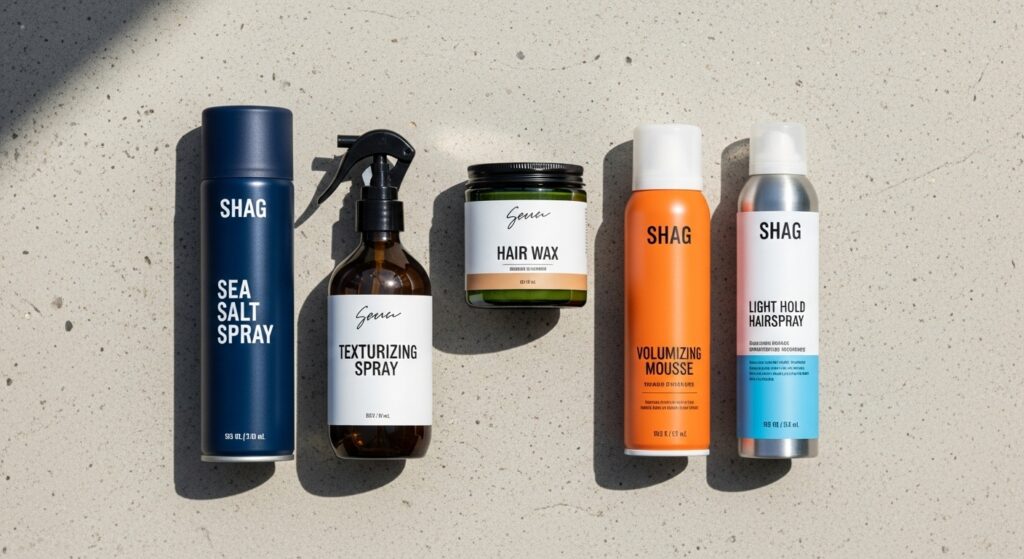
Product Power: Your At-Home Shag Arsenal
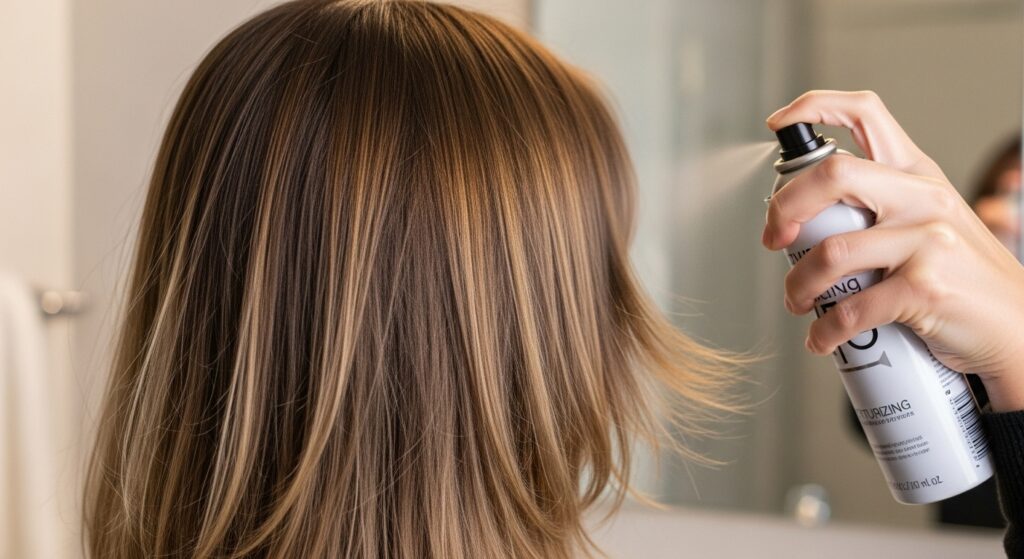
Having the right products is non-negotiable for achieving the perfect shag. Your bathroom shelf should be stocked with heroes that build, hold, and define texture without weighing hair down.
Sea Salt Spray: This is the holy grail for creating effortless, beachy waves and grit. Spritz it on damp or dry hair to encourage separation and a tousled finish.
Texturizing Spray or Powder: These products are like dry shampoo’s cooler, more textured cousin. They add instant volume at the roots and a matte, grippy texture throughout the lengths, making your layers look more defined.
Pomade or Wax: A small amount of a flexible pomade rubbed between your palms and then scrunched into the ends will create that piece-y, defined look that is central to the shag aesthetic.
Volumizing Mousse: Applied to the roots of damp hair before drying, a good mousse provides the foundational lift and body that the shag relies on.
A Light-Hold Hairspray: You want to lock in the style without making it stiff or crunchy. A flexible-hold hairspray is perfect for keeping the movement alive while taming flyaways.
Embracing Your Natural Texture
One of the most liberating aspects of the modern shag is its celebration of natural texture. This cut is a chameleon, designed to flatter every hair type.
If you have curly hair, a shag can be a game-changer. The layers help to reduce bulk, define curl clusters, and prevent the dreaded “triangle” shape. Style by applying a curl cream and gel to soaking wet hair, then diffuse. The layers will create a beautiful, cascading effect of ringlets and waves.
For those with wavy hair, the shag is your best friend. It enhances your natural pattern, giving it shape and direction. Use that sea salt spray and scrunching technique to bring out your waves, and let the layers add bounce and volume.
If your hair is straight and fine, the shag gives you the volume and texture you crave. The internal layers create the illusion of thickness, while texturizing products and strategic styling with hot tools add the necessary bend and piece-y-ness that might not occur naturally.
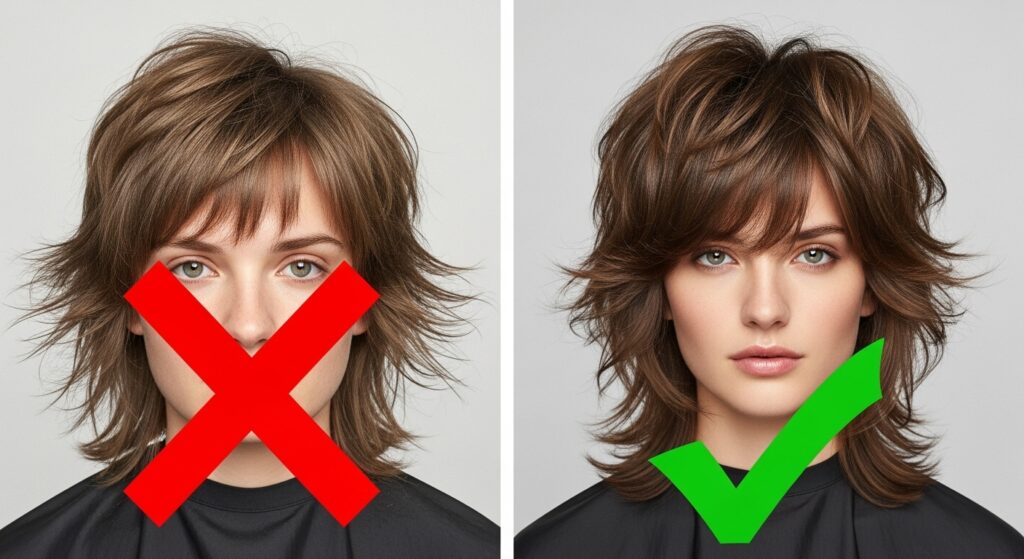
Common Shag Pitfalls and How to Avoid Them
Even with the best intentions, it’s possible to run into a few styling snags. Here’s how to troubleshoot common shag issues.
The “Triangle” Head: This happens when the top layers are too light, and the bottom is too heavy. The fix is to ensure you have enough layers throughout the crown to create volume at the top. When styling, focus your root-lifting products at the crown and avoid applying heavy conditioners or products to your roots.
Stringy, Over-Texturized Ends: Sometimes, you can have too much of a good thing. If your ends are looking thin and scraggly, you may have overdone it with texturizing shears or heavy wax. Let your hair grow out a bit for the next trim, and use a deep conditioning treatment to add moisture back into the ends.
Bangs That Are Too Blunt or Heavy: The shag demands soft, blended bangs. If yours feel too blocky, use the point-cutting technique described earlier to texturize the ends and create a softer, more feathered transition into the rest of your hair.
Your Journey to Shag Perfection Starts at Home
Perfecting your medium shag haircut doesn’t require a cosmetology license or a weekly salon budget. It requires a understanding of the cut’s spirit—its celebration of texture, movement, and effortless individuality. With the right techniques for trimming, a strategic approach to styling, and a curated arsenal of texturizing products, you can keep your shag looking fresh, modern, and incredibly chic all on your own.
Embrace the process. Play with your hair. Experiment with different products and techniques to discover what makes your unique shag sing. The most beautiful thing about this iconic haircut is that it’s meant to look a little wild, a little undone, and completely you. So put down the fear, pick up the texturizing spray, and own your perfect shag.