19 Denman Brush Techniques for Curl Definition
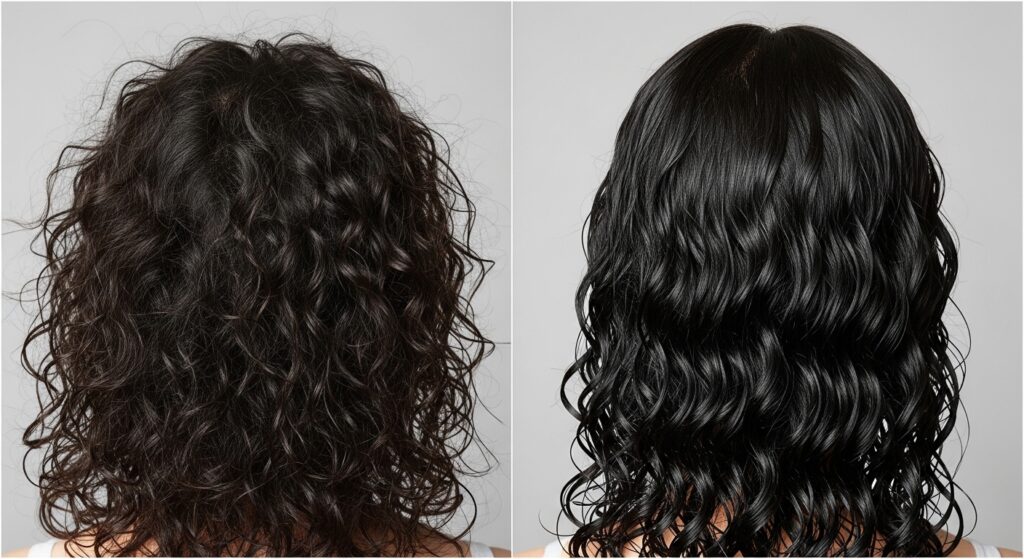
If you’re on a quest for perfectly defined, springy, and frizz-free curls, you’ve likely heard the holy grail whispers about the Denman Brush. More than just a styling tool, this iconic brush is a curl-transforming wizard in your hands. But owning one and mastering it are two very different things. Simply running it through your hair won’t unlock its magic. The true power lies in the technique.
Foundation First: Prep & Basic Brushing
Before you start styling, setting the right foundation is non-negotiable. These initial techniques ensure your hair is ready to receive and hold its definition.
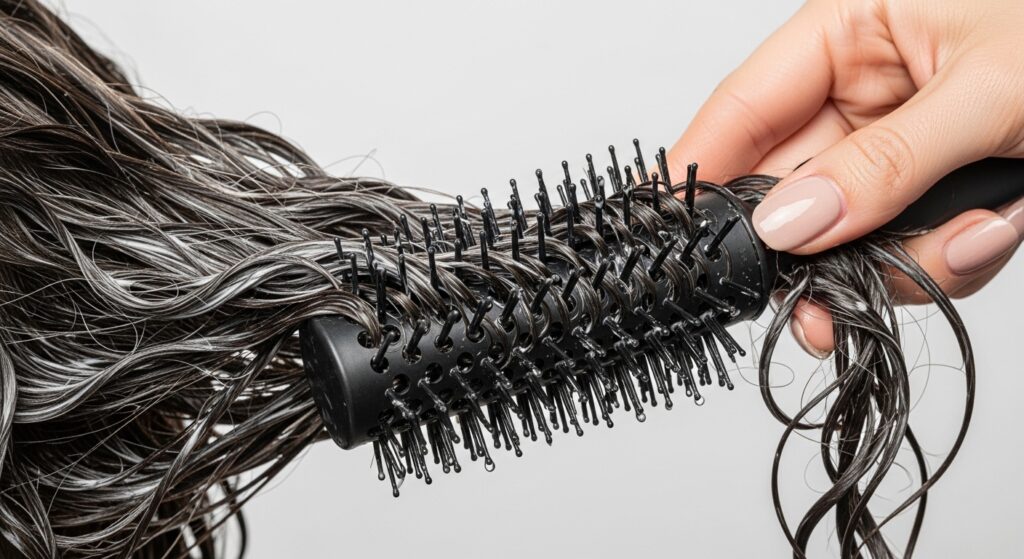
1. The Saturated Section Technique: Never brush dry curls! Always work on soaking wet or damp hair that’s generously coated with your favorite leave-in conditioner and styler (cream or gel). The water and product provide slip and allow the brush to glide, smoothing the cuticle and aligning curls without breakage.
2. The Tension Method: This is the cornerstone of definition. Hold a section of hair taut with one hand while brushing from roots to ends with the Denman in the other. The tension stretches the hair slightly, allowing the brush teeth to gather and organize every strand into a uniform curl clump.
3. The Root-to-Tips Glide: Start with the brush at your roots, and in one continuous, smooth motion, pull it through to the ends. Avoid short, jagged strokes. This single motion helps form a clean, uninterrupted curl shaft.
4. Sectioning for Success: Don’t try to brush your whole head at once. Work in manageable horizontal or vertical sections (about 1-2 inches wide). Smaller sections mean more control, ensuring every single curl gets the attention it needs for maximum definition.
Core Definition & Clumping Techniques
Now for the main event! These techniques are all about actively forming and defining those beautiful curl clumps.
5. The Basic Curl Clump: After brushing a section with tension, simply release the hair and let it spring up. Use your hands to gently scrunch the formed curl clump upward toward your scalp to encourage its natural shape and set the definition.
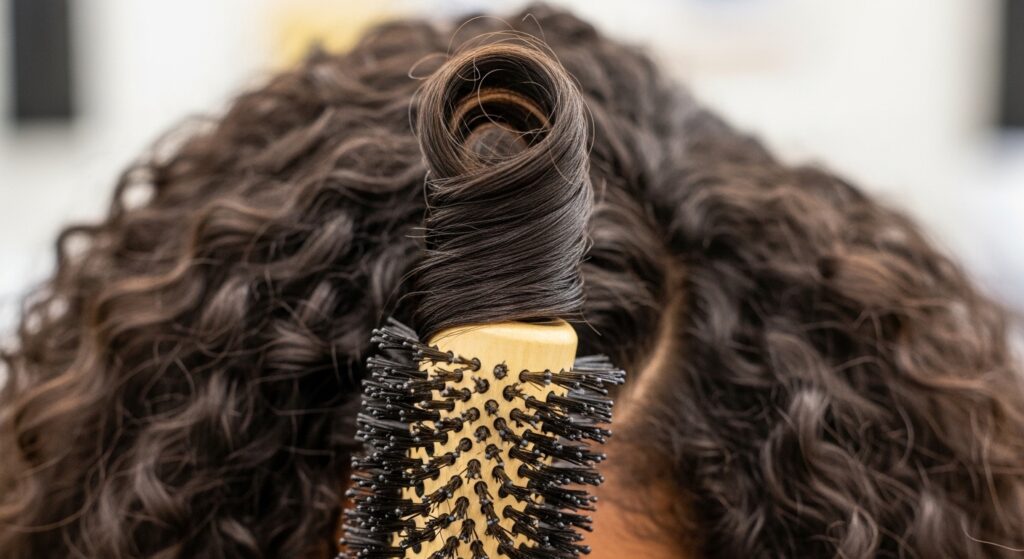
6. The Brush Coil (Finger Coiling with the Brush): Place the brush under a brushed section at the ends. Slowly rotate the brush upward toward your scalp, wrapping the hair around the brush handle or the brush head itself. Slide the brush out, and you’ll have a perfectly formed, spiral coil.
7. The Brush Shake: After brushing a section downward, hold the ends and gently shake the brush horizontally or vertically. This subtle motion helps the individual strands find each other and merge into a unified, bouncy clump.
8. The Scrunch-In: Brush your section normally. Then, with the brush still at the ends, gently push (scrunch) the brush upward toward your scalp a few times. This adds volume at the root while encouraging the curl to form from the very base.
9. The “Rake and Shake”: Use the Denman to rake through a section to detangle and distribute product. Then, put the brush down and use your hands to shake the section at the roots and gently scrunch. It’s a quicker, more natural clumping method.
Advanced Styling & Volume Tricks
Ready to level up? These techniques add directional styling, incredible volume, and professional finishes.
10. The Brush-Out for Volume: Once your hair is 100% dry and cast is formed, carefully insert the Denman brush at the root under a curl clump. Gently push the brush outward away from your scalp to lift the root. Do this sparingly for mega volume without losing definition.
11. Directional Brushing for Style: Control your curl direction by brushing sections away from your face, toward your face, or straight back. This creates intentional movement and can help shape your haircut, creating more volume in specific areas.
12. The Curl Separation Trick: If a clump dries too large or “chunky,” use a single row of the Denman teeth to gently separate the clump vertically into two or three smaller, bouncier curls. Be very gentle to avoid frizz.
13. The Fringe/ Bang Definition: For curly bangs, take small vertical sections. Brush downward while twisting the brush slightly at the ends to create a soft, defined curl or wave that falls perfectly on your forehead.
14. The Surface Smoothing Pass: After styling, do one very light, final pass over the very top layer of your hair with a brush loaded with a tiny bit of gel or water. This lays down flyaways for a sleek, polished crown.
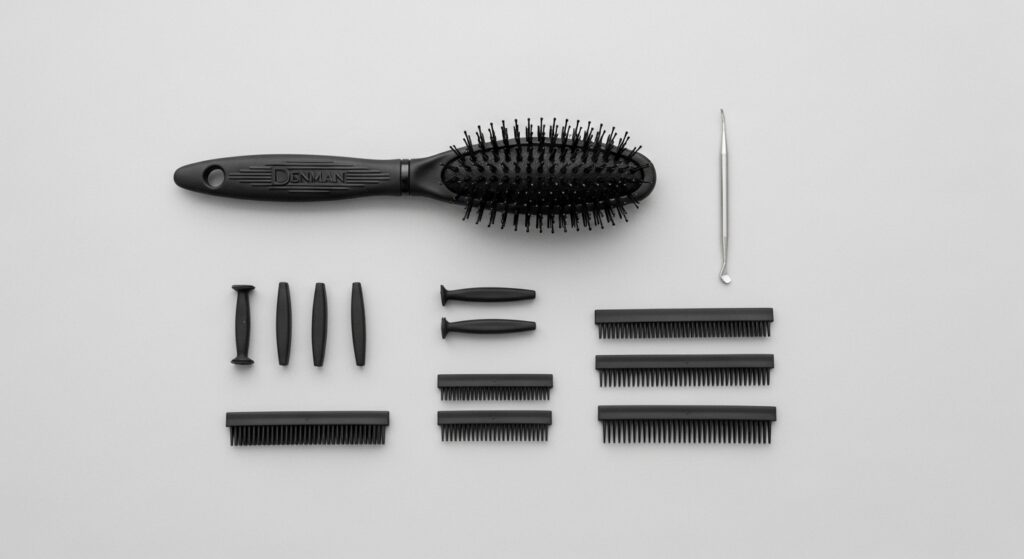
Denman Brush Modifications & Customizations
Did you know you can customize your Denman? Modifying the brush can tailor its performance to your specific curl type and desired result.
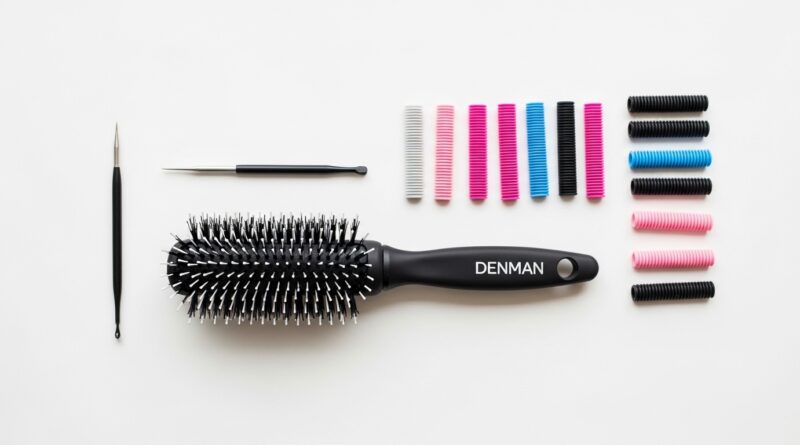
15. The Row Removal Method: Most Denman brushes have 7 or 9 rows of teeth. For thicker, denser hair, you might keep all rows. For finer or looser curls, removing 3-5 rows (using the included tool) reduces tension, creating softer, larger waves instead of tight coils.
16. The Grip-and-Pull Modification: For even less tension and definition, some curlies remove every other rubber grip from the rows. This creates more space between the teeth, allowing for bigger, more separated curl clumps.
17. The “No-Grip” Technique: For the softest result, some remove all the rubber grips, using just the plastic bristle base. This turns the Denman into more of a wide-tooth comb for gentle detangling and very loose wave formation.
Problem-Solving Techniques
Hit a curl roadblock? These techniques are your solutions for common styling dilemmas.
18. The Frizz-Fixer Stroke: Encountering frizz mid-style? Spritz the frizzy section with water or a mix of water and leave-in. Then, using the tension method, re-brush just that section. The re-wetting and smoothing will re-incorporate the frizz into a clean clump.
19. The Refresh Revival: On day 2 or 3, mix water and a little conditioner in a spray bottle. Dampen a curl clump that has lost its shape. Use the Denman to gently re-brush and re-form that one clump, then scrunch and let it dry. It’s like a mini reset for tired curls.
Mastering Your Curl Journey
Remember, mastering the Denman brush is a practice. Your hair is unique, so experiment with these 19 techniques to discover which combination works best for your curl pattern, density, and desired look. Start with the foundational tension method and basic clumping, then gradually incorporate advanced tricks like brush coiling and root volume.
The true magic happens when you move from simply using a tool to truly understanding the technique. Be patient, have fun, and let your beautifully defined curls be the reward. Your Denman brush isn’t just a brush—it’s your partner in crafting the healthy, defined, and head-turning curls you’ve always wanted.