Energize 20 Space Buns Capturing Festival Spirit Everywhere
Okay, let’s be real. We’ve all seen the space buns. They’re the ultimate festival and fun-day staple, and for good reason. They’re playful, they keep your hair off your neck, and they just scream good vibes. But maybe you’re thinking… haven’t we done this before?
I thought so too, until I started seeing them pop up everywhere—not just at music festivals, but at brunch, in the office (the cool ones), and all over my feed with a fresh, 2026 energy. This isn’t your 2014 Coachella look. It’s evolved.
So, I got my team together and we played. We found 20 ways to twist, accessorize, and reinvent this classic. Whether your personal style leans toward romantic goth or glitchy glam, there’s a space bun vibe here for you. Let’s dive in and give your everyday spirit a little festival lift.
1. The Classic High & Tight
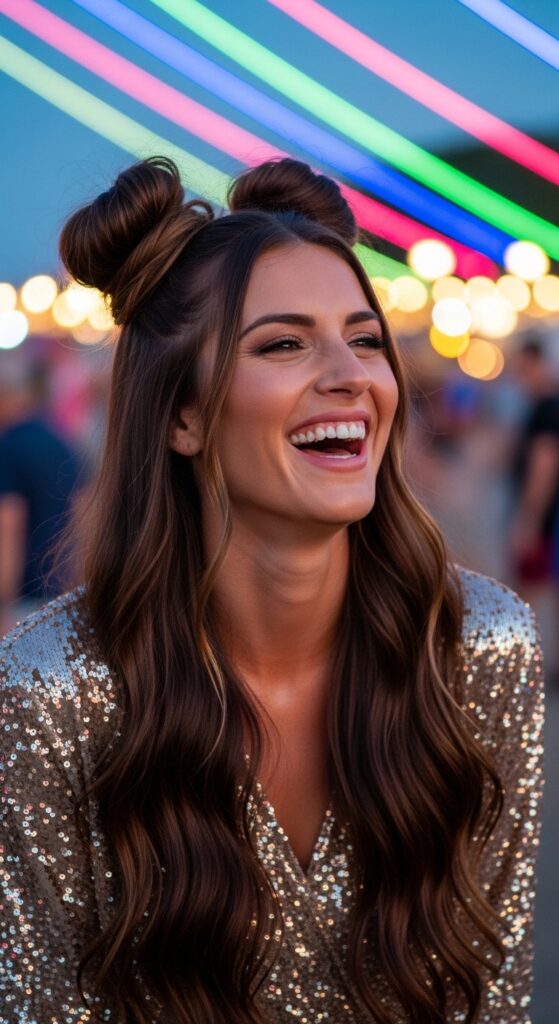
This is your foundation. The key here is height and symmetry. It’s clean, it’s bold, and it instantly adds a playful energy to any outfit.
Start with a deep side part or a clean middle part, depending on your face shape. Make sure those buns are sitting high on the crown for that perky, youthful look.
- Use a strong-hold gel on damp hair for a sleek finish.
- Wrap a small section of hair around the base of each bun to hide your hair tie.
- Lock it all in with a serious hold hairspray to dance all day.
2. The Messy, Textured Boho
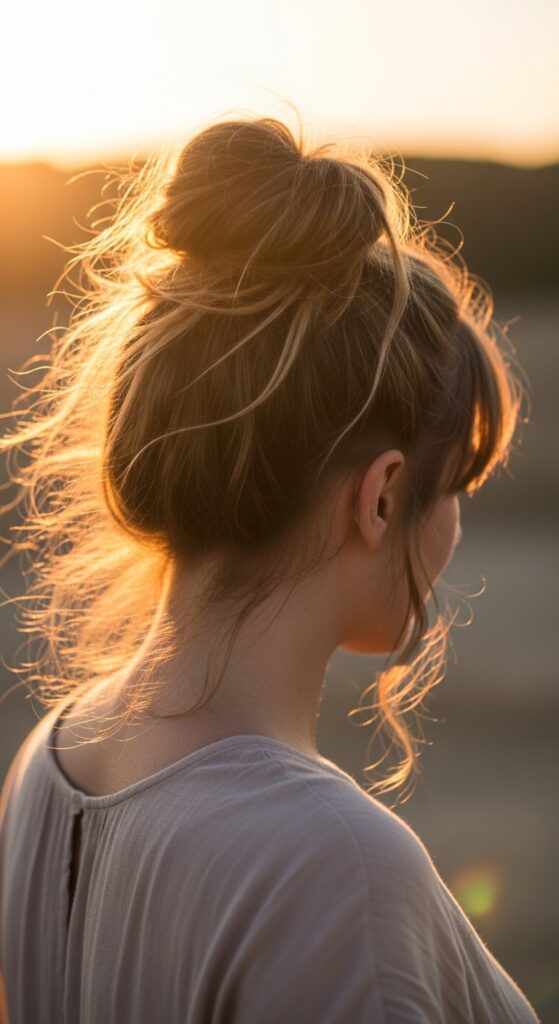
Perfection is overrated. This version is all about effortless, lived-in texture. It pairs perfectly with denim shorts or a floral dress.
The goal is to look like you just threw your hair up after a day at the beach. Curl your hair lightly before you start, or braid it the night before for natural wave.
- Tease the roots gently for volume before twisting into buns.
- Leave plenty of pieces out around your face and neck.
- Don’t twist too tightly—let it be a little undone.
3. The Half-Up Space Bun Party
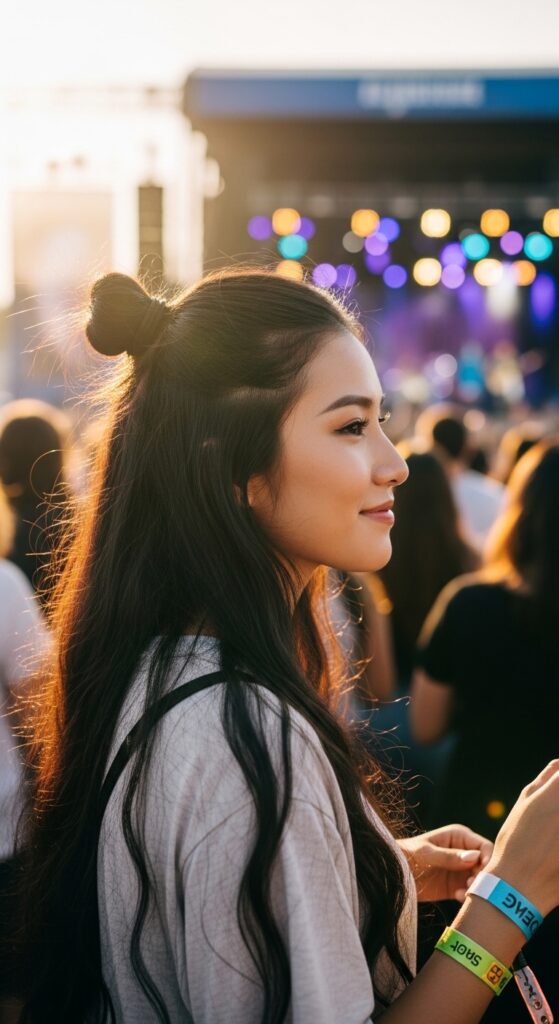
Can’t commit to full buns? This is your perfect compromise. You get the fun vibe while still showing off your length.
It’s a great way to experiment with trends like the asymmetrical lob or hime cut without losing your signature style. Just take two sections from above your ears.
- Section off the top crown portion of your hair.
- Split it into two and create mini buns.
- Pull out a few face-framing pieces for softness.
4. Accessorize with Scrunchie Power
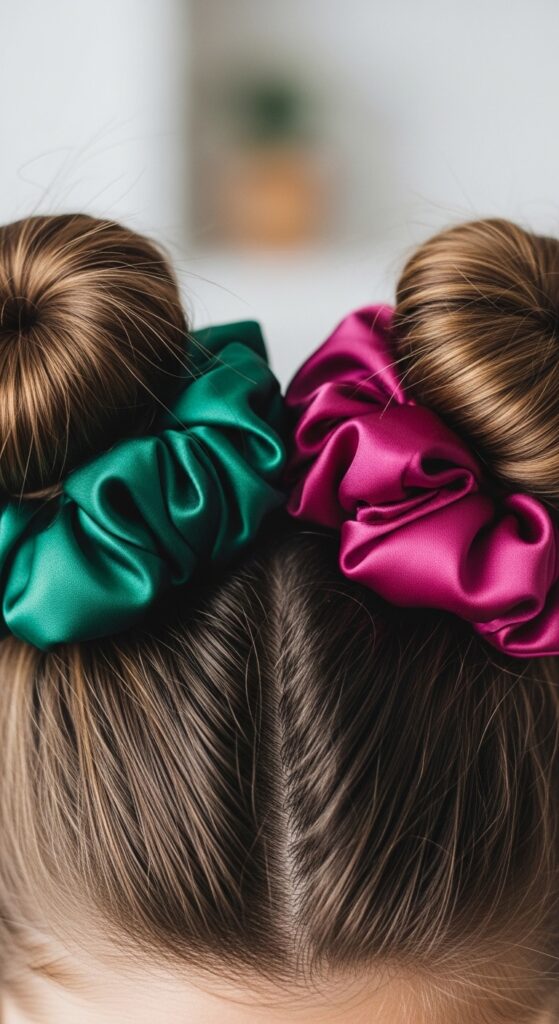
Scrunchies are back, and they’re the easiest way to elevate your buns in two seconds. They add color, texture, and a touch of nostalgia.
Choose a scrunchie that matches your outfit or go for a bold pop. Silk gives a luxe feel, while velvet leans into romantic goth hairstyles.
- Make a low ponytail first, then twist into a bun and wrap the scrunchie around.
- Use two different colored scrunchie for a quirky twist.
- Let the scrunchie fabric puff out for maximum effect.
5. The Braided Bun Crown
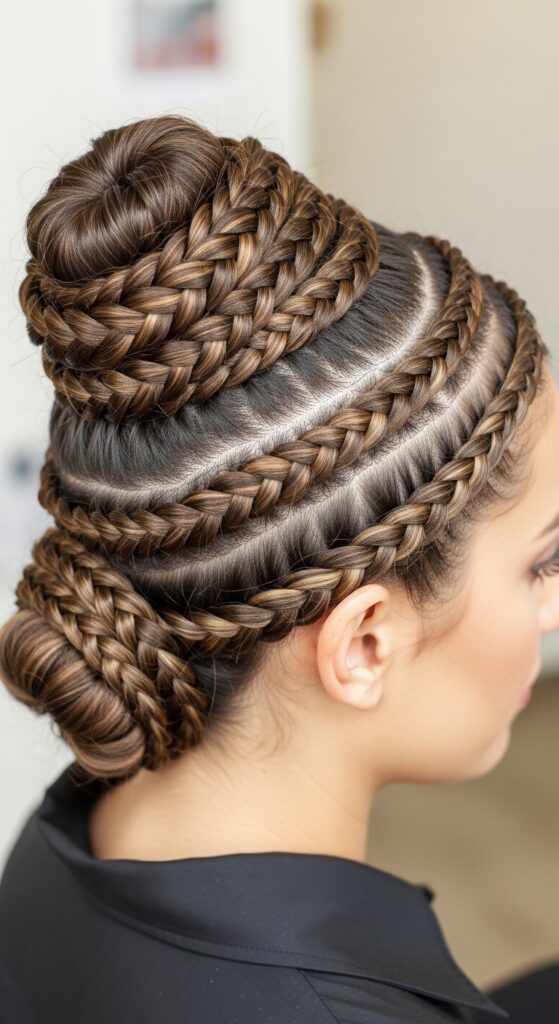
This takes a little more time but the payoff is huge. It’s intricate, beautiful, and keeps every hair securely in place all day long.
Think of it as a festival-ready take on old money hair elegance—structured but fun. It works on all hair lengths, especially if you have layers.
- Create two pigtail braids (Dutch braids are gorgeous for this).
- Wrap each braid around itself into a bun at the top of your head.
- Pin securely and tuck the ends under.
6. Mini Buns for Short Hair
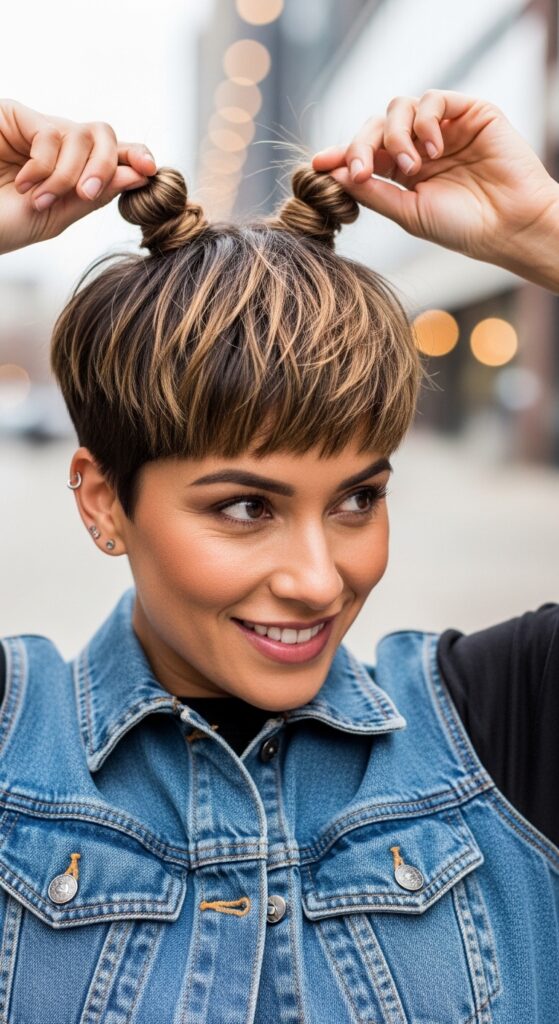
Short hair friends, you are not left out! Mini space buns are arguably even cooler. They’re edgy, modern, and full of personality.
This look is a cousin to the vampire haircut and glitchy glam hair—it’s all about bold, intentional styling. Use the top sections of your hair.
- Work with texturizing paste to grip shorter pieces.
- Don’t worry about making them perfect or symmetrical.
- Use tiny, clear elastics and bobby pins to secure.
7. The Low & Sleek Goddess
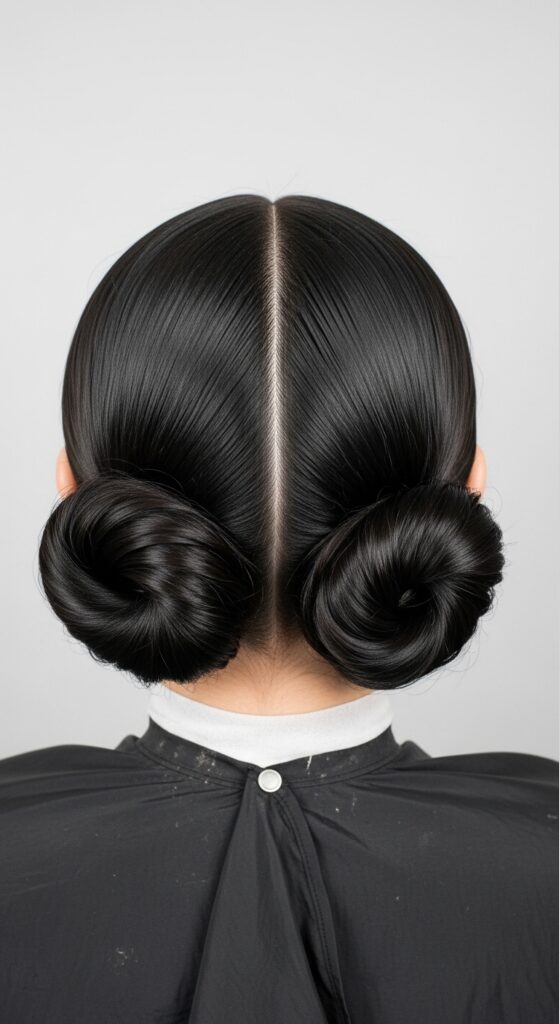
Move the party to the back. Low space buns feel sophisticated, artistic, and surprisingly chic. It’s a quiet luxury bob’s playful sister.
This style keeps your neck clear but looks incredibly polished. It’s perfect for when you want to feel put together but still creative.
- Create two low ponytails at the nape of your neck.
- Twist each tightly and coil into a compact bun.
- Smooth all flyaways with a toothbrush and hairspray.
8. Bubble Buns Fun
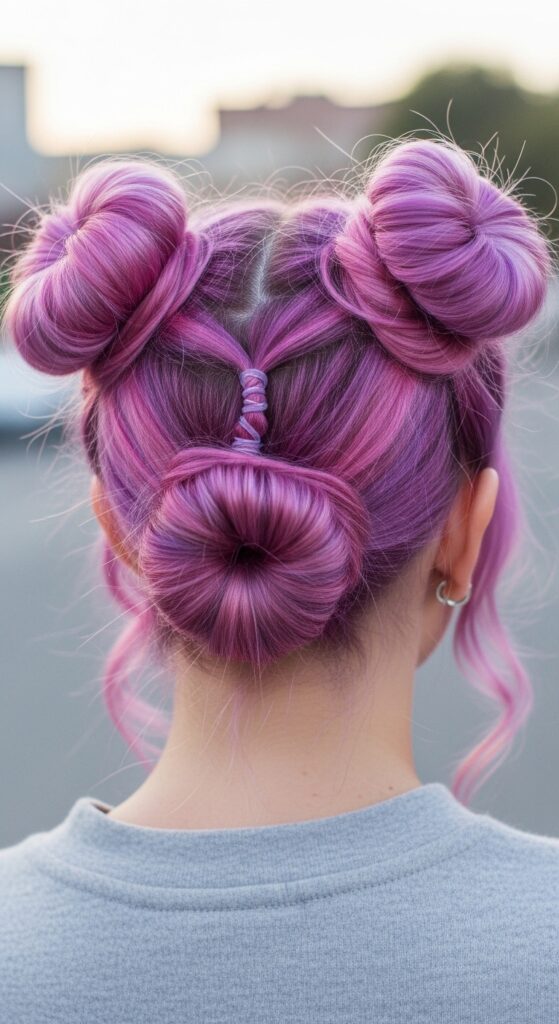
Remember bubble ponytails? Let’s apply that to buns! This creates amazing volume and a really unique, modern silhouette.
It’s a fantastic way to add drama to thinner hair. You’ll get so much height and body, making it a top contender for 2026 hairstyles.
- Make two high ponytails and secure with multiple elastics down the length.
- Gently pull on each section between elastics to create “bubbles”.
- Then, twist the bubbled tail into a bun and pin.
9. Embellished with Hair Charms
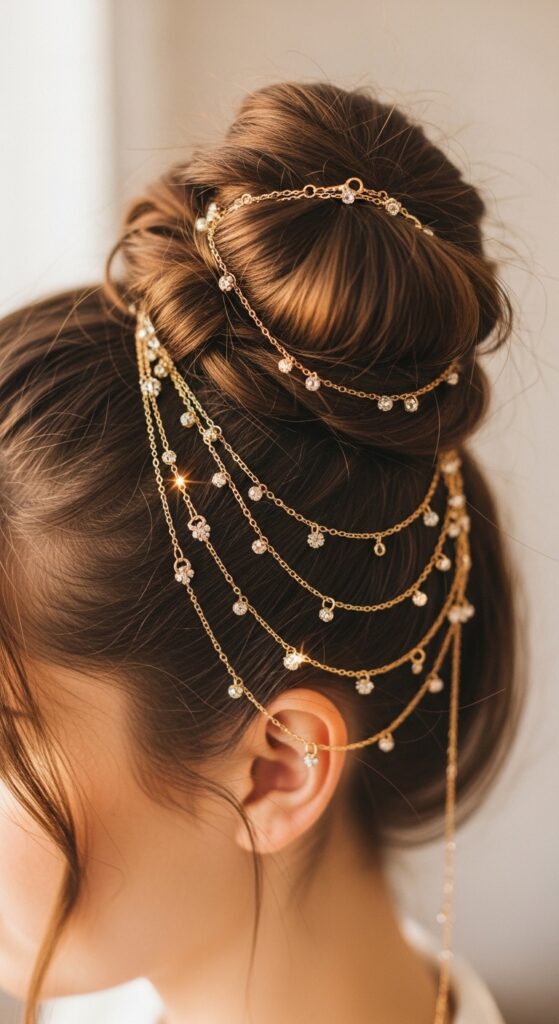
Hair jewelry is having a major moment. Adding a few delicate chains or charms instantly makes your style feel expensive and special.
Weave them in after you’ve made your buns. This tiny detail can bridge the gap between boho and quiet luxury bob aesthetics.
- Look for lightweight charms on fine chains.
- Wrap a chain around the base of the bun or pin it so it dangles.
- Less is more—one or two per bun is plenty.
10. The Poofy & Retro
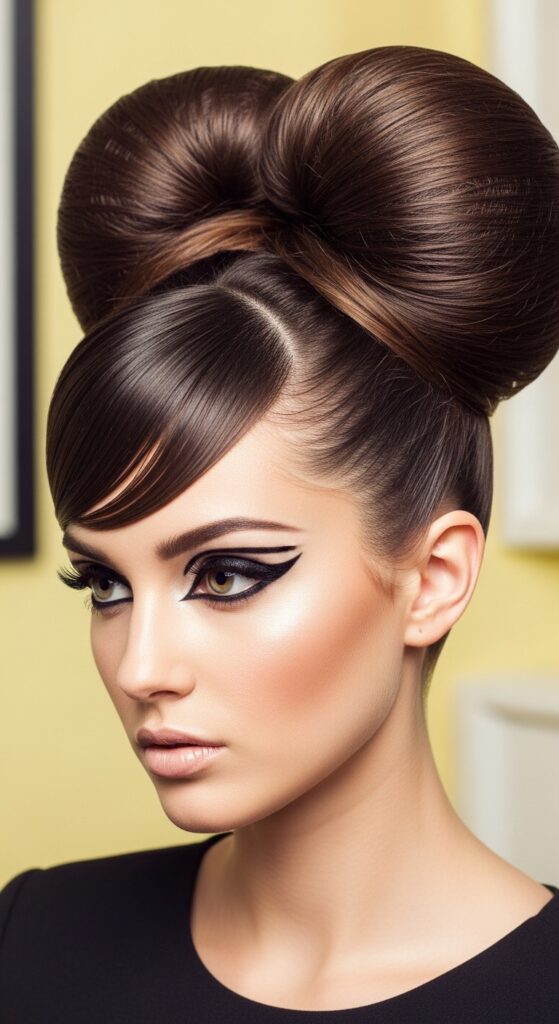
Channel your inner mod icon. This is all about big volume, sharp lines, and a retro-futuristic feel. It’s confident and unforgettable.
Backcombing is your best friend here. Don’t be shy with the teasing at the roots before you gather your hair into sections.
- Tease the crown of your hair thoroughly for maximum height.
- Section off hair for the buns, leaving some poof at the front.
- Secure buns and smooth the top layer only for a polished poof.
11. Space Buns with Bangs
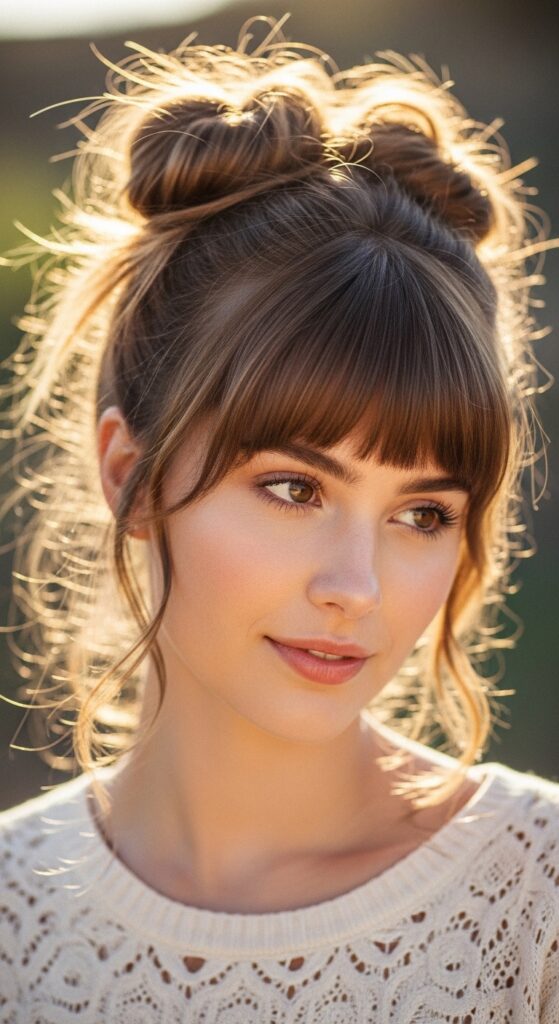
Bangs and buns are a match made in heaven. Whether you have a blunt fringe or wispy curtain bangs, they add a soft, framing effect.
This combo is perfect for those exploring romantic goth hairstyles—think dark hair, bold bangs, and textured buns. It’s very cool-girl.
- Style your bangs first, before you tackle the buns.
- Let your bangs fall naturally or sweep them to the side.
- Use a flat iron or roller to give them a perfect shape.
12. The Double Braid Wrap
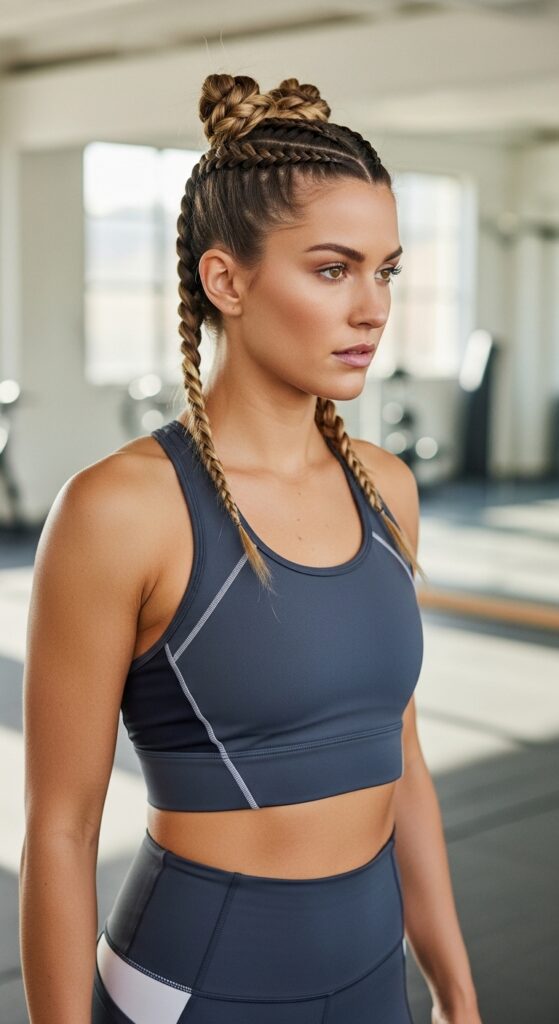
This is your go-to for an active day. The braids keep everything super secure, and the wrapped bun looks neat and intentional.
It’s athletic and cute, perfect for a festival where you plan to be in the front row dancing for hours. No hair in your face!
- Make two simple braids from the front to the back of your head.
- Wrap each braid into a bun at the crown.
- Pin every few inches to lay flat against your head.
13. The Colorful Money Piece Bun
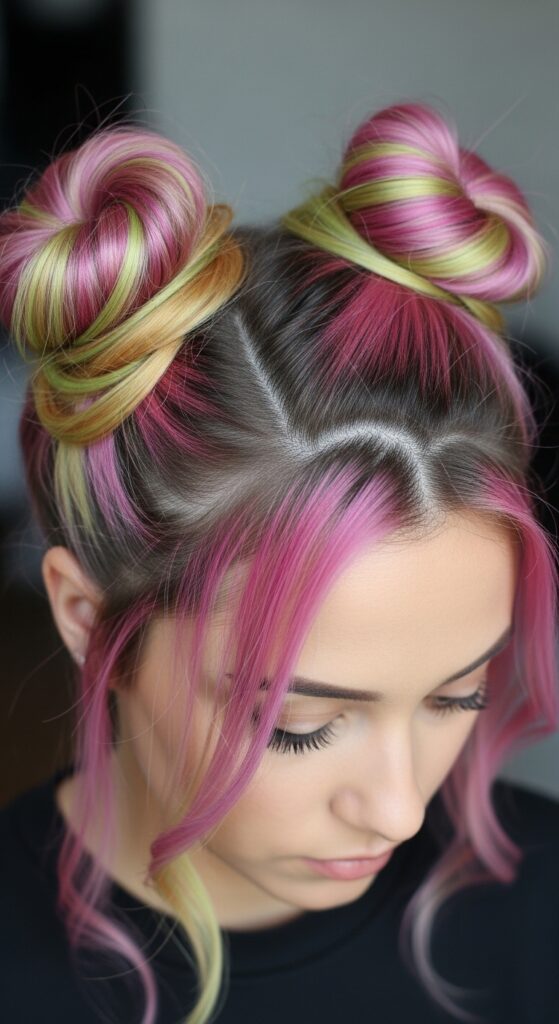
If you have face-framing highlights or a fun color streak, make them the star. Wrap those pieces so they’re front and center in your buns.
It’s a brilliant way to show off your color without it getting lost. This has major glitchy glam hair energy—intentional and eye-catching.
- Isolate your money piece or bright front sections.
- When making the bun, ensure these pieces are on the outer layer.
- Twist them so the color is prominently displayed.
14. The Slicked-Back Wet Look
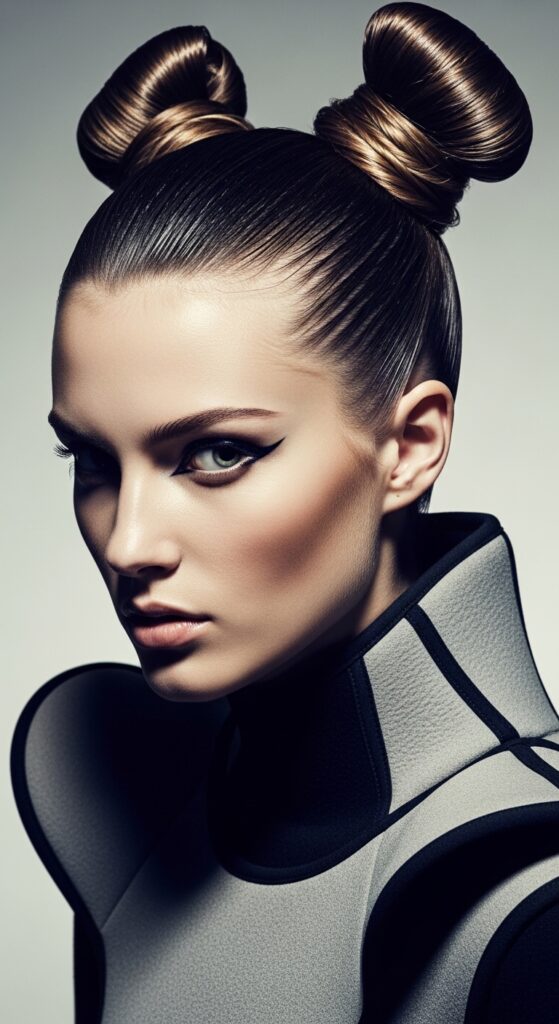
This is the ultimate power look. It’s severe, chic, and makes a major statement. You’ll feel like you own the place.
Use a strong-hold styling gel or pomade on soaking wet hair to get that perfectly slicked finish. Not a hair out of place.
- Apply gel evenly through towel-dried hair from roots to ends.
- Use a fine-tooth comb to slick hair back into two sections.
- Form buns and use more gel on a toothbrush to tame baby hairs.
15. The Wispy & Fairy-Like
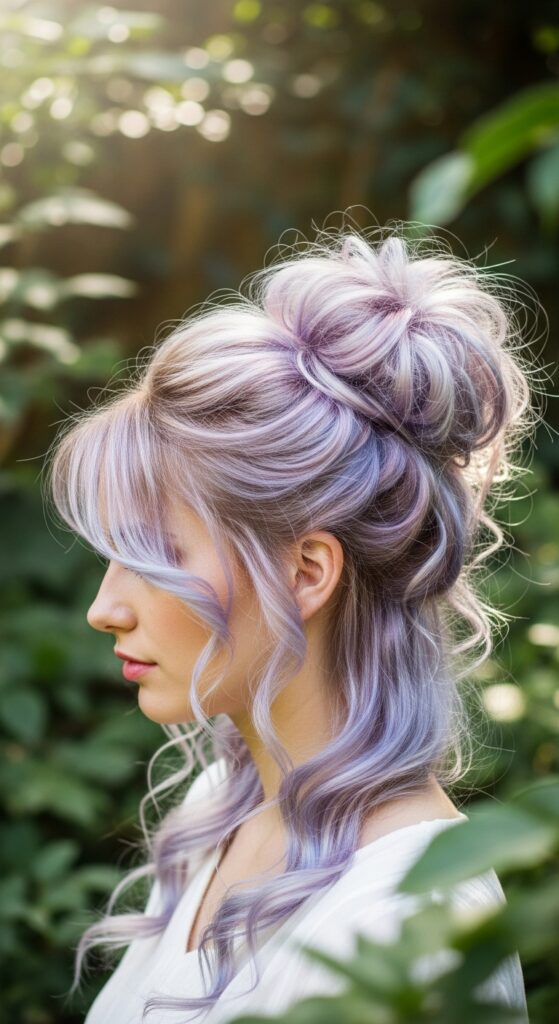
Go for total fairy vibes. This style is soft, romantic, and looks almost accidental. It’s incredibly flattering and feminine.
Curling all of your loose ends is the secret here. Use a small barrel iron to create lots of tiny, wispy spirals around your face and buns.
- Create very loose, almost messy buns.
- Leave out more hair than you think you should.
- Curl every single leftover piece for a cloud-like effect.
16. The Asymmetrical Single Bun
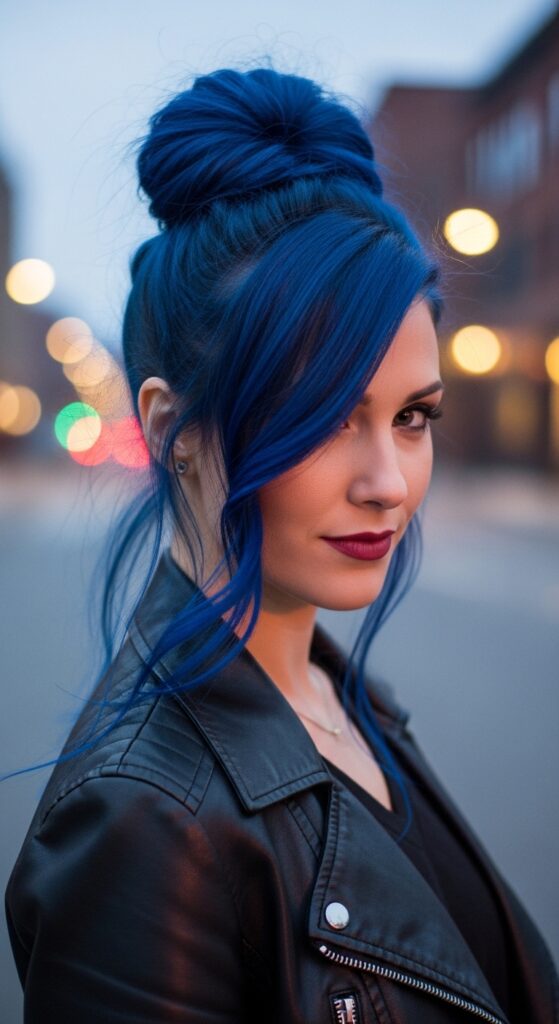
Why have two when one will do? A single, asymmetrical space bun is fashion-forward and effortlessly cool. It breaks all the rules.
This plays right into the asymmetrical lob mindset—unexpected and modern. Pair it with a statement earring on the bare side.
- Gather all your hair to one side, high above your ear.
- Twist into one statement bun.
- Pull out a few pieces around your face to soften the look.
17. Buns with Ribbon Lacing
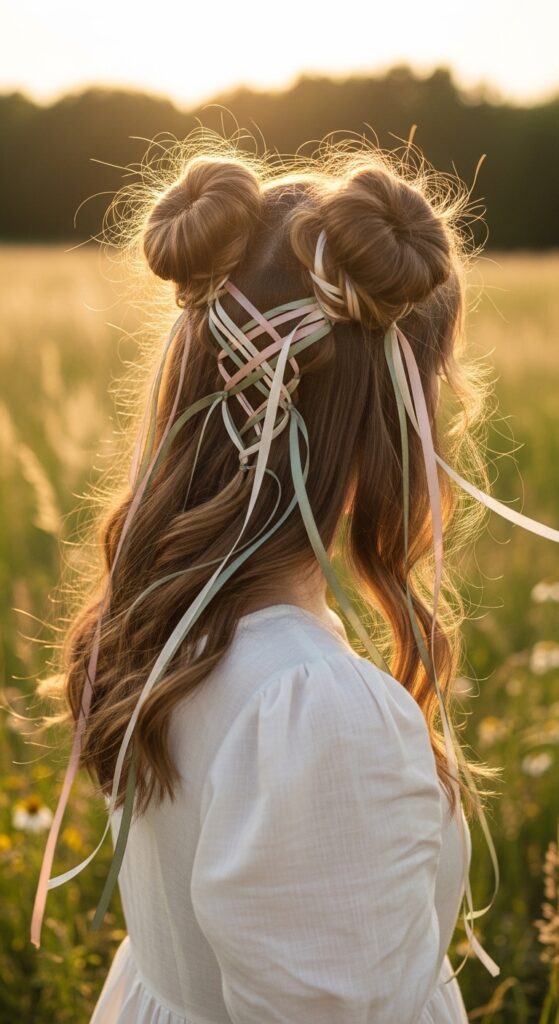
Ribbons add a touch of sweet, romantic detail. Lace them through the base of your buns or braid them in for a storybook feel.
Choose a ribbon color that complements your outfit. This is a beautiful way to add a special touch to a simple style.
- Use long ribbons and braid them into pigtails before bunning.
- Or, tie the ribbon around the base of the bun and let the ends flow.
- Secure the ends with a tiny dot of clear glue to prevent fraying.
18. The Twisted Rope Bun
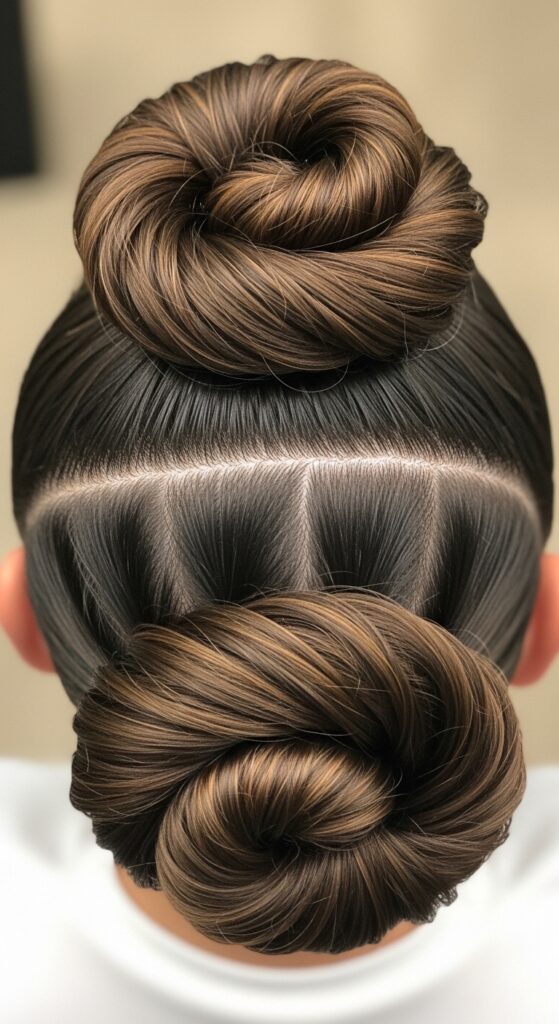
Forget just twisting hair into a knot. This method uses a rope twist technique first, which gives the bun amazing texture and hold.
It looks complicated but is surprisingly simple. The resulting bun has a beautiful, woven appearance that holds all day.
- Split your section into two equal strands.
- Twist them tightly around each other (like a rope).
- Wrap the twisted rope around itself to form the bun and pin.
19. The Undone Lob Version
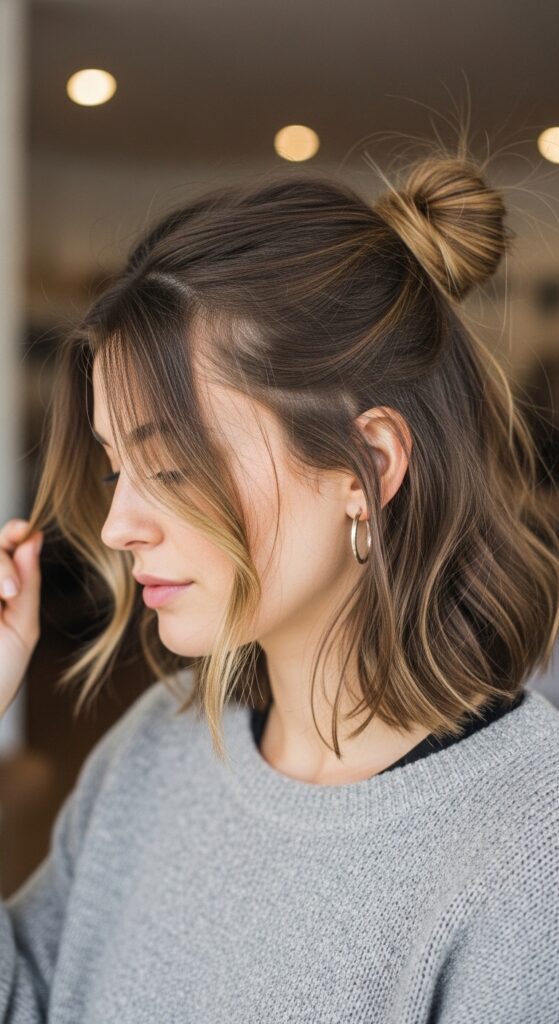
The lob is the perfect haircut, and it does space buns beautifully. Since you have less length, the buns are smaller and sit lower.
It’s a great way to style second or third-day hair on a quiet luxury bob. It looks artful, not trying-too-hard.
- Embrace the piecey texture of your lob.
- Create two low buns at the back of your head.
- Use texturizing spray on the ends for that undone finish.
20. The Glitter Roots Accent
Go all out for the festival or a big night. Adding glitter to your roots and dusting it on your buns is the ultimate celebration look.
Use cosmetic-grade glitter and a strong-hold glitter gel. It washes out easily but makes a unforgettable impact.
- Apply glitter gel along your part and at the roots of your sections.
- Style your buns as usual.
- Use a fluffy brush to dust a little extra glitter on the buns.
So, there you have it! Twenty ways to take a simple idea and make it entirely your own. The beauty of space buns is their versatility—they can be neat or messy, high or low, simple or totally decked out.
I hope this list sparked some inspiration for your next fun day out, or even just a Tuesday that needs a little energy boost. Remember, the best hairstyle is the one that makes you feel the most like you.
Now I’d love to hear from you! Which of these styles are you trying first? Is there a combo you’re dreaming up? Tell me in the comments below!
Save this post to Pinterest to keep all these ideas handy for your next style session!