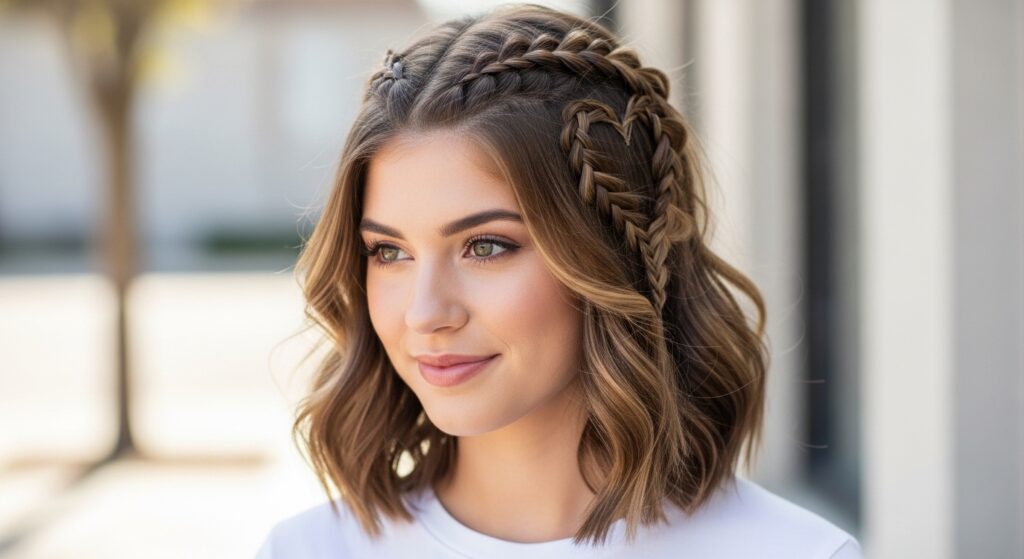
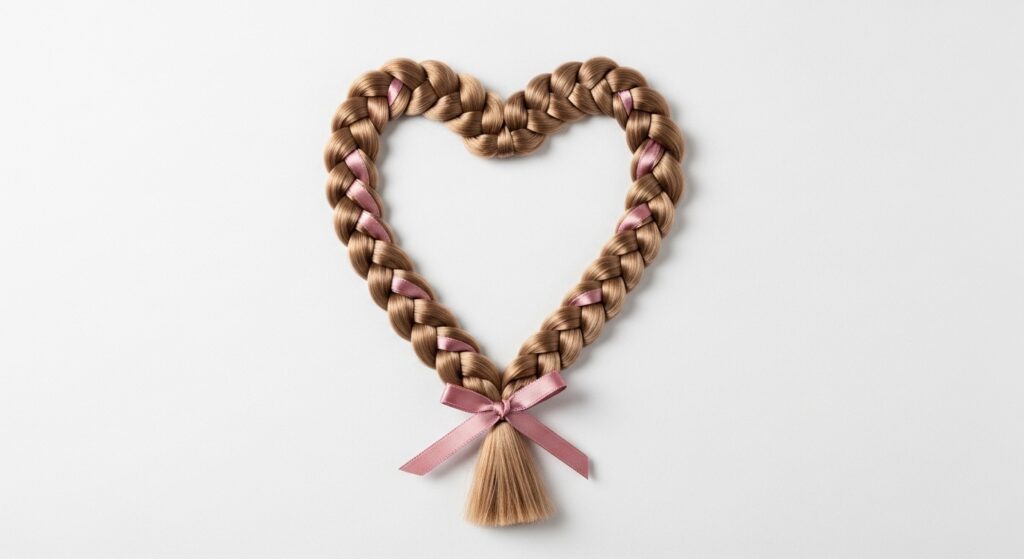
Half-Up Heart Braid Mastered in Minutes Effortlessly
Okay, let’s be real. We’ve all seen that gorgeous half-up heart braid all over our feeds. It looks impossibly romantic and like it took an hour and three hands to create. I almost scrolled right past, thinking it was a “me-never” style.
But guess what? I got obsessed and figured it out. And I’m here to tell you it’s actually one of the easiest, fastest updos you can do. Seriously, minutes.
This isn’t about being a professional hairstylist. It’s about looking like you put in way more effort than you did. It’s the perfect blend of sweet and stylish, working for everything from a casual coffee run to a wedding.
So, grab a brush and two hair ties. I’m breaking this down into the simplest steps ever. You’ve totally got this.
Why This Braid is Your New Secret Weapon
This hairstyle is a powerhouse. It keeps hair out of your face while still looking soft and down. It adds instant polish to any look, making even a basic tee feel special.
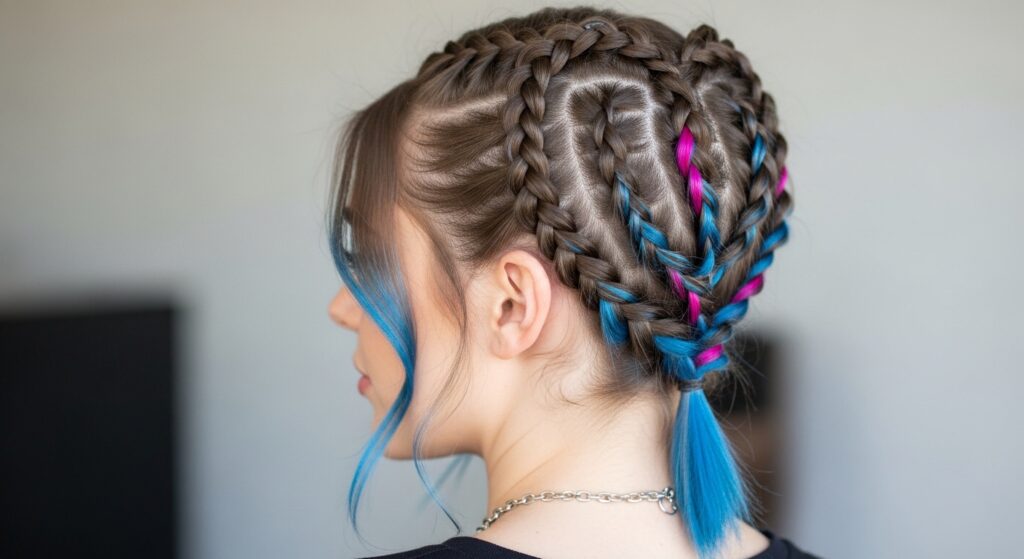
It works on almost every hair type and length past your shoulders. Whether your vibe is old money hair or romantic goth hairstyles, this braid adapts. It’s a timeless trick that feels fresh for 2026 hairstyles.
Gathering Your Simple Tools
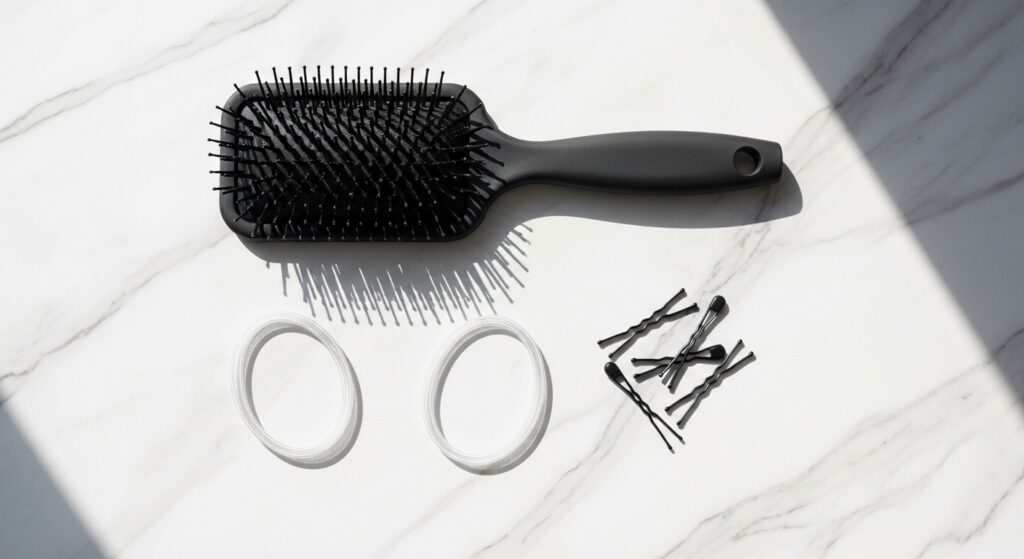
You don’t need anything fancy. Complicated tools just slow you down. Here’s your complete kit:
- A brush or comb to detangle.
- Two small, clear elastic hair ties. (Scrunches work too for a chunkier look!).
- Optional: A few bobby pins for securing ends.
- Optional: Light-hold hairspray or texturizing spray.
Starting Right: The Perfect Part
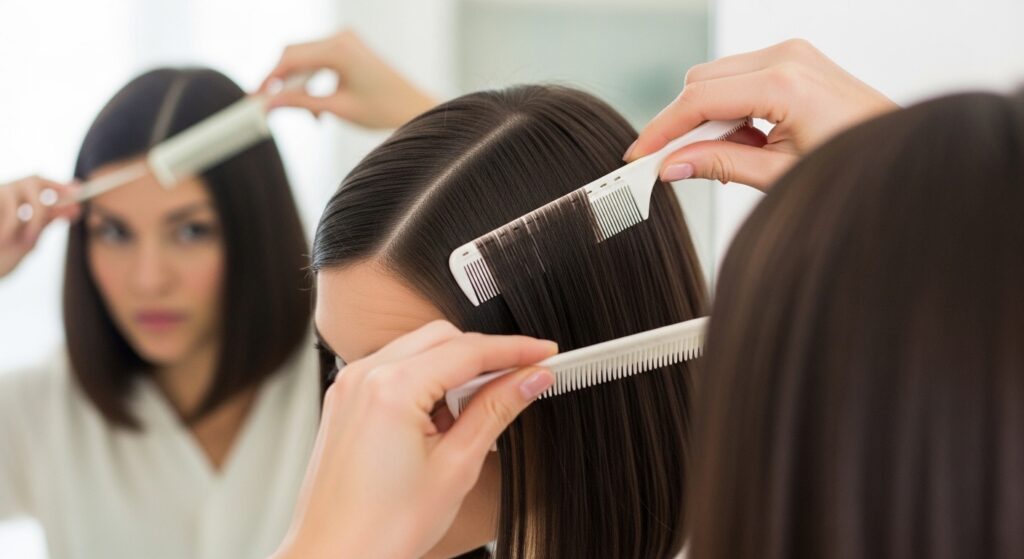
Begin with brushed, detangled hair. A center part is classic for this style, but a deep side part is gorgeous too. It changes the feel instantly.
Don’t stress about it being surgical-straight. A slightly imperfect part looks more effortless. This is the foundation, so take the extra ten seconds to get it how you like.
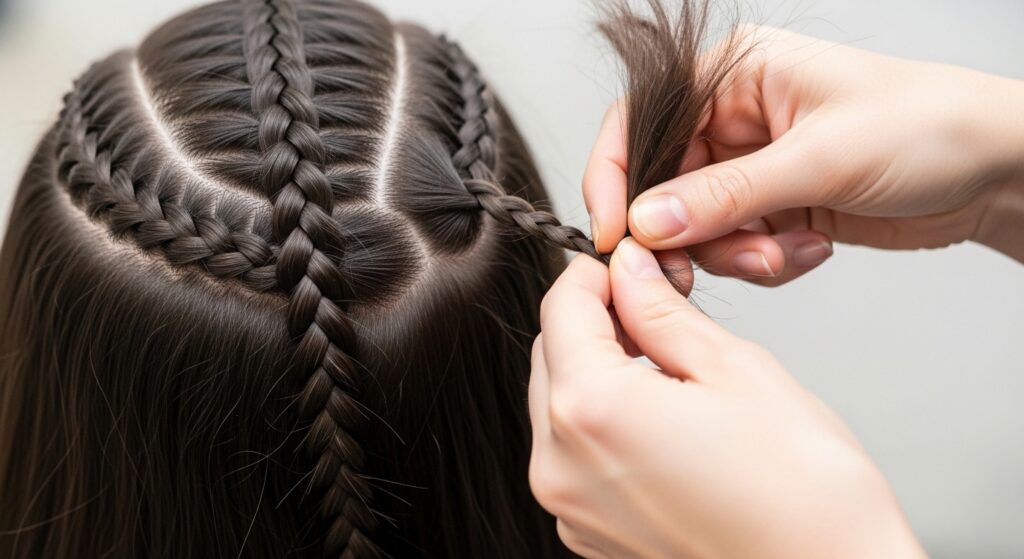
Sectioning Made Foolproof
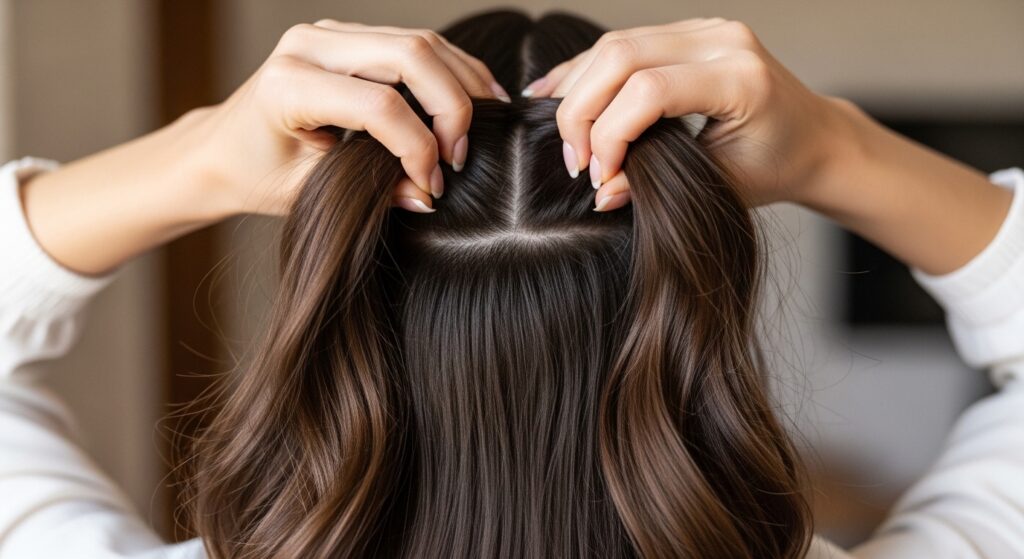
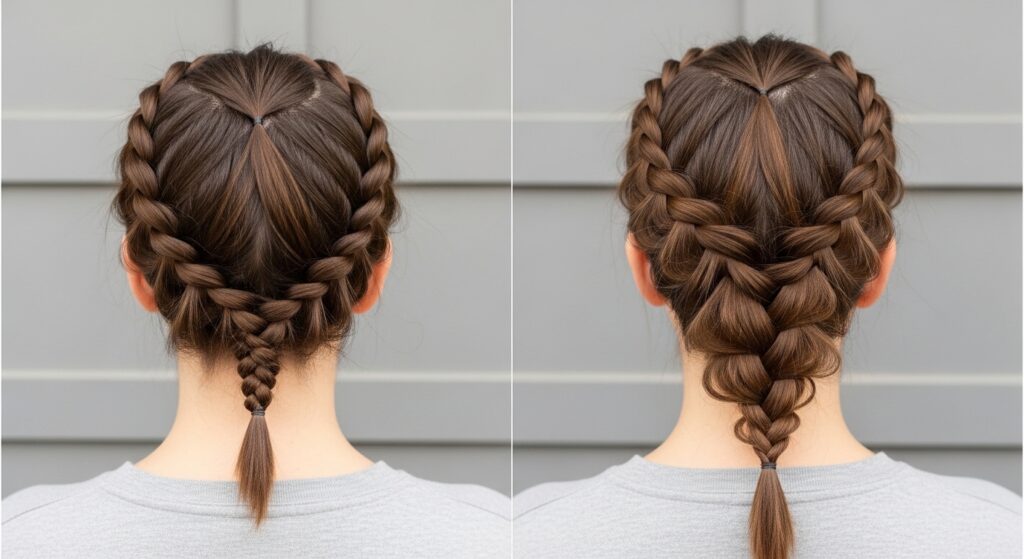
This is the only “sectioning” you’ll do. With your fingers, gather the hair from the top of your head. Start at your temples and go back to about the crown.
Think of creating a large, upside-down U shape. Secure this top section with a temporary clip or just hold it. Leave all the hair beneath it down for now.
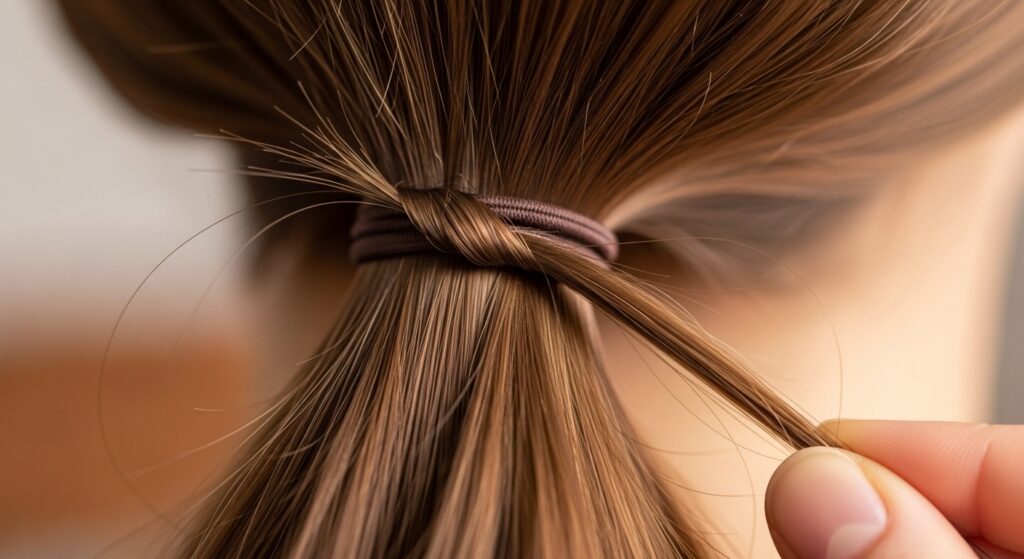
Creating the First Ponytail
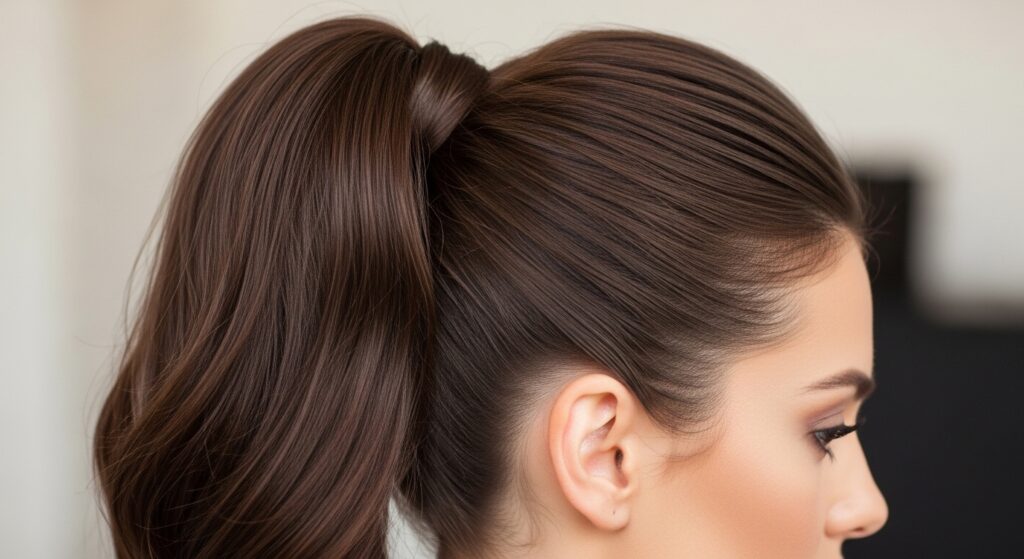
Take that top section you just gathered. Now, tie it into a high ponytail at the very top of your crown. Use one of your clear elastics.
Make sure it’s snug but not painfully tight. This ponytail is the base of our heart. The height is key for the shape later.
The Simple Twist for Volume
Before you braid, add a little volume. Gently tug on the sides of the ponytail, right above the elastic. Pull it outwards a bit to loosen.
This gives the braid body and makes the final heart shape fuller. It also hides the elastic a little, for a softer look.
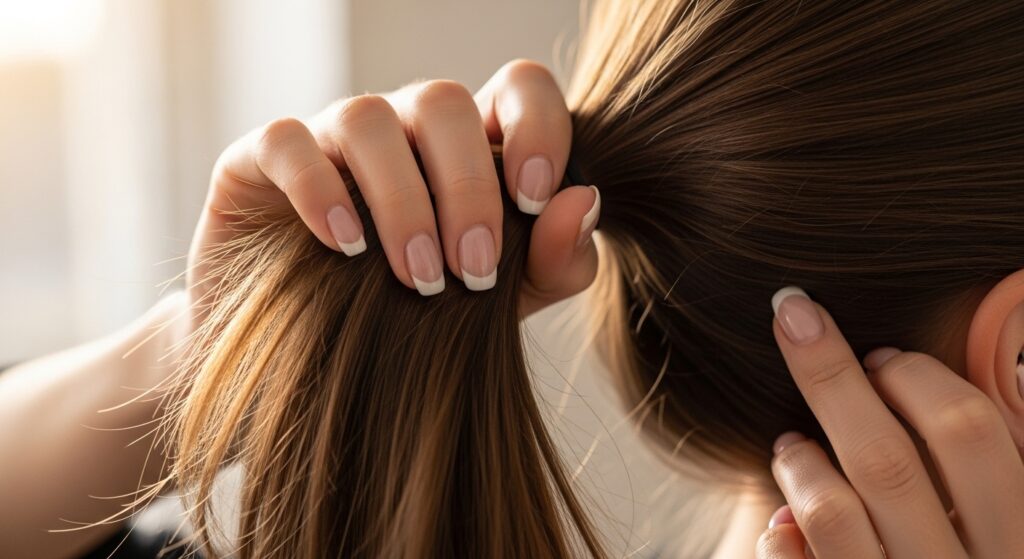
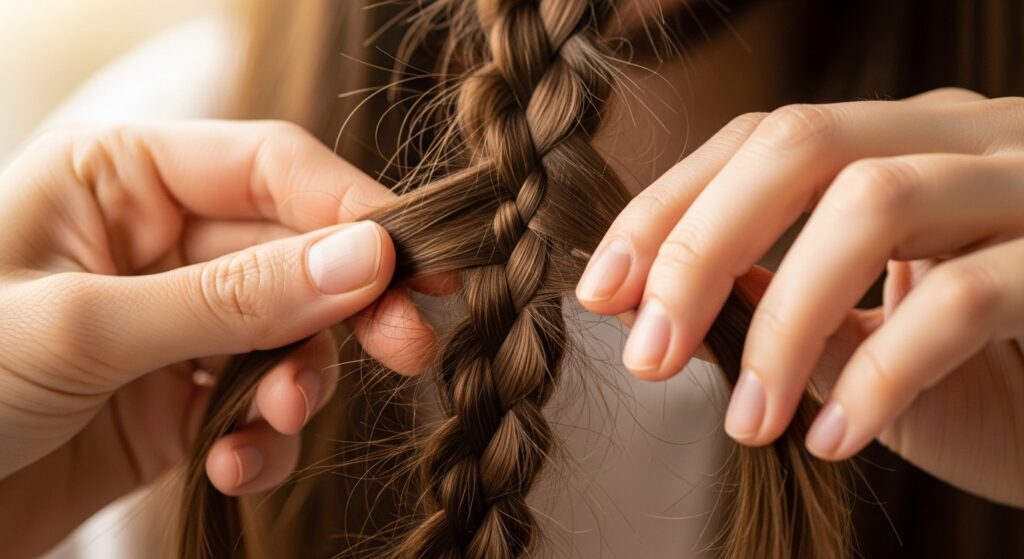
Braiding the First Side
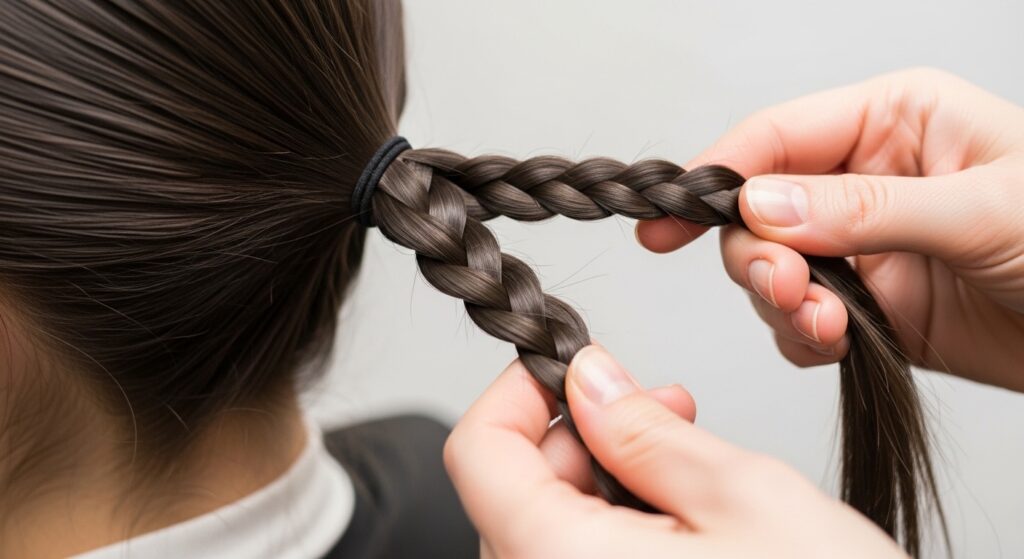
Split your ponytail directly in half. You’ll work on one side at a time. Take the right half and divide it into three equal sections.
Now, just do a basic three-strand braid. Braid it all the way down to the ends. Secure the end with a small clear elastic. Easy, right?
Braiding the Second Side
Repeat the exact same process on the left half of the ponytail. Divide into three, braid to the ends, and secure with an elastic.
Try to make them about the same tightness. You should now have two separate little braids hanging down from your ponytail base.
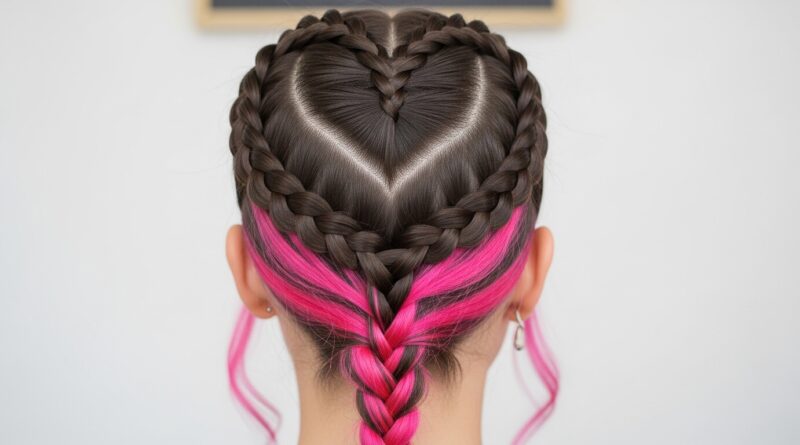
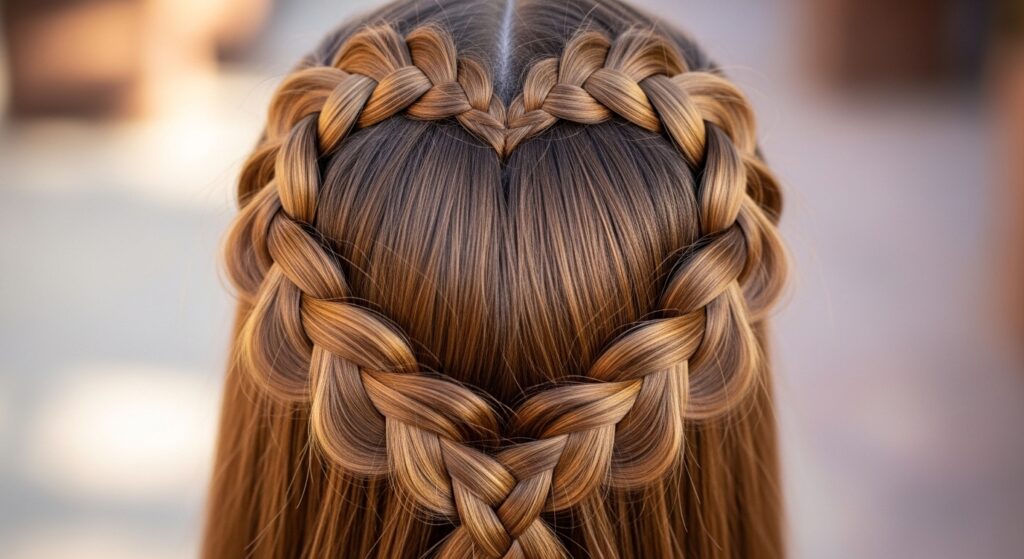
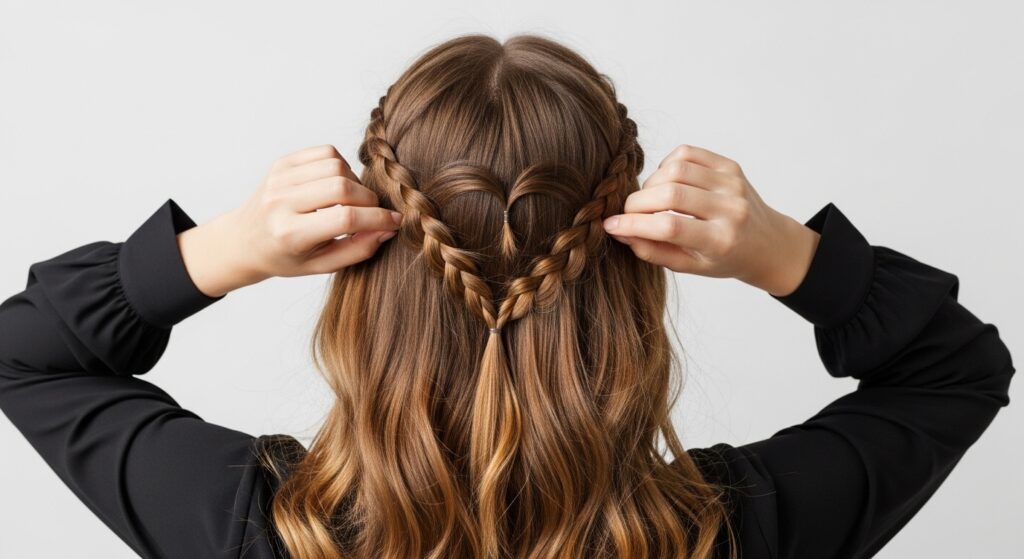
Shaping the Top of the Heart
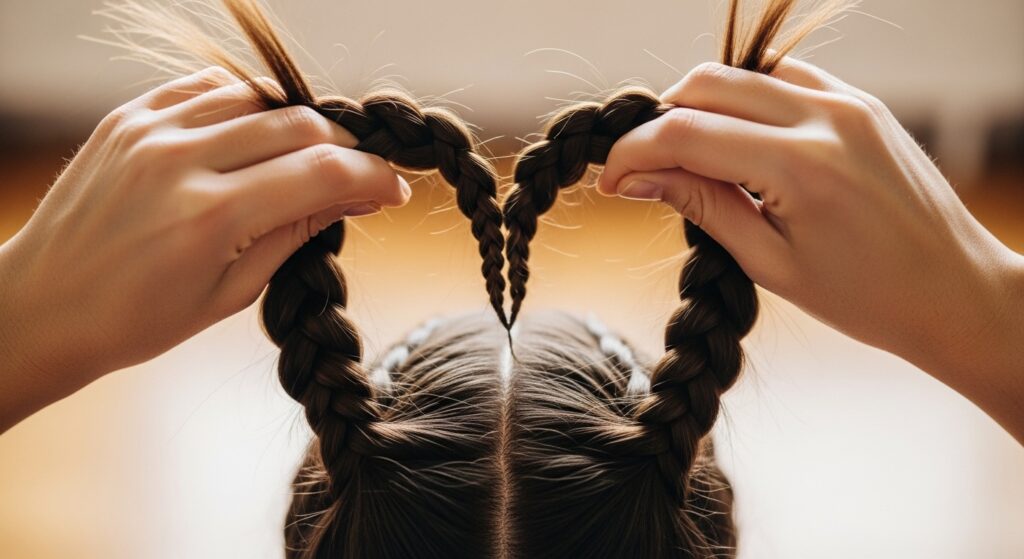
Here’s the magic. Take the right braid and gently pull it to the right and up, creating a curve. Do the same with the left braid, pulling it left and up.
You’re forming the two rounded top bumps of the heart. Use a bobby pin at the base of each curve, hidden under the braid, to hold this shape if needed.
Connecting the Bottom Point
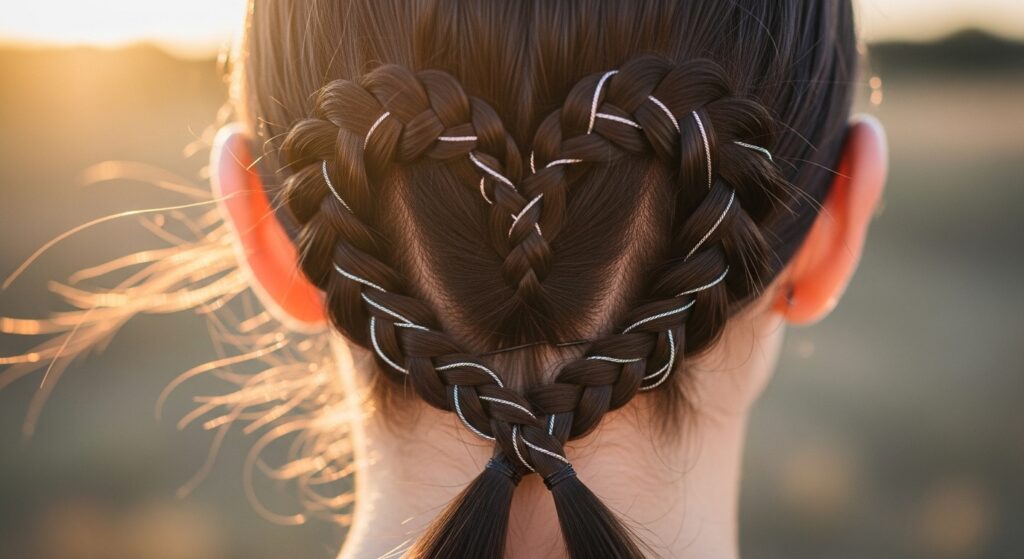
Now, take the ends of your two braids. Cross them underneath the ponytail, bringing them towards the center back of your head.
They should meet to form the V point of the heart. Twist them around each other once and secure them together with bobby pins, hiding the pins under the bulk of your hair.
Hiding the Elastics Like a Pro
See those clear elastics at the ends of the braids? Let’s hide them. Take a tiny strand of hair from the tip of one braid and wrap it around the elastic.
Tuck the end of that strand under the elastic and secure it with a tiny bobby pin. Repeat on the other braid. It creates a seamless, finished look.
Loosening for That Effortless Feel
Perfectly tight braids can look severe. To get that soft, romantic vibe, gently pull on the outer loops of each braid. Tug them outwards to plump up the braid.
Also, pull a few tiny face-framing pieces loose. This softening step is what makes it look “effortless” and not like a stiff competition style.
Setting It All Day
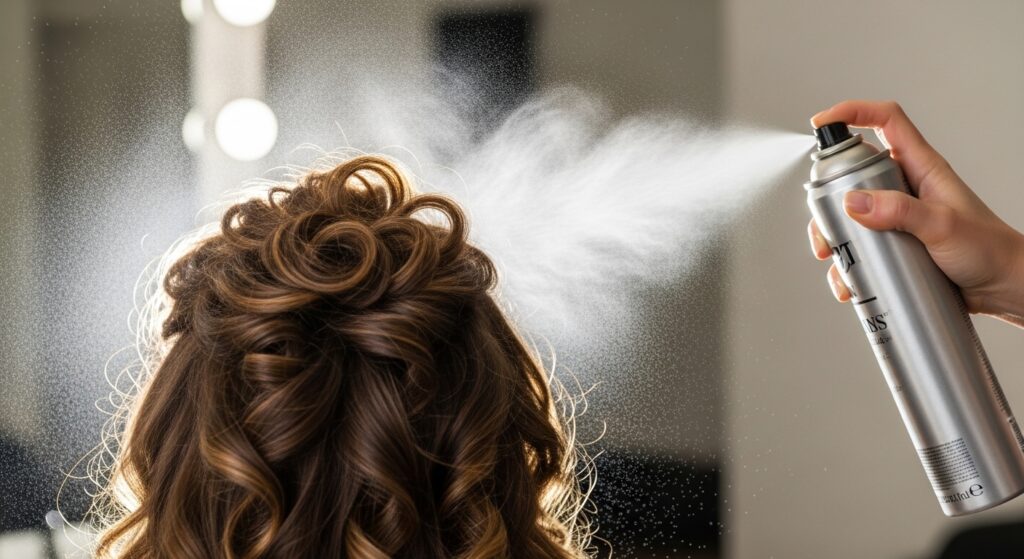
A quick spray is your friend. Use a light-hold, flexible hairspray. Hold the can about 10 inches away and give it one light mist all over.
This will keep any flyaways in check and help the shape hold without making your hair crunchy or hard. The goal is touchable hair that lasts.
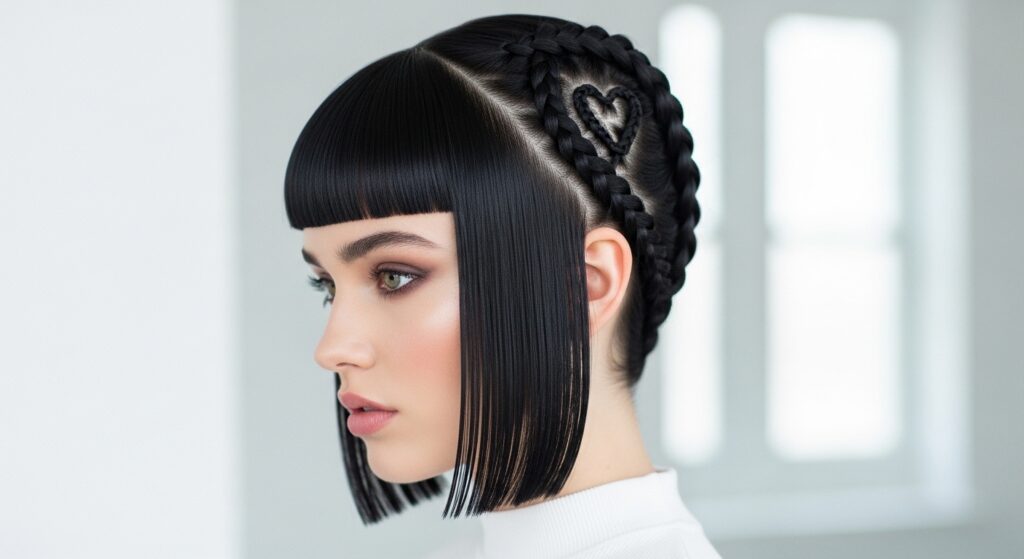
Adapting for Shorter Hair (Like a Lob!)
If you have a chic asymmetrical lob or a quiet luxury bob, you can still do this. Just make your initial top section smaller.
Your braids will be shorter, and the heart will be more delicate. Use more bobby pins to secure the ends. It creates a adorable, polished look perfect for shorter styles.
Adding Ribbons for Extra Romance
Want to level up the romance? Take a long, thin ribbon. When you start each three-strand braid, make one of the strands the ribbon.
Braid it right in. You can tie the ends into a small bow at the bottom point of the heart. It’s pure fairy-tale, romantic goth hairstyles energy.
Making it Glitchy Glam
For a glitchy glam hair twist, think about texture and color. Tease the crown slightly before starting. Or, use a few clip-in streaks of a bold color in your braids.
You could also braid in some metallic threads or tiny chains. It’s about mixing that sweet shape with an unexpected, edgy element.
Pairing with Other Trend Cuts
This style plays amazingly with other cuts. Imagine it with the dramatic lines of a hime cut or the textured layers of a vampire haircut.
It adds a soft, feminine detail to stronger, edgier cuts. It’s proof that mixing trends creates the most personal and interesting 2026 hairstyles.
Quick Fix for Second-Day Hair
This is a perfect second-day style. If your hair is a little oily or flat, dry shampoo at the roots first. The texture actually helps the braid hold better.
You might find it’s even easier to do on hair that isn’t freshly washed. It has more grip and natural volume, making the shape fuller.
Common Mistakes to Avoid
The main mistake is placing the first ponytail too low. It must be high on the crown for the right shape. Also, avoid braiding too tightly.
Don’t skip the loosening step! And ensure you’re crossing the braid ends *underneath* to form the point, or the heart gets lost.
From Day to Night in Seconds
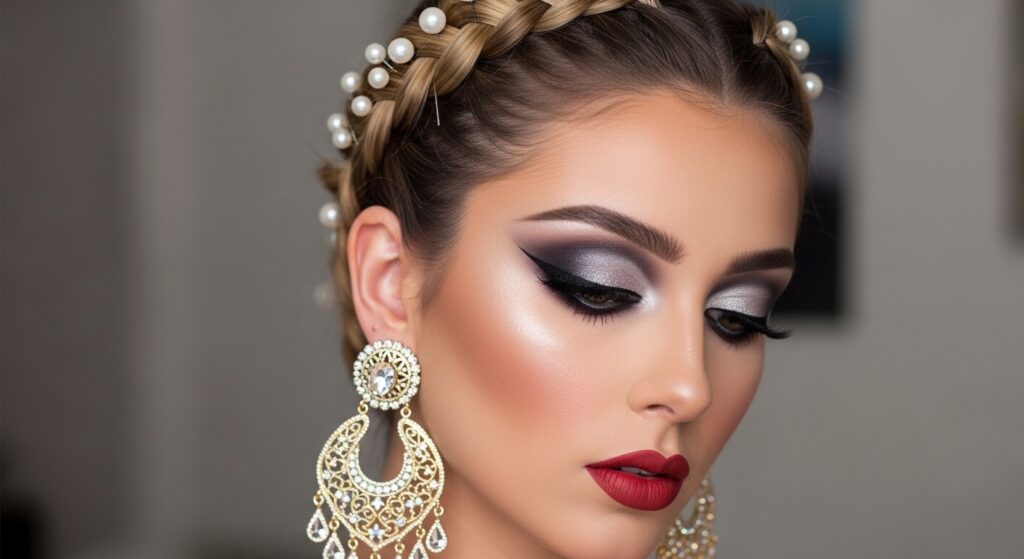
To transition this look for evening, it’s all about accessories. Add statement earrings since your hair is up. Swap a clear elastic for a velvet scrunchie.
You can also pull out a few more pieces around your face for a softer, more undone vibe. A spritz of glitter hairspray can add instant party magic.
Why This Style Feels So “You”
This hairstyle works because it feels personal. It’s not a stiff updo. It has movement and a little whimsy. It shows you care about the details without trying too hard.
It fits that old money hair ideal of being polished but never overdone. It’s a small act of self-care that makes your whole day feel more put together.
And that’s it! See? I told you it was easier than it looked. The first time might take you five minutes, but by the third try, you’ll be doing it in two while thinking about your coffee order.
The best part about a trick like this is that it becomes part of your routine. It’s a reliable way to feel pulled together on a busy morning or add a special touch to a big night out.
I want to see your masterpiece! Did you try it? How did it go? Leave a comment below and tell me—or share your own little twist on it. And if you want to keep this tutorial handy for your next hair day, save this post to Pinterest so you can find it anytime you need a quick style win.