Seamless Weave Install Hacks at Home Perfectly
Okay, let’s be real. The salon bill for a flawless weave install can be… a lot. I’ve been there, staring at the price tag and wondering if I could just figure it out myself. The good news? You totally can.
With the right prep and a few insider tricks, getting a seamless, undetectable install at home is within reach. It saves money and gives you total control over your look.
Whether you’re aiming for that quiet luxury bob or a voluminous style for 2026 hairstyles trends, the foundation is everything. A bad install can ruin the most beautiful hair. A great one? You’ll feel unstoppable.
This guide is my no-stress, step-by-step playbook. We’ll cover everything from braiding to blending, so you can skip the salon chair and still get a perfect, natural-looking result. Let’s get into it.
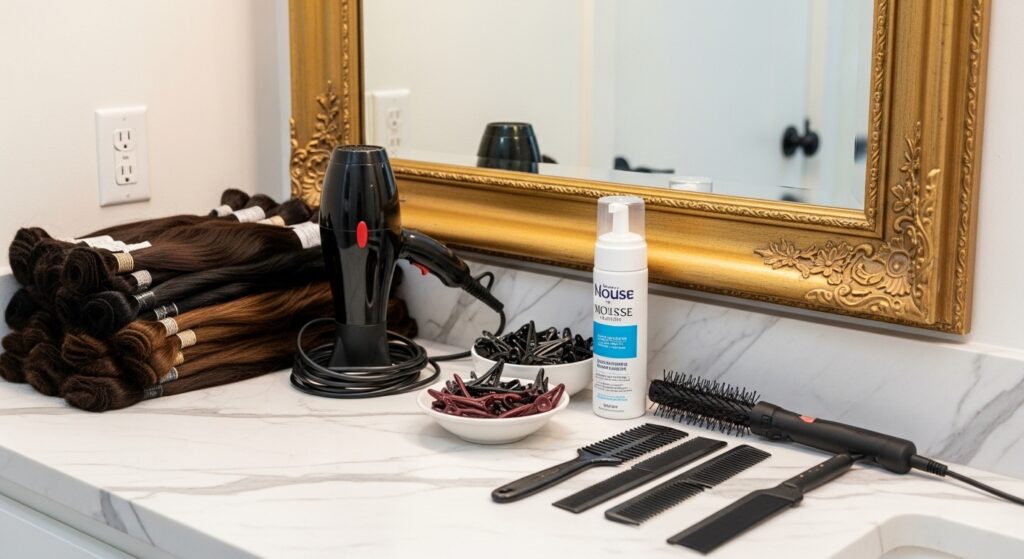
1. Your Pre-Installation Checklist: Gather Everything First
Nothing kills the DIY vibe faster than running to the store mid-install. Before you even wash your hair, lay out all your tools. This setup is non-negotiable for a smooth process.
You’ll need: a tail comb for parting, hair clips, weaving thread and needle (for closure installs), a strong-hold mousse, edge control, a blow dryer, and your chosen weave bundles. Don’t forget a good mirror setup and time—rushing is the enemy of seamless.
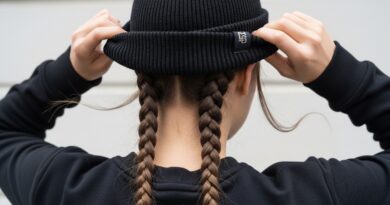
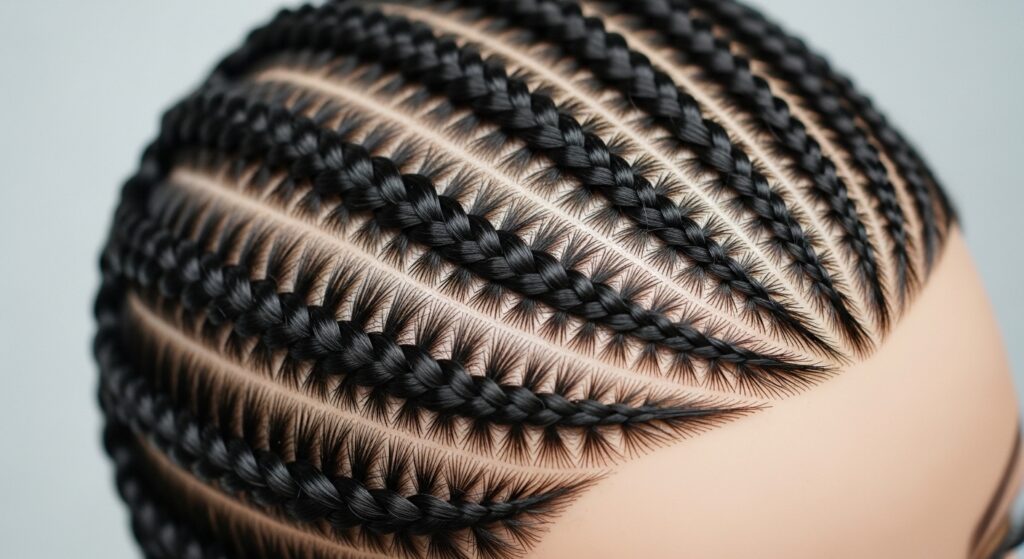
2. The Braid Down Foundation: Flat & Neat is Key
This is the most important step. Your braid pattern is the blueprint. If it’s lumpy or uneven, your weave will be too. I always recommend a simple, flat cornrow pattern going straight back.
Part damp, detangled hair into four sections. Braid each section tightly against your scalp, but not so tight it causes tension. Use the mousse on each section for hold and to lay down flyaways. The flatter the braids, the smoother the final result will be.
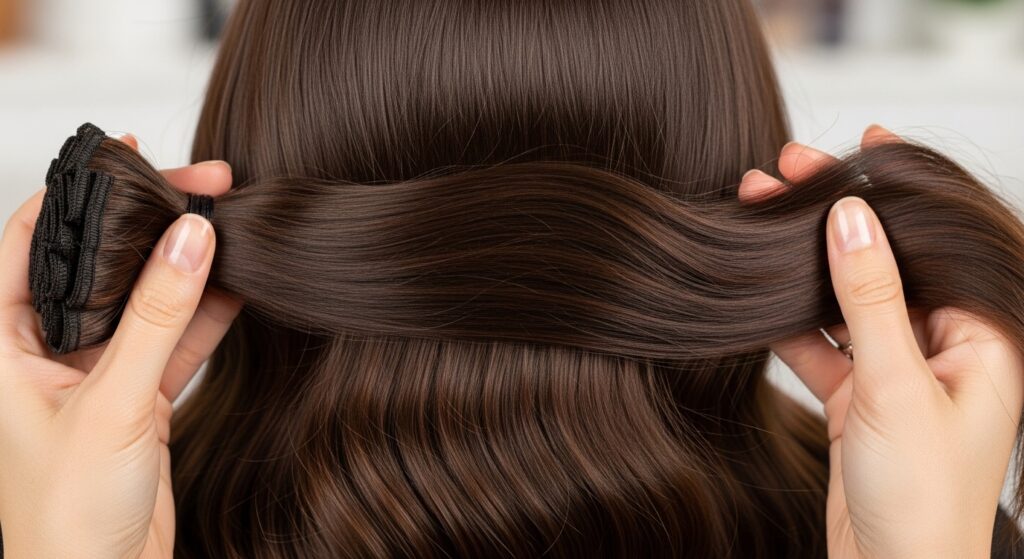
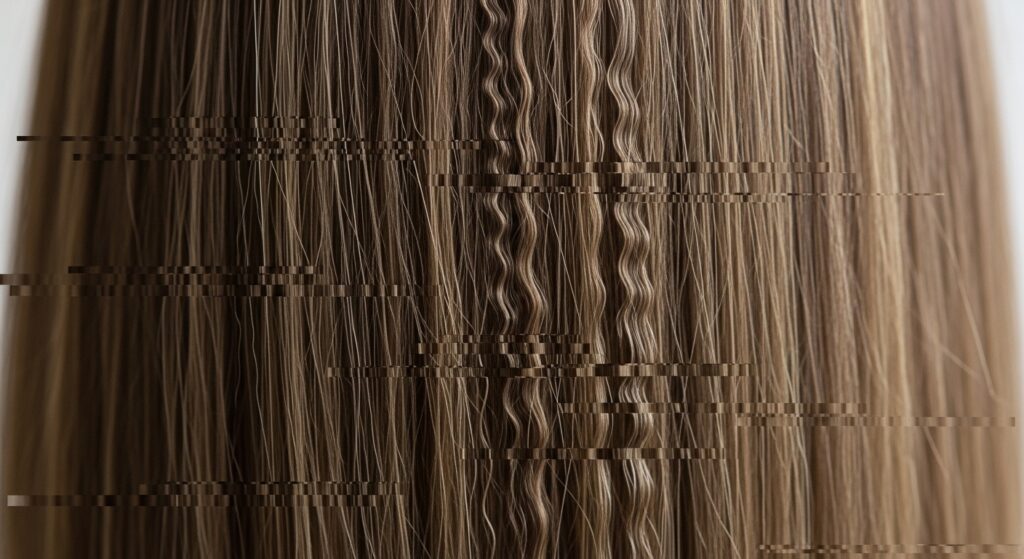
3. Choosing Your Weave: Quality Matters for Blending
Not all hair is created equal, especially for a seamless blend. For styles like the asymmetrical lob or old money hair, you need hair that moves naturally and matches your texture.
Invest in good quality virgin or remy hair. It lasts longer, tangles less, and blends better with your natural hair. Match the texture as closely as possible—whether it’s silky straight, body wave, or kinky curly. This makes the final blending step so much easier.
4. The Secret Weapon: A Wig Cap (Yes, Really!)
This is my favorite hack. After braiding, put on a wig cap that matches your scalp color. Then, sew your weave tracks onto the cap, not directly onto your braids.
It creates an extra-smooth surface, prevents braids from peeking through, and makes the entire install more comfortable. It also protects your natural hair from the thread, making take-down less stressful.

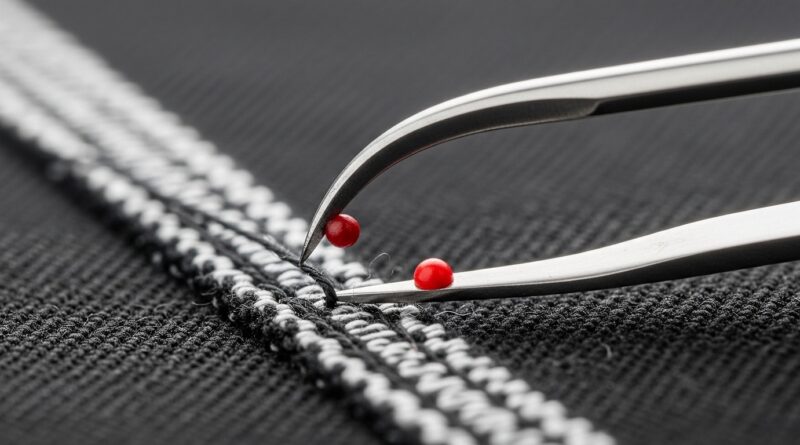
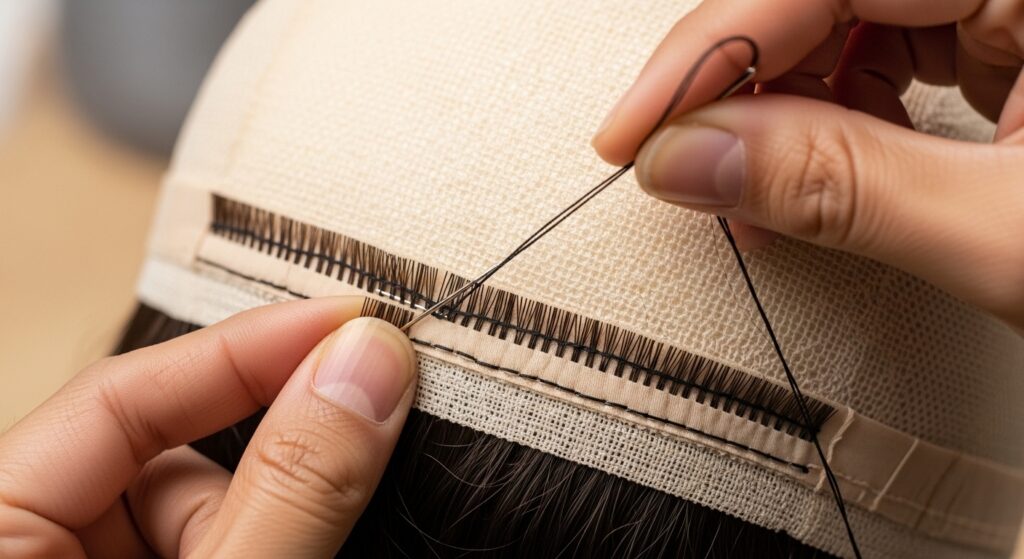
5. Starting Your First Track: The Perimeter Method
Never start in the middle. Always sew your first track along the very bottom perimeter of your braids or cap. This establishes a solid anchor for the rows above.
Use a strong, double-threaded needle and make small, tight stitches. Go over each stitch twice for security. This base row needs to be rock-solid, as it supports the weight of the hair above it.
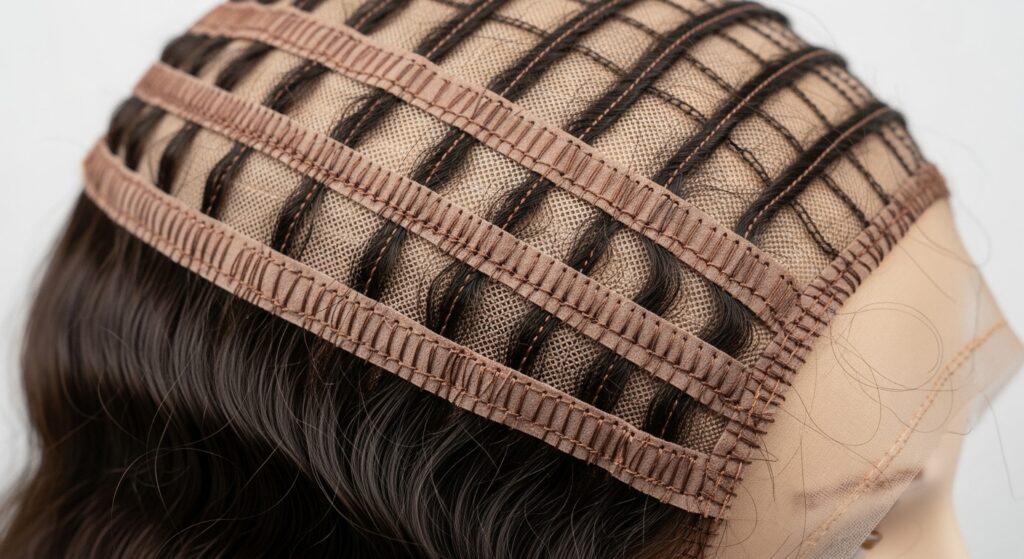
6. Building Rows Upwards: The Overlap Trick
As you sew each new row above the last, let the track overlap the previous one by about a quarter-inch. This is the golden rule for density and scalp coverage.
This overlap ensures no gaps or “track lines” are visible. It creates a full, thick look that mimics natural hair growth. Keep your rows as straight as possible, using the tail comb to guide you.
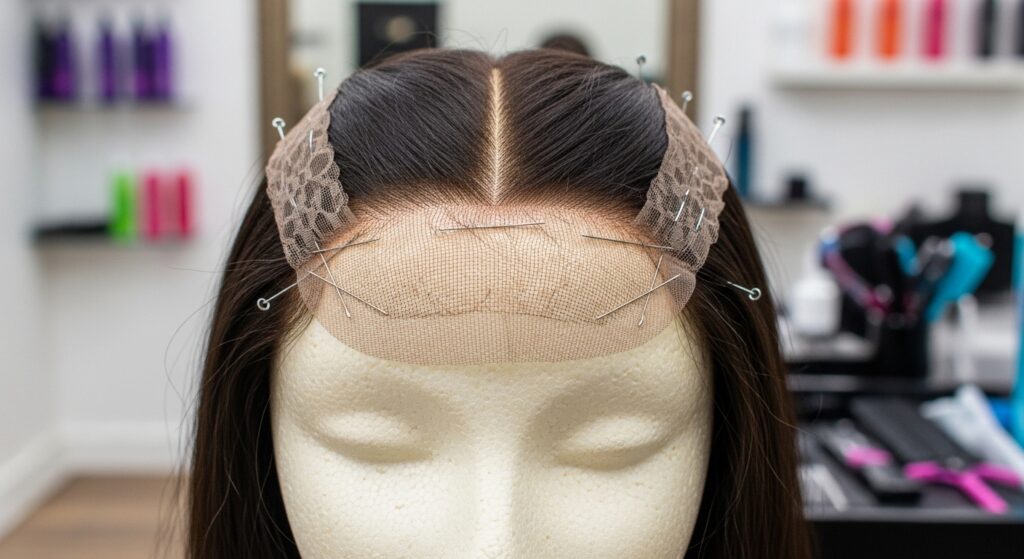
7. Installing a Closure: For That Perfect Part
Closures give you a natural-looking part. Place your closure where you want your part to be—center, side, or three-part—and pin it in place first. Make sure it’s aligned perfectly before you start sewing.
Sew around all four sides of the closure, attaching it to the braids or cap beneath. Use a curved needle for the corners for a flatter fit. Knot the thread securely and weave the end into the braids.
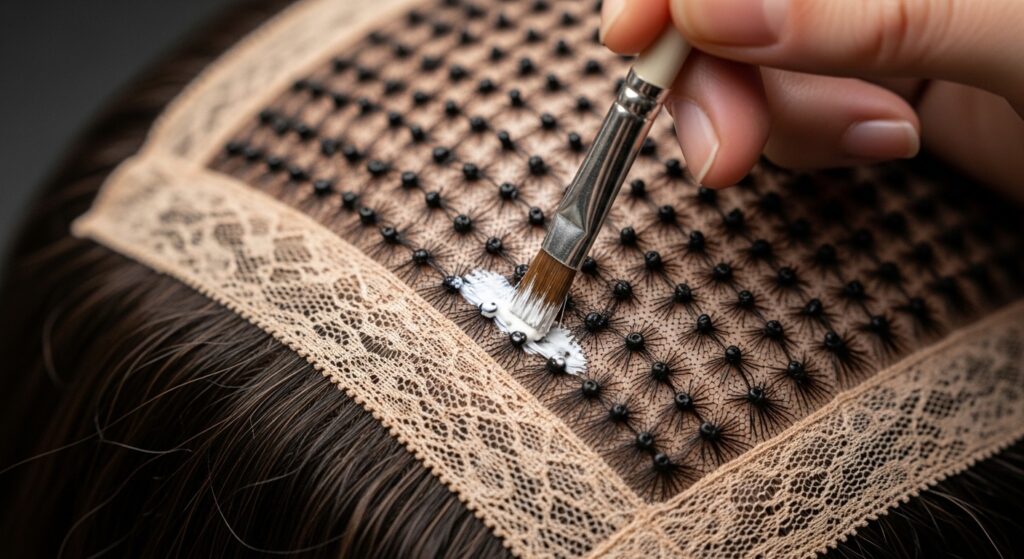
8. Bleaching The Knots on a Closure (Carefully!)
If your closure isn’t pre-bleached, you’ll need to do it for undetectability. Mix a small amount of bleach powder and developer (10 vol) into a thick paste. Using a small brush, apply ONLY to the knots on the lace part.
Watch it closely! It usually only takes 5-10 minutes. Rinse thoroughly and apply a conditioner. This step makes the knots disappear, so your part looks like scalp.
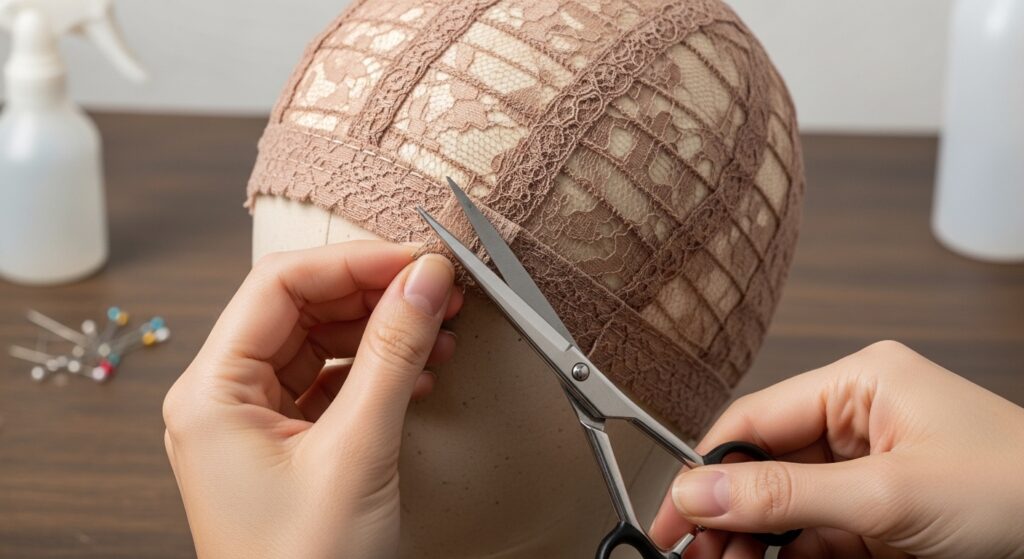
9. Cutting and Styling the Closure: Blend It In
Once secured, cut the excess lace carefully with small scissors. Leave a tiny margin. Then, pluck a few hairs from the parting area to create a more realistic, less dense hairline.
Use a soft-bristle brush and a tiny bit of edge control to lay down any baby hairs on the closure, blending them with your own. This melds the closure into your skin seamlessly.
10. The “Leave-Out” Strategy: How Much to Leave Out
If you’re not using a closure, you’ll blend the weave with your own hair. The key is to leave out a thin, manageable amount—just enough to cover the tracks.
Too much leave-out can become damaged and hard to blend. A thin, consistent perimeter around your hairline is perfect. This works great for textured styles that need to blend, like a glitchy glam hair look.

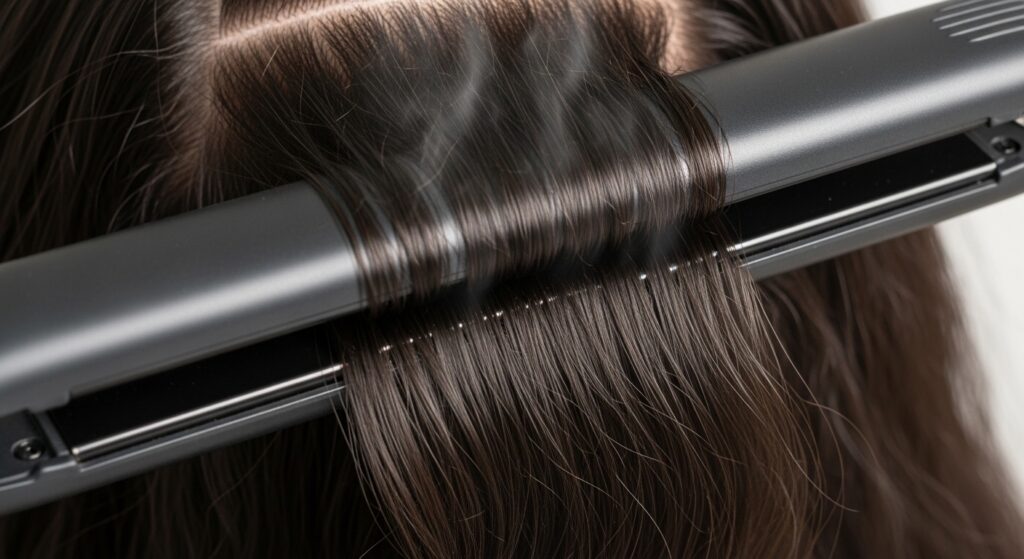
11. Blending Your Leave-Out: The Flat Iron Secret
Blending is an art. After installing, curl or flat iron both your weave and your leave-out hair together in the same direction. Use a heat protectant!
Take small sections and make sure the textures marry. If the weave is straighter, you may need to lightly flat iron your natural hair to match. The goal is to make it look like all one head of hair.
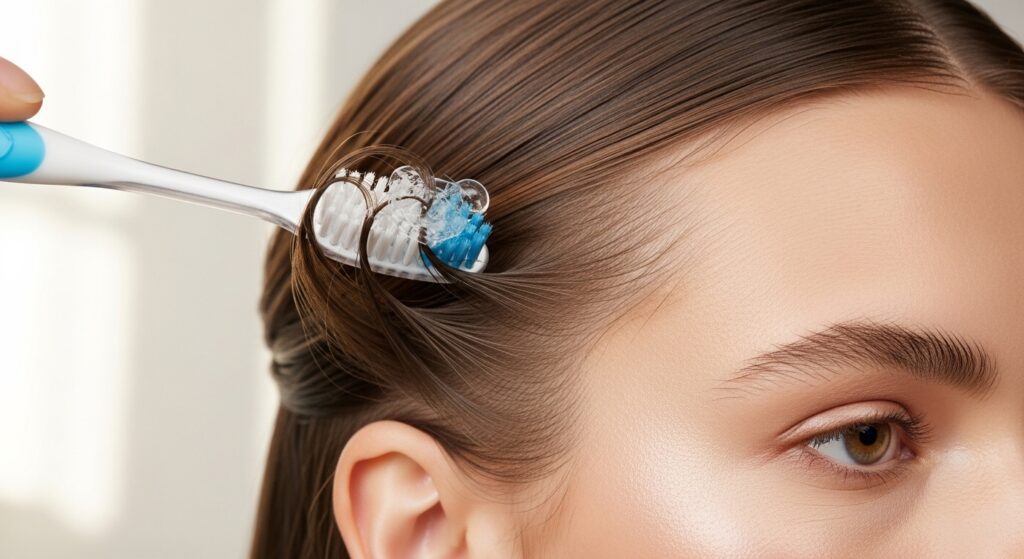
12. Creating a Natural Hairline: Baby Hair Magic
Baby hairs are your best friend for a realistic finish. Use the shorter hairs from your bundles or your own edges. Apply a light gel or edge control with a toothbrush.
Swirl them down onto your temples and forehead softly. The key is “softly”—avoid hard, crispy lines. This frames your face and hides any harshness from the install.
13. Styling Into a Quiet Luxury Bob
For that chic, quiet luxury bob, ensure your install is blunt and heavy at the ends. Once installed, get a professional trim or carefully trim it yourself to one even length.
Use a flat iron to create a sleek, glass-like finish or a large curling iron for a soft, inward bend. The look is polished, healthy, and perfectly weighted—no layers or fuss.

14. Styling Into an Asymmetrical Lob
The asymmetrical lob is a statement. After install, have a helper mark where you want the shorter side to end (usually at the chin) and the longer side (shoulder-length).
Cut carefully on dry hair. Style with texture spray and a curling wand, directing waves away from the face. The install needs to be flat so the sharp cut looks clean.

15. Achieving Vampire or Romantic Goth Styles
For vampire haircut or romantic goth hairstyles, deep color and texture are key. Install a jet black or dark brown weave. Add clip-in pieces in burgundy or silver for a pop.
Style with lots of volume at the crown and face-framing pieces. Use a texturizing spray for a lived-in, dramatic feel. Think big, romantic curls or sleek, sharp bobs.

16. Trying the Hime Cut at Home
The hime cut is bold with its straight-across fringe and long sidelocks. Install your weave as normal. Then, create a deep, straight-across bang section from the closure or leave-out.
Cut the bang bluntly at eyebrow level. Keep the rest of the hair long and straight. This style relies on a super straight, sleek install, so flat iron thoroughly.

17. Adding Glitchy Glam Texture
Glitchy glam hair is all about imperfect, piece-y texture. After a straight install, go in with a flat iron and randomly crimp small, vertical sections throughout your hair.
Then, break it up with your fingers. Add a shine serum only to the ends of some pieces. The contrast between sleek and crimped creates the “glitch” effect on a seamless base.
18. Daily Maintenance for Longevity
Your install can last 6-8 weeks with proper care. Wrap your hair at night with a silk scarf. Use a sulfate-free shampoo and concentrate on the scalp, not the lengths.
Condition mid-shaft to ends. Dry thoroughly at the roots to prevent mildew on the braids. Light oil on the scalp keeps it healthy underneath.
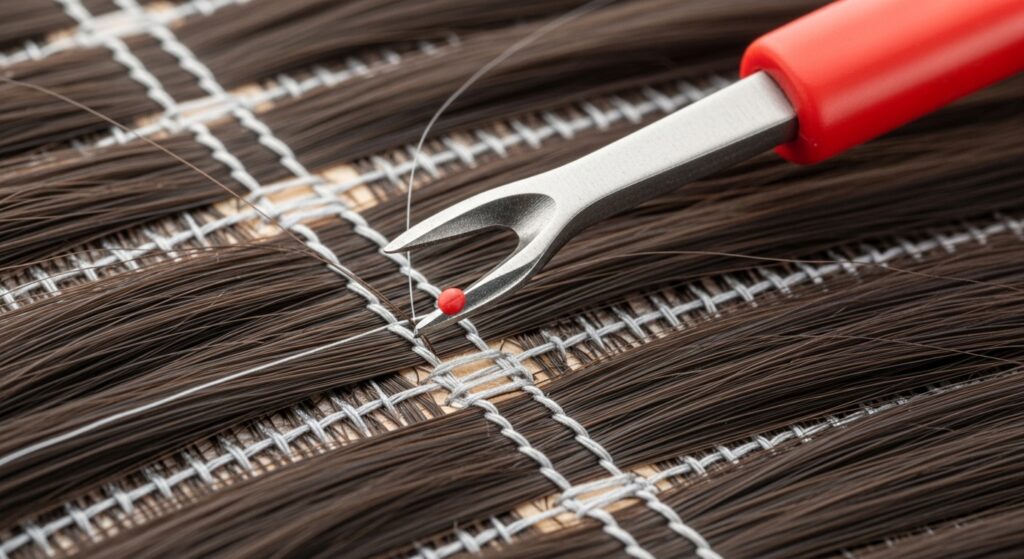
19. The Take-Down Process: Be Patient
When it’s time, don’t rip it out! Carefully cut the thread of each track with a seam ripper or small scissors. Gently remove the tracks and then unravel your braids.
Detangle your natural hair with loads of conditioner. Follow with a deep conditioning treatment. Your hair needs TLC after being tucked away.
20. Letting Your Scalp Breathe
After take-down, give your hair and scalp a break for at least a week. This is the time for intensive moisturizing treatments, scalp massages, and protective styles like loose braids.
Letting your scalp breathe prevents tension alopecia and keeps your natural hair healthy. It ensures your next install will have a strong, healthy foundation to build on.
And there you have it—my full playbook for a flawless at-home install. It might seem like a lot of steps, but once you get the rhythm, it becomes a relaxing, empowering ritual. You’re not just saving money; you’re mastering a skill.
The best part? You can switch up your look to match any trend, from the classic old money hair to the edgy vampire haircut, all on your own schedule. It’s all about that perfect foundation.
I want to see your creations! Did you try one of these hacks? Which style are you dreaming of? Let me know in the comments below—I read every single one.
Save this post to Pinterest so you have all the steps handy for your next install day. Trust me, future-you will be so grateful. Happy styling!