Achieve 30 Vibrant Color-Streaked Cornrows Turning Heads at Festivals Boldly
Hey gorgeous! Festival season is calling, and if you’re dreaming of a look that stops traffic, you’ve landed in the right spot. We’re talking about turning classic cornrows into a masterpiece of vibrant color. It’s the ultimate blend of protective styling and head-turning, bold expression.
I know, the idea of adding color can feel like a big commitment. But what if you could get that wow-factor without a full-head dye job? That’s the magic of strategic streaks. They’re playful, powerful, and surprisingly low-maintenance compared to some of the 2026 hairstyles we’re seeing.
This guide is your backstage pass. I’m breaking down everything from choosing your colors to finding the right braider. We’ll keep it practical, honest, and totally doable. Get ready to walk into that festival with confidence and a style that’s uniquely, brilliantly you.
Why Color-Streaked Cornrows Are a Festival Game-Changer
Festivals are for bold moves. While the quiet luxury bob has its place for elegant evenings, a field full of music calls for something with more energy. Color-streaked cornrows give you that instant “it” factor.
They combine the neat, protective benefits of traditional braids with a punk-rock splash of personality. Think of it as the rebellious cousin to more subdued trends. You get to play with color without the long-term commitment of an all-over dye.

Finding Your Perfect Color Palette
This is the fun part! Your color choice sets the whole mood. Do you want electric neon, soft pastels, or rich jewel tones? Look at your festival outfits for inspiration.
- Bold & Electric: Think hot pink, cobalt blue, or lime green. Perfect for a glitchy glam hair vibe.
- Earthy & Rich: Deep purples, burgundy, or emerald green. This has a romantic goth hairstyles edge.
- Soft & Ethereal: Lavender, baby blue, or peach. Creates a dreamy, fairy-like effect.

The Big Question: To Bleach or Not to Bleach?
If your natural hair is dark, vibrant colors will need a light base to really pop. This means bleaching the sections you plan to color. It’s a crucial step to discuss with your stylist.
Bleaching must be done carefully to avoid damage. A professional will know how to protect your hair integrity. For a lower-lift option, consider darker, vivid colors on unbleached hair, which can give a deep, tonal streak.

Choosing Between Human Hair or Synthetic for Color
For permanent, vibrant color, you’ll often bleach and dye your own natural hair before braiding. But for temporary pops, pre-colored synthetic braiding hair is a fantastic option.
It comes in every color imaginable and requires no chemical processing on your own hair. It’s a safer, less damaging route for experimenting. Kanekalon or Toyokalon fibers are great for holding color and blending well.

Must-Have Products for Pre-Braiding Care
Healthy hair is the foundation. A week before your appointment, give your hair some extra love. This ensures it’s strong enough for the styling process.
- Clarifying Shampoo: Removes buildup for a clean slate.
- Deep Conditioner: Hydrates and strengthens strands.
- Leave-In Conditioner: Provides slip for braiding and moisture.
- Protein Treatment (if needed): For hair that feels weak or stretchy.

Your Consultation: Questions to Ask Your Braider
Never skip the consultation! This is where you and your stylist get on the same page. Bring clear inspiration photos and be honest about your hair’s history.
Key questions to ask: “What’s your experience with color-streaked styles?” “How do you protect hair during bleaching?” “What’s the total time and cost estimate?” A good braider will welcome these questions.

Popular Cornrow Patterns for Color Streaks
The pattern changes the whole look. Simple straight-back rows let the color shine cleanly. More intricate designs like geometric parts or curved lines can frame the color in stunning ways.
Consider a mix! Maybe bold color in the front rows and a more subtle tone in the back. Or use color only in the “underlay” braids for a hidden surprise. The pattern is your canvas.

The Bleaching Process: What to Expect in the Chair
If you’re bleaching, this will be the first step. Your braider will carefully isolate the sections for color. They’ll apply bleach only to those specific strands, keeping it off your scalp and untouched hair.
It will need to process until it reaches a pale yellow (for bright colors). They’ll then rinse, shampoo, and gently dry those sections. Your scalp might tingle, but it shouldn’t burn. Speak up if you’re uncomfortable!

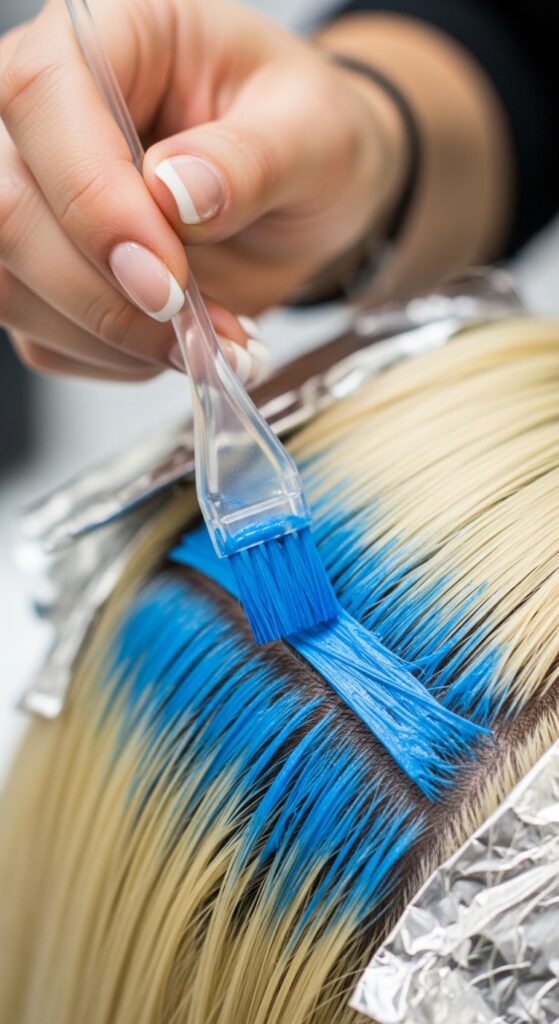
Applying the Vibrant Color
Once bleached, the fun really starts. The vibrant dye is applied to the lightened sections. This is often done with a brush for precision. The color needs to sit to develop richness and depth.
This might be done before the final braiding, or sometimes color is applied to the hair extensions before they’re braided in. Your stylist will have their preferred method for a clean, long-lasting result.
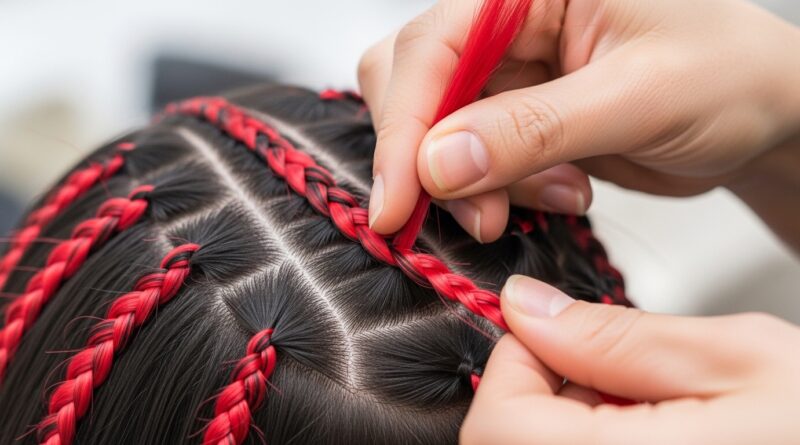
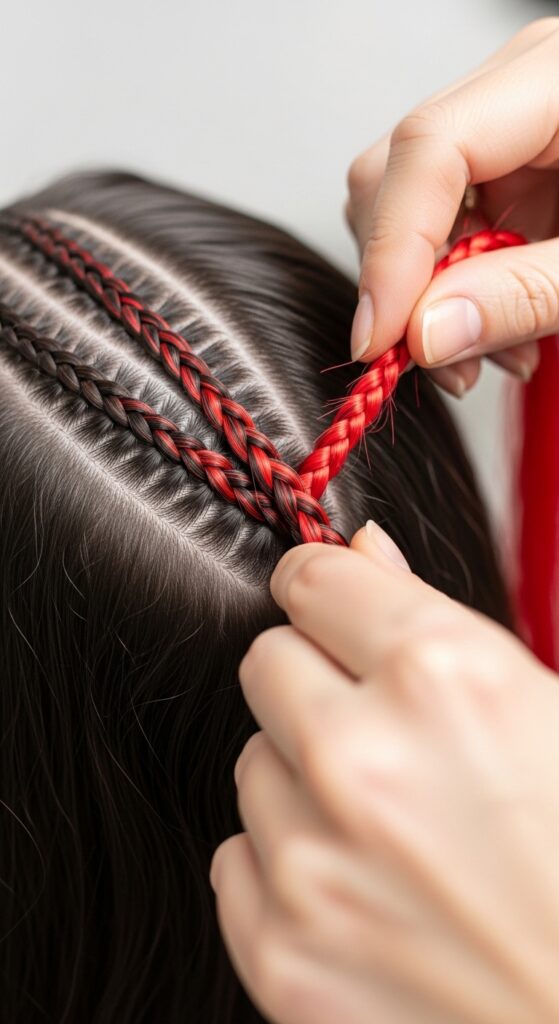
The Art of Braiding in the Color
Now for the main event. Your braider will begin cornrowing, incorporating your colored sections (whether they’re your own dyed hair or synthetic pieces) seamlessly. Tension is key—too tight causes pain, too loose won’t last.
Watch how they feed in the colored hair. The goal is smooth, even braids where the color transitions look intentional and fluid, not choppy. This is where skill truly shines.
Festival-Proofing Your Style: Securing the Ends
How you finish the ends determines longevity. For a clean look, the ends are usually dipped in hot water to seal synthetic hair or secured with small rubber bands if it’s your own hair.
Some opt for curly ends or beads. For festivals, consider sealing well and maybe adding a light gel to flyaways. You want this style to survive dancing and weather!

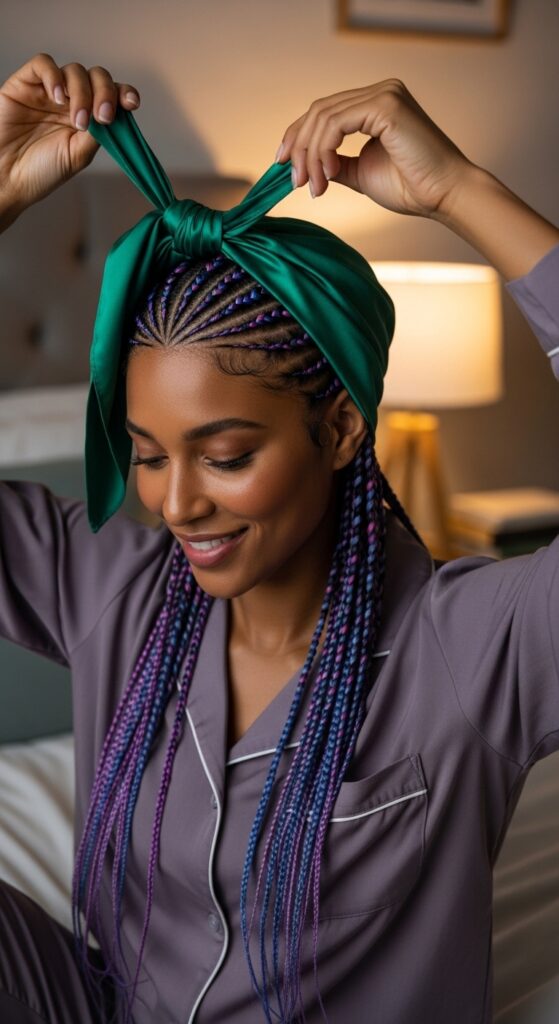
Immediate Aftercare: The First 48 Hours
Your scalp needs to breathe. Avoid heavy styling products initially. You can use a light edge control for your hairline, but let your scalp settle. Sleep with a satin scarf or bonnet—this is non-negotiable!
It’s normal to feel some tightness, but severe pain or bumps are not. If you experience this, consult your stylist about possible adjustments. Gentle massages around the braids can relieve tension.
Your Festival Haircare Kit Essentials
Pack smart! Your festival bag should have a few haircare heroes. These will keep your style fresh and your scalp happy all weekend long.
- Satin Bonnet: For sleeping in a tent or Airbnb.
- Lightweight Oil or Serum: A drop to shine up the color and braids.
- Travel Edge Control: For quick touch-ups at the hairline.
- Scalp Soothing Spray: With tea tree or peppermint to refresh.

How to Wash Your Scalp With Braids
Yes, you can and should wash your scalp! Mix a diluted shampoo in an applicator bottle. Gently apply it along your parts, massage with your fingertips (not nails), and rinse thoroughly.
Focus on the scalp, not the length of the braids. Follow with a light, diluted conditioner on the scalp if needed, or just a rinse-out conditioner on your own hair ends if they’re exposed. Dry thoroughly with a microfiber towel.

Fighting Frizz and Flyaways
A little frizz is normal, especially after washing or in humidity. Have a small toothbrush or soft bristle brush dedicated for this. Spray it lightly with water or a bit of holding spray.
Then gently smooth down the flyaways along your parts and the braids themselves. A tiny bit of gel or edge control on the brush can help, but don’t overdo it to avoid buildup.

Accessorizing Your Vibrant Braids
Accessories take it to the next level. Think holographic cuffs, delicate gold chains woven through, or simple metallic beads at the ends. Less is often more—let the color be the star.
For a festival, playful accessories like feathers or colorful threads can be so fun. Just make sure they’re secured well so you don’t lose them in the crowd!

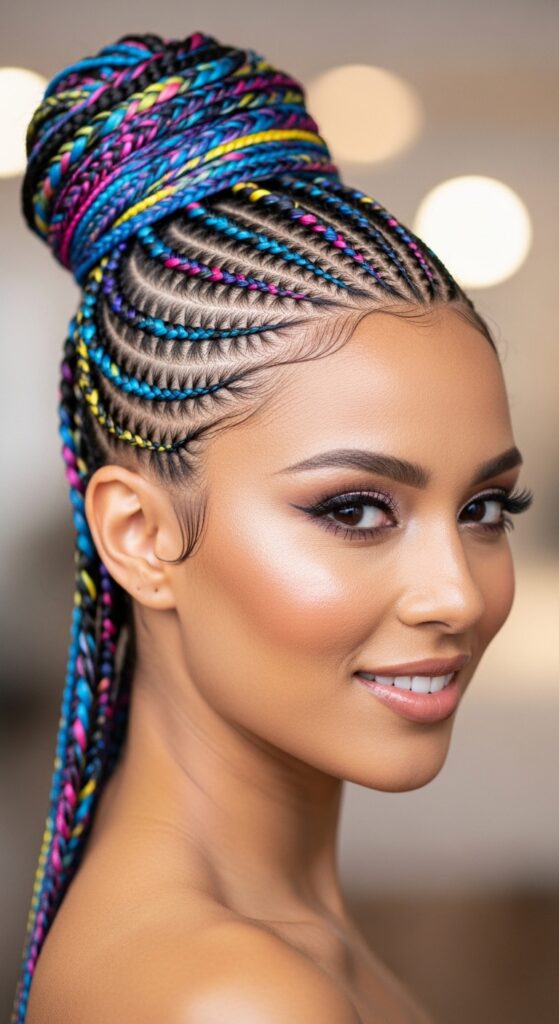
Styling Variations: Half-Up, Buns, and More
Don’t just wear them down! A high half-up ponytail shows off the intricate front patterns. A low bun looks elegant. You can also pin back the front sections with decorative clips for a different vibe.
Play around! The structure of cornrows gives you so many styling options that are both cute and practical for keeping hair off your face while you’re dancing.
How Long Will This Style Last?
With proper care, color-streaked cornrows can last 4 to 6 weeks. The color may fade slightly, especially bright fashion colors, but that can create a cool, pastel effect. The braids themselves will start to grow out.
Listen to your hair and scalp. When you see significant new growth or feel itchiness that washing doesn’t solve, it’s time to plan for removal. Don’t leave them in too long to prevent matting.

The Take-Down Process: Be Patient & Gentle
This requires patience. Use a pair of sharp, small scissors to carefully cut the sealed ends off. Then, use a conditioner or oil to lubricate the braid as you slowly unravel it from the tip up to the root.
Never rip or pull. Detangle the unbraided hair with your fingers first, then a wide-tooth comb. Expect some shedding—it’s just hair that would have shed naturally over the weeks.

Post-Braid Hair Care and Recovery
Your hair has been in a protective style, but it needs TLC now. Give it a gentle, clarifying wash to remove all buildup. Follow with a deeply nourishing protein and moisture treatment.
Plan to wear your hair in low-manipulation styles for a week or two. Think loose buns or a chic asymmetrical lob if you need a cut. Let your scalp and hair recover fully before your next big style.

Budgeting for Your Statement Braids
This is an investment style. Prices vary wildly by location, stylist expertise, and hair used. For intricate, color-streaked work, expect a range from $300 to $800 or more. The bleaching and coloring process adds significant time and cost.
See it as paying for art and expertise. Always get a clear quote after your consultation. Remember, the cheapest option isn’t always the best when it comes to the health of your hair.

Finding Your Perfect Braider: A Checklist
Your stylist makes all the difference. Don’t just pick based on Instagram likes. Dig deeper into their portfolio and client testimonials.
- Do they specialize in color and braids?
- Is their work neat and consistent?
- Do they prioritize hair health?
- Are they licensed and professional?
- Do you feel heard in the consultation?

Own Your Look With Confidence
Walking out with this style, you will get looks. Own it! This look is about bold, joyful expression. It’s the opposite of old money hair—it’s loud, proud, and full of life.
Whether you’re channeling romantic goth hairstyles with deep hues or a glitchy glam hair vibe with neons, your confidence is the best accessory. You put in the work, now enjoy every second of it.
And there you have it, friend! Your complete roadmap to rocking the most vibrant, head-turning festival braids. It might seem like a process, but breaking it down step-by-step makes it totally achievable. The key is in the planning and choosing a skilled artist you trust.
Remember, hairstyles like this are about more than just looks—they’re about feeling powerful and expressive in your own skin. Whether you’re leaning into the vampire haircut edge or the playful spirit of glitchy glam hair, make it yours.
I’d love to see your creation! Save this post to Pinterest to keep the inspiration handy, and drop a comment below telling me which color palette you’re dreaming of. Is it electric neon or soft pastel? Let’s chat!