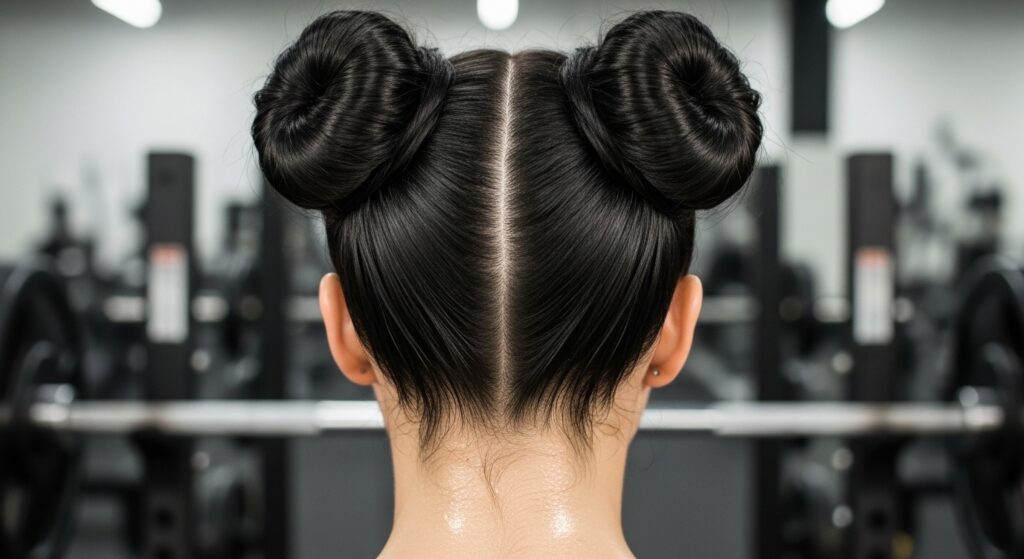
Style 14 High Twisted Buns Holding Firm Through Active Workouts
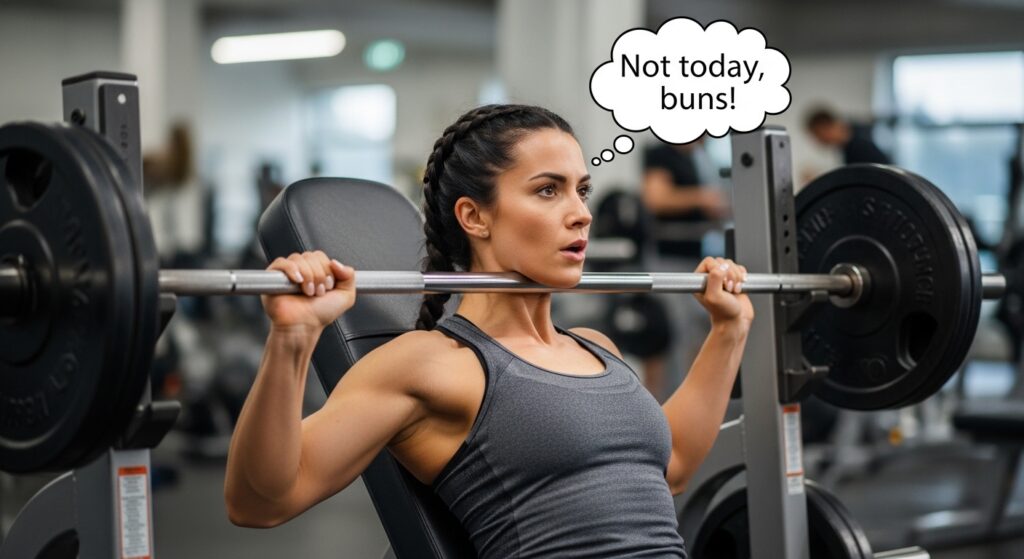
Okay, let’s be real for a second. How many times have you started a workout with a cute hairstyle, only to have it completely fall apart halfway through? I’ve been there more times than I can count. It’s the worst feeling, especially when you just want to focus on your session, not your slipping bobby pins.
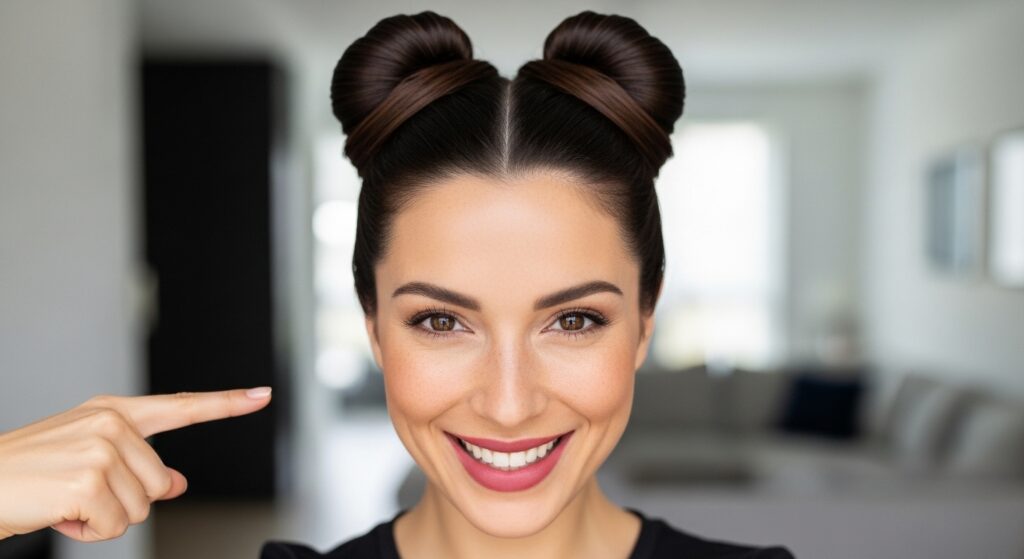
That’s why I became obsessed with finding a style that actually holds. And friends, I think I’ve found the holy grail for active days: the double high twisted bun. It sounds simple, but the specific way you twist and secure it makes all the difference.
This isn’t just for the gym. It’s perfect for busy days, running errands, or when you want your hair completely off your face but still look put-together. It’s a functional style that has a cool, almost warrior-princess vibe. Let me walk you through exactly how to get it to stay put, from prep to final hold.
Why This Bun Works When Others Fail
The secret is in the twist. A regular bun just wraps hair around a base. This method creates tension and grip by twisting each section before you coil it. It locks the hair in place from root to tip, distributing the weight and movement evenly.
It also keeps shorter layers and flyaways contained much better. The double-bun style balances the look, so it doesn’t feel too heavy on one side of your head, which is key for high-impact activities like running or HIIT.
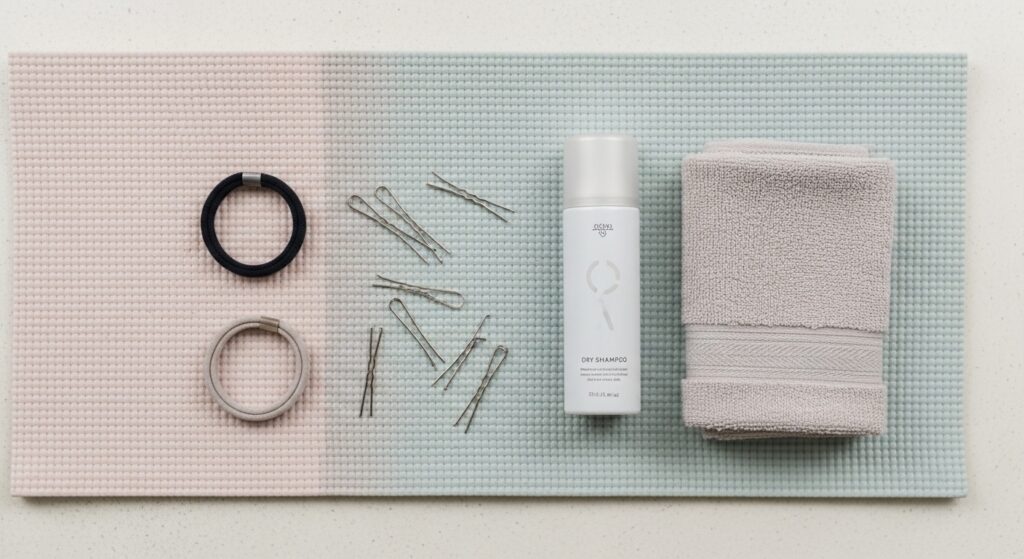
Gathering Your Simple Tool Kit
You don’t need much! In fact, over-complicating it with too many products can weigh hair down. Here’s my bare-bones, can’t-fail kit for this style:
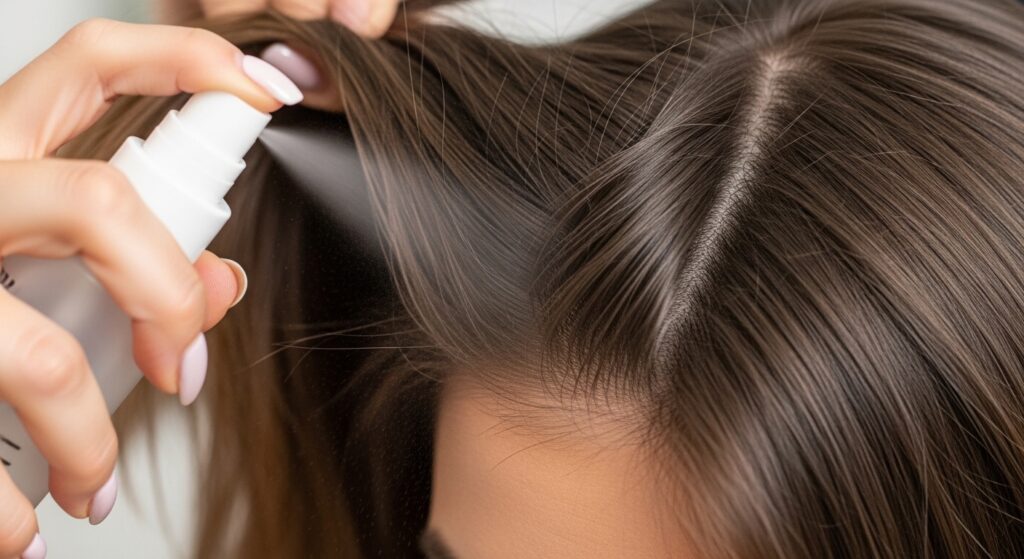
- Texture Spray or Dry Shampoo: A light spritz at the roots gives new or clean hair some grit to hold onto.
- Strong-hold Elastic Bands: The thin, no-slip kind. You’ll need two.
- U-shaped Hair Pins (Bobby Pins): The real MVPs. Get the strong, coated ones.
- Fine-Hair Spray (Optional): A light mist for the very end, just to seal flyaways.
Step 1: The Perfect Part Matters
Start with dry hair. A clean, straight part is crucial for this symmetrical look. Use the end of a comb or a tail brush to draw a line from the front of your head to the nape of your neck.
Make sure it’s neat. A messy part will make your buns look uneven, and the style will feel off-balance. If you want a more relaxed vibe, a soft zig-zag part can add a touch of that glitchy glam hair randomness.
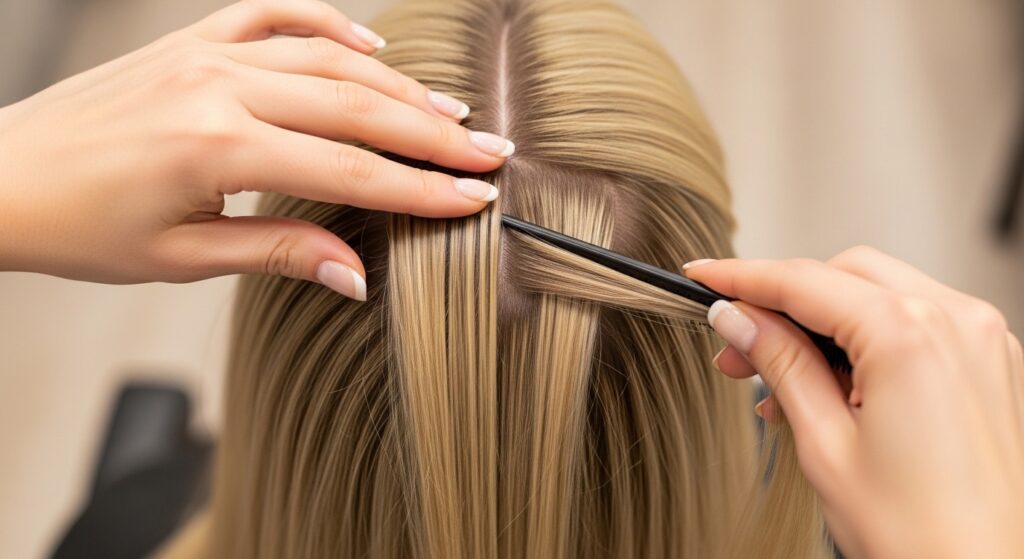
Step 2: Creating Two High Ponytails
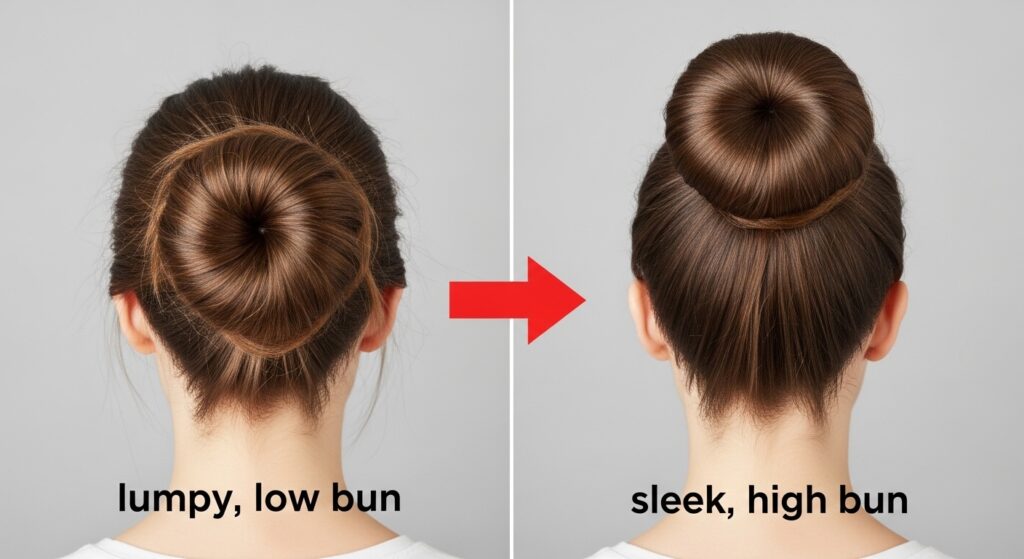
Gather the hair on each side of your part. Pull them up to the crown of your head, right above your ears. They should sit high and tight. This placement is key for the buns to feel secure and look athletic.
Secure each one with a strong elastic. Give them a gentle tug to make sure they’re firm. At this stage, they should look like two high, perky ponytails. Smooth any bumps as you go.

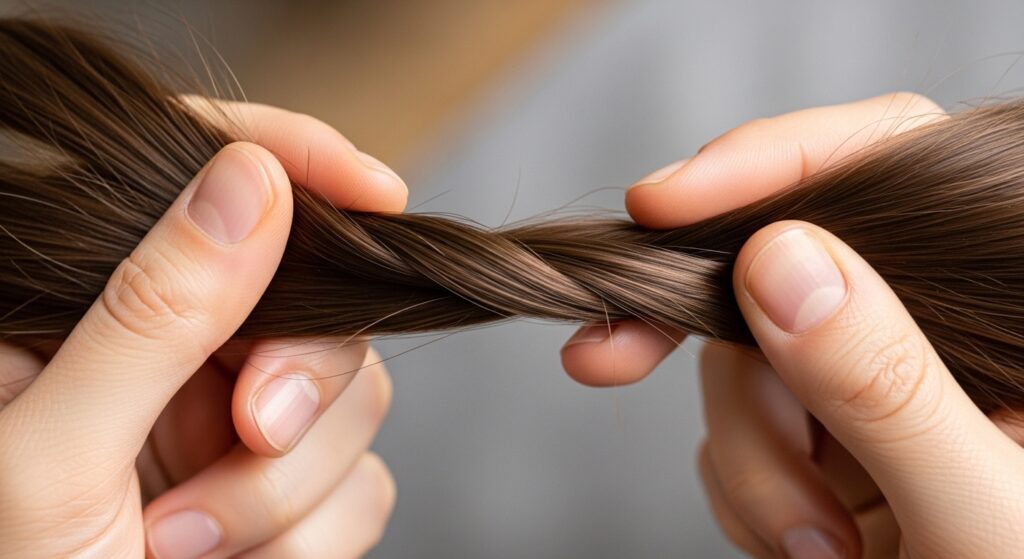
Step 3: The Magic Twist Technique
Take one ponytail and begin twisting it tightly, clockwise. Twist it all the way down to the ends. You’ll feel it getting tighter and wanting to coil up on itself. That’s exactly what you want.
Keep a firm grip. This twist is what creates the internal structure of the bun. The tighter and neater the initial twist, the cleaner and more secure the final bun will be.
Step 4: Wrapping & Securing The First Bun
Now, coil the twisted rope around the base of the ponytail. Wrap it tightly, following the direction of the twist. It should naturally lay flat against your head.
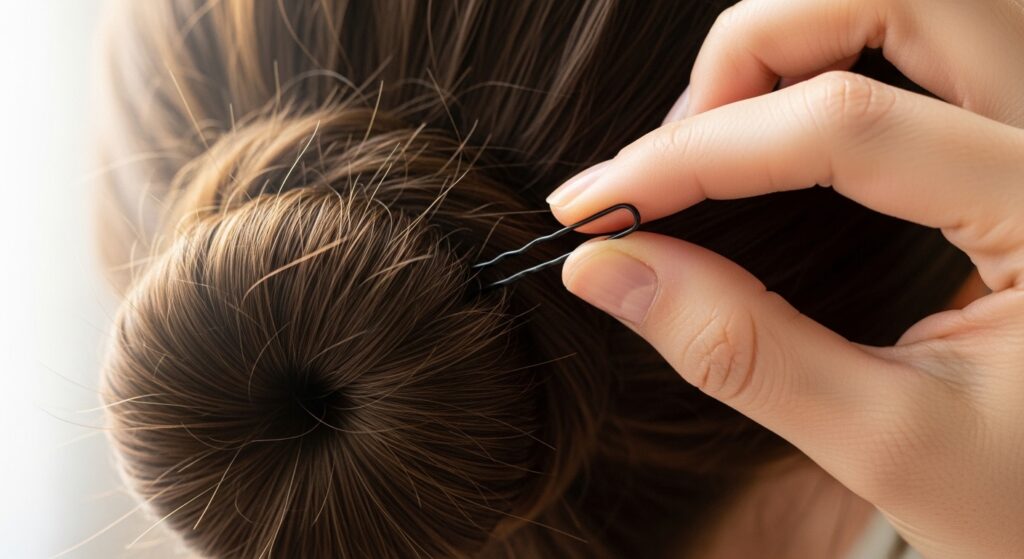
As you wrap, tuck the end of the hair under the coil. Hold the bun in place with one hand. With the other, reach for your bobby pins. Don’t just stab them in—slide them into the base, catching your scalp hair for maximum grip.
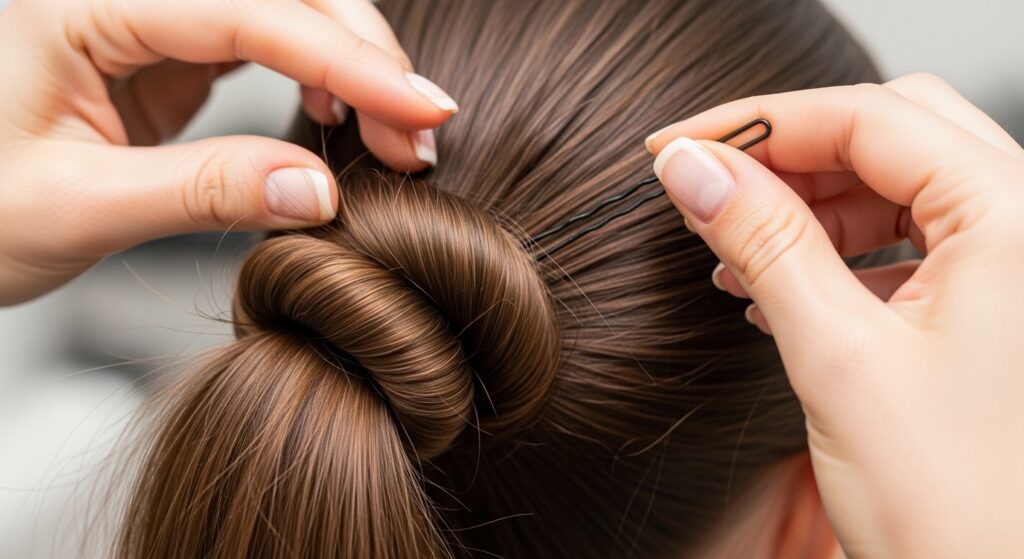
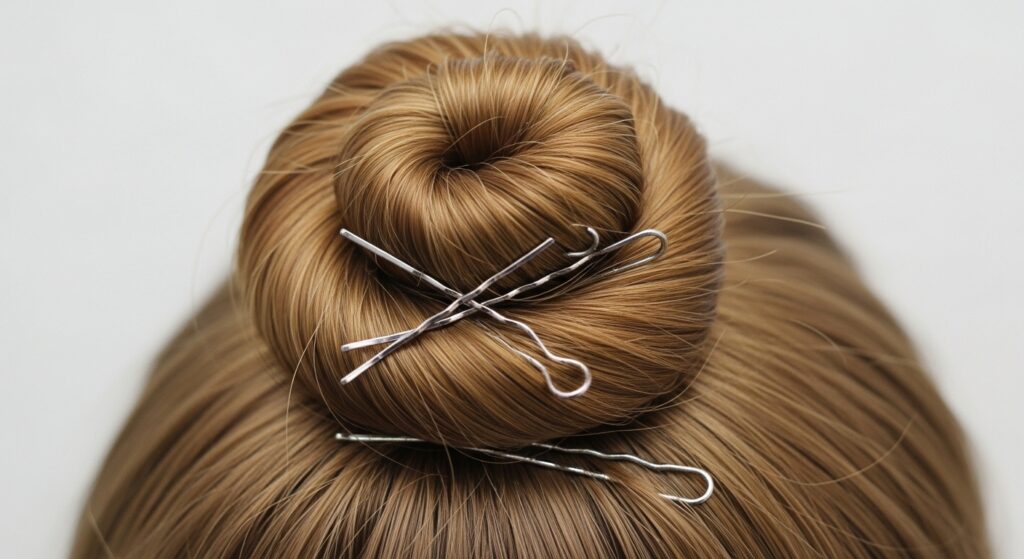
Step 5: Locking It Down with Bobby Pins
Use more pins than you think you need. I use 3-4 per bun. Slide the pins in with the wavy side down, against your scalp. Criss-cross them for a stronger hold.
Really push them in until they feel snug. A wobbly pin is a bun about to fail. This is the step that makes it workout-proof. Once they’re in, gently shake your head. If anything feels loose, add another pin.
Step 6: Repeat on The Other Side
Go back to your second ponytail and repeat the exact process: twist, coil, and pin. Try to mirror the placement and tightness of your first bun.
Take a look in a mirror from the front and side to check they’re even. A quick adjustment now is easier than fixing it halfway through your day. Symmetry is what gives this style its polished, intentional look.
Pro Tip: For Super Slick Hair
If your hair is very silky or freshly washed, add a texturizing spray at the very beginning, before you part your hair. Focus it on the mid-lengths and roots where you’ll be twisting and pinning.
This gives the hair something to grip. It’s the same principle behind many 2026 hairstyles that focus on lived-in texture and hold. A little grit goes a long way.
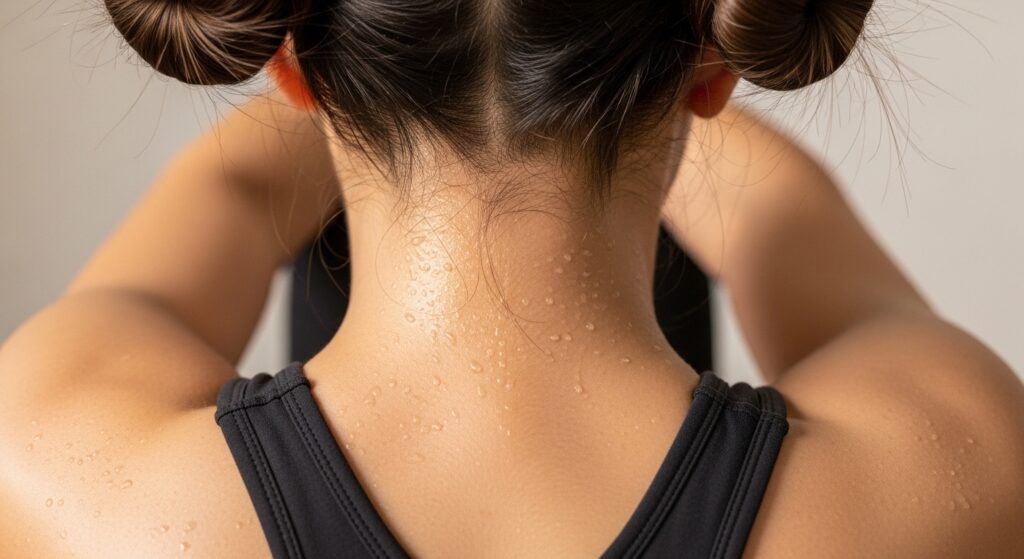
Making It Last Through Cardio
The true test! For running or jumping, lean more on the bobby pins. After you’ve pinned, take one final pin and slide it horizontally through the center of the bun, anchoring it deeply.
Do a few test jumps in front of the mirror. If you see any wobble, that’s where you need an extra pin. Trust me, this will survive a full spin class.
The “I Woke Up Like This” Version
For a less perfect, cooler-girl vibe, do this on second-day hair and don’t worry about a super-clean part. Pull the ponytails up a little looser, and let a few face-framing pieces escape.
It gives off a similar effortless energy to the old money hair trend—polished but not trying too hard. It’s perfect for a busy day that goes from errands to an casual lunch.
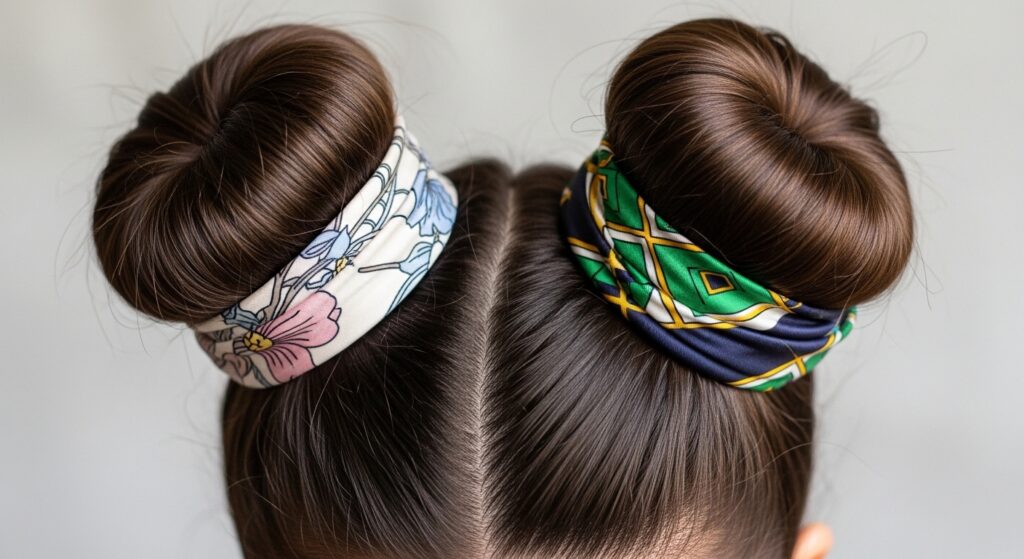
Adding a Fun Hair Accessory
Once your buns are locked in, you can have fun! Slide a sleek claw clip over the base of each bun, or wrap a scrunchie around the coil. Thin, decorative scarf ties also look amazing.
This is where you can play with different aesthetics, from a quiet luxury bob vibe with neutral silk scarves to romantic goth hairstyles with dark velvet ribbons.
What To Do With Bangs or Layers
Short layers are your friend here! They’ll tuck in and stay put. For bangs or a hime cut, you have options. Sweep them to the side and pin them back into the bun, or let your fringe hang loose in front for a softer look.
If you have an asymmetrical lob, the shorter side might not reach the bun. Just twist it and pin it flat against your head, blending it into the base of the bun seamlessly.

Transitioning From Gym to Evening
This style is incredibly versatile. After your workout, simply remove the sweaty hair ties (the buns will stay pinned!). Gently pull on the edges of the buns to loosen them slightly for a fuller, more relaxed look.
Add a sparkly pin or mist with a shine spray. In minutes, you go from gym-ready to dinner-ready. It’s a fantastic hack for days when you don’t have time to re-do your hair.

Common Mistakes & Quick Fixes
The biggest mistake is placing the ponytails too low. This pulls and gets uncomfortable. Always aim for the crown. Another error is using thick, bulky elastics—they create a lumpy base.
If your bun feels loose, it’s always a pin issue. Take it down and re-pin, using that criss-cross method. More pins, placed strategically, beat one or two shoved in randomly.
Why I Love This More Than a Ponytail
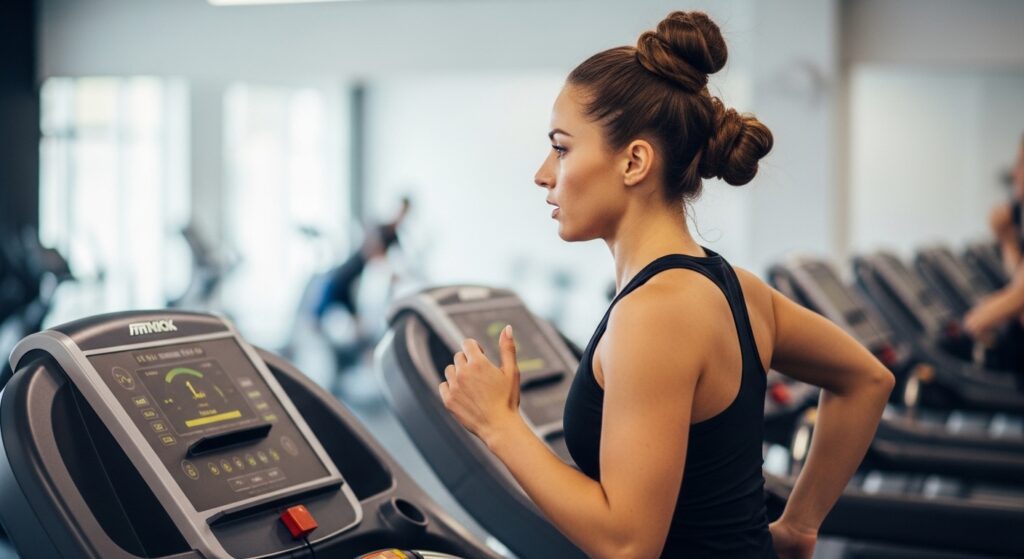
A single high ponytail can cause tension and headaches during long workouts. It also swings and slaps your neck. This double-bun style distributes the weight evenly across your head.
It feels lighter and more secure. Plus, it keeps the hair off your neck completely, which is a lifesaver in hot yoga or during summer runs. It’s simply a more functional, comfortable choice.
Adapting It For Different Hair Lengths
Long hair? You’re golden. Medium hair (like a lob)? You might have shorter ends that pop out. Just twist them and tuck them under, securing with an extra pin. Embrace the piecey look!
For shorter cuts inspired by the vampire haircut or a pixie, you can create mini top-knots instead. The same twisting principle applies—just on a smaller, edgier scale.
My Favorite Products For Maximum Hold
While you don’t need much, a few heroes make it bulletproof. I love a dry texture spray for grip and a super-strong-hold hairspray that’s still flexible.
- Living Proof Dry Volume Blast: Amazing root lift and grit.
- Bobby Pins from Goody or Kitsch: Their grip is unmatched.
- Ouai Fine Hair Spray: Holds without crunch or stickiness.

How It Complements Your Features
This style acts like a natural facelift, pulling the eyes upward. It highlights your cheekbones and jawline. It also shows off your neck and earrings, adding a touch of elegance.
It’s a confident look. Having your hair completely off your face feels powerful and freeing, letting your features shine. It’s a great way to change up your silhouette from softer styles.
When This Style Isn’t The Best Fit
Be honest about your workout. For exercises where you’re lying flat on your back (like bench presses or floor stretches), these buns can be uncomfortable. A low, flat braid might be better.
If you have a severe tension headache or a sensitive scalp, the tightness might not feel good. Listen to your body. The goal is to feel good, not just look good.
Your Questions, Answered!
Q: Does it work on thin hair?
A: Absolutely! The twisting technique actually creates the illusion of more volume. Just focus on the texture spray at the roots.
Q: How do I take it down without breakage?
A: Gently remove pins, then carefully cut the elastics out with scissors. Never rip them out! Detangle from the ends up.
The Final Shake Test
Before you head out, do the ultimate test. Jump up and down, shake your head side to side, and flip your head over. If anything feels loose or wobbly, now is the time to fix it.
Once it passes, you can hit your workout—or your busy day—with total confidence. No more constant adjusting or worrying about a hair escape.
So, that’s my not-so-secret weapon for days when my hair just needs to stay put. It took a few tries to perfect the pinning technique, but once I got it, it changed my active routine completely. No more messy, frustrating hair moments mid-burpee.
I love that it’s a style that works as hard as I do, but still looks like I put in some effort. It’s that perfect blend of practical and polished that makes you feel pulled together, even when you’re drenched in sweat.
Give it a try this week and let me know how it holds up for you! Did it survive your workout? Did you dress it up for after? I want all the details.
Save this post to Pinterest so you always have the steps handy! And tell me in the comments—what’s your biggest hair struggle during workouts?