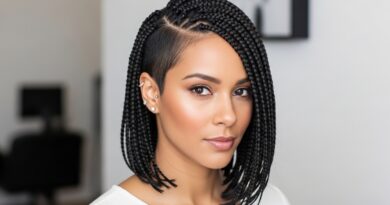
Flatter 25 Goddess Knots Enhancing Thickness Illusion for Fine Strands
Hey friend. Let’s talk about that feeling when you run your fingers through your hair and wish there was just… more of it. I get it. My fine hair has been a source of both love and frustration for years. We crave those beautiful, intricate styles we see everywhere, but they often feel impossible to achieve without major volume.
That’s why I’m obsessed with the goddess knot. It’s not just another updo; it’s a total game-changer for creating the illusion of thickness. It’s all about strategic twisting and pinning to build body and texture right from your roots.
This post is your ultimate guide to 25 ways to wear it. We’re going beyond the basic knot. I’ll show you how to adapt this style for every vibe—from old money hair elegance to romantic goth hairstyles drama. Get ready to make your fine strands look incredibly lush.
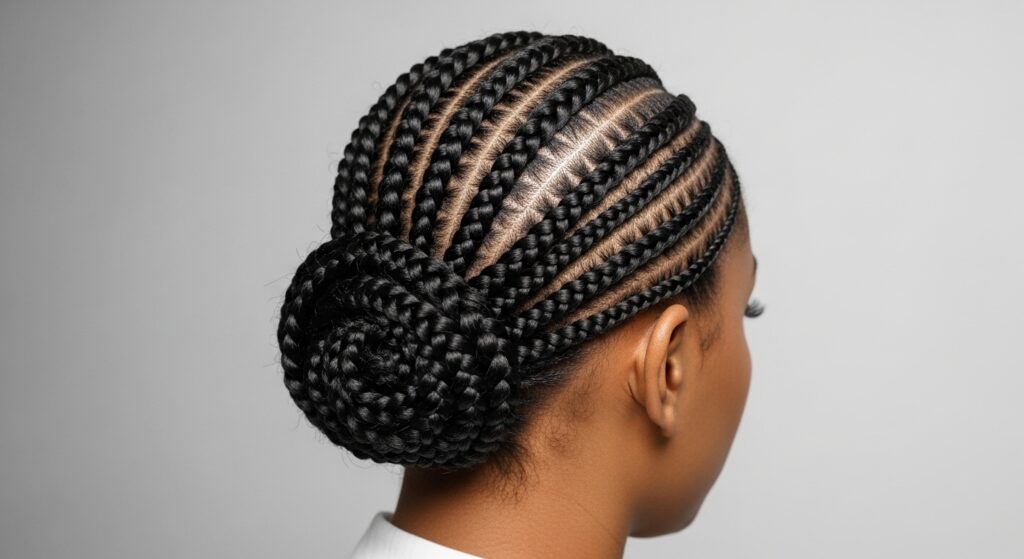
1. Why The Goddess Knot Is A Fine Hair Hero
So, what makes this style so special? Unlike a regular bun that can flatten your crown, the goddess knot is built. You create volume by twisting sections and pinning them strategically at the base. This lifts your roots instantly.
The weaving technique also gathers hair in a way that makes your ponytail or base look twice as thick. It’s a physical illusion you can see and feel. It’s secure, elegant, and works on even the silkiest, most slippery strands with the right method.
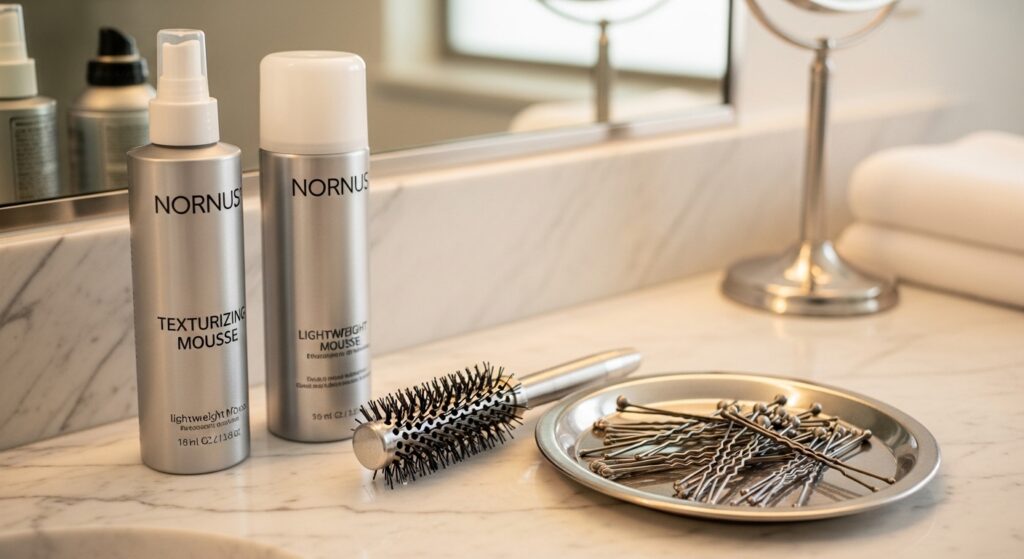
2. Your Essential Prep Work For Lasting Volume
Preparation is everything. Start with day-old hair or use a dry shampoo at your roots. This gives your hair some grip. I always use a lightweight volumizing mousse on damp hair before blowing it out.
For styling, have these ready:
- A fine-tooth comb for clean sections.
- A texturizing spray for grit.
- A small teasing brush for targeted lift.
- Strong, small hairpins (not bobby pins!) and a snag-free elastic.
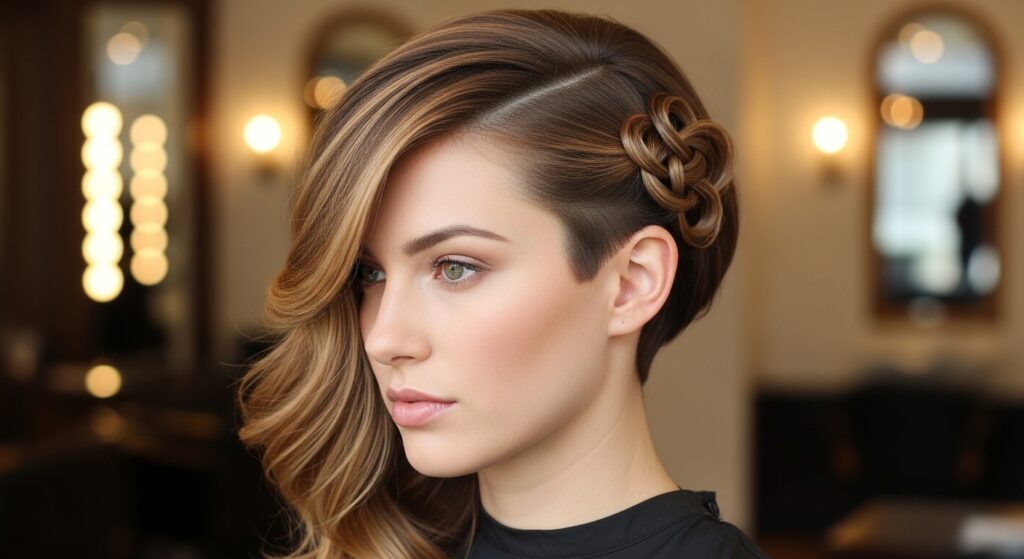
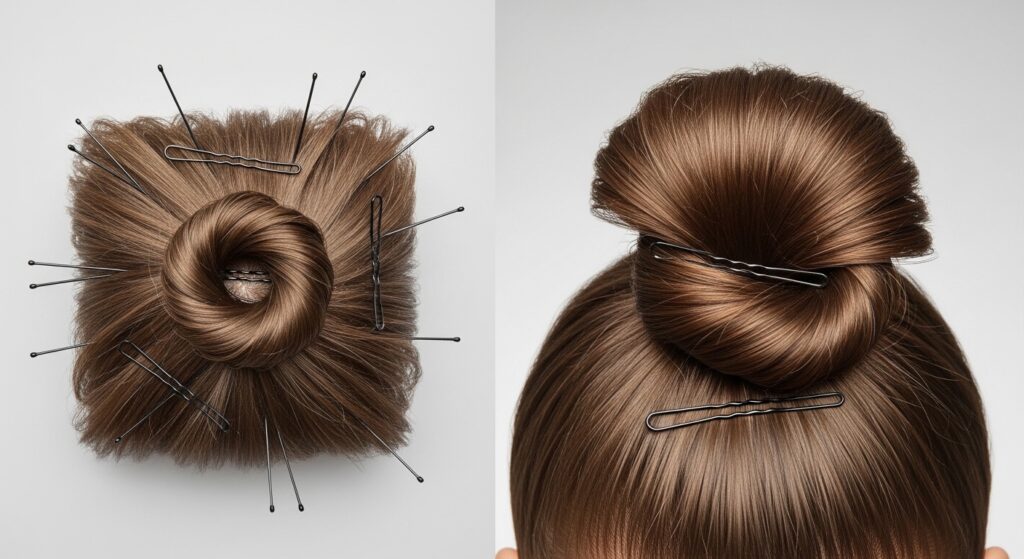
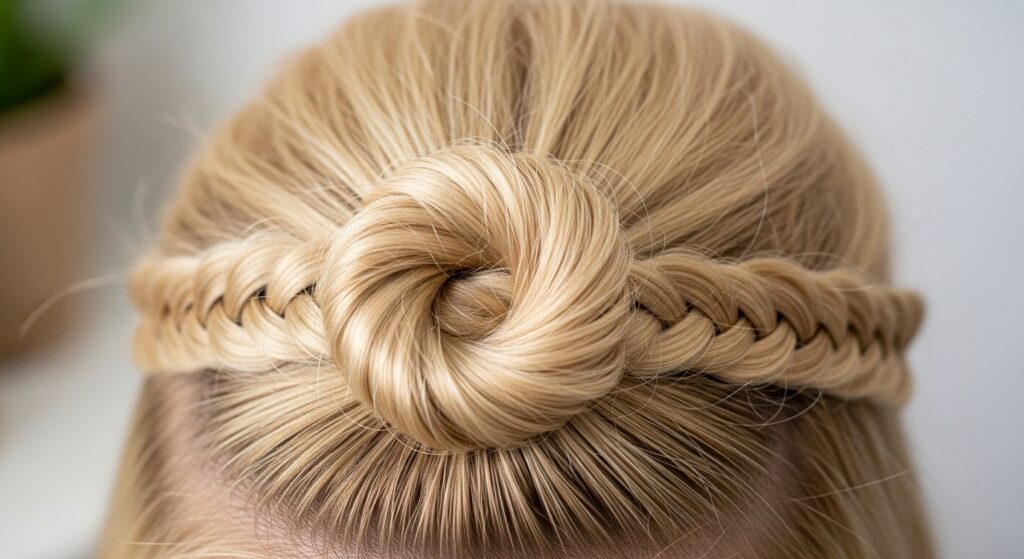
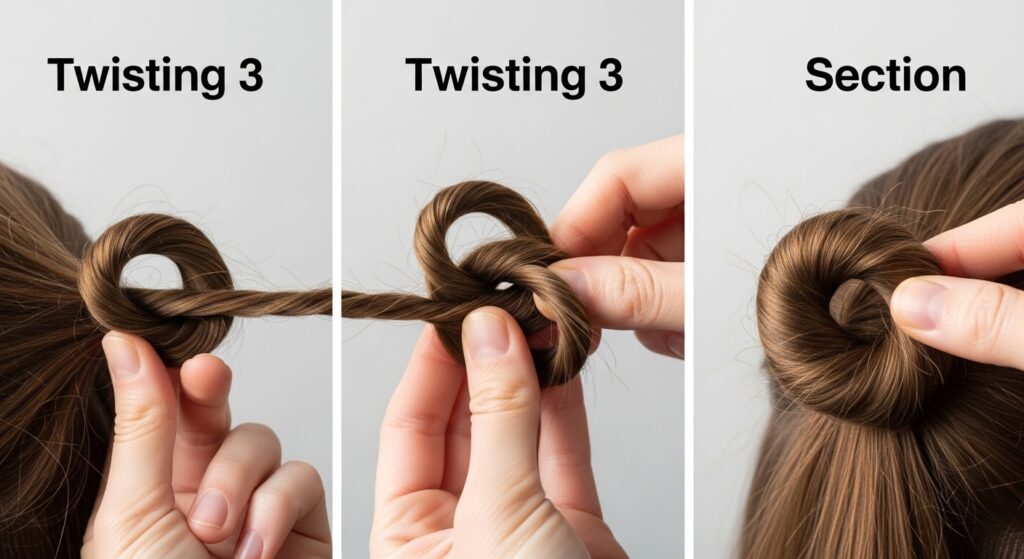
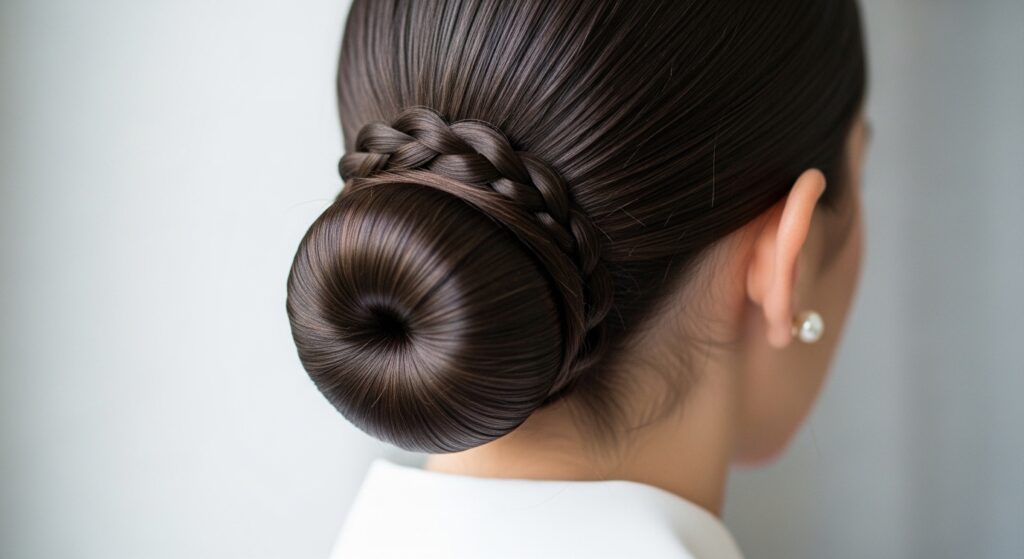
3. The Foundational Knot: Step-By-Step
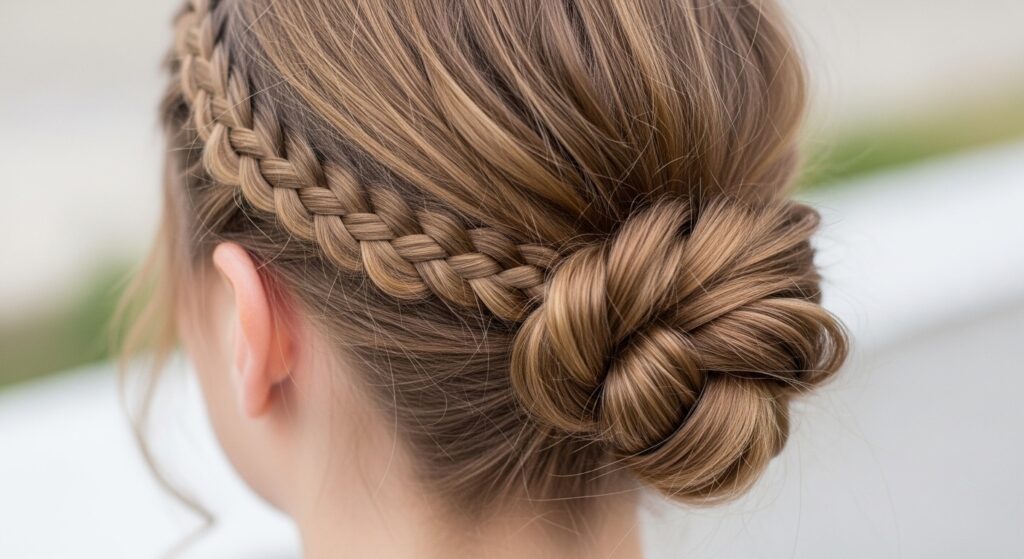
Let’s master the basic move. Start by gathering a deep, face-framing section from your temples and crown. Lightly tease the roots of this section for hold.
- Twist this section gently back towards the crown of your head.
- Loop the twist into a loose, soft knot and hold it in place.
- Using your pins, secure the knot right at the base where the twist begins. Don’t pull tight—keep it soft and elevated.
- This lifted knot becomes the “anchor” for the rest of your style.
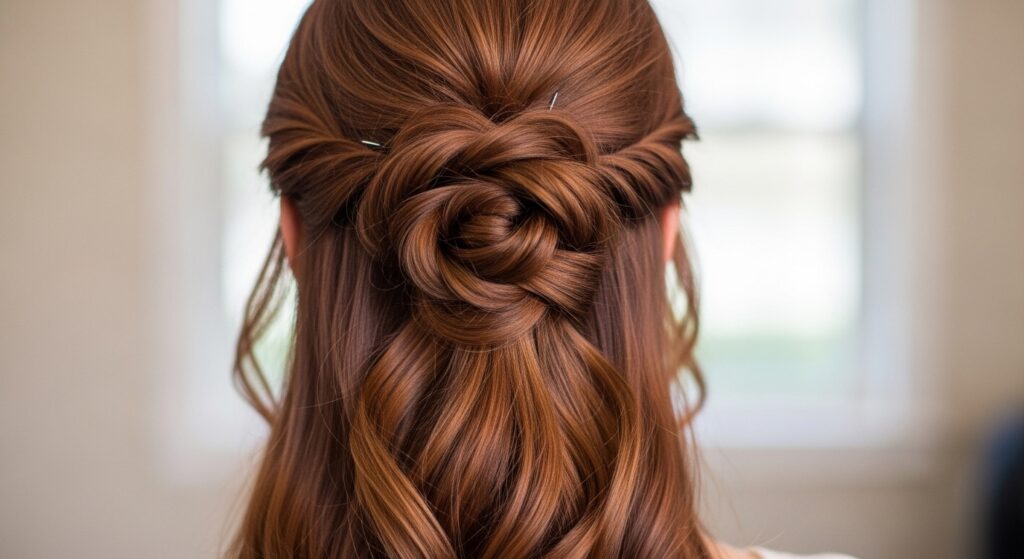
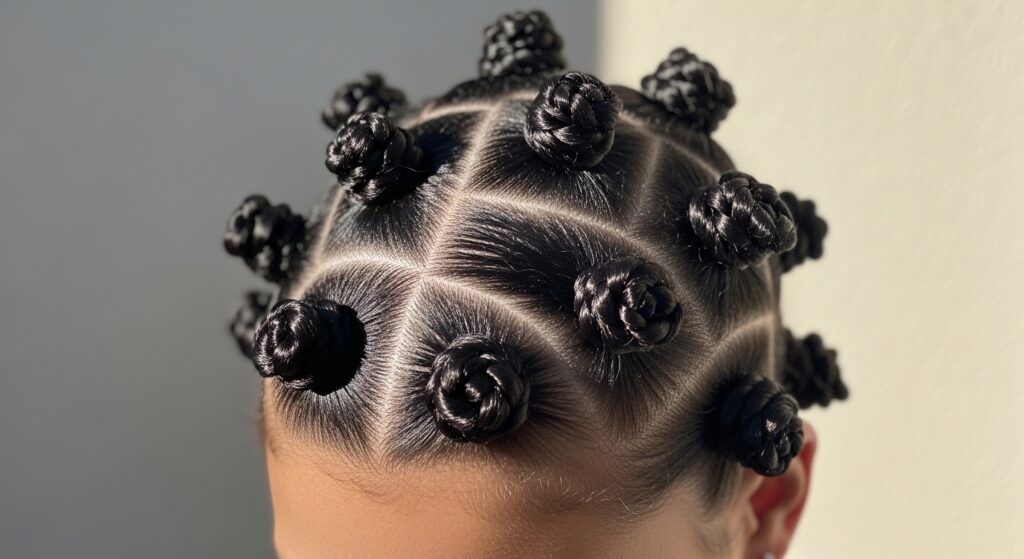
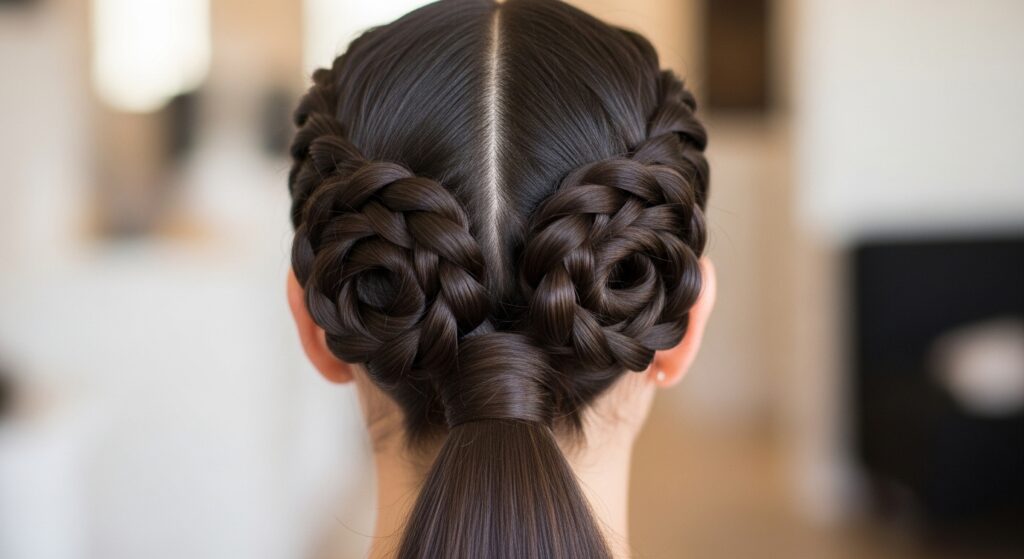
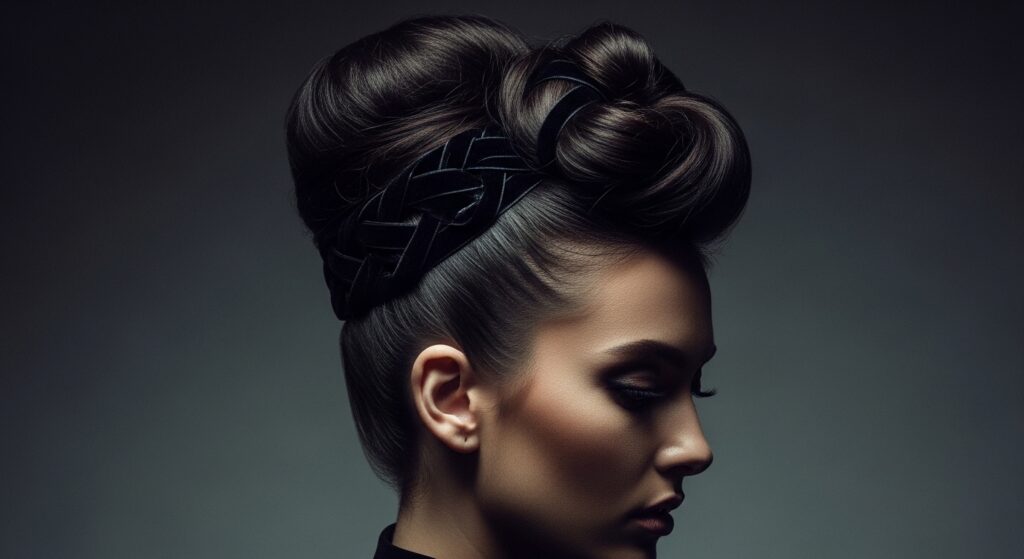
4. The Double Knot For Maximum Fullness
Want even more impact? Create two foundational knots. Part your hair down the middle from forehead to nape. On each side, take a temple-to-crown section.
Create a goddess knot on each side, pinning them side-by-side at the back of your crown. This gives you a wide, voluminous base. You can then gather all your hair, including the knots, into a low ponytail or chignon. The difference in thickness is unbelievable.
5. The Old Money Hair Goddess Bun
This is quiet luxury for your hair. Create one clean, polished goddess knot at the back of your head. Smooth all your remaining hair into a low, tight ponytail.
Wrap the ponytail around the base to form a classic bun, tucking the ends and pinning. The secret is the knot underneath, which pushes the bun up and out, making it look fuller and more intentional. It’s polished, rich, and perfectly undone.
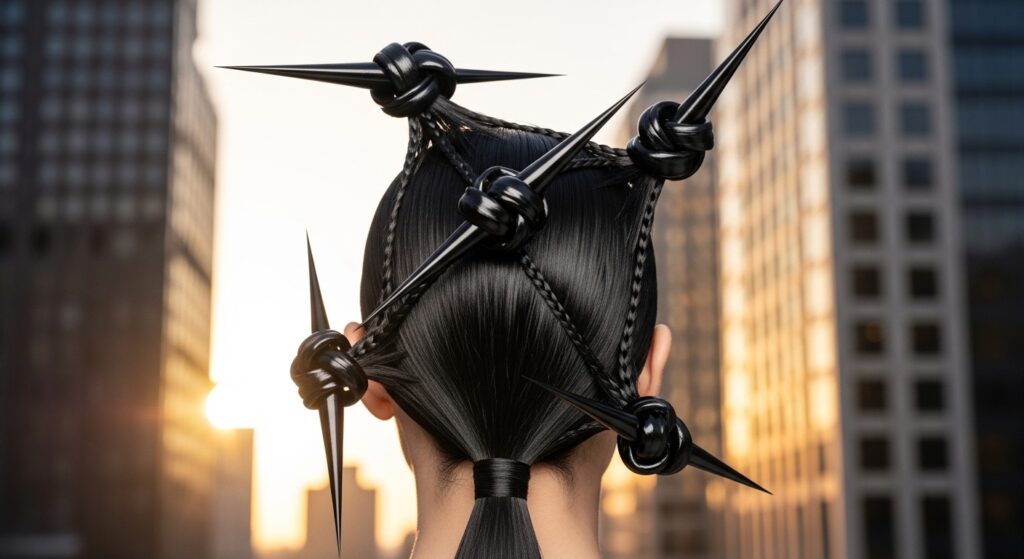
6. A Romantic Goth Twist
Incorporate this into your romantic goth hairstyles repertoire. Start with deeply textured, waved hair. Create a looser, messier goddess knot on one side of your head.
Before you pin it, weave a piece of velvet ribbon or a chain through the twist. Let a few tendrils escape. The knot adds structured volume that contrasts beautifully with the deliberate messiness. It’s darkly romantic and full of body.
7. With Face-Framing Tendrils & Layers
Have layers? Use them! This style actually looks better when not all hair is captured. After creating your knot, deliberately pull out your shortest face-framing layers and a few pieces around your ears.
Use a curling iron to bend these pieces away from your face. They’ll hide the pins and make the style look effortless and soft. The knot gives structure, while the tendrils keep it modern and flattering.
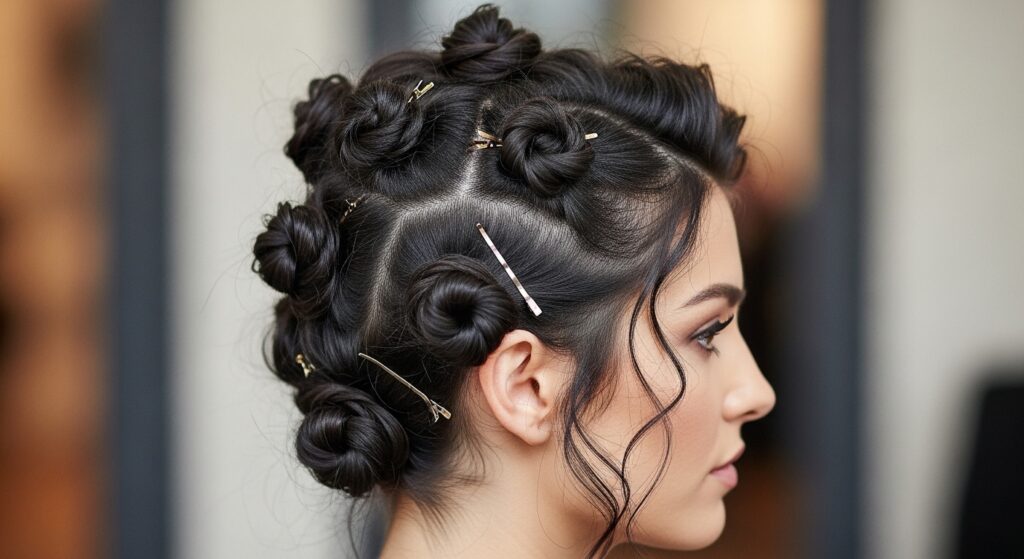
8. The Glitchy Glam Hair Approach
For that glitchy glam hair vibe, think asymmetrical and deconstructed. Create multiple small goddess knots scattered across your crown. Don’t make them perfect. Twist some tighter, some looser.
Leave the ends of the twists sticking out. Secure random sections with shiny, metallic hair clips. The goal is a “broken” yet beautiful look—like a stylish digital error. The knots create unexpected points of volume.
9. Adapting It For An Asymmetrical Lob
Short hair can do this too! If you have an asymmetrical lob or angled bob, focus on mini knots. On the longer side, take a section above your ear.
Twist it back and create a small, flat knot, pinning it close to your head. This gives a piece of hair on that side a “lifted” effect, enhancing the asymmetry and adding a detail that prevents the style from falling flat.
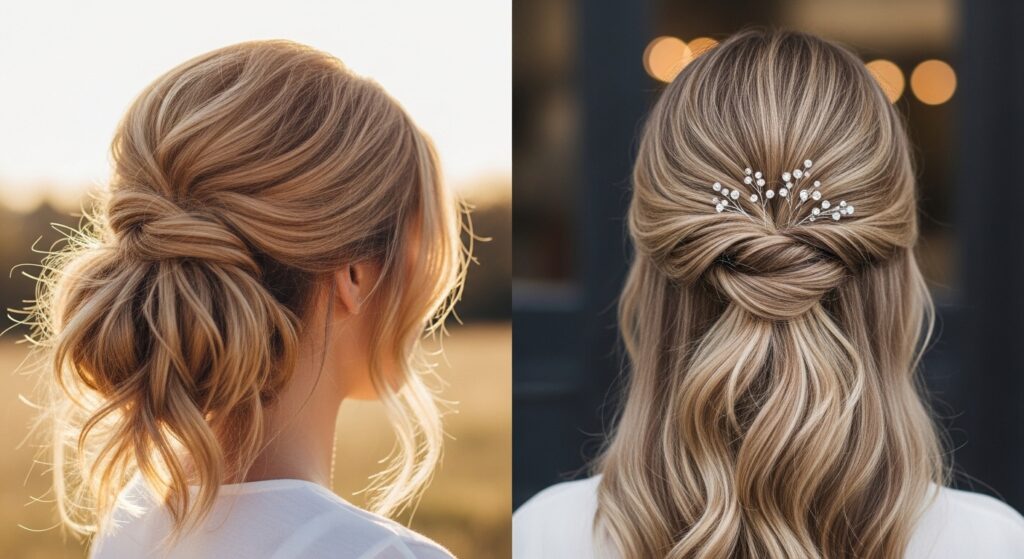
10. The Half-Up, Half-Down Volume Queen
This is my go-to for instant lift without a full updo. Create a deep half-up section, but instead of just tying it, form a goddess knot with it. Pin it securely at the back of your crown.
Let the rest of your hair flow down. The knot acts like a volume cushion, making the top half of your hair look incredibly thick and supporting any waves beautifully. It’s simple but so effective.
11. Incorporating Braids For Texture
Add even more grip and visual interest. Take the section for your knot and split it in two. Braid one of the sections loosely before you start the twisting process.
Then, incorporate the braid into your twist as you form the knot. The braid adds texture for the pins to hold onto and creates a beautiful, detailed look when you view the knot from the side.
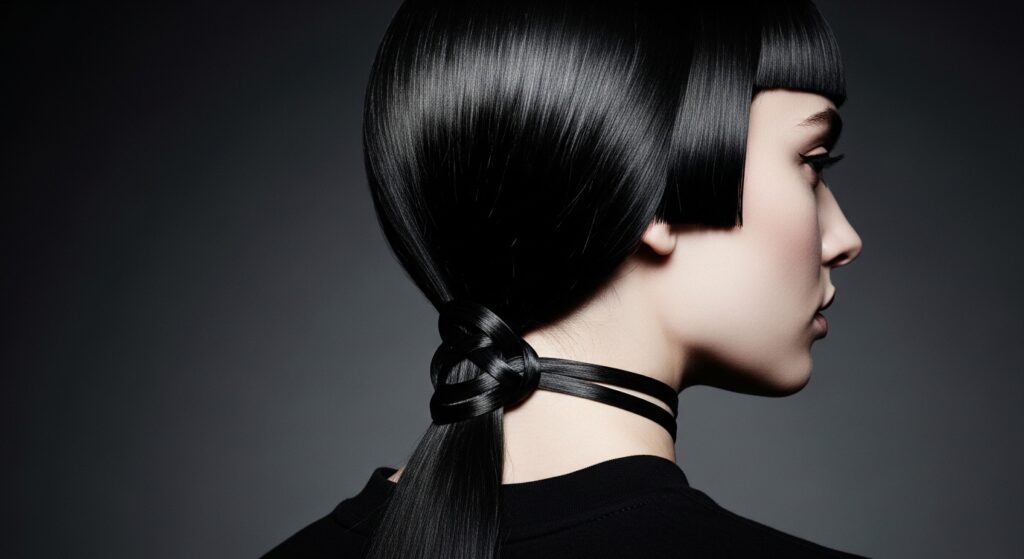
12. The Vampire Haircut Companion
If you rock a sharp vampire haircut, this adds a touch of ornate detail. On sleek, straight hair, create a single, precise goddess knot at your nape.
Keep the knot tight and neat, contrasting with the bluntness of your cut. It turns a simple low style into something regal and dramatic, perfect for enhancing that dark, elegant aesthetic.
13. Hime Cut Meets Goddess Knot
The hime cut is all about dramatic shapes. Use small goddess knots as decorative anchors. Where your short, blunt sidelocks meet the longer back hair, take a small section from each side.
Create a tiny, flat knot on each side to “mark” that intersection. It adds a folkloric, detailed touch that complements the cut’s geometry and keeps the shorter layers neatly defined.
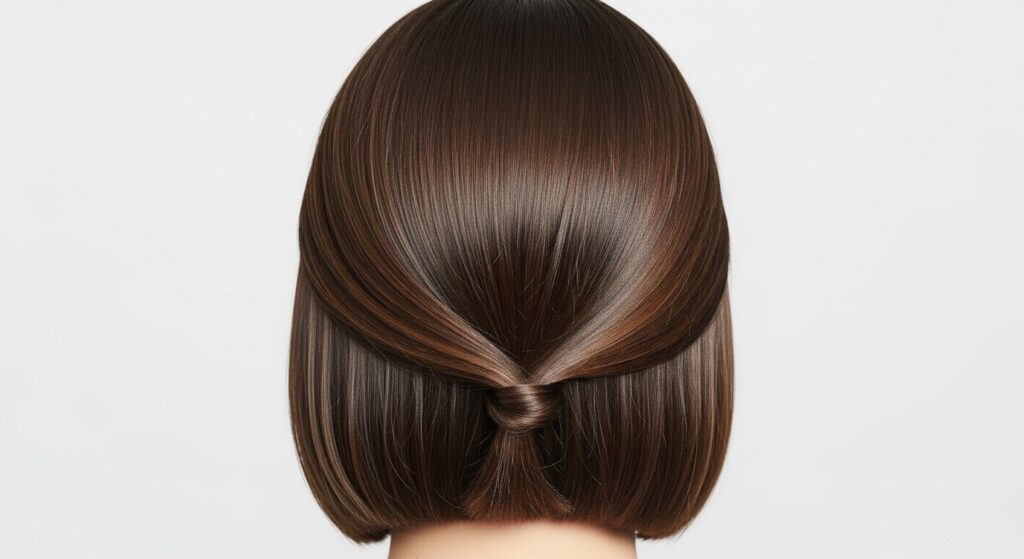
14. For A Modern, Quiet Luxury Bob
Elevate your quiet luxury bob with hidden volume. On a smooth, blown-out bob, create a very small, flat goddess knot right at the occipital bone (the bump at the back of your head).
Pin it so it’s seamless. This subtly lifts the hair above it, giving your bob a rounded, expensive shape without any visible styling. It’s the ultimate secret weapon for that “perfect cut” look.
15. The Messy Weekend Knot
For weekends, embrace the mess. Create two or three loose goddess knots around your head without worrying about perfection. Don’t pin all the ends in.
Let them fray. Pull out lots of face-framing pieces. The combination of the knotted sections gives the messy updo a solid foundation of volume, so it looks intentionally chic, not just sloppy.
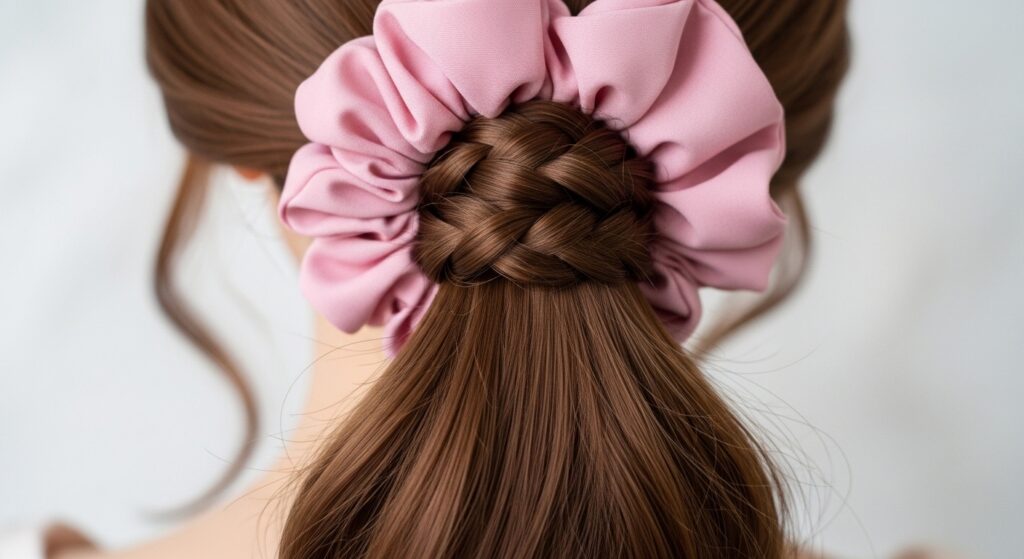
16. Using Accessories: Scrunches & Claws
Accessories are your friends. After making a ponytail with a scrunchie or claw clip, don’t just stop. Create a small goddess knot with a section of hair right at the base of your ponytail.
Pin it to cover the elastic or clip. This hides the hardware and makes the base of your ponytail look thicker and more decorated. It instantly upgrades a simple look.
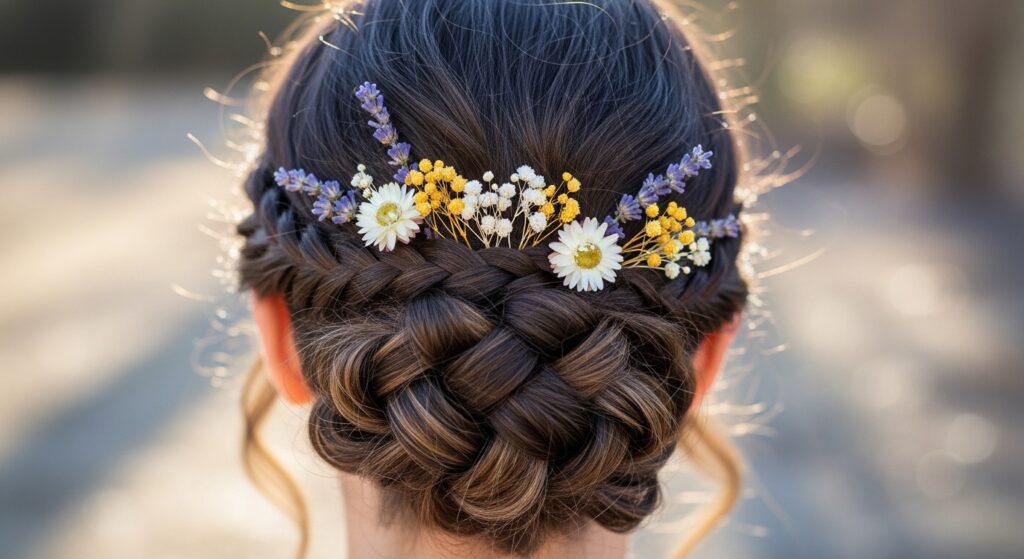
17. The Festival-Proof Updo
Need a style that lasts all day? Build a fortress of knots. Start with multiple small goddess knots close to your scalp as a base. Then, gather the remaining hair and incorporate it into larger knots.
Weave in strings of beads or small flowers as you go. Because each knot is individually pinned, the style holds up to wind and dancing much better than a single bun or braid.
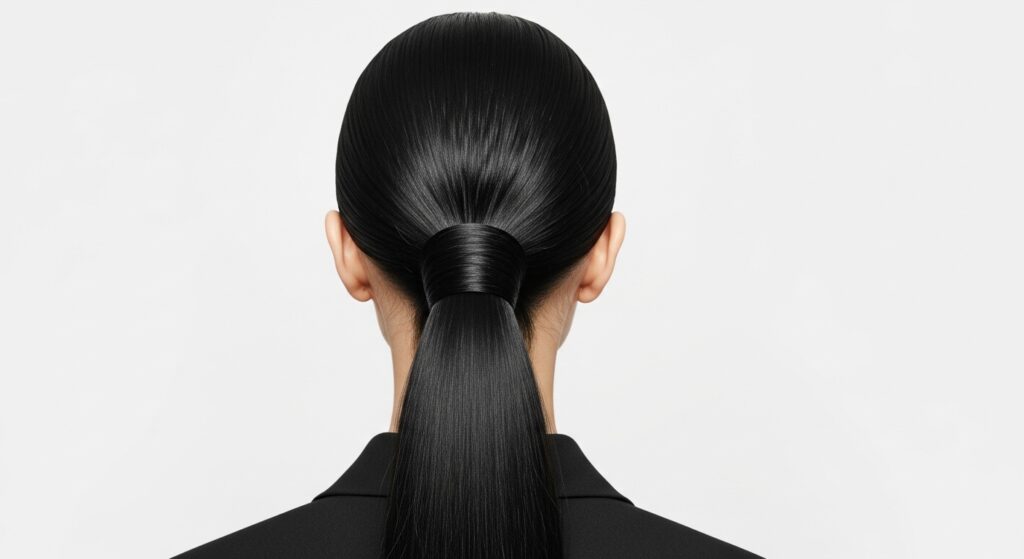
18. Sleek & Smooth For Fine, Straight Hair
Fine, straight hair can look incredibly chic. Apply a smoothing serum and blow-dry your hair straight. Create a single, taut goddess knot at the back of your head.
Keep the twist very neat before knotting. Use the rest of your hair in a low, slick ponytail. The knot introduces a sculptural element and volume break in an otherwise ultra-sleek look.
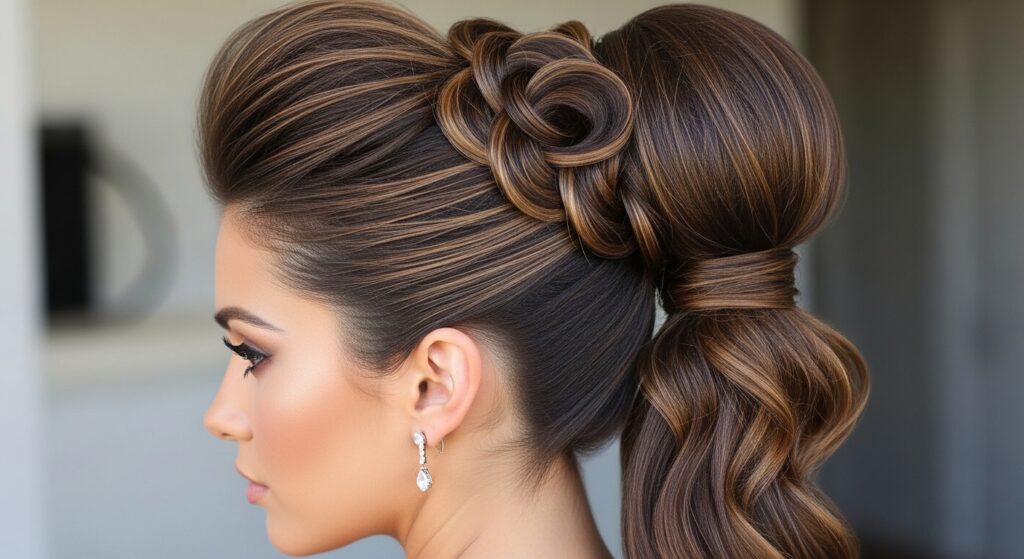
19. The Voluminous Ponytail Base
Say goodbye to flat high ponytails. Before gathering your high pony, take the top section of your hair (from temples back) and create a goddess knot where you want the base of your ponytail to be.
Then, gather all your hair, including the knot, into your high ponytail. The knot acts like a built-in volumizer, giving you that coveted “ponytail lift” without teasing or backcombing.
20. A Look Ahead: 2026 Hairstyles Preview
Looking at 2026 hairstyles trends, we see structure and artistry. The goddess knot is evolving. Think bigger, looser knots placed in more artistic placements—like off-center at the temple, or multiple knots forming a line down a center part.
The focus is on hair as sculpture. This technique is perfect for that because it builds form. Start practicing now to be ahead of the curve with these wearable art pieces.
21. Common Mistakes & How To Fix Them
The main mistake? Not pinning securely. Pins should go through the base of the knot AND into your root hair. Always criss-cross them for hold. Another error is twisting too tightly—keep it soft for volume.
If your knot slips, you likely didn’t start with textured hair. Go back, add texturizing spray at the roots, and try again. Using small sections for multiple knots is better than one big, heavy one that falls.
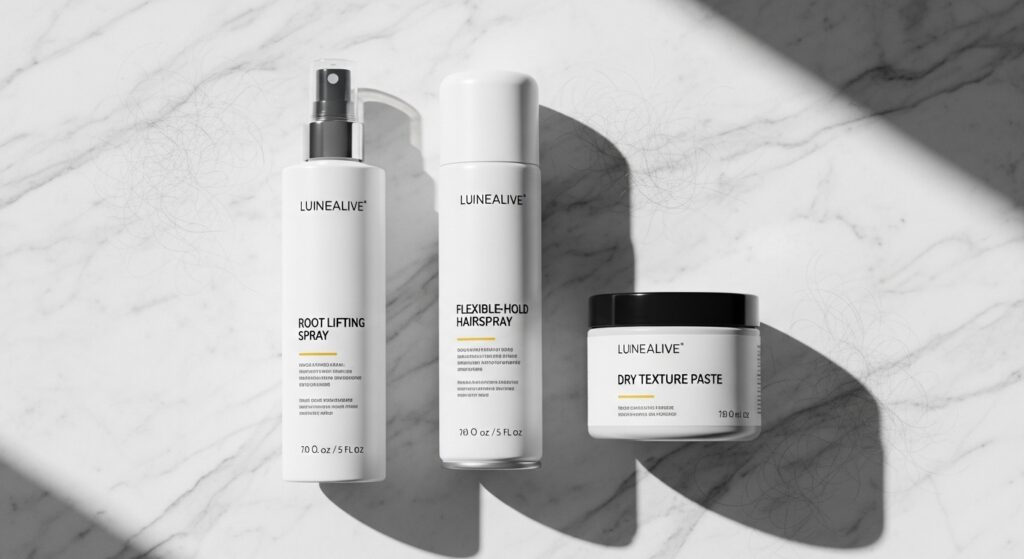
22. Products That Are Non-Negotiable
My holy trinity for this style:
- Root Lifter: Spray on damp roots before blow-drying for lasting lift.
- Dry Texture Spray: The grit needed for pins to grip fine hair.
- Flexible Hold Hairspray: A final mist to lock in style without crunch.
Skip heavy oils or creams. You need grip, not slip. A good volumizing mousse is also a great base layer.
23. How To Make It Last All Day & Night
For all-day hold, technique is key. After you pin each knot, gently tug on the sides of it to “set” the pins and create a bit more volume. Carry a few extra pins and a travel hairspray for touch-ups.
If you feel it loosening, don’t panic. Find a bathroom, spritz a bit of texturizing spray at the base, and push in a fresh pin or two. The beauty of this style is it’s easy to reinforce.
24. From Day To Night: Quick Transformations
Take your daytime knot to dinner in minutes. For a day look, keep it soft and maybe half-up. To transition, pull out a few more face-framing pieces and curl them.
Swap your simple pins for a couple of decorative ones—think gold or pearl-tipped. Spritz a shine spray or add a gloss to the lengths. It’s about small, impactful changes that elevate the entire vibe.
25. Your Practice Plan: Start Simple
Don’t try the most complex version first. Start with the foundational knot in Section 3. Practice on day-old hair when you’re home alone. Use a mirror in front and a hand mirror behind to see what you’re doing.
Do it three times in a row. Muscle memory is real. Once you can do the basic knot without thinking, adding braids, multiple knots, or accessories will feel easy and fun, not frustrating.
And there you have it—your full playbook for turning fine hair into a thick, textured dream with goddess knots. This isn’t about hiding your hair type, but about celebrating it and giving it the tools to shine. The best part? Once you learn the basic move, your creativity is the only limit.
I hope you feel empowered to try at least one of these styles this week. Remember, the first