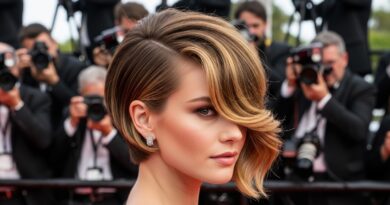
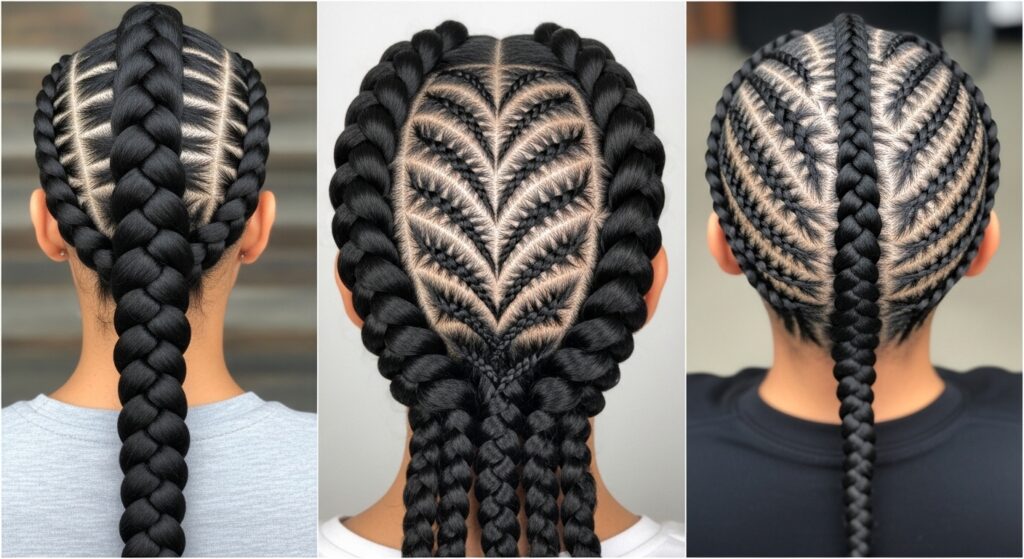
Bead 15 Tribal Pattern Twists Honoring Roots with Bold Designs
Hey you. Have you ever looked at a hairstyle and felt it was more than just hair? Like it was a story, a piece of art, a deep nod to where you come from? That’s exactly the feeling I got when I first saw tribal pattern twists. They stopped me in my tracks.
We’re talking about taking the classic protective style we know and love and elevating it into something breathtakingly bold. It’s about honoring roots—yours, mine, the collective—with every single bead and intricate pattern.
This isn’t just another trend; it’s a wearable celebration. And the best part? It’s totally achievable. Whether you’re a braiding pro or thinking of visiting one, this guide will walk you through everything, from the inspiration to the maintenance. Let’s get into it.
What Are Tribal Pattern Twists?
Think of them as the elevated cousin of traditional twists. Instead of simple, uniform twists, these incorporate deliberate, geometric patterns and designs right into the braiding technique. The patterns are often inspired by African, Indigenous, and other cultural art forms.
They’re then accented with beads, cuffs, or threads in strategic places to make the design pop. The result is a head-turning style that’s rich in meaning and visual impact. It’s personal art you wear every day.
Why This Style Feels So Powerful Right Now
In a world of fleeting micro-trends, this style stands out because it has weight. It connects you to a legacy of craftsmanship and identity. While 2026 hairstyles might be buzzing with glitchy glam hair or the vampire haircut, this trend is about timeless resonance.
It’s the opposite of fast fashion hair. It asks for intention and rewards you with a style that feels both grounding and spectacularly bold. It’s a statement of pride, patience, and personal story.
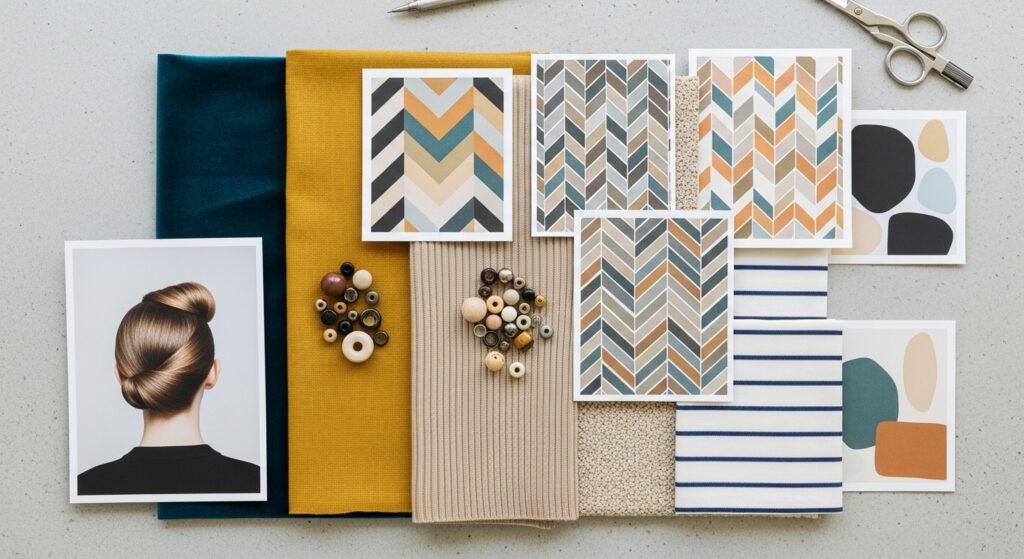
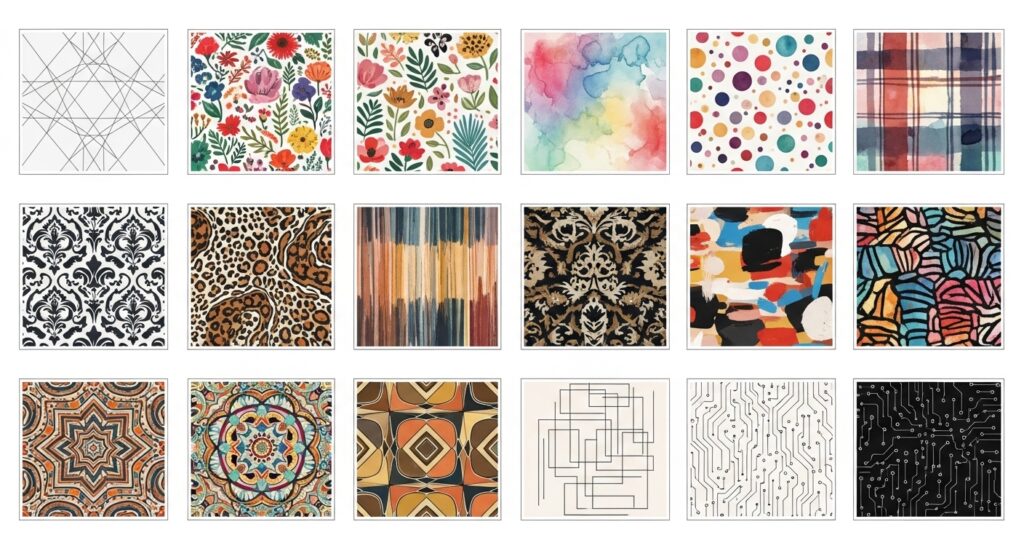
Gathering Your Inspiration: Mood Board Essentials
Don’t just walk into the salon. Walk in prepared. Start a Pinterest board or save a folder on your phone. Look beyond hair—inspiration is everywhere.
- Traditional textile patterns (like kente or mudcloth)
- Symbols from your own heritage or ones you feel drawn to
- Modern graphic art and geometric architecture
- Nature’s patterns: snake scales, honeycombs, spider webs
This will give your braider a clear visual language to work from and ensures you get a design that’s uniquely you.
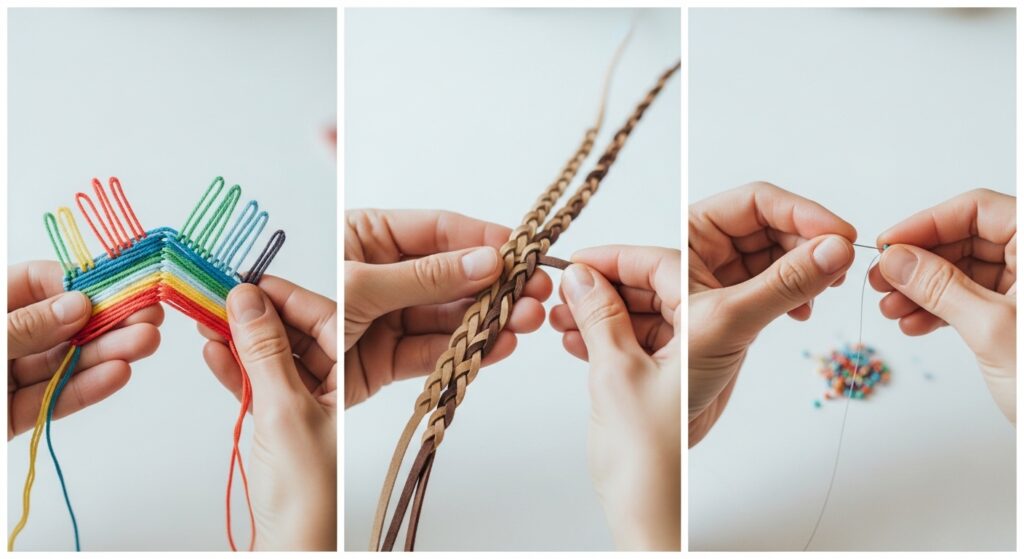
The Core Tools & Materials You’ll Need
Getting this right starts with the right supplies. Here’s your non-negotiable kit list for either DIY or to discuss with your stylist.
- Braiding Hair: High-quality kanekalon or pre-stretched braiding hair for smooth results.
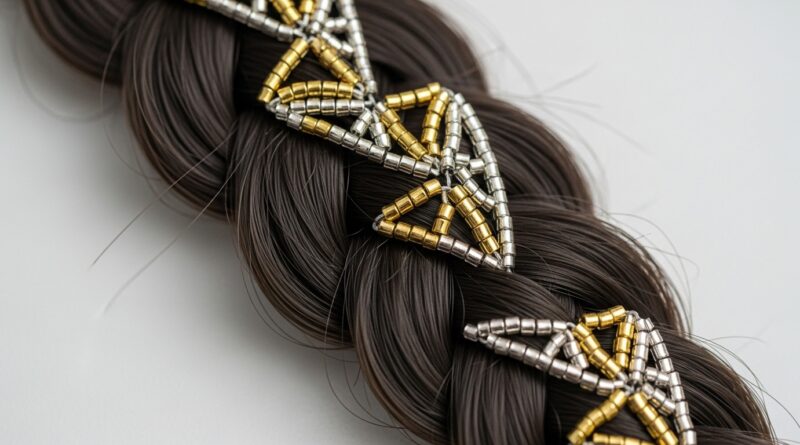
- Beads: An assortment of wooden, metal, or acrylic beads. Think different shapes and sizes.
- Thread or Wire: For securing beads and creating wrapped sections.
- Edge Control & Gel: For crisp, clean parts and pattern definition.
- Sharp Hair Shears: For trimming and perfecting ends.

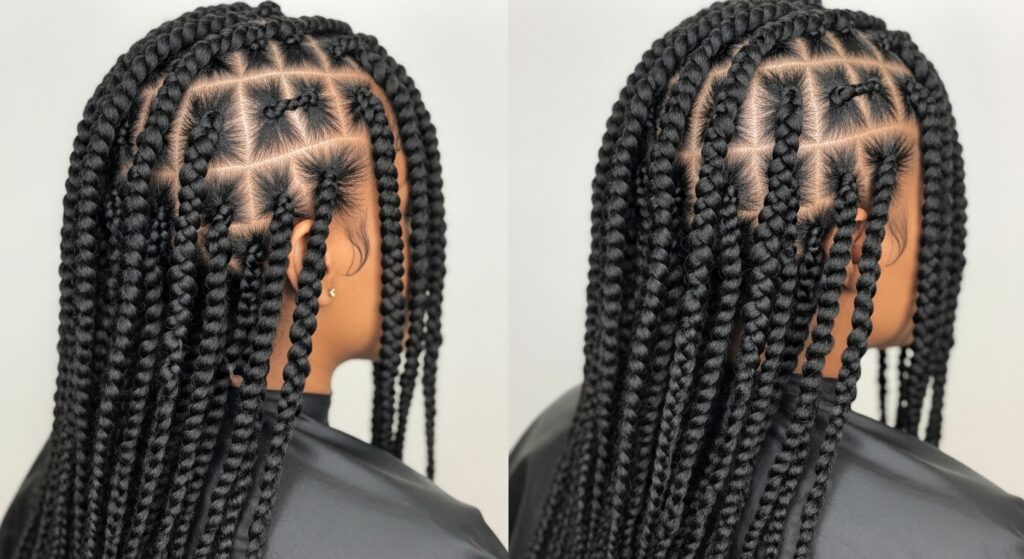
Choosing Your Base: Box Braids, Senegalese Twists, or Cornrows?
The pattern can be applied to different bases. Your choice changes the final look and feel.
- Box Braids: Perfect for bold, chunky patterns. Each braid is a clean canvas.
- Senegalese Twists: Softer look, great for more subtle, woven-in designs.
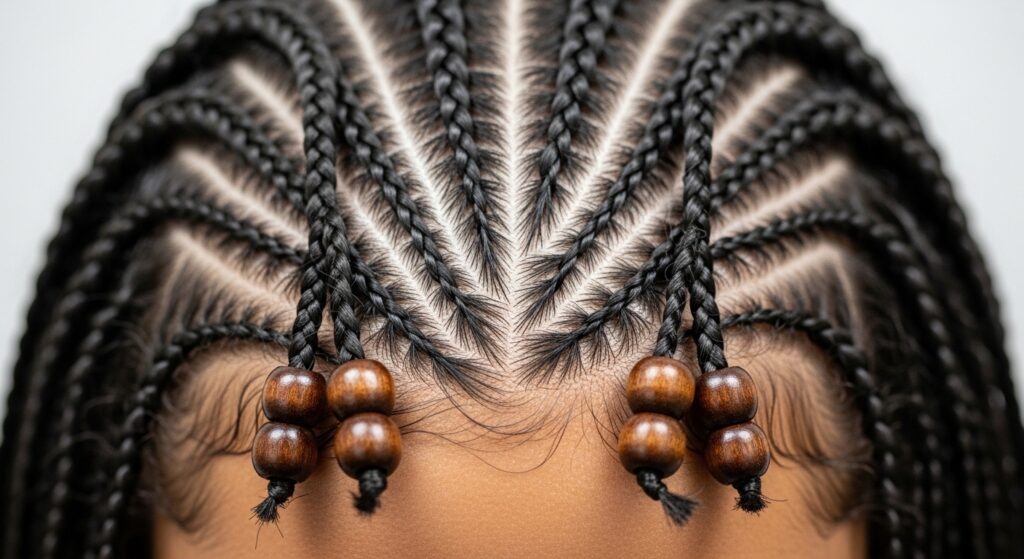
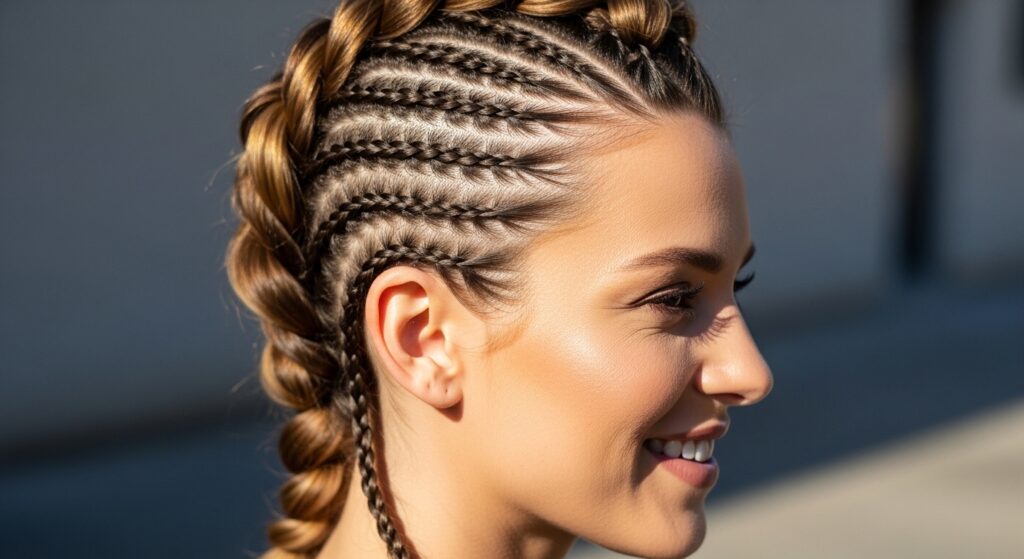
- Cornrows: Ideal for scalp art and intricate, connected patterns that flow across the head.
Consider your lifestyle and the statement you want to make. Cornrows offer the most graphic impact, while individual braids/twists offer versatility.
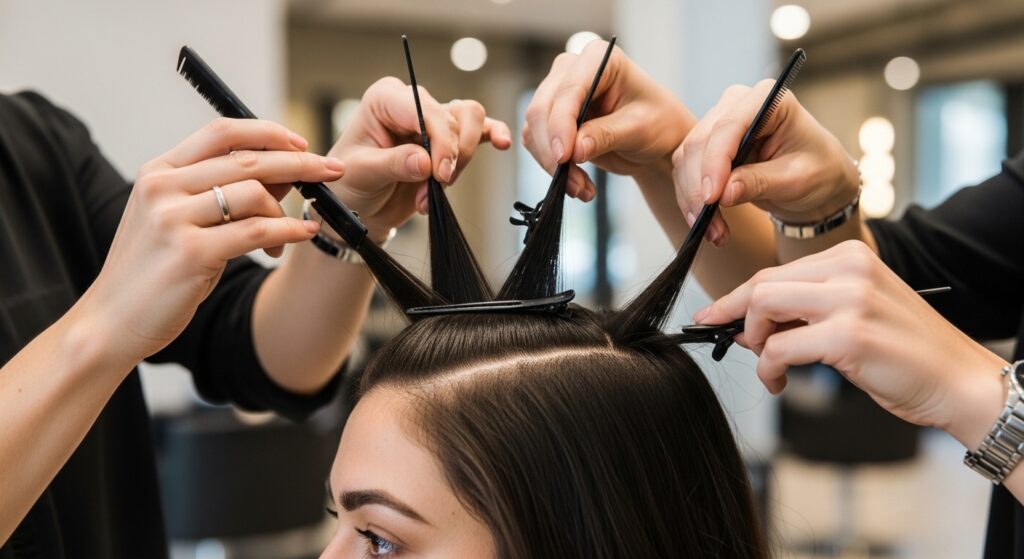
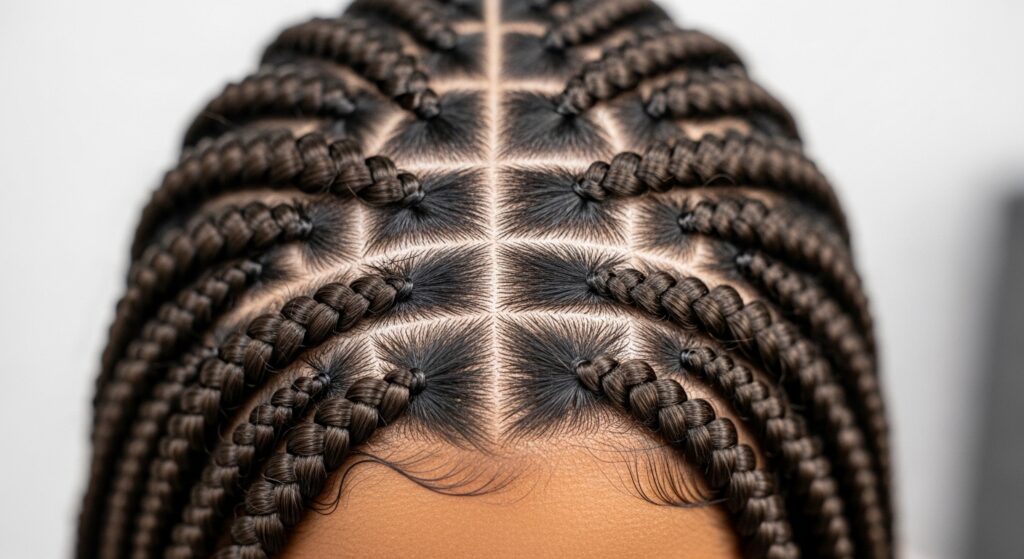
Mastering the Part: The Foundation of the Design
This is where the magic blueprint is drawn. The parts aren’t just straight lines; they become the outlines of your triangles, diamonds, and curves.
Use the tail of a rat-tail comb for precision. Apply edge control along the part line before braiding to keep it sharp for weeks. Don’t rush this step. A clean part is what makes the pattern recognizable and professional.
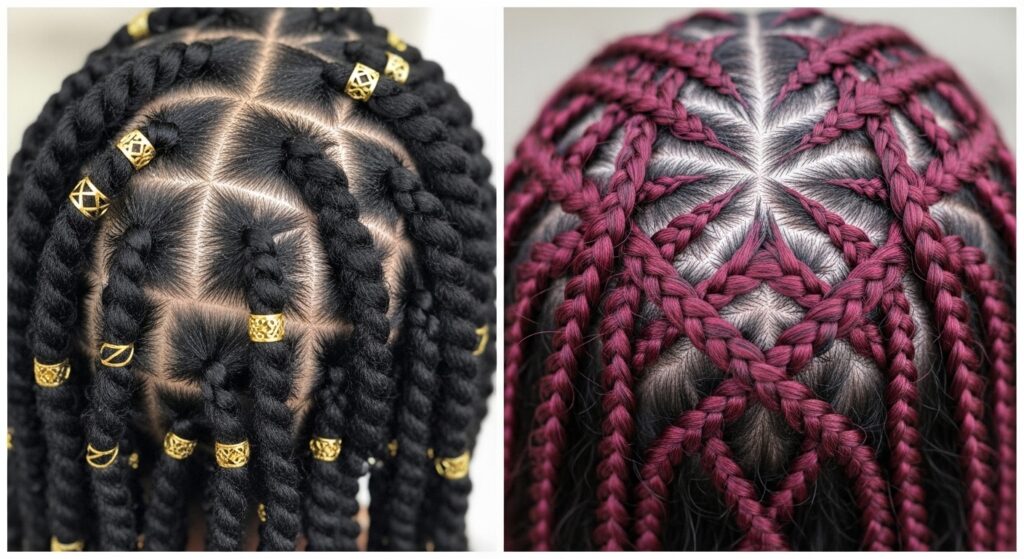
15 Pattern Ideas to Steal and Make Your Own
Ready for the inspo? Here are 15 concepts to kickstart your design talk. Mix, match, and modify!
- Chevron Cascade down a center part
- Diamond Grid across the crown
- Spiral Sunburst at the crown
- Parallel Lines with staggered beads
- Adinkra Symbols incorporated into cornrows
- Arrowhead Trails along the hairline
- Waveform patterns from temple to nape
- Geometric Triangles at the ends
- Zig-Zag Parts with alternating bead colors
- Step Patterns inspired by traditional dance
- Minimalist Lines (think quiet luxury bob but in braids)
- Asymmetrical Block patterns (like an asymmetrical lob of color)
- Wrapped Sections mimicking thread work
- Beaded Tassels at the ends of select braids
- Negative Space designs using your scalp
Step-by-Step: Creating the Chevron Cascade Pattern
Let’s break down one popular pattern. The Chevron Cascade is stunning and easier than it looks.
- Create a deep side part. From the highest point of the part, draw a diagonal line back towards the crown. Repeat in the opposite direction to form a “V”.
- Braid the hair within that “V” section. Continue creating connected “V” shapes down the head.
- At the end of each braid in the cascade, add two beads in a contrasting color to emphasize the pattern’s flow.
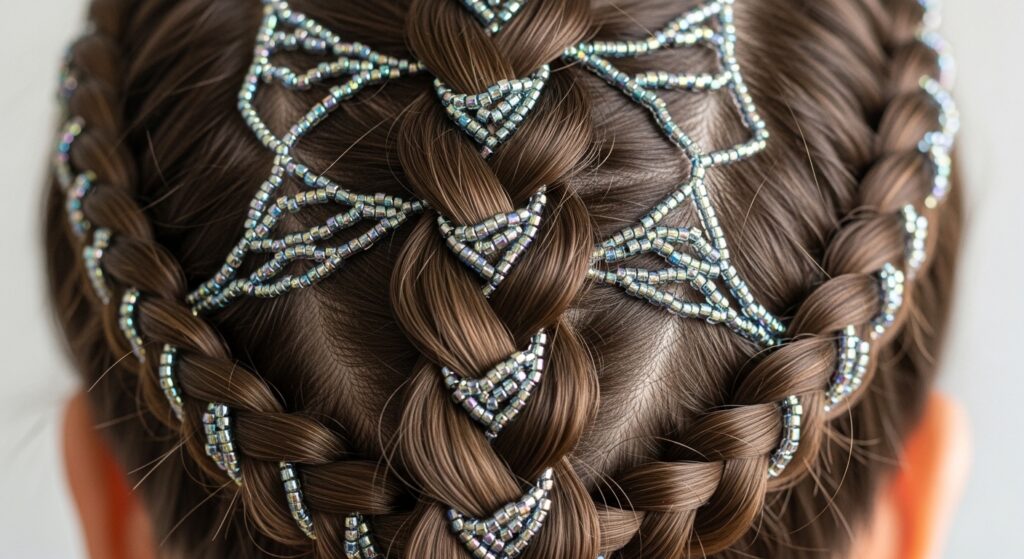
The Art of Beading: Placement is Everything
Beads are your exclamation points. Don’t just randomly add them. Use them to highlight the pattern’s key points.
- Place beads at the apex of a triangle or the end of a line.
- Use color blocking: all red beads on one pattern line, all wood on another.
- Mix sizes: a large bead at a focal point, surrounded by smaller ones.
This intentionality turns cute beads into integral parts of the design narrative.
Color Theory for Your Twists: Subtle vs. Bold
Color can amplify your pattern. You don’t have to go rainbow—subtlety works wonders.
For a nod to old money hair elegance, use braiding hair in shades close to your natural color but add beads in gold, ivory, or jet black. For bold drama, integrate strands of burgundy, deep blue, or even platinum in the pattern itself, reminiscent of romantic goth hairstyles.
How to Combine with Other Major Trends
This style is incredibly versatile. Feel free to fuse it with other looks you love.
Love the hime cut? Create your patterns on long twists in the back, but keep the front shorter, face-framing twists. Into glitchy glam hair? Add a few strategic, brightly colored braids or beads that “glitch” out of the pattern. It’s all about personal expression.
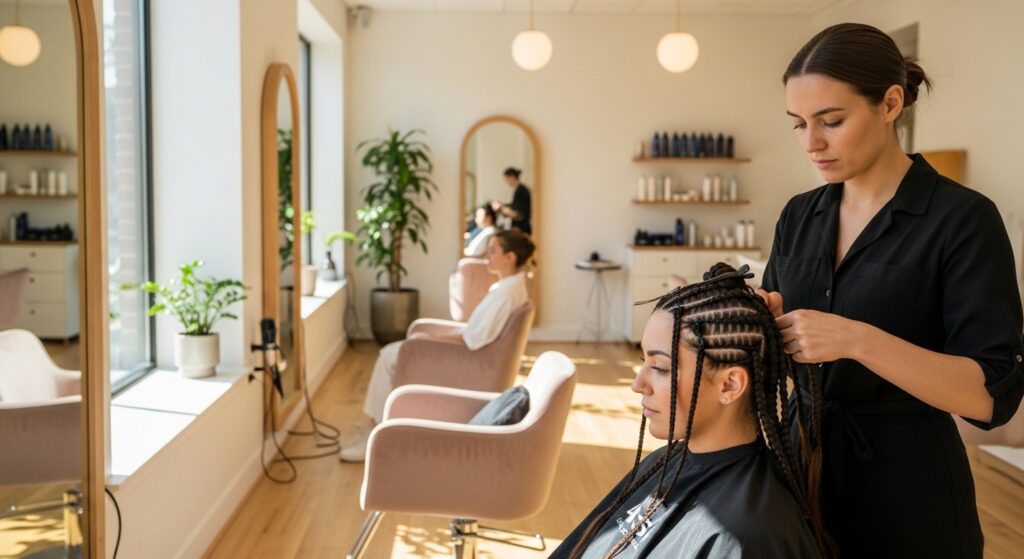
Finding the Right Braider: What to Ask
Not every braider specializes in this. Your consultation is key. Come with your inspiration photos.
- “Have you done patterned styles like this before?”
- “Can we do a test braid to see the pattern scale?”
- “What’s your rate for this level of detail?”
- “How long should I block out for this appointment?”
Their answers will tell you if they’re excited and experienced enough for the project.

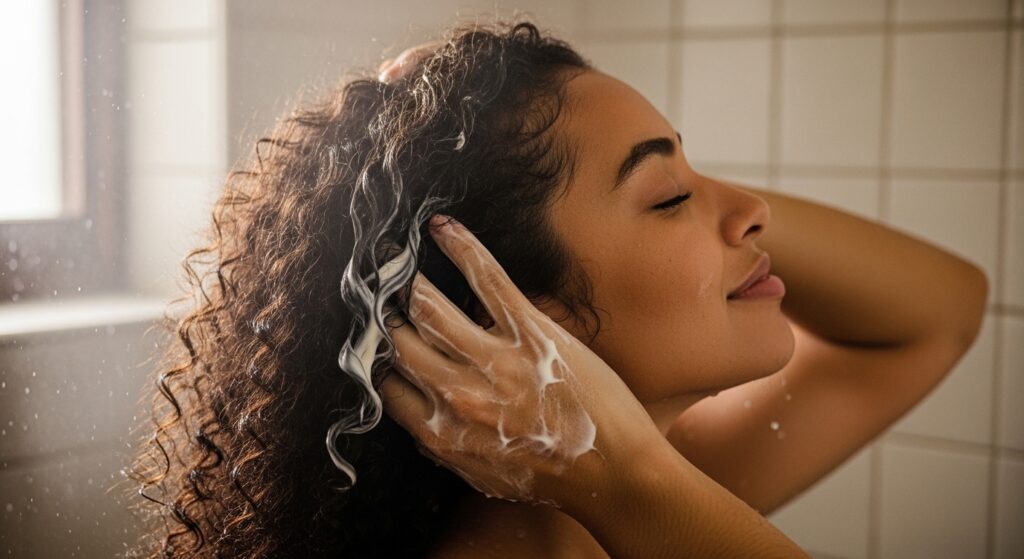
Prepping Your Natural Hair: A Non-Negotiable Step
Protective styling is only protective if your hair is healthy underneath. This prep ensures your hair thrives.
- Wash and deep condition your hair the week before.
- Do a thorough detangling session.
- Apply a lightweight leave-in conditioner.
- Blow-dry or stretch your hair for easier braiding.
Never let a stylist braid dirty, tangled hair. It leads to breakage and discomfort.
The Installation: What to Expect Time-Wise
Set realistic expectations. This is not a quick style.
Depending on complexity and density, installation can take anywhere from 6 to 10+ hours. It’s often done over two sessions. Pack snacks, a water bottle, headphones, and patience. The result is worth the marathon.
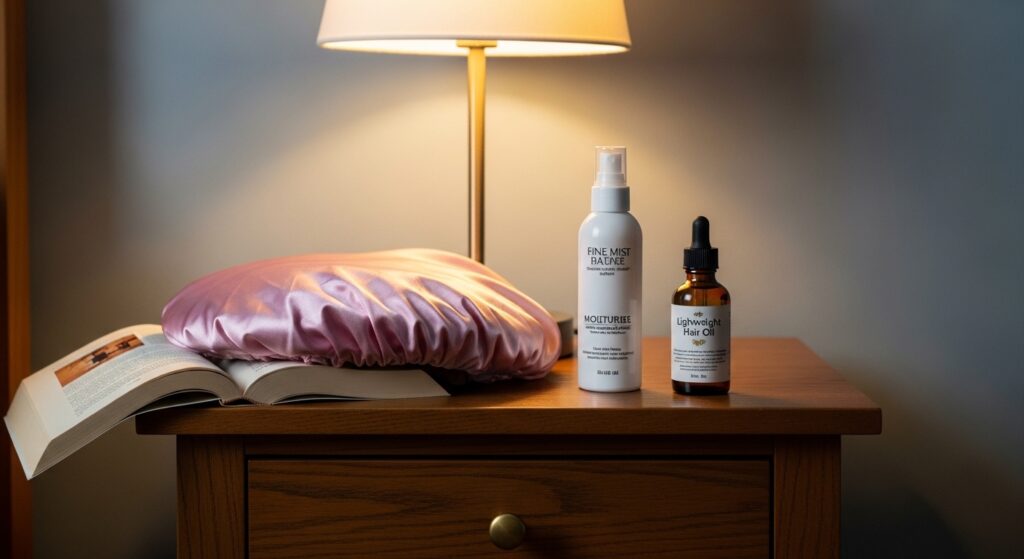
Maintenance 101: Keeping It Fresh for Weeks
To make your investment last, a little upkeep goes a long way.
- Nighttime: Always sleep on a satin pillowcase or in a satin bonnet.
- Washing: Dilute shampoo in a bottle and gently cleanse your scalp every 2 weeks.
- Moisture: Use a light oil or moisturizing spray on your scalp and the length of your braids.
- Frizz Control: A tiny bit of edge control on a toothbrush can smooth down flyaways.
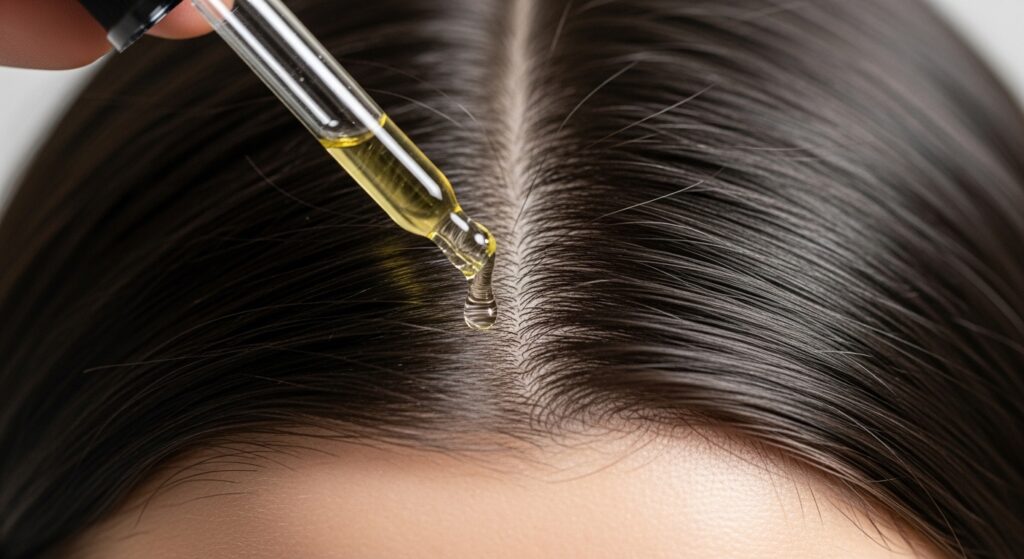
Scalp Care While in Protective Style
An itchy scalp is the worst. Keep it happy and healthy.
Use a dedicated scalp oil or a mix of tea tree and jojoba oil to combat dryness and buildup. Apply it directly along your parts with a dropper. This promotes health and keeps you comfortable for the long haul.
When to Take Them Down: Listening to Your Hair
Don’t push the timeline. 6-8 weeks is usually the sweet spot for medium-sized twists/braids.
Signs it’s time: significant new growth causing tension, buildup that won’t wash away, thinning or frizzing at the roots, or just plain boredom. Giving your hair a break between styles is crucial for long-term health.
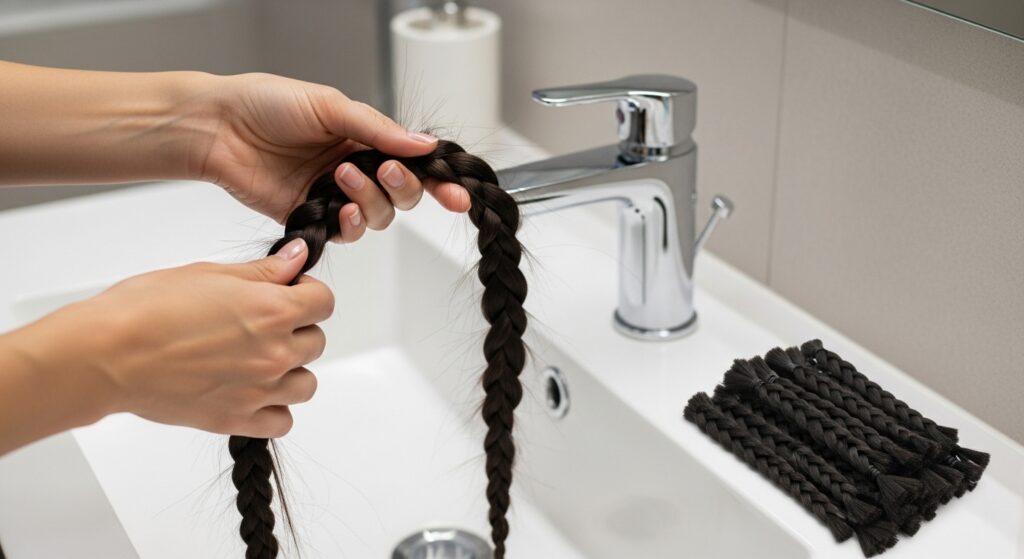
The Take-Down Process: Be Gentle!
This requires as much patience as the install. Rush and you’ll see unnecessary shedding.
- Cut the beads off carefully.
- Use a pair of sharp shears to cut the braiding hair away from your own (be very careful!).
- Apply conditioner or oil to the remaining braided section and slowly unravel with your fingers.
- Detangle gently under running water with loads of conditioner.
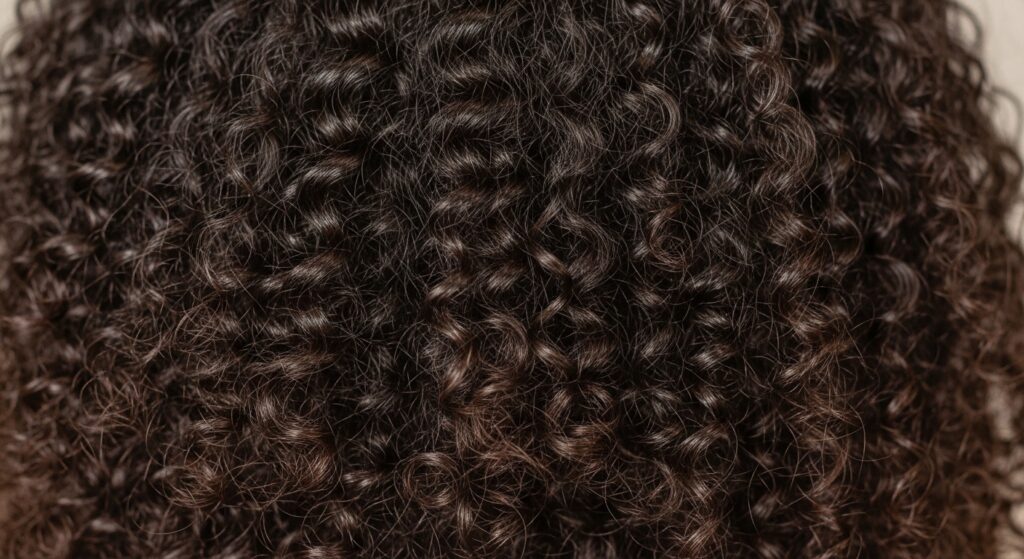
Post-Style Care: Pampering Your Natural Hair
After removal, your hair needs love. This is a reset moment.
Follow with a clarifying wash, a protein treatment if needed, and an intense moisturizing deep condition. Let your hair breathe in a simple style like a wash-and-go or buns for a week or two before your next protective style.
Frequently Asked Questions, Answered
Let’s tackle the big questions I get in my DMs.
Q: Is this style cultural appropriation?
A: When done with respect, research, and acknowledgment of its inspirations, it’s appreciation. Credit cultures, support artisans who make traditional beads, and understand the significance.
Q: Can it be done on shorter hair?
A: Absolutely! Cornrows and flat twists are perfect for shorter lengths, creating stunning scalp art.

Your Turn to Create Something Meaningful
So, what story do you want your hair to tell? This style is an invitation to think deeper about the art you carry with you every day.
It’s a conversation starter, a piece of heritage, and a bold fashion statement all in one. Don’t be afraid to bring your full vision to a skilled braider and create something that feels authentically, powerfully you.
And that’s the full journey, from that first spark of inspiration to taking care of your gorgeous hair afterwards. I hope this guide made a seemingly complex style feel approachable and exciting.
Remember, the best hairstyles are the ones that make you feel connected—to yourself, to your creativity, to something bigger. This style has that power in spades.
Save this post to Pinterest to keep all these ideas and tips handy for your next salon visit! And I’d love to know—which pattern idea are you most obsessed with? Drop a comment below and let’s chat.