Master 23 Overlapping Knot Braids Creating Textured Headpiece Effects
Okay, let’s be real. We’ve all seen those incredible, intricate braided hairstyles that look like a textured crown or headpiece and thought, “I could never do that.” I totally get it. It feels like a next-level skill reserved for pros.
But what if I told you the secret is just one simple knot, repeated and overlapped? It’s true. This technique is your gateway to creating stunning, editorial-worthy looks right at home.
Today, I’m breaking down exactly how to master 23 overlapping knot braids. It’s easier than you think, and the effect is pure magic. Get ready to turn heads and finally create that textured headpiece effect you’ve been dreaming of.
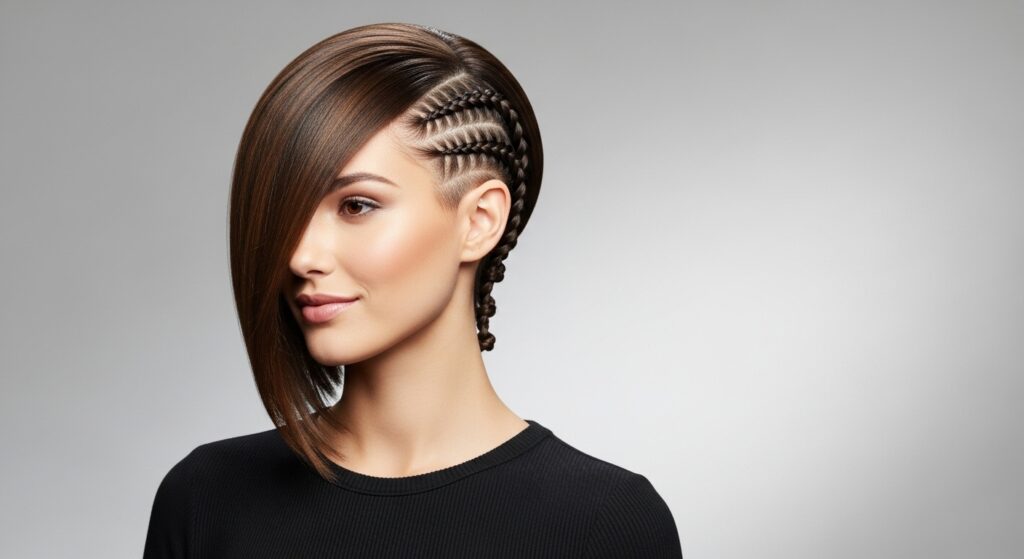
What Are Overlapping Knot Braids?
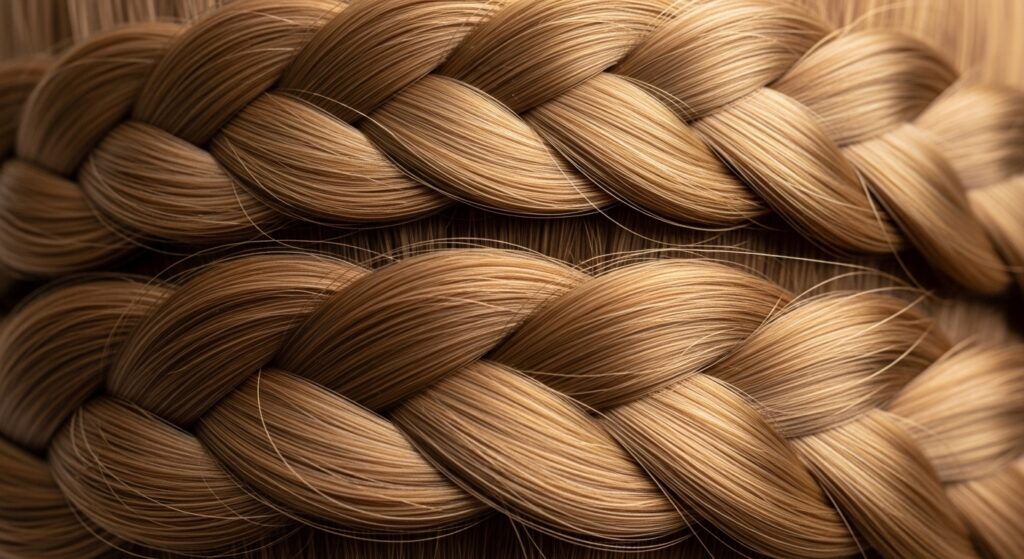
Think of this as the chic, sophisticated cousin of a basic braid. Instead of weaving three strands, you create small, delicate knots with two sections of hair. You then “overlap” them by adding new pieces as you move along your head.
The result is a flat, rope-like braid that sits beautifully against your scalp. When you create multiple rows that nestle together, they form a stunning textured pattern. It looks complex, but the hand motion is simple once you get the rhythm.

Why This Technique is a Game-Changer
This style is incredibly versatile. It works on all hair textures, from straight to coily, especially when you want a defined, elegant look. The knots give amazing grip, so the style holds all day without tons of pins.
It’s also the perfect foundation for so many 2026 hairstyles we’re starting to see. You can build everything from an old money hair vibe to something more romantic and intricate. It’s one skill with endless possibilities.
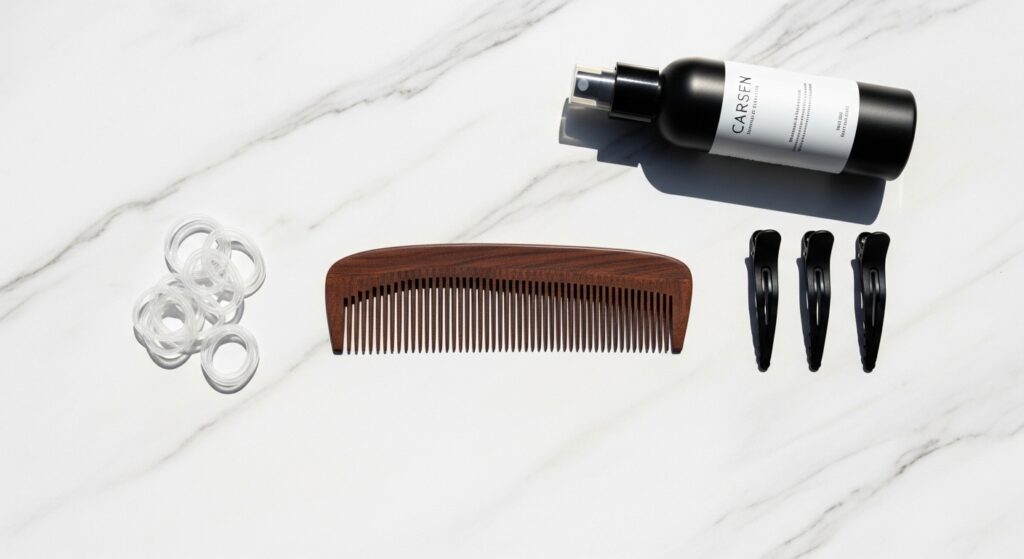
Gather Your Simple Tools
You don’t need much! Here’s my go-to kit for a flawless result. Having these ready will make the whole process so much smoother.
- A fine-tooth comb for clean parts
- Strong-hold hairspray or a light gel (I like a spray for control)
- Small, clear elastic bands
- Hair clips to section off your hair
- A mirror you can easily see the back of your head in
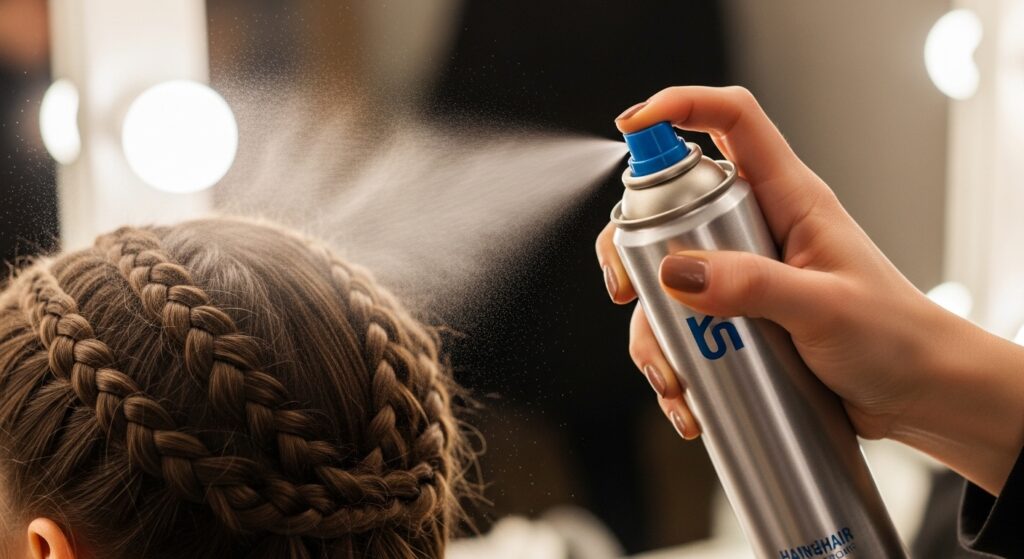
Start with the Perfect Base
This step is non-negotiable. Start with day-old hair or use a dry texture spray. Slightly gritty hair gives the knots something to hold onto. If your hair is super clean and slippery, the braids might slide.
Brush your hair thoroughly to remove any tangles. Then, decide where you want your braided pattern to go. A center part is classic, but a deep side part can feel more modern and aligns with trends like the asymmetrical lob’s vibe.
Master the Basic Knot Motion
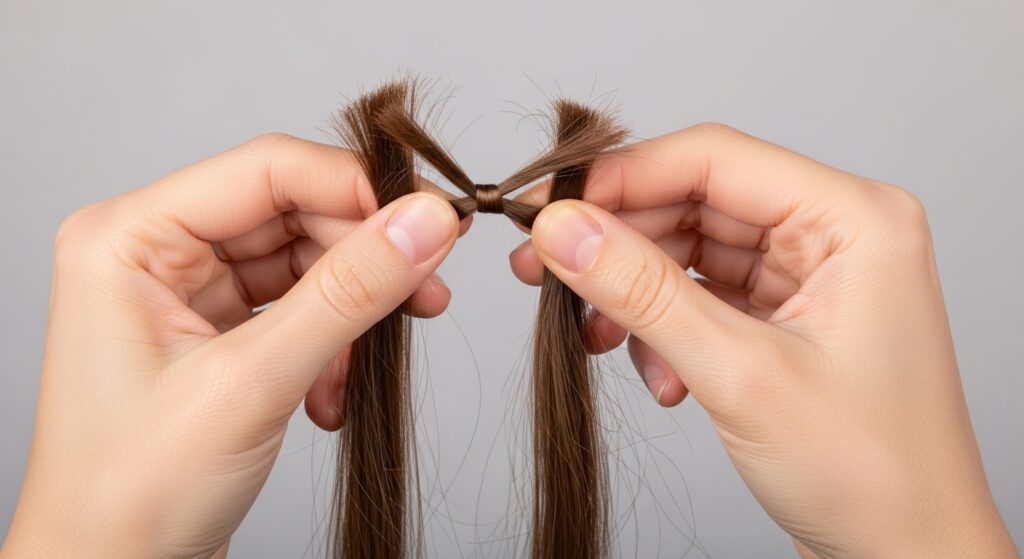
Let’s practice on one small section before you touch your head. Take two thin strands of hair. Cross the right strand over the left, like you’re starting to tie your shoes.
Now, pull that right strand under and through the loop you’ve created. Gently tighten it upward, toward the scalp. That’s it! One knot. The key is to keep tension even and consistent for a uniform look.
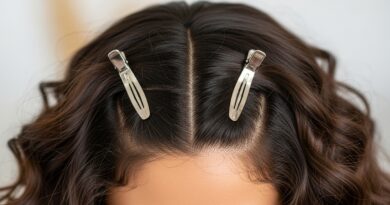
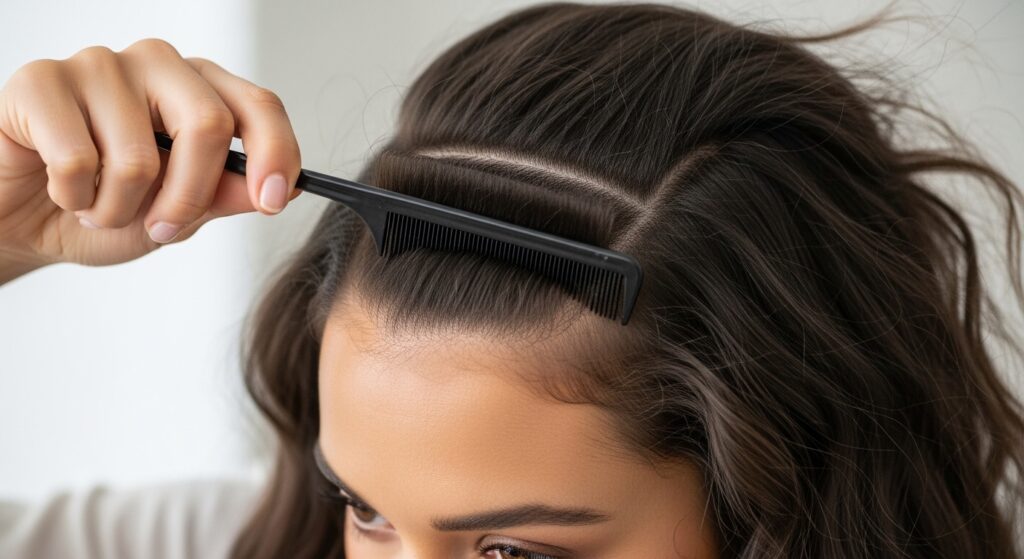
Sectioning Your Hair for the First Row
For your first row, take a horizontal section of hair at your front hairline, about an inch thick. Clip the rest of your hair out of the way. Divide this front section into two equal parts.
This will be your starting pair. Make your first knot with them. Now, to “overlap,” you’ll add a little more hair to each strand before you make the next knot. This is what builds the braid along your head.
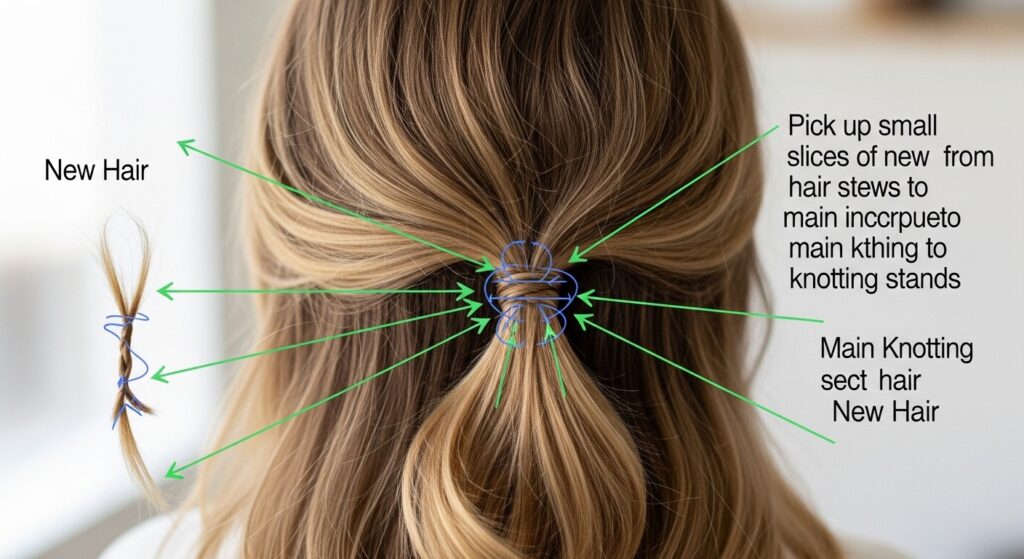
How to Add Hair & Overlap
After your first knot, you have a right and left strand again. Before making the next knot, gather a tiny slice of new hair from the loose hair below your braid. Add it to the right strand.
- Make your next knot.
- Then, add a tiny slice of new hair to the left strand.
- Make your next knot.
Keep alternating which side you add hair to with each knot. This pulls in the loose hair and builds the braid downward.
Keeping Tension & Consistency
This is the secret to a pro look. Pull each knot tight in an upward direction, toward your scalp, not out to the side. This keeps the braid flat and secure.
Try to make each knot the same size and add the same small amount of hair each time. It might feel slow at first, but consistency creates that beautiful, even textured effect we’re after.

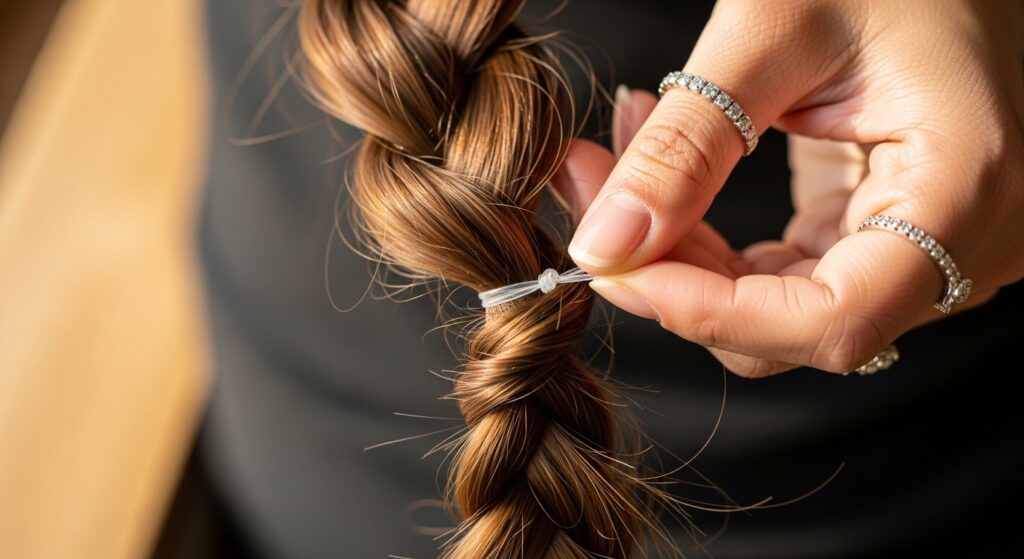
Finishing & Securing a Single Braid
When you run out of hair to add in (usually when you reach behind your ear), you’ll just have your two original strands left. Continue knotting them together without adding more hair for 3-4 more knots.
Secure the end with a small, clear elastic. You can also twist the ends together and tuck them under, pinning them for an invisible finish. Lightly mist the finished braid with hairspray.
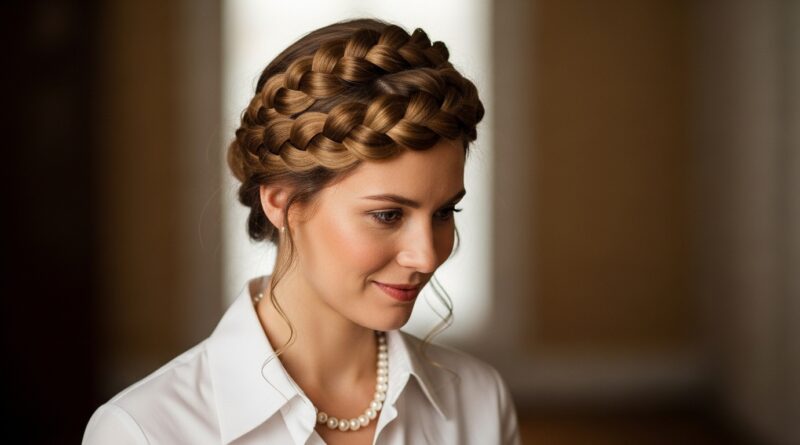
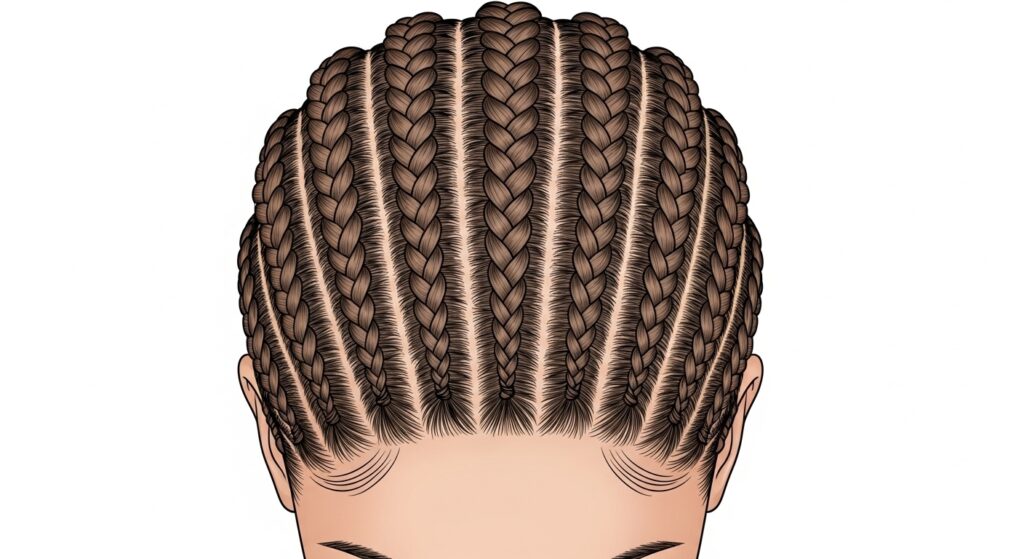
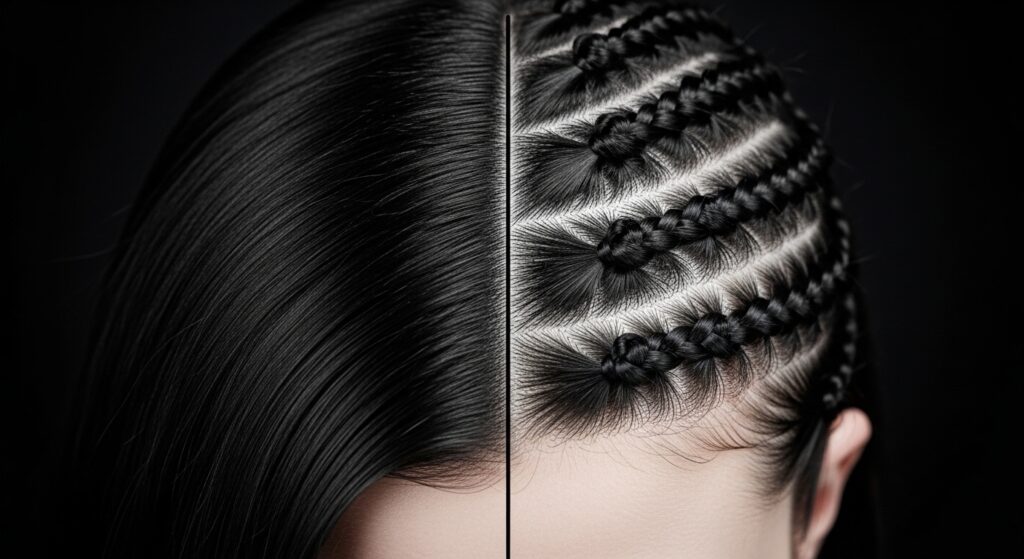
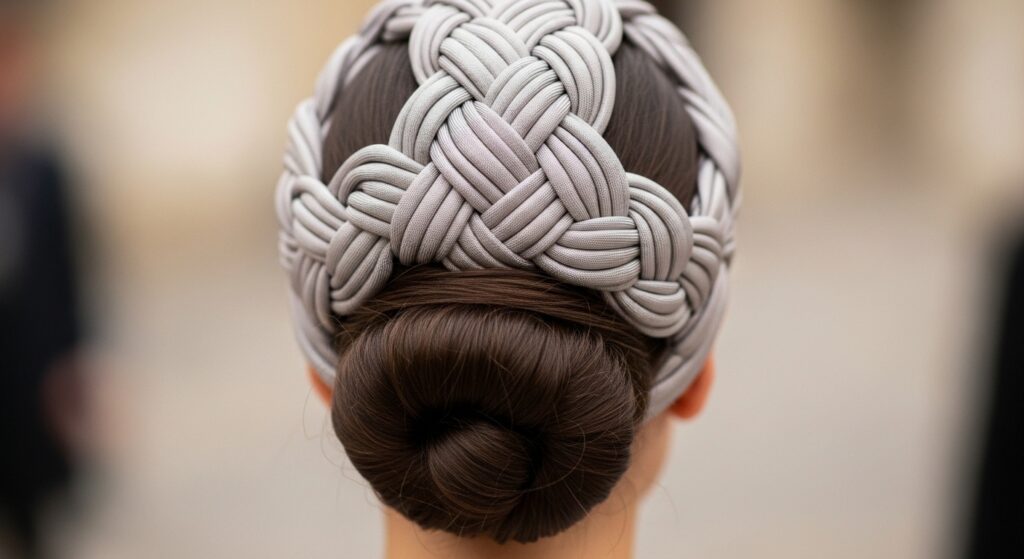
Planning Your 23 Braid Pattern
Twenty-three sounds specific, but it’s about coverage. You’ll likely create 4-5 major rows, with each row containing 4-5 individual braids that sit side-by-side. Sketch a mental map: start at the front hairline and work back toward your crown.
Each new row should nestle right under the one above it. This overlapping of the rows is what creates that full, headpiece-like texture. Don’t worry about perfection—the slight variation makes it beautiful.
Creating the Second Row & Beyond
Unclip another horizontal section of hair right below your first finished braid. The top of this section should touch the bottom of your first row. Divide this new section into smaller parts to create your next set of braids.
Repeat the same knotting process. As you work, let the braids from the row above rest on top so you can see how they align. This methodical approach is what builds the stunning, intricate final look.

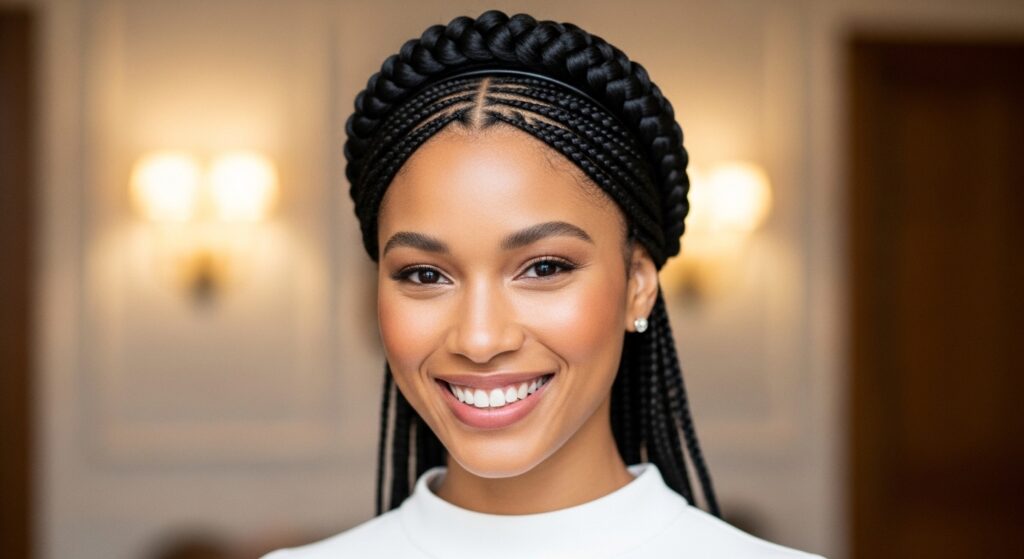
Blending Braids for a Textured Effect
To avoid a choppy look, make sure the start of each braid in a new row sits in the “gap” between two braids in the row above. This staggered, brick-layering effect is crucial.
It makes the finished style look like one continuous, textured piece rather than separate rows. This blending technique is a hallmark of romantic goth hairstyles and other intricate looks, adding depth and mystery.
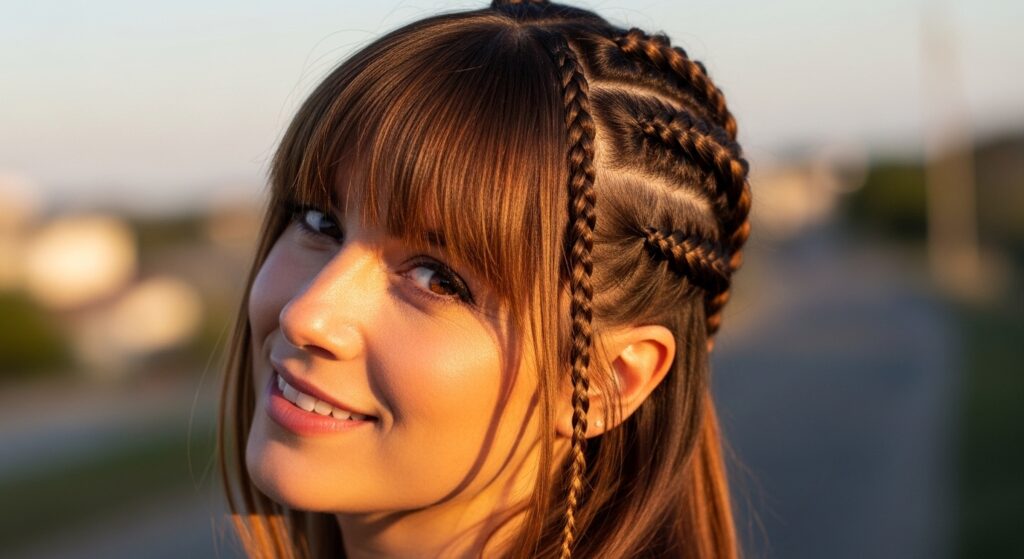
Incorporating Bangs or Face-Framing Layers
If you have bangs or layers, incorporate them! You can knot them into the first row for a blended look. Or, leave them out and style them separately for soft contrast.
For a hime cut or curtain bangs, this is perfect. You can create the knotted headpiece behind them, letting your bangs frame your face. It adds a modern twist to a classic look.
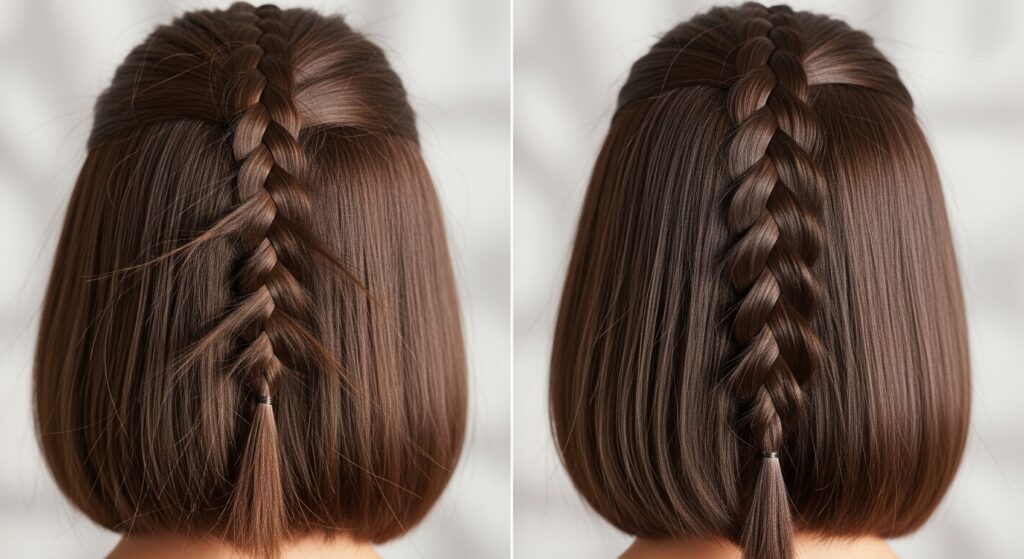
Adapting for Shorter Hair (Lobs & Bobs)
Yes, you can do this on shorter hair! On a quiet luxury bob or asymmetrical lob, focus on creating just 2-3 rows along the side or back. The knots will be smaller and tighter.
You might not get 23 full braids, but the overlapping knot principle is the same. It creates incredible texture at the crown or nape of the neck, elevating a simple cut instantly.
Creating a “Vampire Haircut” Vibe
The vampire haircut is all about sharp, modern contrast with a touch of drama. Use this knot technique along one side of a deep part, keeping the other side sleek or voluminous.
Pair the intricate, dark braiding with very sleek, straight hair. The contrast between the textured knots and the smooth hair is what creates that iconic, edgy-yet-elegant look.
Adding Ribbons or Thread for “Glitchy Glam”
For a glitchy glam hair moment, weave a thin ribbon or metallic thread into your knots. As you start each braid, include the ribbon as one of your two initial strands.
Knot it right into the hair. The ribbon will peek out in unexpected places, creating a digital, disrupted effect that’s so cool and modern. Try a neon thread for real impact.
Styling the Rest of Your Hair
Once your braided crown is complete, style the remaining loose hair to match the vibe. A low bun or chignon is effortlessly elegant. Leaving it down in loose waves creates a softer, more romantic feel.
For a bold look, keep it pin-straight. The contrast between the intricate knots and simple, sleek hair is stunning and totally on-trend for 2026 hairstyles focusing on texture.
Making It Last All Day & Night
Longevity is key. After finishing all braids, do a final spray with a strong-hold hairspray, focusing on the braided sections. Tuck and pin any loose ends securely under the braids.
Carry a few extra pins and a travel hairspray for touch-ups. If a knot loosens, you can often gently tighten it and pin it discreetly at the root without redoing the whole braid.
Troubleshooting Common Problems
If your braids look puffy, your sections were too thick or your knots weren’t tightened upward. If they’re sliding, you needed more texture at the start.
Don’t get frustrated! Your first try might not be perfect. The beauty of this style is that practice makes a huge difference. The second attempt will always be faster and neater.
Day 2 Refresh & Style Extension
This style gets better on day two! Sleep with a silk scarf or on a silk pillowcase. In the morning, spritz a little texturizing spray at the roots and gently smooth any flyaways.
You can also transform it by carefully gathering all the braids into a high ponytail or half-up style. The knots become an amazing textural element in a whole new look.

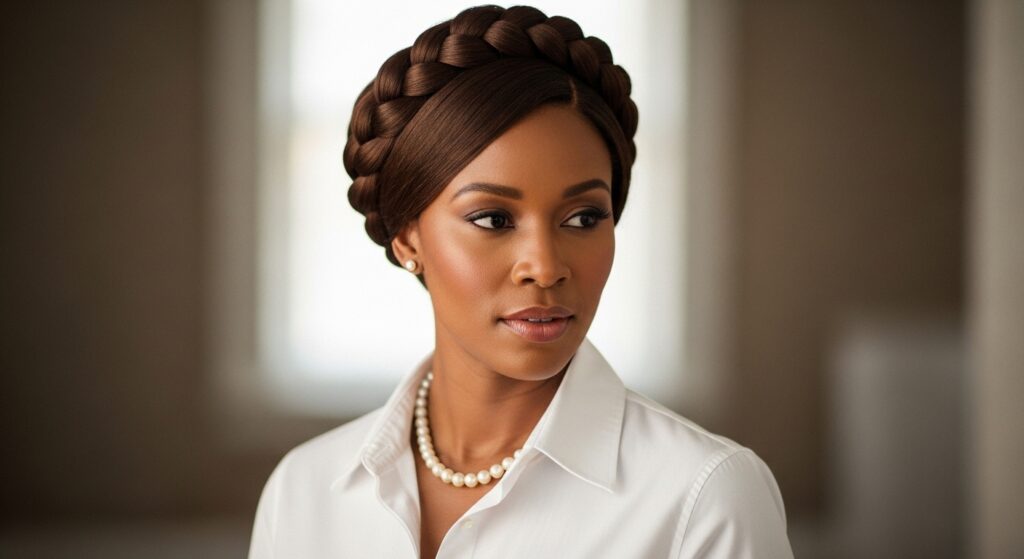
Why This Fits the “Old Money Hair” Aesthetic
Old money hair is about looking effortlessly polished, like you didn’t try too hard. This style nails that. It’s intricate but not flashy, elegant and rooted in classic technique.
It suggests you have the time and skill for beautiful details, which is the ultimate quiet luxury. Paired with a simple outfit, it becomes the standout, sophisticated focal point.
Your New Go-To Special Occasion Style
Weddings, parties, dates—this is your new secret weapon. It looks incredibly time-consuming and expensive, but only you’ll know the simple trick behind it.
It works with everything from boho dresses to sleek gowns. Once you master it, you’ll have a reliable, show-stopping style in your back pocket for any event that calls for something special.
And just like that, you’ve got it. What seemed like an impossible, red-carpet-only hairstyle is now something you can create on a quiet Tuesday night. That’s the best feeling, isn’t it? Unlocking a new skill that makes you feel incredibly put-together and creative.
The true magic of these overlapping knots is how they empower you. They’re a building block. Once the motion is muscle memory, you can adapt it, play with it, and make it yours. Maybe next time you’ll add a ribbon, or only do one dramatic side. The possibilities are what make hair so fun.
I truly hope you give this a try. Start with one braid, then a row. Be patient with yourself. I promise, the result is worth the few minutes of practice.
Save this post to Pinterest to keep this guide handy for your next hair night! And I’d love to know—which variation are you most excited to try? Drop a comment below and tell me!