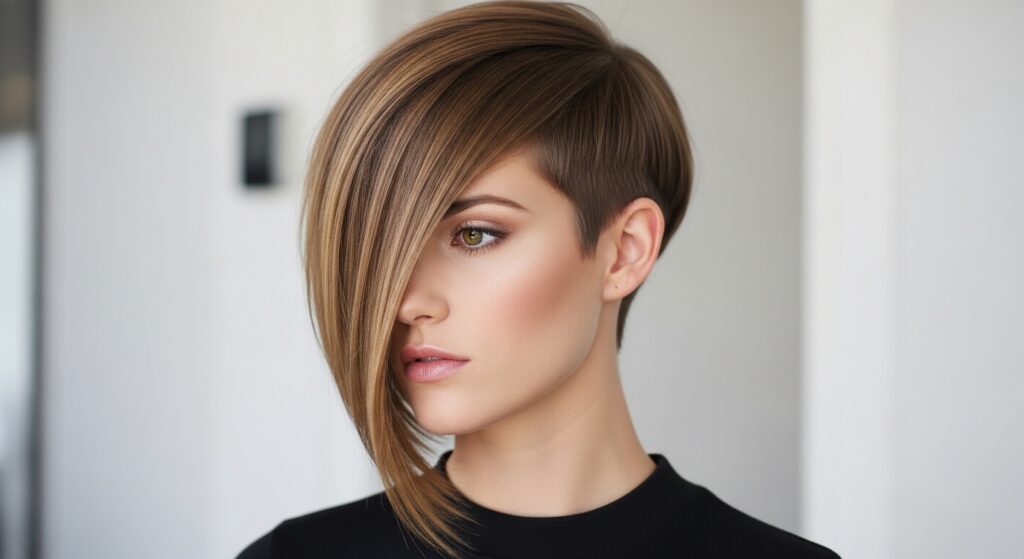
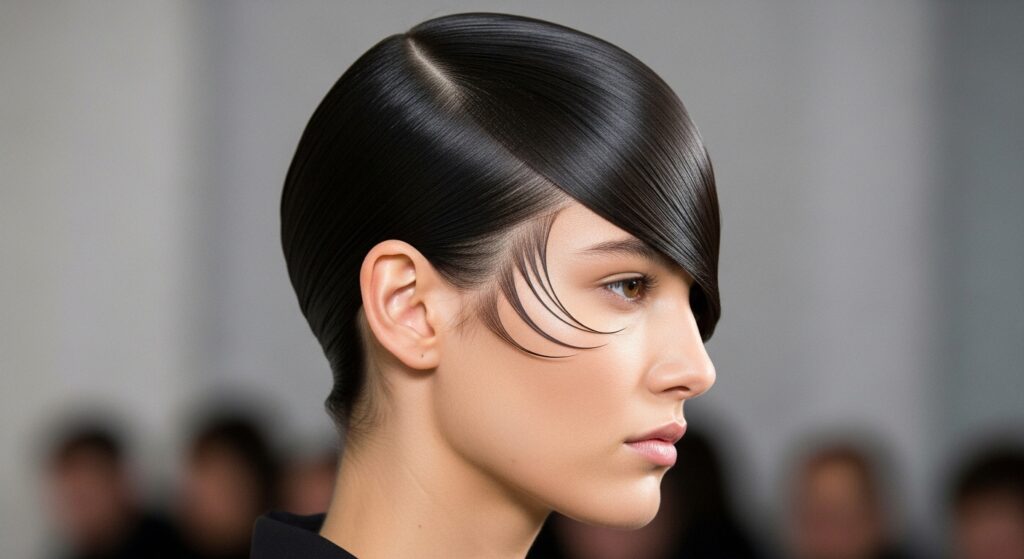
Side 23 Sweep Bangs Brushed Aside for Dramatic Part Lines
Okay, let’s talk about that little voice in your head that whispers, “Maybe I should get bangs.” We’ve all been there. But what if the most stylish move right now isn’t committing to full fringe, but mastering the art of the dramatic side part?
I’m talking about sweeping those would-be bangs completely aside. It’s a look that feels both classic and incredibly fresh. It adds instant volume, frames your face in a flattering way, and honestly, it’s a total power move.
This technique is popping up everywhere, from old money hair looks to romantic goth hairstyles. It’s the secret behind a lot of those 2026 hairstyles we’re starting to see. The best part? It works on almost every hair length and type.
So, grab your brush and a good strong-hold spray. I’m breaking down everything you need to create this look, style it for any vibe, and keep it looking perfect all day. Let’s get into it.
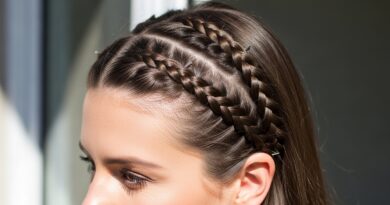
What Are Side-Swept Bangs, Really?
When we say “side-swept bangs brushed aside,” we mean taking the front section of your hair—the part you’d typically cut for fringe—and training it to fall deeply to one side. It creates a strong, clean part line that becomes the focal point.
This isn’t a wispy piece falling in your face. It’s a deliberate, polished section that adds height at the crown and drama to your overall silhouette. It’s a foundational technique that can adapt to so many trends.
Think of it as the base for a quiet luxury bob or the first step in building a vampire haircut. It’s all about that strong, graphic line.
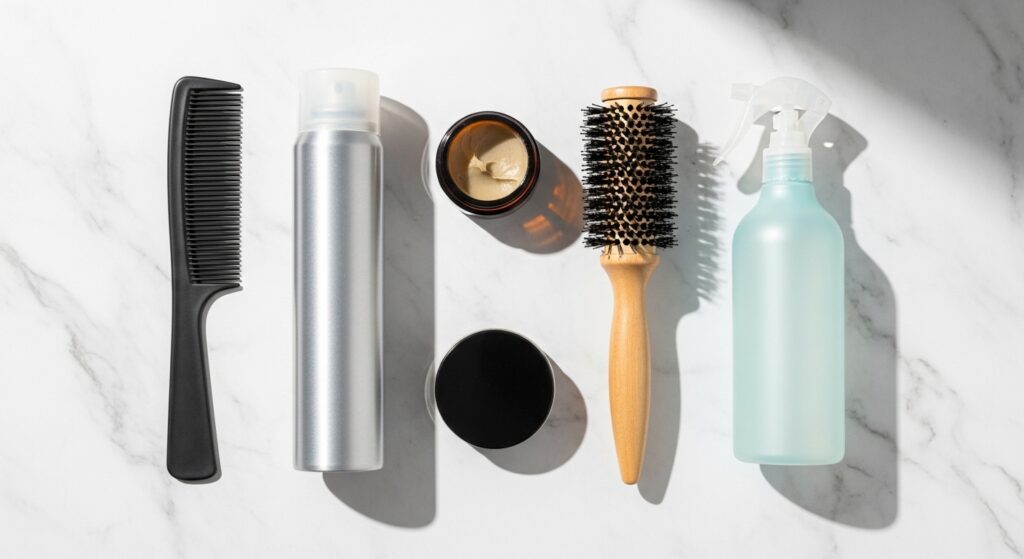
The Tools You Absolutely Need
You don’t need a salon cart, but a few key items make this so much easier. First, a fine-tooth comb or a tail comb for creating that razor-sharp part. A good heat protectant is non-negotiable if you’re using hot tools.
For hold, I recommend a strong-hold hairspray and a light pomade or wax. The pomade helps control any shorter pieces around your face and adds polish. A round brush and blow dryer are your best friends for building volume at the root.
- Fine-tooth or tail comb
- Heat protectant spray
- Strong-hold hairspray
- Lightweight pomade or wax
- Round brush & blow dryer
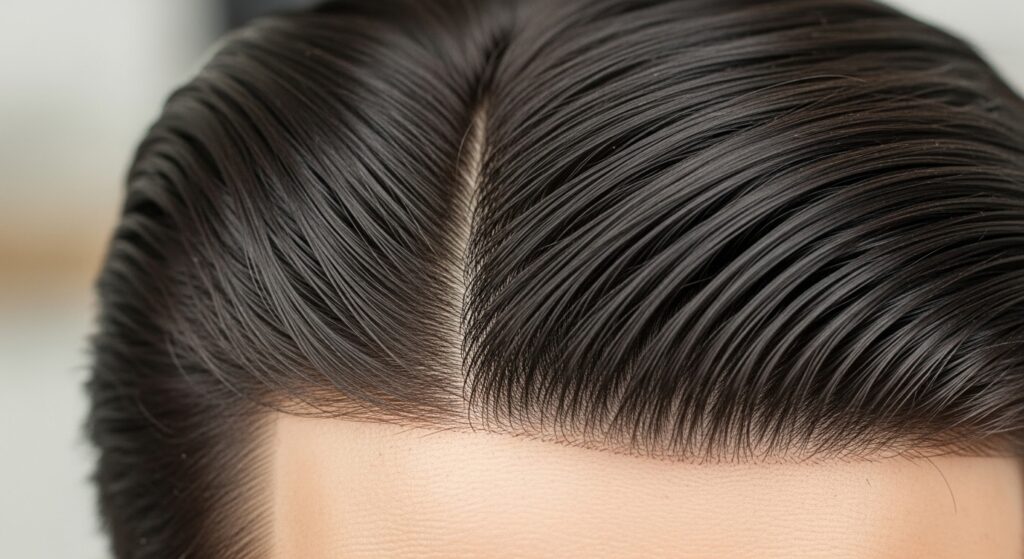
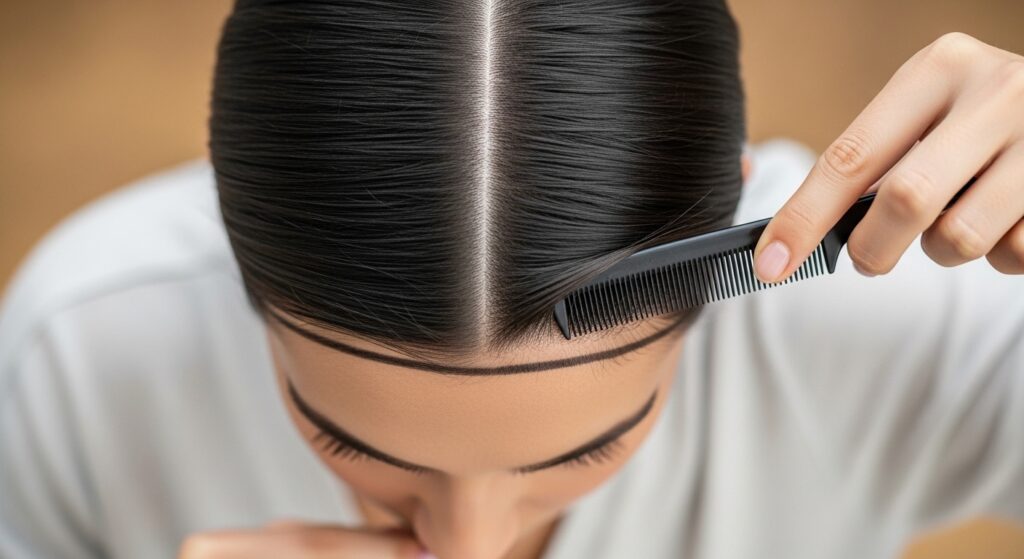
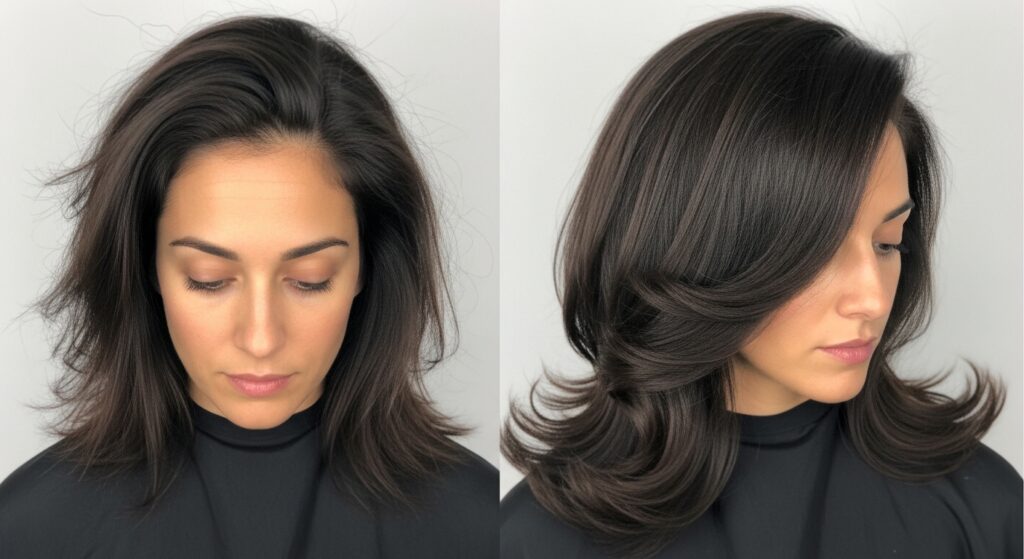
Step 1: Find Your Perfect Part
This is the most important step. Using the end of your tail comb, start from the center of your forehead and drag it back to where your head starts to curve. Don’t just follow your existing part!
For maximum drama, go for a deep side part. This means starting the part at the arch of your eyebrow or even further over. It might feel extreme at first, but trust me, it gives the best volume.
Look straight in the mirror while you do this. Once you’ve etched the line with your comb, apply a tiny bit of pomade along the part to keep the baby hairs in place.
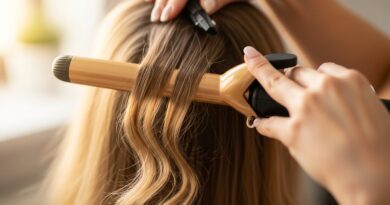
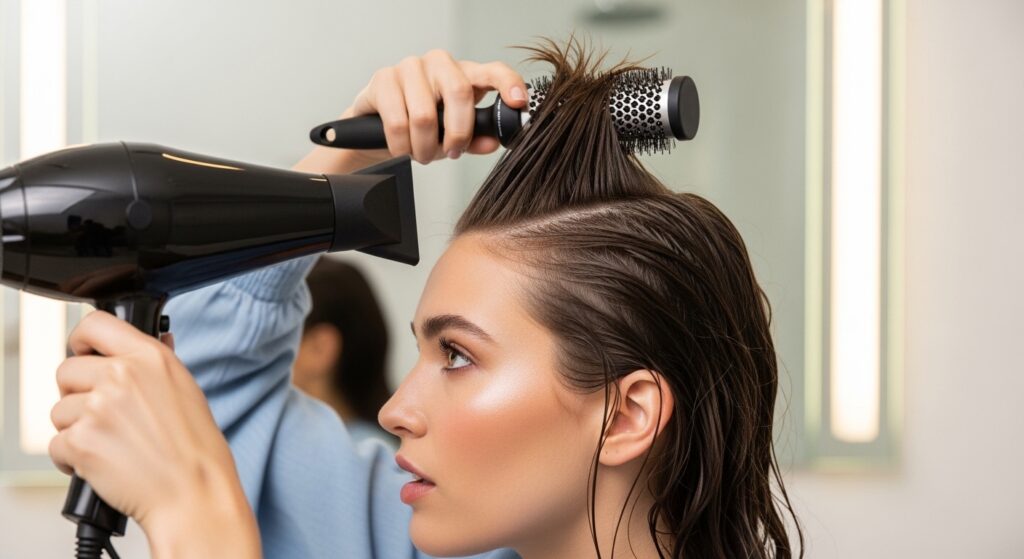
Step 2: Blow-Dry for Maximum Lift
Right after showering, apply your heat protectant. Then, lean your head to the OPPOSITE side of your part. So, if your part is on the left, lean your head to the right. Blow-dry the roots at the base.
This lifts the hair at the root on the heavier side of your part, creating incredible volume that lasts. Use your round brush to guide the front section smoothly to the side you want it to go.
Keep the dryer nozzle pointed down the hair shaft to smooth the lengths. You’re aiming for a smooth, lifted base, not a lot of bend or curl at this stage.
Step 3: Set & Lock It In Place
Once your hair is fully dry, it’s time to set the look. Lightly mist the roots near your part with hairspray before you do anything else. Let it cool for a second—this helps “set” the volume.
Then, take a very small amount of pomade on your fingertips. Smooth it over the side-swept section, focusing on the ends and any flyaways near your part. This gives that “lived-in but perfect” finish.
Do a final, light spray of hairspray from a distance to hold everything without making it look crunchy. The goal is polished, not stiff.

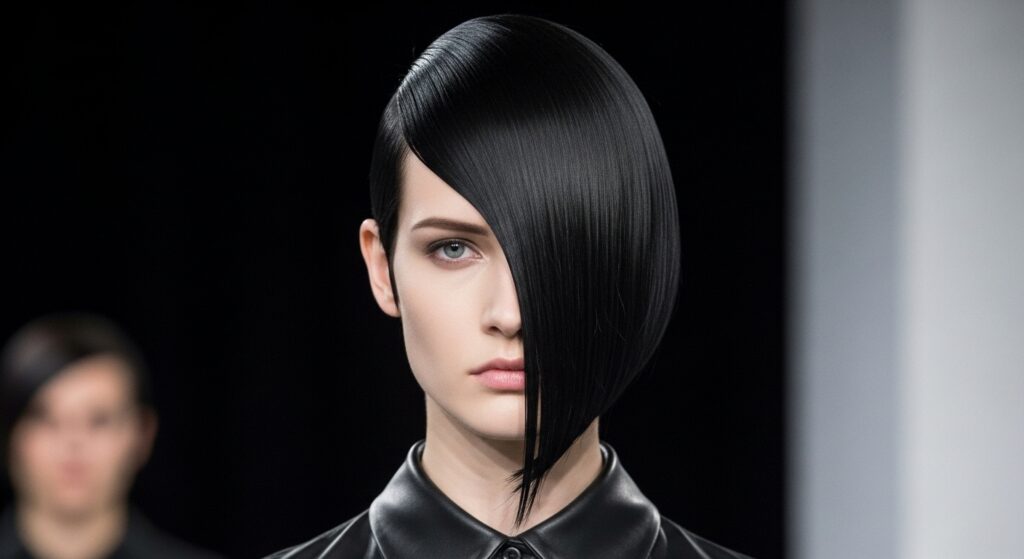
Adapting It to a Blunt Bob
This look was made for a blunt bob. On a quiet luxury bob, that swept-aside section creates a beautiful, architectural line that emphasizes the sharp cut. It feels expensive and effortless.
Make sure your ends are super fresh and blunt. The contrast between the severe part and the clean line of the bob is everything. Style with a flat iron for a pin-straight, sleek finish.
This is a prime example of old money hair—it’s not fussy, it’s just impeccably done. Add a pair of simple gold hoops and you’re set.

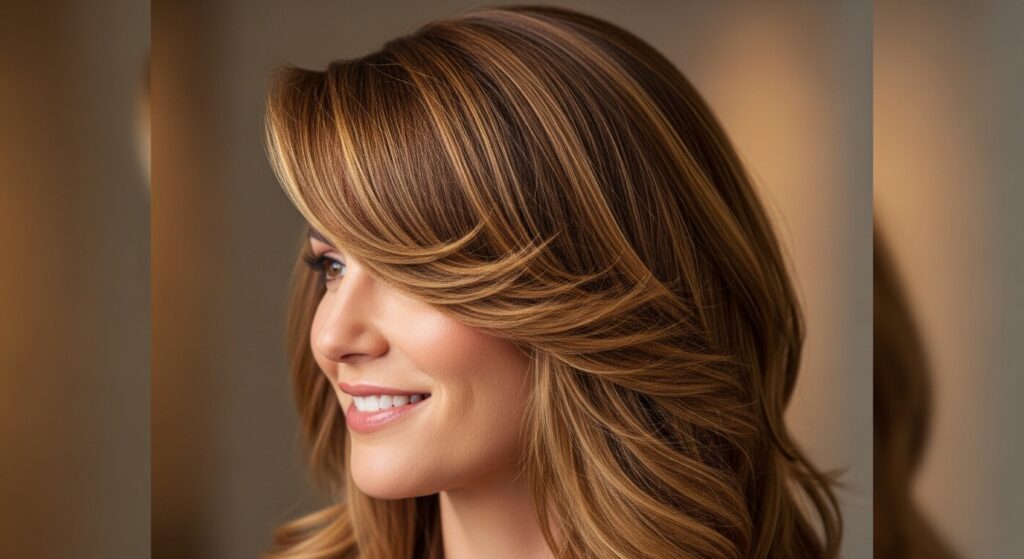
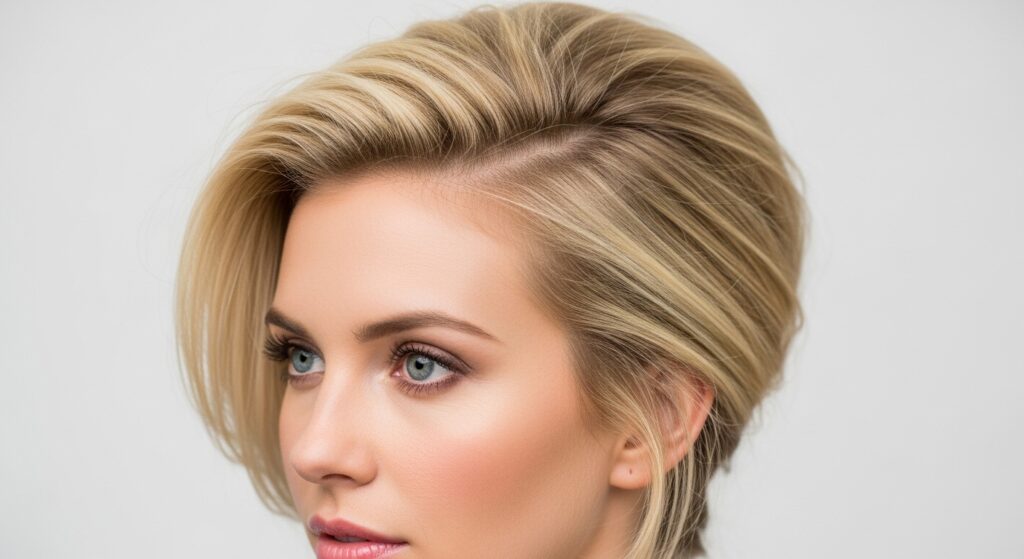
Adapting It to Long Layers
On long hair with layers, this style adds a ton of romantic movement. After you create your part and blow-dry, use a large-barrel curling iron to add loose waves away from your face.
The side-swept front pieces will blend beautifully into the waves, creating a soft, cascading effect. It’s less severe than on a bob, but just as dramatic.
This is a gorgeous way to add a touch of romantic goth hairstyles vibe—think soft waves, a deep part, and a moody lip color. It’s all about the feeling.
The Asymmetrical Lob Version
For an asymmetrical lob (long bob), this parting technique is a game-changer. It plays into the asymmetrical shape perfectly. Often, the lob is shorter in the back and longer on one side.
Sweep your hair to the longer side to emphasize the angle. Or, sweep it to the shorter side for a cool, unexpected contrast. The deep part makes the geometric cut pop even more.
This style has a bit of that glitchy glam hair energy—it’s polished but with an interesting, off-kilter twist that feels very modern.
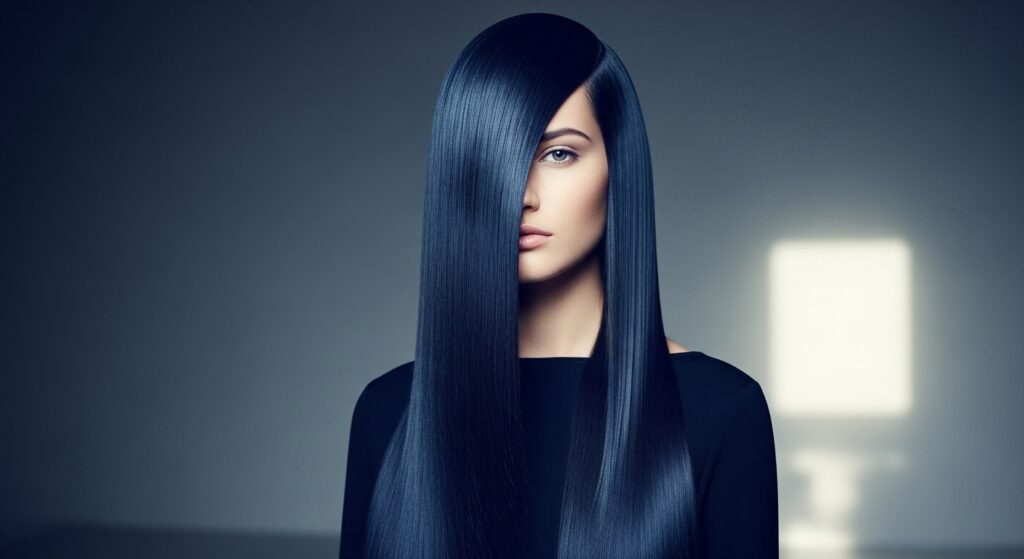
Creating a “Vampire” Vibe
The vampire haircut is all about sharp, dramatic contrasts and a touch of romanticism. That deep, severe side part is a core component. Pair it with inky black hair or a deep burgundy.
Keep the rest of the hair sleek and straight, or add a few very deliberate, sharp curls at the ends. The key is intensity and polish, with no stray hairs.
It’s a powerful, character-driven look. Play with a deep side part and a sharp bob or lob to really capture this aesthetic. It’s bold and absolutely stunning.
A Touch of “Hime” Style
The hime cut traditionally features straight, blunt front sections. For a modern take, try blending that idea with this side-swept technique. Keep the front pieces slightly longer and more blended than a classic hime.
Brush them aside into your dramatic part, letting them fall diagonally across your cheek. It softens the hime look while keeping its iconic, structured feel.
This works beautifully on straight, blunt haircuts. It’s a way to nod to the trend without going full-on princess cut, perfect if you love graphic styles.
For Fine Hair: The Volume Secret
If you have fine hair, this style is your new best friend. That deep part and lifted root on the heavy side creates the illusion of so much more thickness. The key is in the blow-dry.
Don’t skip the step of leaning over and drying the roots upside down. Consider a volumizing mousse at the roots before you blow-dry for extra oomph. Dry shampoo at the roots on day-two hair also works wonders.
Keep the ends light and avoid heavy products that can weigh fine hair down. You want lift, lift, lift!
For Thick or Curly Hair
If you have thick or curly hair, you might need to use a bit more tension when blow-drying that front section smooth. A boar bristle brush can help really smooth the hair from root to tip.
You can also embrace your texture! Define your curls, then use the side-swept technique to push the front curls to one side, creating a gorgeous, voluminous frame. The part might not be scalpel-sharp, but the effect is just as dramatic.
Use a strong-hold gel or cream along your part to define it and keep curls in place on that side.

The “Glitchy Glam” Interpretation
Glitchy glam hair is about intentional imperfection within a polished look. How do you do that with this style? After you’ve perfected your side-swept look, gently pull out one or two tiny, wispy pieces near your part.
Or, use a tiny bit of texturizing paste to piece out the very ends of your side-swept section. It’s about looking like you just ran your hands through it, in the best way.
The base is sleek and done, but these little “glitches” add so much personality and modernity. It keeps it from feeling too retro.
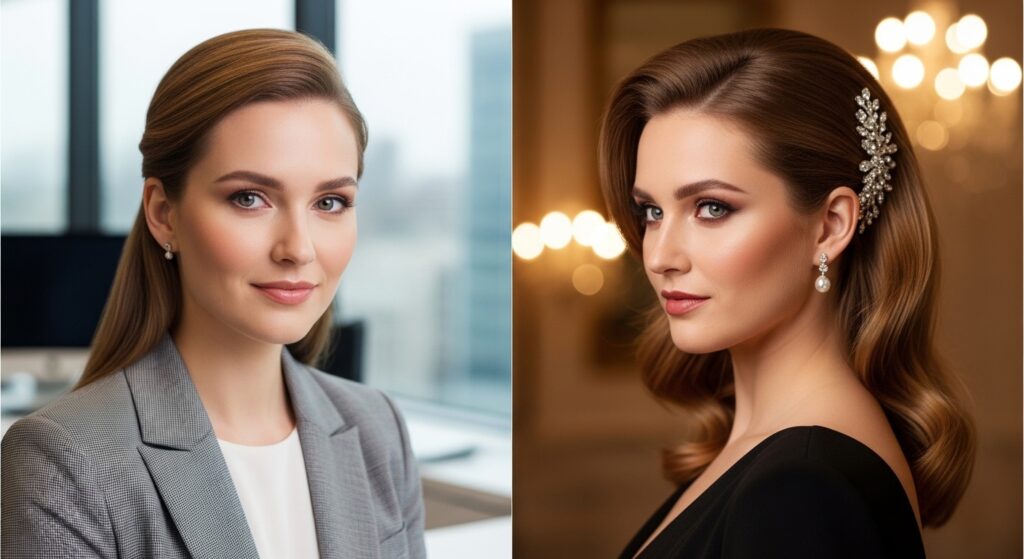
Day-to-Night Transformation
This style transitions perfectly. For day, keep it clean and polished with just a bit of pomade. For night, you have so many options. Add a sparkly clip to hold the swept section back.
Or, amp up the texture with a texturizing spray for a messier, more voluminous look. You can also create a few face-framing pieces by curling just the ends of the side-swept section outward.
It’s such a versatile base. In two minutes, you can go from a boardroom meeting to a dinner date without needing a full restyle.
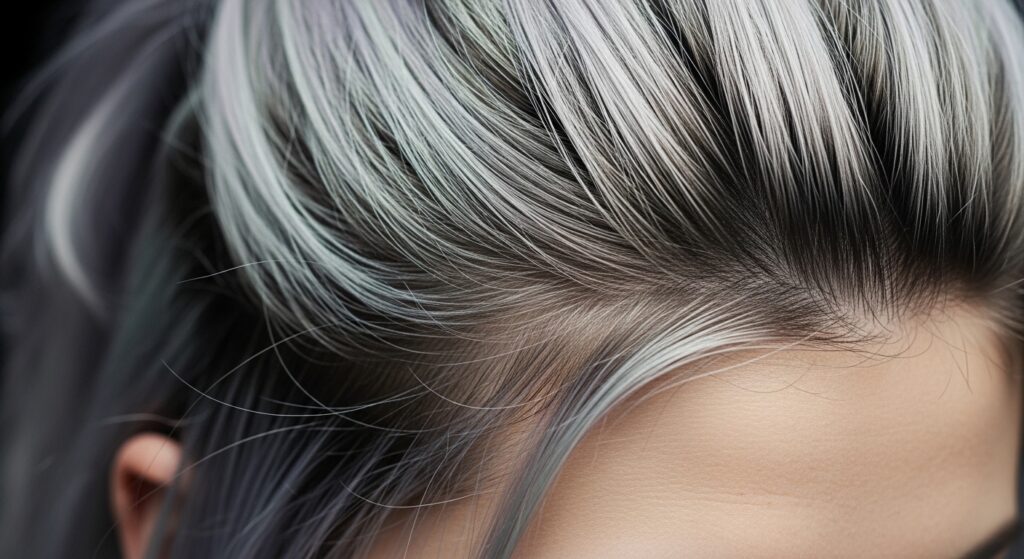
Managing Regrowth & Roots
If you have color-treated hair, a sharp part can highlight root regrowth. You can use this to your advantage! A dark root with a deep side part feels very grunge and cool.
If you prefer a seamless look, make sure your colorist knows you wear a deep part so they can blend accordingly. A root smudge or shadow technique is perfect for this style, as it softens the line of demarcation.
On the flip side, a stark blonde highlight starting right at that part can look incredibly chic and graphic.
Common Mistakes to Avoid
The biggest mistake is not using enough hold at the root. If your hair is soft at the root, it will fall flat. Really work that blow-dry step and don’t be shy with the initial hairspray.
Another error is making the side-swept section too thin. You want a substantial piece—think the width from the outer edge of your eyebrow to your temple. A wispy strand won’t have the same impact.
Finally, avoid a crooked part. Use your comb and look straight on. A crooked line looks messy, not deliberate.
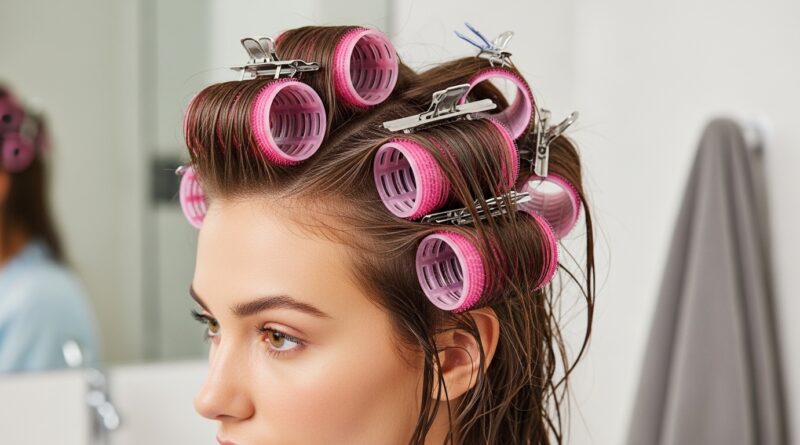
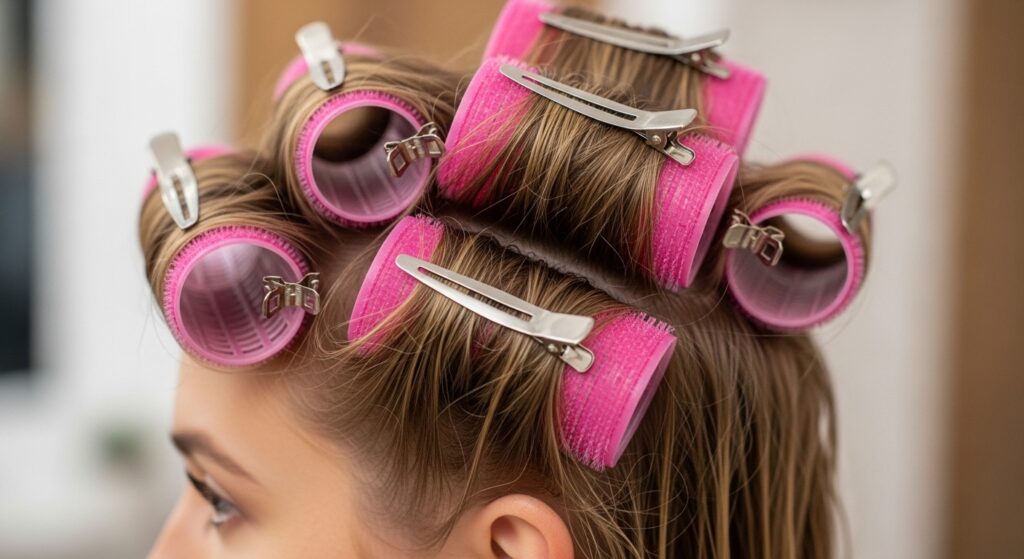
Heat-Free Styling Method
You can absolutely do this without heat. On damp hair, apply a strong-hold mousse. Part your hair deeply and use large roller clips to clip the roots of the heavy side upward, perpendicular to your head.
Let your hair air-dry completely, or use a diffuser on a cool setting. Once dry, remove the clips. The volume will be set. Use pomade to smooth the side section into place.
This method is gentler on your hair and can give a more lived-in, natural volume that’s still very polished.
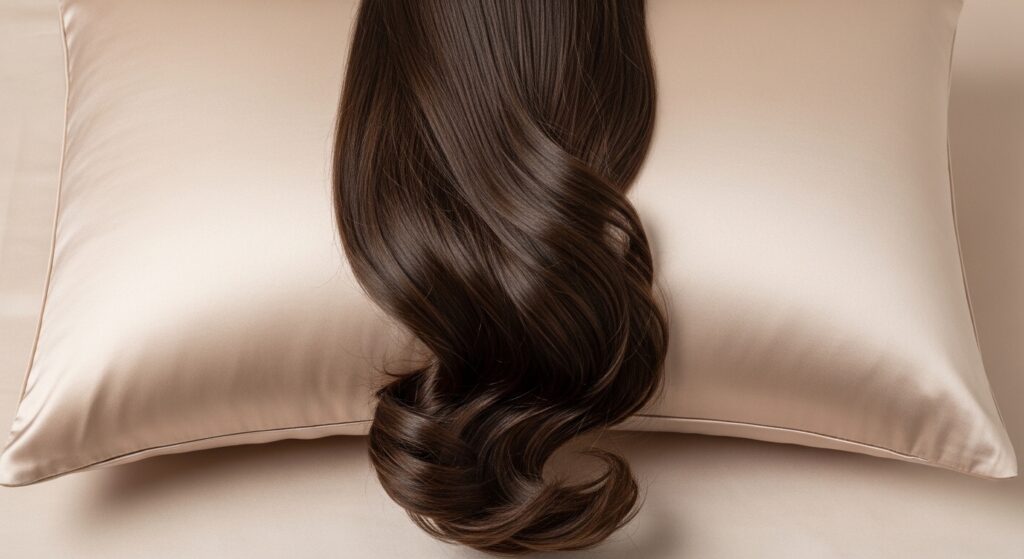
Maintaining It Overnight
To make your style last a second (or third!) day, invest in a silk or satin pillowcase. It reduces friction so your hair doesn’t get as messed up while you sleep.
In the morning, flip your head over, give the roots a light spray with dry shampoo for texture and lift, and gently brush the side-swept section back into place. You might need a tiny touch of pomade.
Often, day-two hair has even better texture and hold for this style. The natural oils add a bit of grit that helps everything stay put.
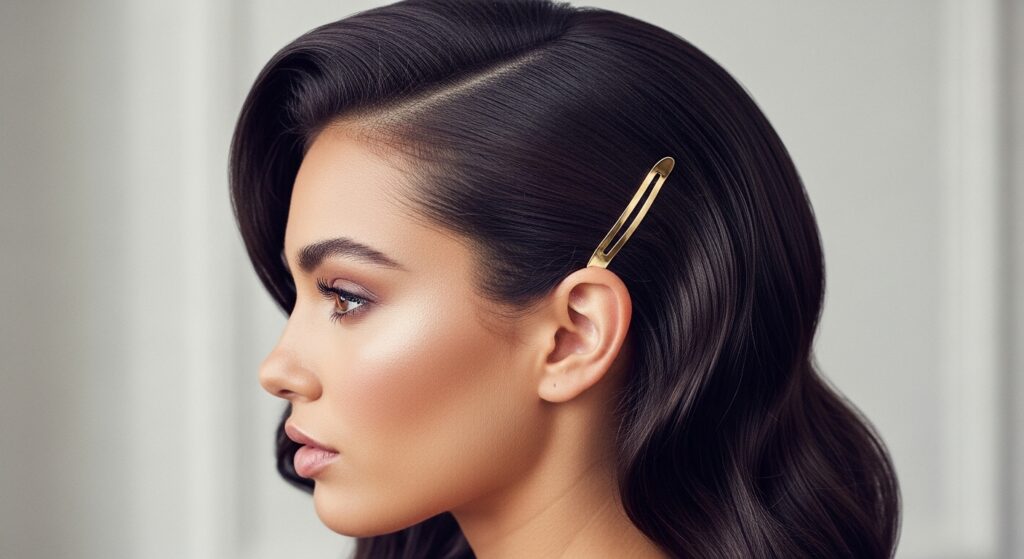
Accessorizing Your New Part
Accessories love this hairstyle. A simple, elegant barrette placed just behind the swept section on the heavier side looks incredible. It’s functional and decorative.
Thin, delicate headbands that sit just behind your hairline also work beautifully. Or, try a dramatic earring on the side where your hair is swept back—it balances the look perfectly.
Less is often more. Let the strong part line be the star, and use accessories as subtle supporting players.
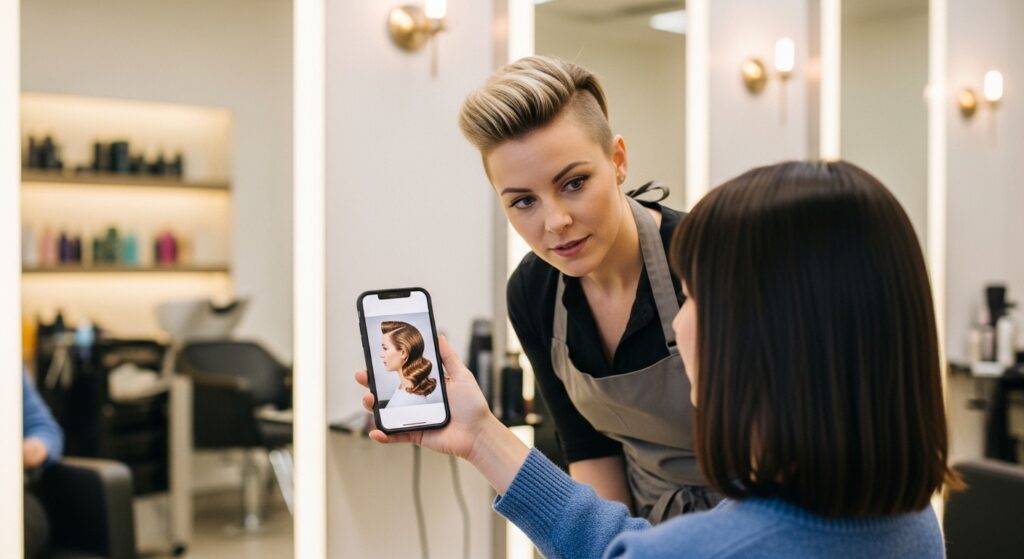
What Your Stylist Needs to Know
If you want to cut your hair with this style in mind, tell your stylist! They can cut your hair with this deep part already established, which makes styling so much easier.
They might leave the front section slightly longer on the side you plan to sweep it to, so it has enough weight to stay put. They can also layer around your face to help it blend seamlessly.
Bring a photo. Saying “I want to wear a deep side-swept part” helps them shape your cut for the final look, not just for when it’s blown straight back.
The Confidence Factor
Let’s be real: walking out with a severe, polished look like this requires a bit of confidence. It’s a statement. But that’s the point! It makes you stand up a little straighter.
Start by wearing it around the house to get used to the feeling. You’ll quickly see how it frames your eyes and cheekbones. That boost is real.
This isn’t just a hairstyle; it’s an attitude. It says you pay attention to detail and you’re not afraid to own your look. That’s powerful.
Final Touch: The Finishing Spray
Never underestimate the power of the final spray. Hold your hairspray can about 10-12 inches away from your head. Give it one or two light, all-over mists.