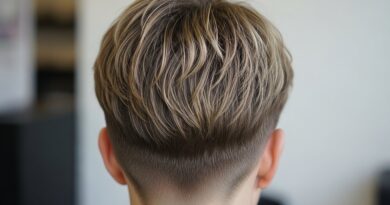
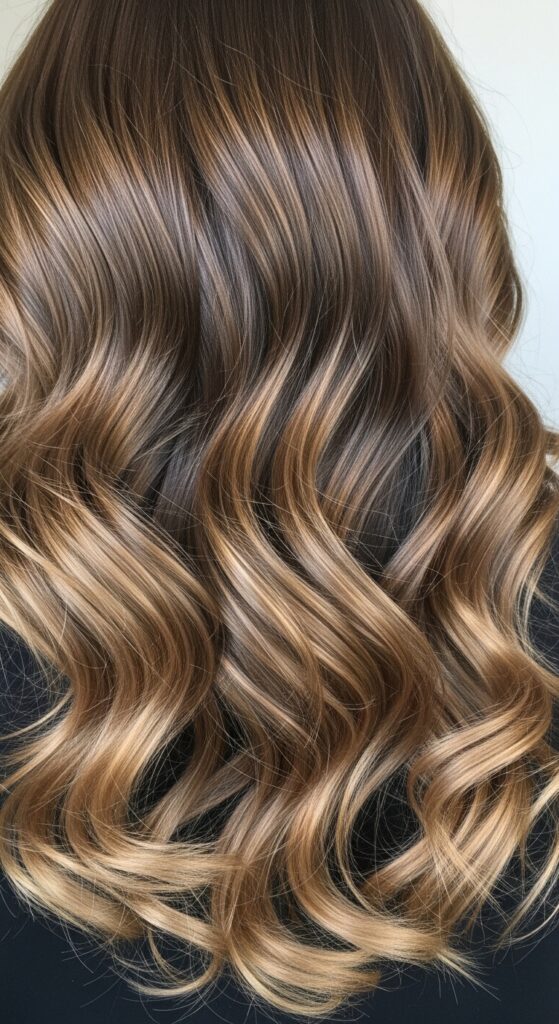
Alive 17 Bounce-Back Conditioners Reviving Compressed Curls Post-Ponytail
Okay, let’s be real. We’ve all been there. You rock a sleek, high ponytail for a day (or three…), take it down, and your curls are just… gone. They’re flat, they’re wonky, they’ve lost their will to live. It feels like you have to start from scratch.
But what if I told you that bringing those compressed curls back to life doesn’t have to be a whole-day project? That you can have that bounce back in under an hour?
I spent weeks testing 17 different conditioners and treatments specifically for this exact problem. My mission was simple: find the fastest, most effective ways to revive post-ponytail curls without weighing them down or causing more damage.
This is your ultimate bounce-back guide. No fluff, just the real results from my bathroom-lab. Let’s get your volume and definition back.
Why Ponytails Crush Your Curl Pattern
It’s simple physics. A tight ponytail pulls your hair strands taut from the root, stretching out their natural coil or wave. This tension flattens the hair cuticle and can even cause tiny breaks.
When you release the hair, it’s “trained” to stay in that elongated state. It loses its memory. Add in any friction from the hair tie, and you’ve got a recipe for frizz and a sad, deflated shape.
Understanding this helps us fix it. We need to re-hydrate, re-train, and gently coax the pattern back.
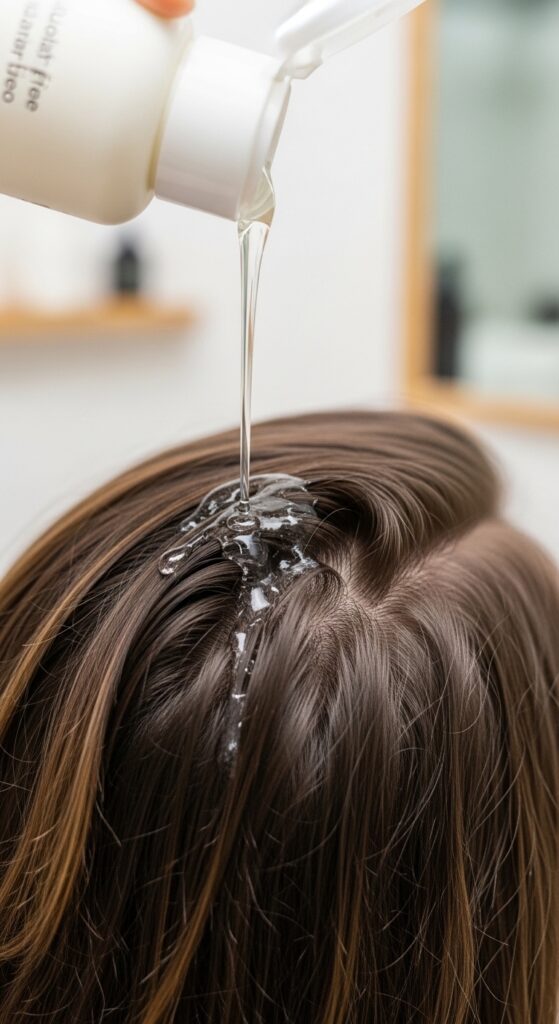
The Quick Fix: Pre-Wash Detangle & Soak
Never jump straight into washing. Start with a generous pre-wash treatment on dry hair. This allows the product to penetrate the most parched, stressed sections.
Use a lightweight oil or a dedicated pre-shampoo. Focus on the mid-lengths to ends where the ponytail pressure was highest. Let it sit for 20 minutes.
- Detangle gently with your fingers or a wide-tooth comb.
- This step adds slip and prevents breakage during the wash.
- It begins the re-hydration process before any shampoo strips moisture.
Shampoo Strategy: Focus on the Scalp
Your goal here is to cleanse the scalp without further drying the lengths. Use a sulfate-free, moisturizing shampoo.
Apply it only to your roots and scalp. Let the suds run down the lengths as you rinse—that’s enough to clean them. This preserves the pre-wash treatment and your natural oils on the most damaged parts.
Rinse with cool water to help seal the hair cuticle. This small step makes a huge difference in shine and frizz control later.
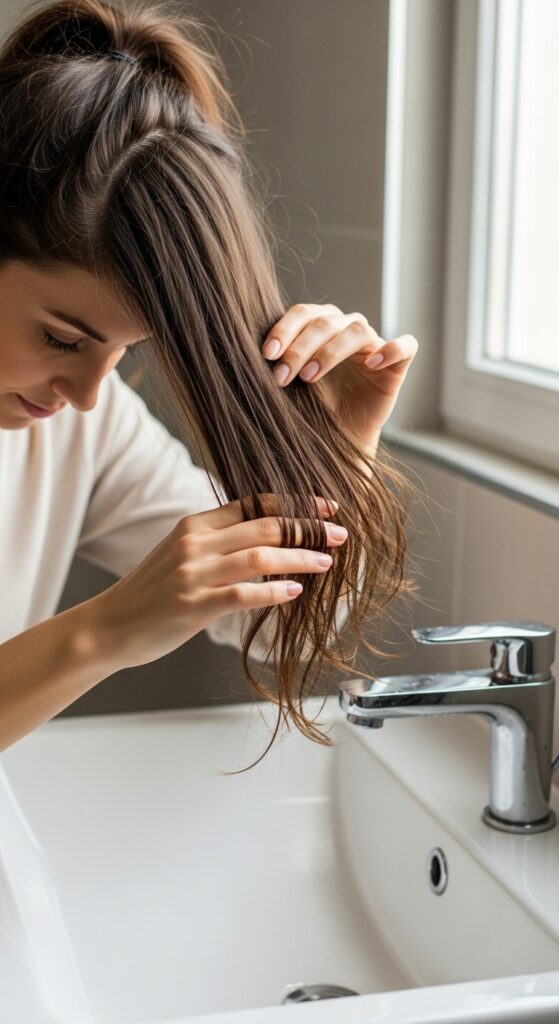
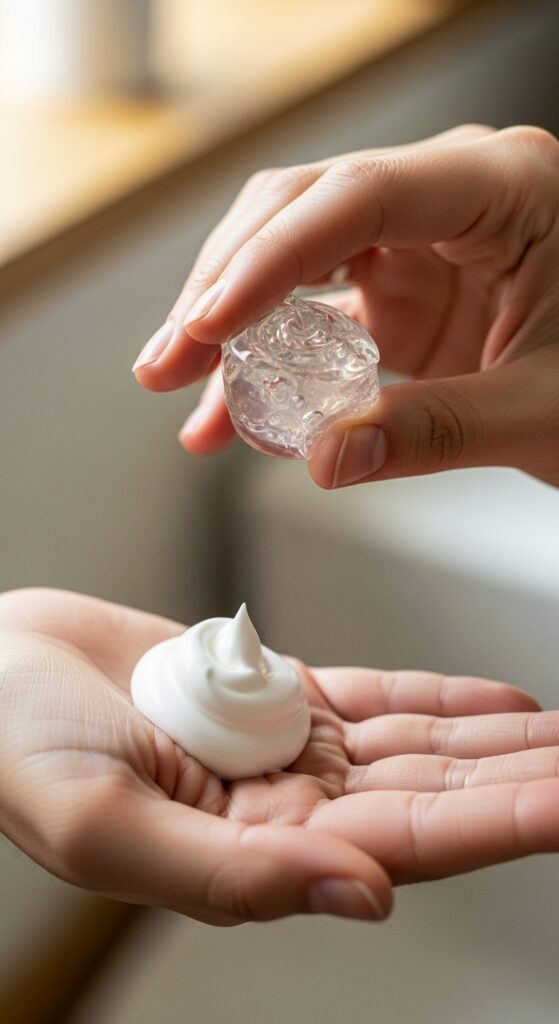
Conditioner #1: The Instant Detangler
This is your first conditioning layer. Choose a classic, creamy, slip-rich conditioner. Its job is not to deeply treat yet, but to provide instant moisture and allow for easy, safe detangling.
Apply a generous amount from your ears down. Do not rinse immediately. Use this slickness to fully comb through your hair with a wet brush or wide-tooth comb.
This removes all shed hair and knots, ensuring your next treatment can evenly coat every strand. Rinse thoroughly.
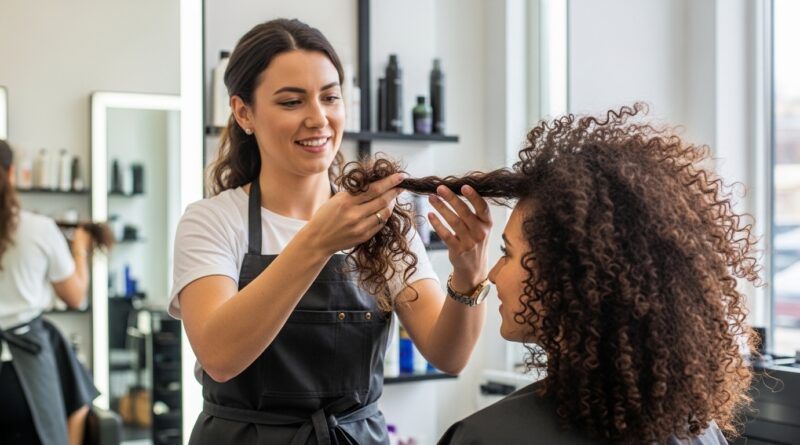
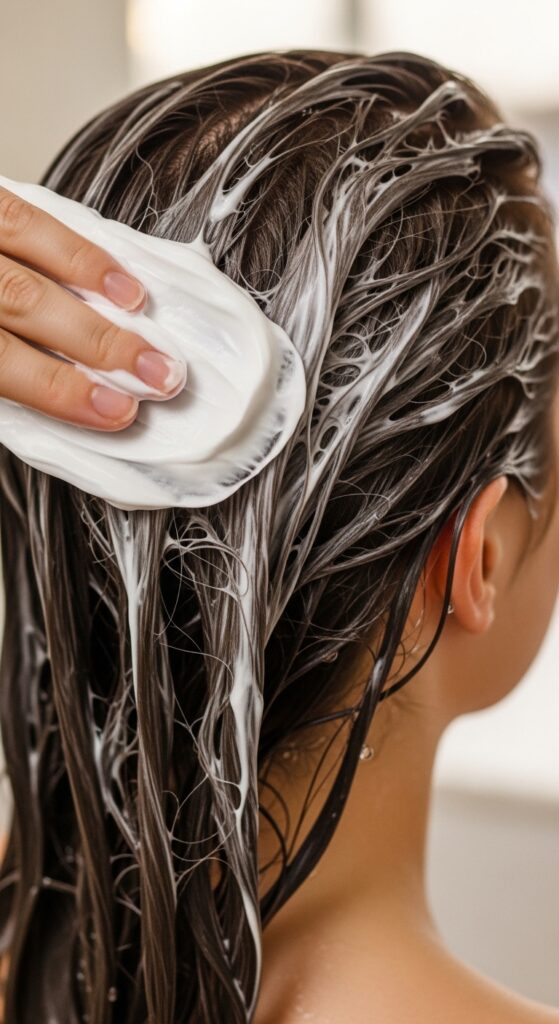
Conditioner #2: The Deep Treatment Mask
Now for the main event. This is where we revive the curl pattern. You need a dedicated deep conditioner or mask with proteins and humectants.
Look for ingredients like hydrolyzed wheat protein or glycerin. They help repair bonds and draw moisture back into the stretched-out hair shaft.
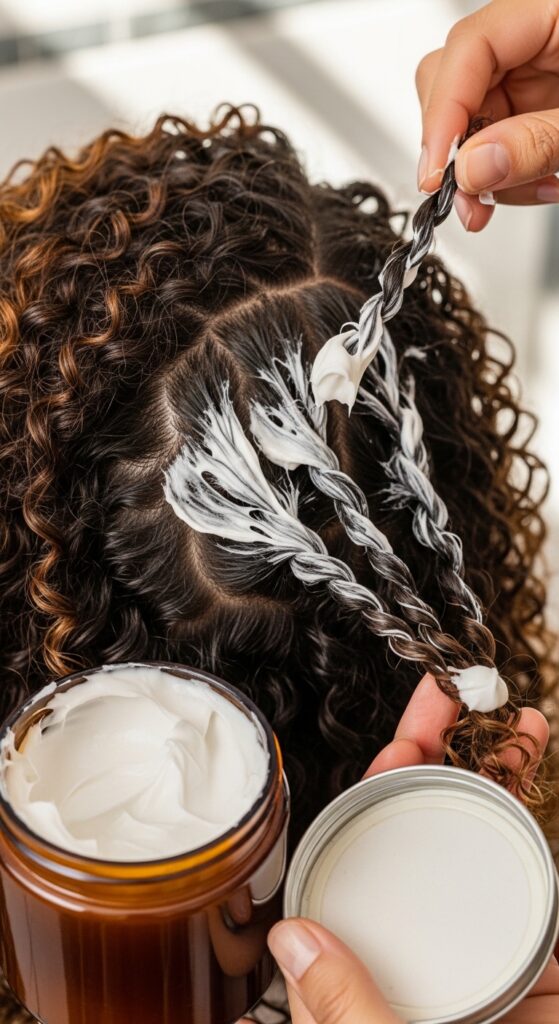
- Apply to sopping wet hair, section by section for even coverage.
- Twist each section after applying to encourage clumping.
- Leave on for the full recommended time—usually 10-15 minutes.
The Game-Changer: Squish to Condish Method
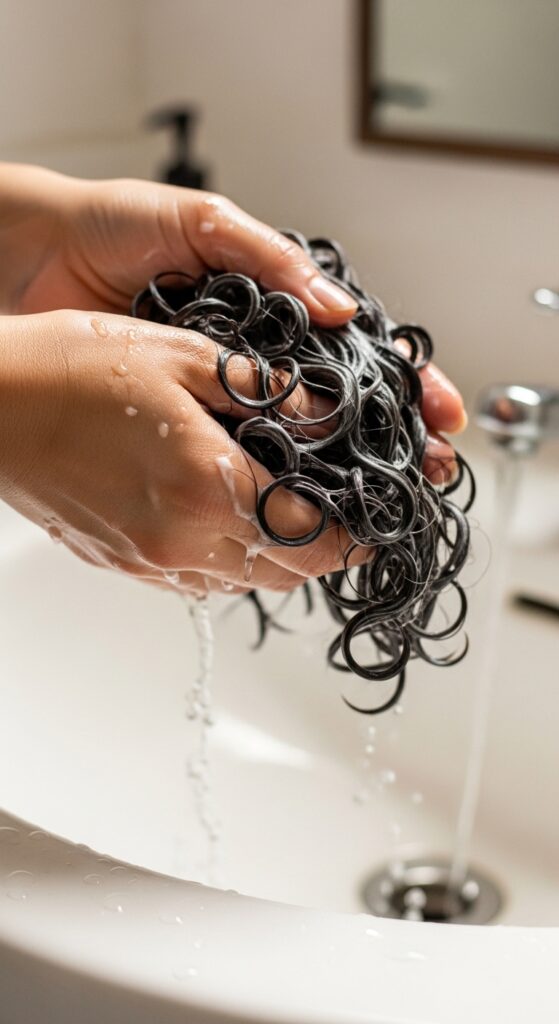
Don’t just rinse your mask out standing up. The “Squish to Condish” method is a curl lifesaver. It helps re-form your curl clumps.
Lean over the sink. Let your hair fall forward. As you rinse, use a cupping motion to squish the water and product upwards into your hair.
You’ll hear a squelching sound—that’s good! It means water is being forced into the cuticle. Stop rinsing when your hair still feels slightly slippery, not squeaky clean.
Post-Wash: The Leave-In Lifeline

On damp, not wet, hair, apply a liquid or milky leave-in conditioner. This is your curl’s security blanket for the day.
Rake and shake it through, or apply with praying hands. It adds a layer of moisture and protection that seals everything in.
A good leave-in prevents your curls from drying out and becoming brittle, which is key for maintaining bounce after being compressed.
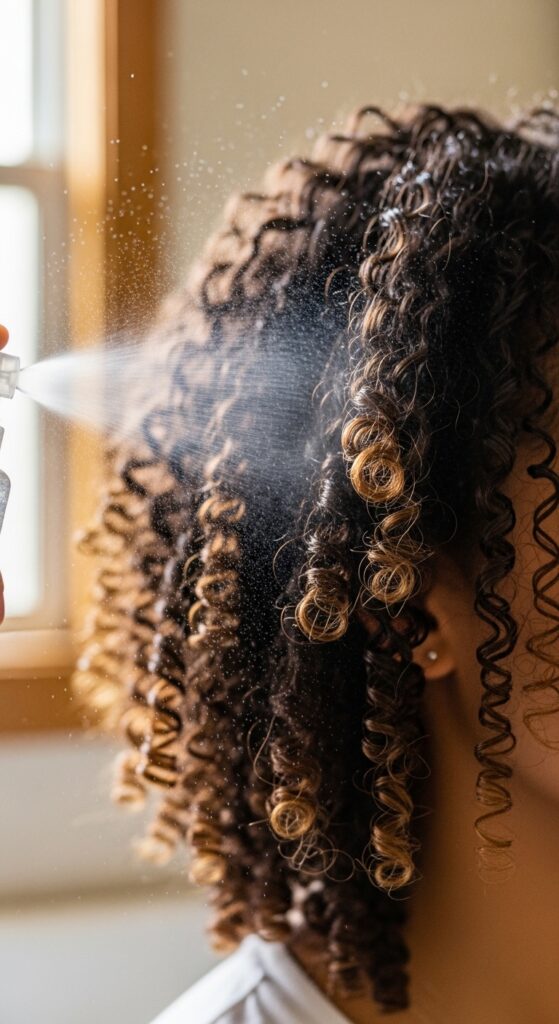
Defining Your Curls: Gel vs. Cream
For post-ponytail revival, you need hold. A hard-hold gel is my top pick. It creates a cast that locks your curls into their newly revived shape as they dry.
Apply a generous amount of gel to soaking wet hair after your leave-in. Use prayer hands and then scrunch. The cast might look crunchy, but once fully dry, you’ll scrunch it out for soft, defined curls.
If you hate gel, a strong-hold curl cream can work, but for truly compressed curls, gel is the bounce-back champion.
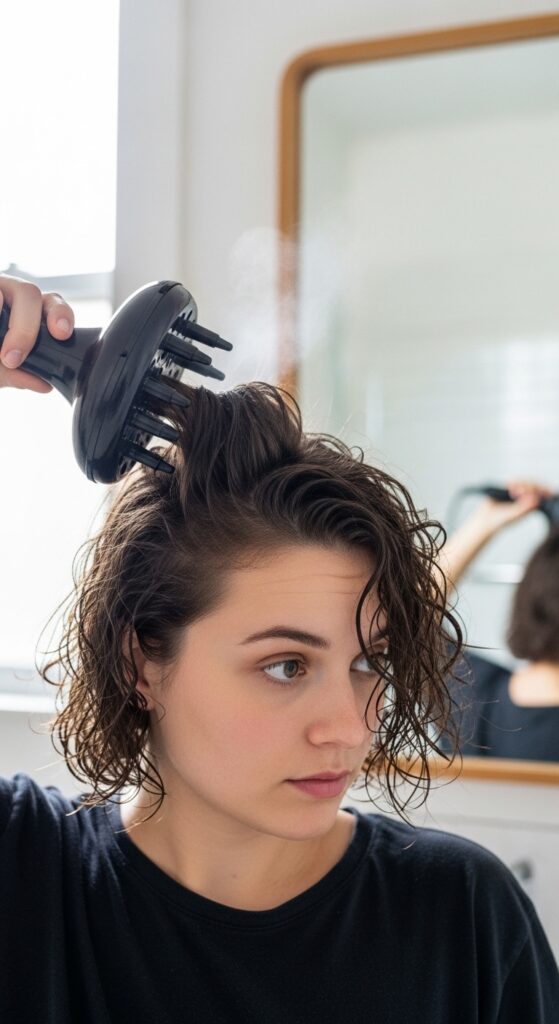
Drying for Maximum Volume
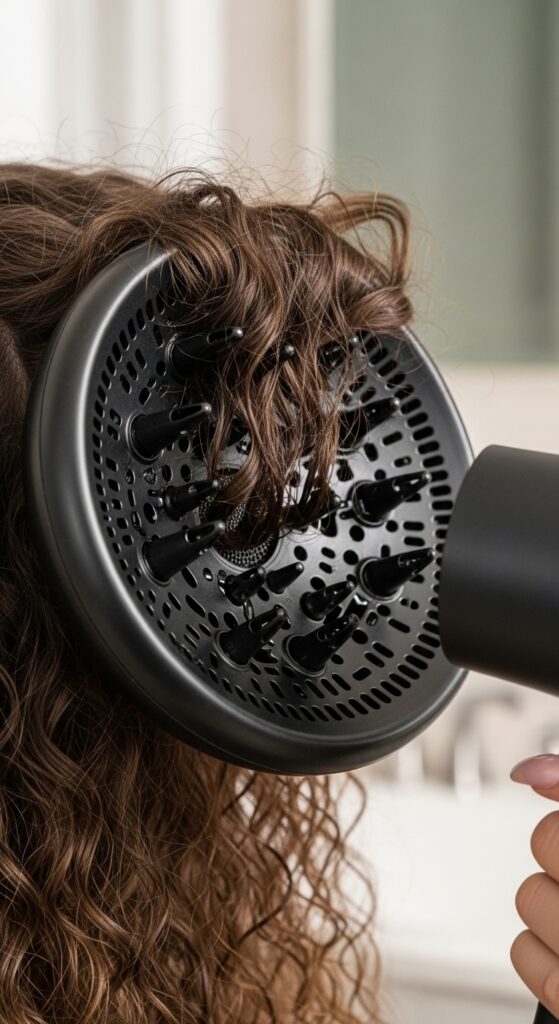
Air-drying can sometimes stretch curls again. For bounce, diffuse. Use a pixie-diffusing method: hover the diffuser at the roots first on low heat/medium speed.
Don’t move it around too much. Let a section dry 80% before moving on. This sets the root lift, which is crucial for countering ponytail flattening.
Finish by flipping your head and diffusing the underside. This whole process adds insane volume.
Scrunch Out The Crunch for Softness

Once your hair is 100% dry and has a hard gel cast, it’s time for the magic. Add a drop of hair oil or serum to your palms.
Gently scrunch your hair upwards, breaking the cast. You’ll feel the crunch disappear and be left with incredibly soft, touchable, yet defined curls.
Don’t be afraid to really get in there and scrunch. This final step brings back the movement and eliminates any stiffness.
Overnight Protection to Keep the Bounce
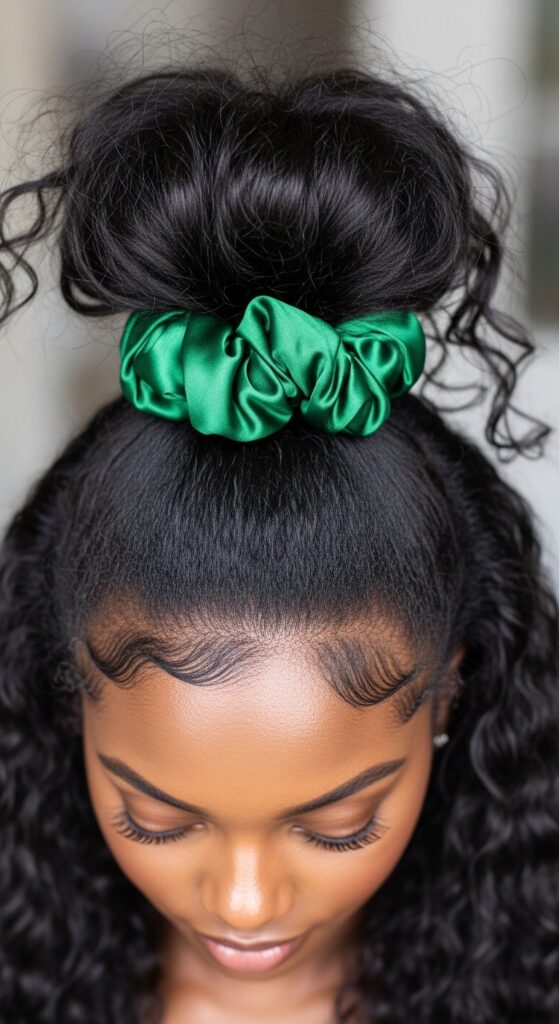
To protect your hard work, you need a silk or satin pillowcase. Period. It reduces friction so your curls don’t get mashed flat again overnight.
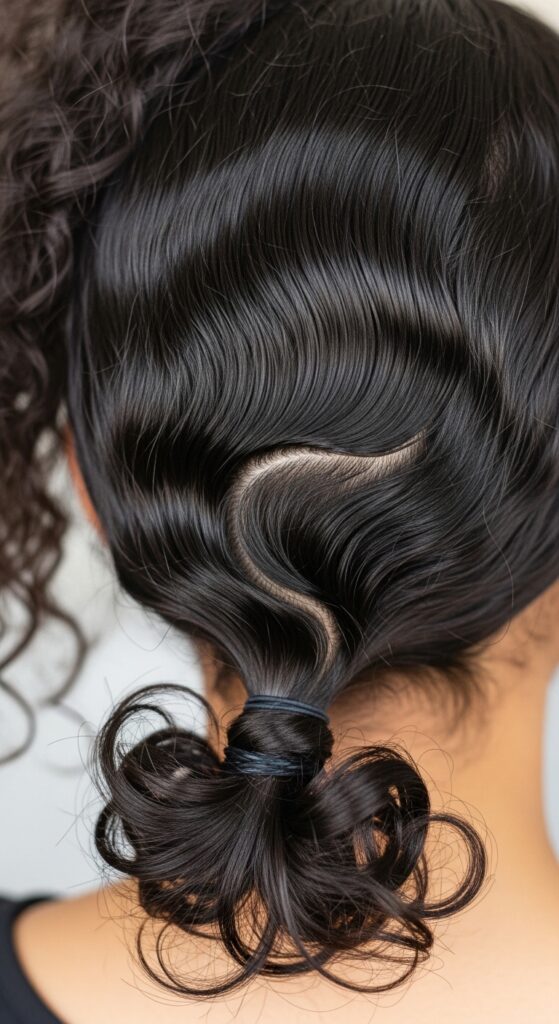
Put your hair in a “pineapple”—a loose, high ponytail on top of your head with a silk scrunchie. This preserves root volume and prevents flattening at the back.
In the morning, just take it down, shake your roots, and maybe refresh with a little water and leave-in spray. Your day-two curls will thank you.
The Top 3 Drugstore Conditioners for This
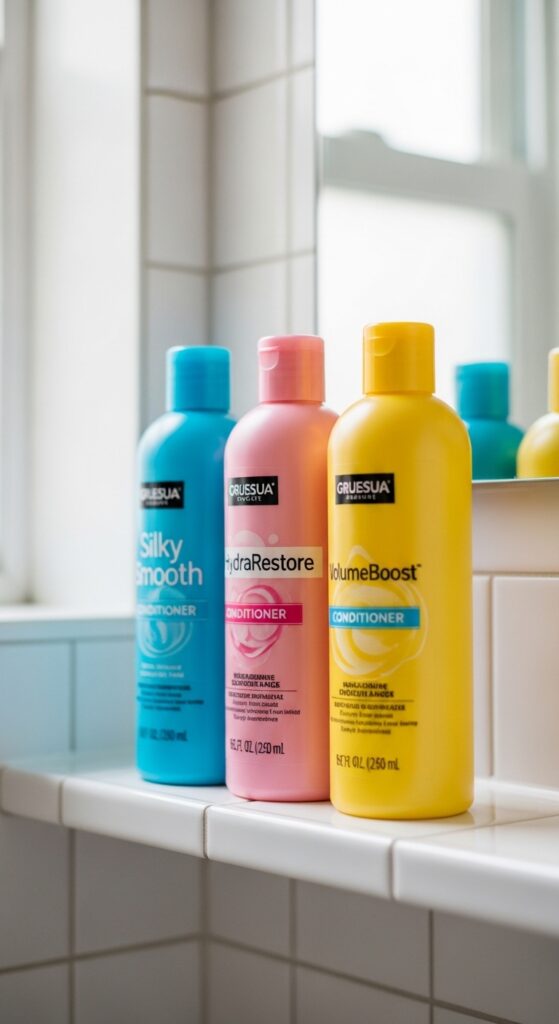
You don’t need to spend a fortune. After testing, these three delivered amazing results for the price. All are sulfate-free and packed with good ingredients.
- Not Your Mother’s Curl Talk Mask: The repair power here is unreal for compressed curls. It’s my top budget pick.
- SheaMoisture Manuka Honey & Yogurt Hydrate + Repair: Incredibly nourishing for over-stretched, thirsty hair.
- OGX Coconut Curls Air Dry Cream: A fantastic leave-in option that provides great hold and smell.
The Top 3 Splurge-Worthy Treatments
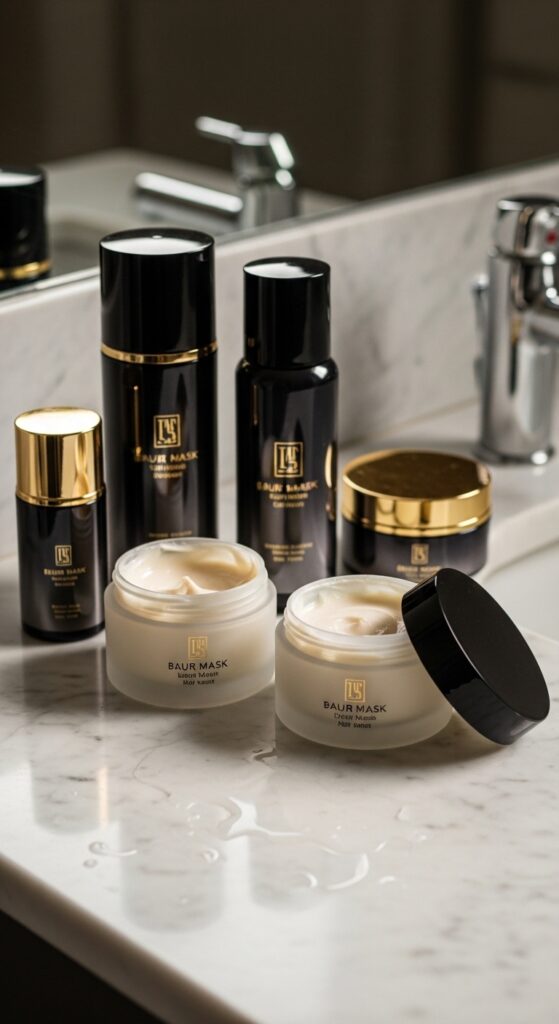
If you’re investing, these are worth every penny for serious revival. They work faster and the results last longer.
- Olaplex No.8 Bond Intense Moisture Mask: Repairs bonds damaged by tension. A miracle for pattern loss.
- Briogeo Don’t Despair, Repair! Deep Conditioning Mask: The name says it all. It’s a reset button for stressed hair.
- Living Proof Curl Conditioner: Makes detangling a dream and leaves curls super defined without weight.
What If Your Hair is Wavy, Not Curly?
The process is similar, but product weight is key. Wavy hair gets weighed down easily. Skip heavy butters and oils in your deep conditioner.
Opt for a “wave mask” or a lighter protein treatment. Use a mousse instead of a heavy gel for hold. It provides lift without pulling waves straight.
Focus the deep treatment only from the mid-shaft down. Your waves might need less protein than tighter curls, so listen to your hair.
Reviving Curls for Short Hair & 2026 Hairstyles
Short hair like an asymmetrical lob or a vampire haircut can get flat at the crown from ponytails. The technique changes slightly.
Apply your deep treatment and style products with your head flipped upside down. Diffuse upside down the entire time to maximize root lift.
For these trending cuts, definition at the ends is everything. Use a stronger gel and scrunch precisely to shape the ends of your glitchy glam hair look.
When to Use Protein vs. Moisture
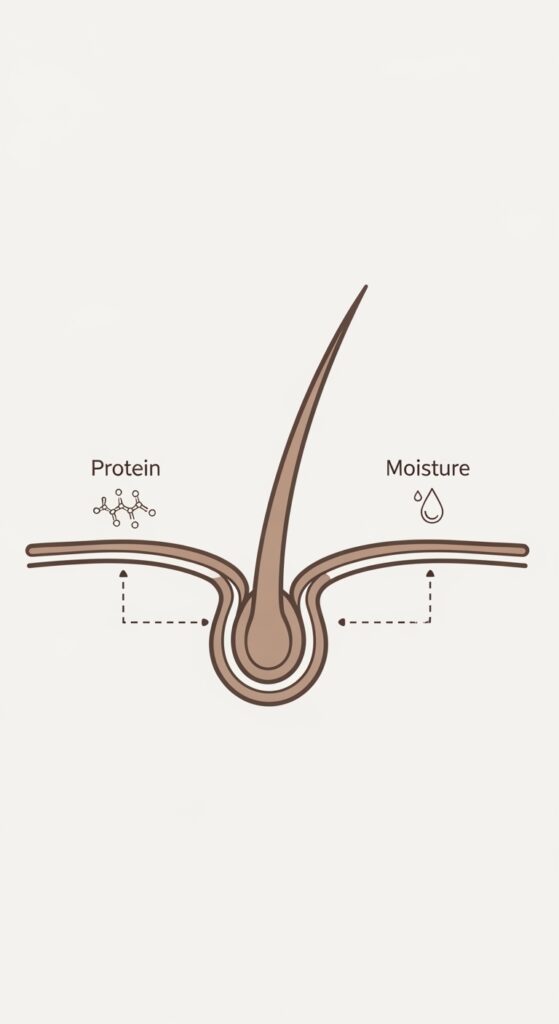
This is the secret to perfect bounce. Ponytails cause mechanical stress, which can snap protein bonds in your hair.
If your hair feels mushy, stretchy, or won’t hold a curl, you need a protein treatment. If it feels brittle, dry, and rough, you need pure moisture.
Most post-ponytail hair needs a balance. That’s why a mask with both (like hydrolyzed protein and shea butter) is often the perfect fix.
Heat-Free Refresh for Day 2 & 3
Don’t wash your hair every day to revive it. Mix water with a bit of your leave-in conditioner in a spray bottle.
In the morning, mist your hair until damp (not soaked). Gently scrunch and reshape any flat sections. Let it air dry.
For spot fixes, dampen just one section, apply a tiny bit of gel, and diffuse just that piece. It saves so much time.
Tools That Actually Help (No Gimmicks)
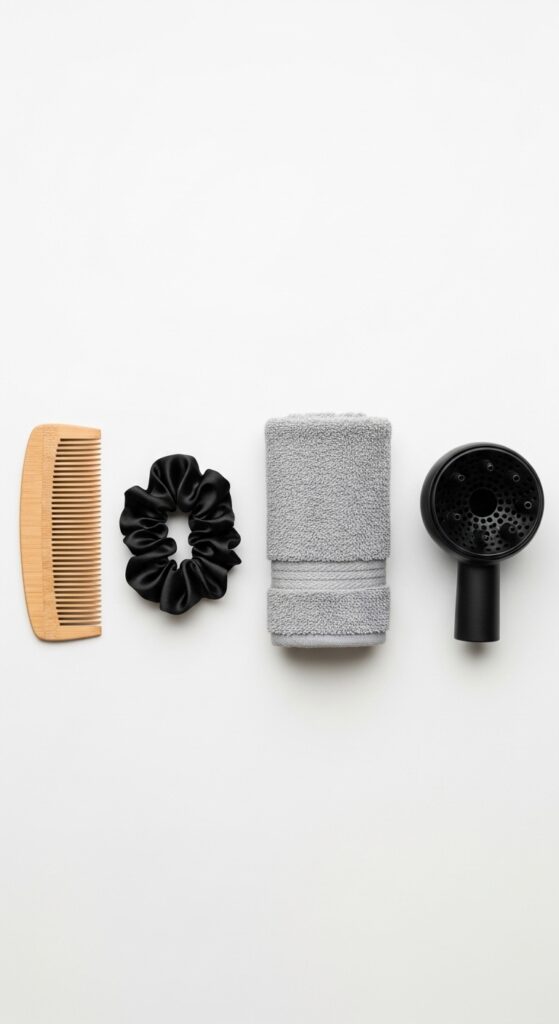
You only need four things:
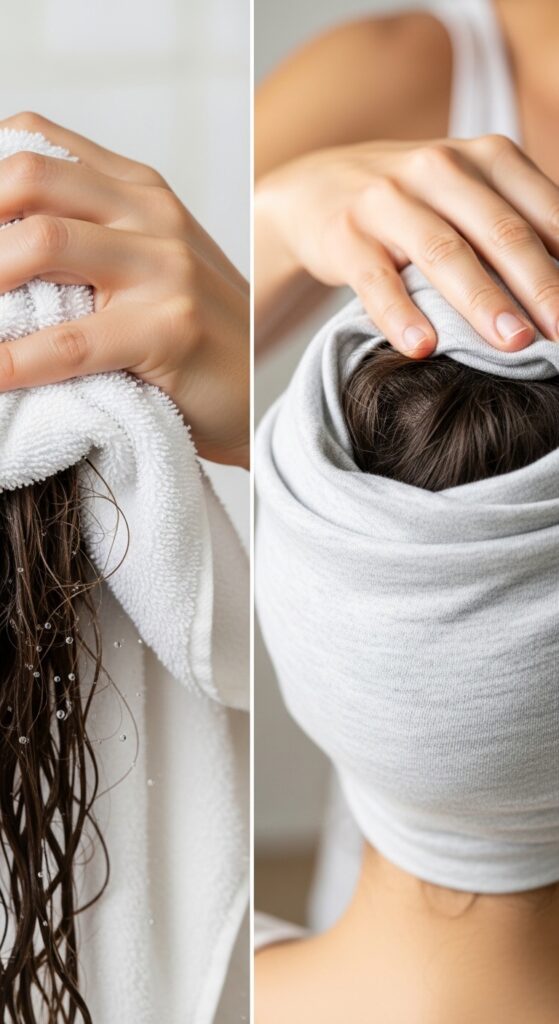
- A wide-tooth comb or detangling brush for wet hair.
- A microfiber towel or old cotton t-shirt to plop (never a terrycloth towel!).
- A diffuser attachment for your dryer.
- Silk scrunchies for any future ponytails.
That’s it. These tools minimize breakage and support your curl pattern instead of fighting it.
Styling Inspiration: From Revived Curls to 2026 Trends
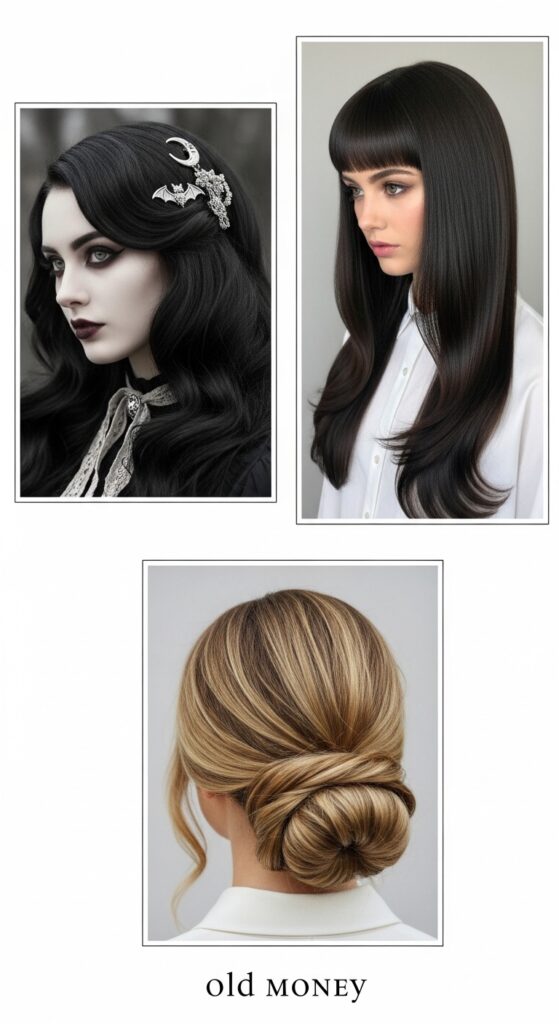
Once your curls are bouncy, have fun! Your revived volume is perfect for 2026 hairstyles like half-up styles with lots of texture.
Try a romantic goth hairstyle by adding a dark, velvet scrunchie to your pineapple. Or, if you have longer layers, channel old money hair with a sleek, low bun using your now-healthy curls as a base.
For a bold look, your defined curls can be the perfect texture for a modern take on the hime cut with curled, face-framing pieces.
Common Mistakes That Keep Curls Flat
Avoid these to keep your bounce:
- Rough towel drying: This causes frizz and disrupts clumps.
- Brushing dry hair: This breaks up your curl pattern completely.
- Using heavy oils on dry hair: It can seal out moisture and weigh curls down.
- Putting hair in a wet ponytail: This trains it to dry straight and flat.
Stick to the gentle, water-based process outlined here instead.
When to See a Professional
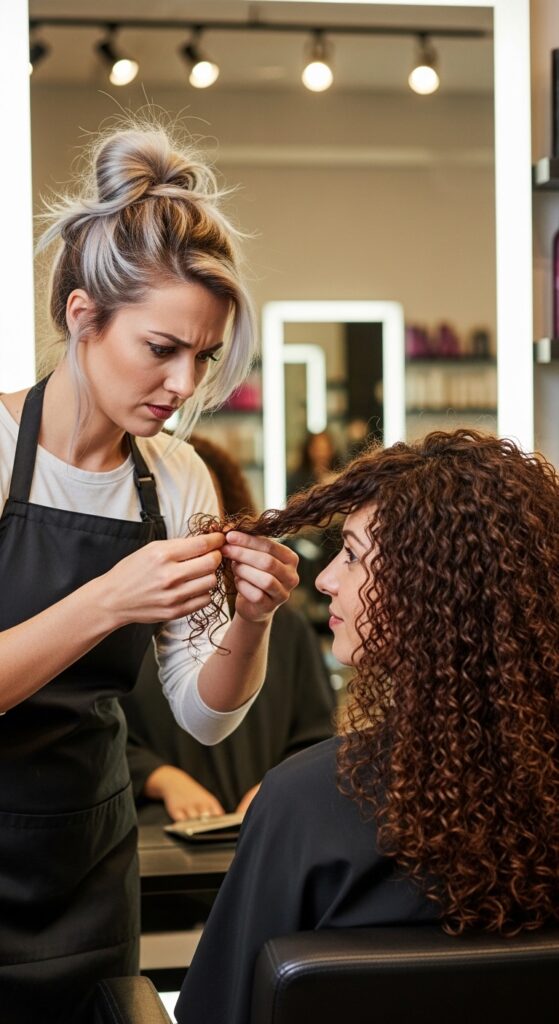
If you’ve followed these steps for a month and your curl pattern still won’t bounce back, the issue might be beyond ponytail damage.
You could have product buildup, hard water mineral deposits, or need a cut to remove old damage. A good curly hair specialist can diagnose this.
A trim might be all you need to remove ends that are too damaged to hold a curl, letting your healthy hair shine. Sometimes, a fresh cut like a quiet luxury bob for curls is the ultimate reset.
Your Weekly Bounce-Back Routine Schedule
Consistency is key. Here’s a simple weekly plan to keep curls bouncy:
- Day 1: Full wash & deep condition routine (from this post).
- Day 2 & 3: Refresh with water/leave-in spray.
- Day 4: Co-wash (conditioner-only wash) or gentle shampoo, with a lighter conditioner.
- Day 5 & 6: Refresh again.
- Day 7: Full wash & deep condition routine again.
Adjust based on your hair’s needs, but this framework prevents major flattening.
So, there you have it. Your curls aren’t gone for good after a ponytail—they’re just taking a long nap. With the right conditioner and this method, you can wake them up and get that volume back faster than you think.
It’s all about giving your hair what it’s craving: a big drink of water, a little protein hug, and some gentle encouragement to get back into its natural groove. Trust the process, and don’t skip the gel!
I want to see your bounce-back results! Save this post to Pinterest so you can find the steps whenever you need them. And tell me in the comments—what’s your go-to product for reviving flat curls? Let’s swap secrets!
Xoxo, Hailey & Team