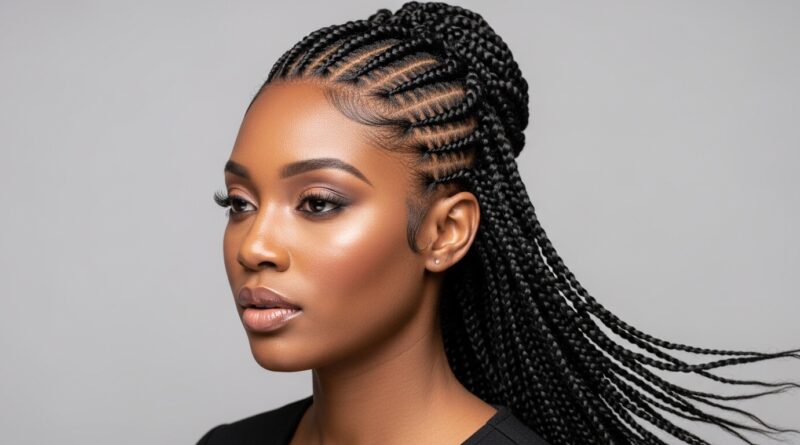
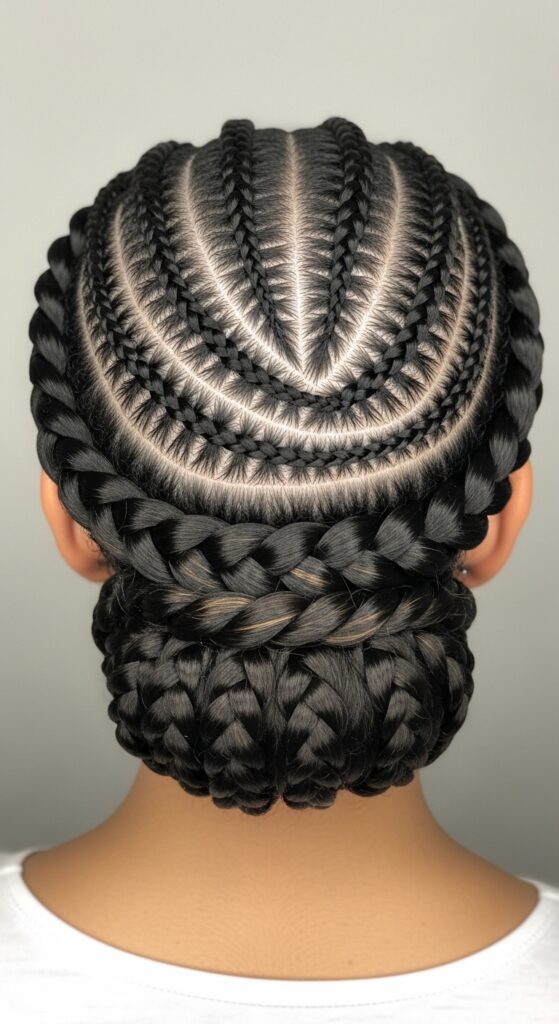
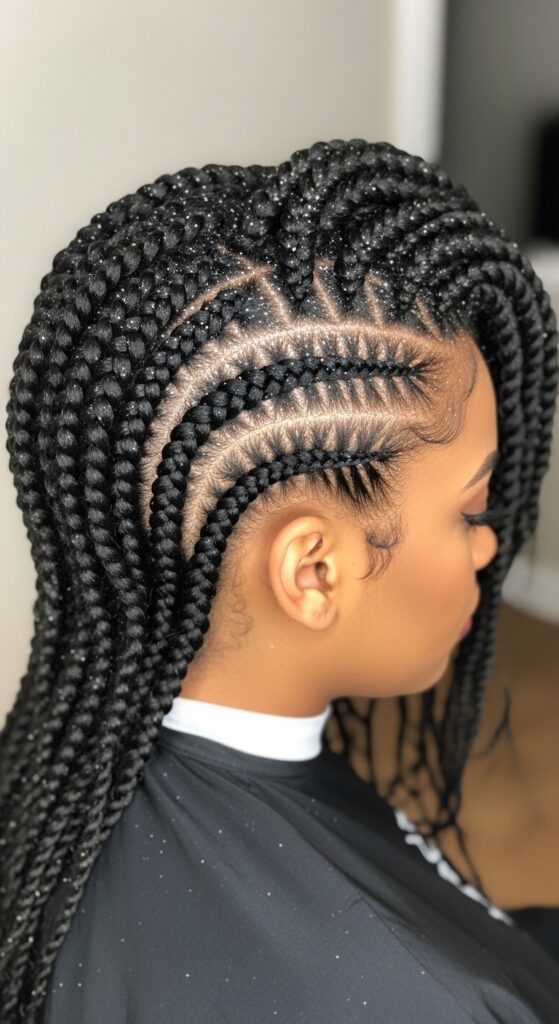
Secure 23 Flat Twist Perimeters Framing Faces with Precision
Okay, let’s be real. We’ve all been there. You spend an hour on a gorgeous flat twist style, it looks perfect, and then… the front starts to unravel. Those perimeters framing your face just won’t stay put. It’s the most frustrating thing, right?
I was dealing with this exact problem last week. My twists looked amazing from the back, but the front pieces were already slipping by lunchtime. I knew there had to be a better way.
So, I went on a mission. I tested every tip, pin, and product I could find. And guess what? I cracked the code. It’s all about precision from the very first section.
This isn’t about complicated techniques. It’s about a few simple, game-changing steps that will lock those 23 flat twists around your face in place all day—or all week. Let’s get into it.
Why Your Front Twists Won’t Stay Put

It usually comes down to three simple things. First, the hair sections are too thick or uneven. A twist needs a clean, manageable base to hold its shape.
Second, not using the right tension. You need a firm, consistent pull from root to end. Too loose, and it slips. Too tight, and it causes discomfort and still might pop loose.
Finally, skipping the right anchor points. The hair at your temples and nape is fine and slippery. You have to secure it properly from the very first cross of the twist.
The Magic Number: Why 23 Twists?

You might be wondering about the specific number. It’s not random! For most head sizes and hair densities, 23 twists create the perfect balance.
It allows for twists that are small enough to be neat and secure, but not so tiny that the style takes forever. This number gives you full coverage and a beautiful, intricate look.
It creates that coveted “framing” effect. Each twist acts like a piece of a puzzle, perfectly contouring your hairline and face shape for a flawless finish.
Gather Your Tools Before You Start
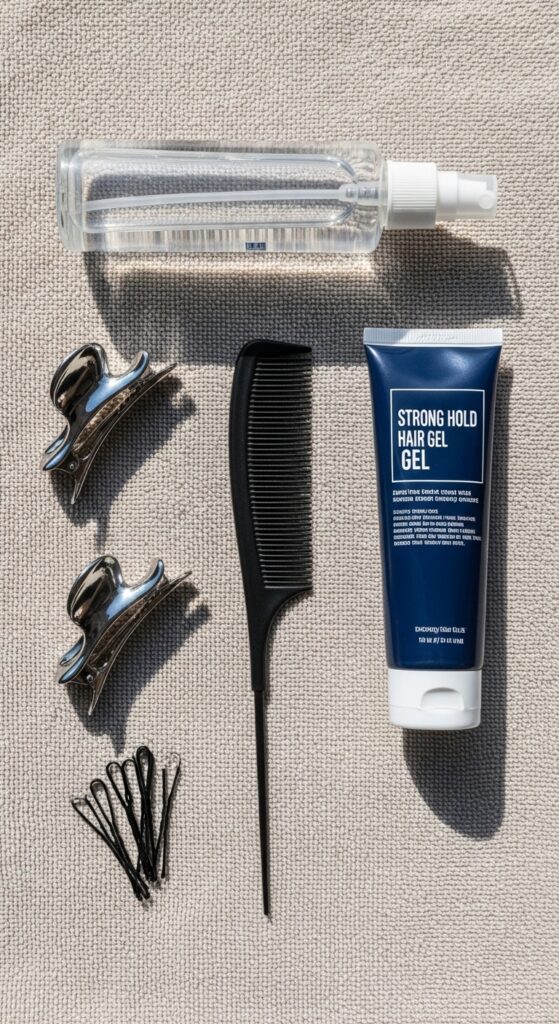
Being prepared is half the battle. You don’t want to be searching for a clip with wet, slippery hair in your hands. Here’s your checklist:
- A fine-tooth rat-tail comb for sharp, clean parts.
- Duckbill clips to section off the hair you’re not working on.
- A strong-hold, no-flake edge control or twisting gel.
- A spray bottle with water to keep hair damp.
- Small, firm-hold bobby pins that match your hair color.
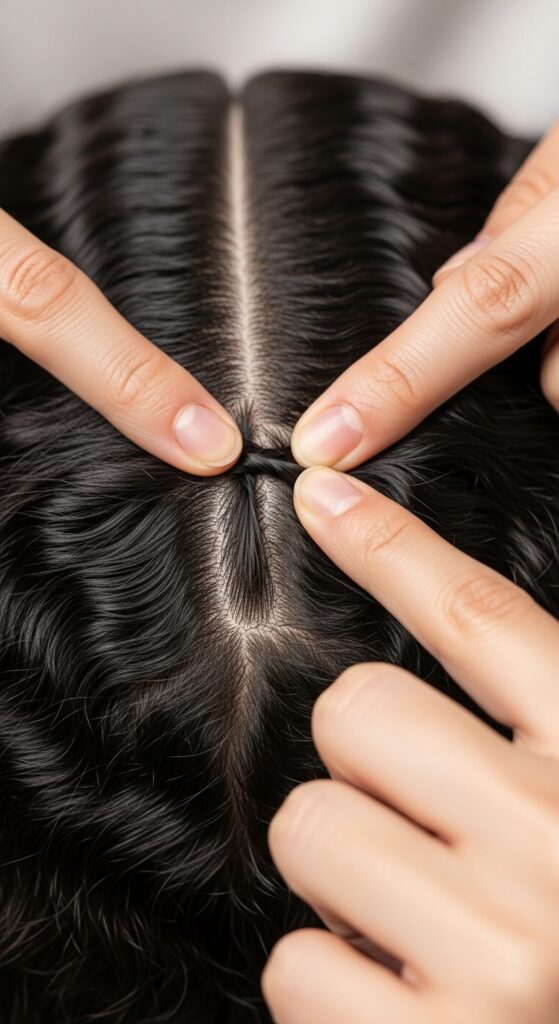
Sectioning is Everything: The First Step
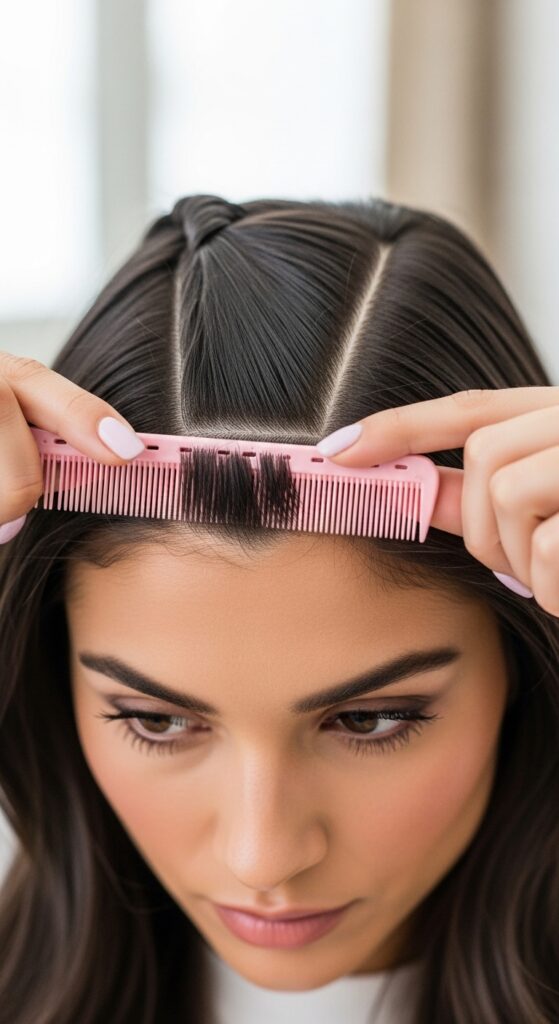
This is the most important step for precision. Start with completely detangled, damp hair. Use your rat-tail comb to create a clean, horseshoe-shaped section around the entire perimeter of your head.
This is your working area. Clip the rest of your hair out of the way. Within this front section, you’ll create your 23 smaller parts. Think of it like drawing a picture frame first, then dividing it into panels.
Mapping Out Your 23 Starting Points
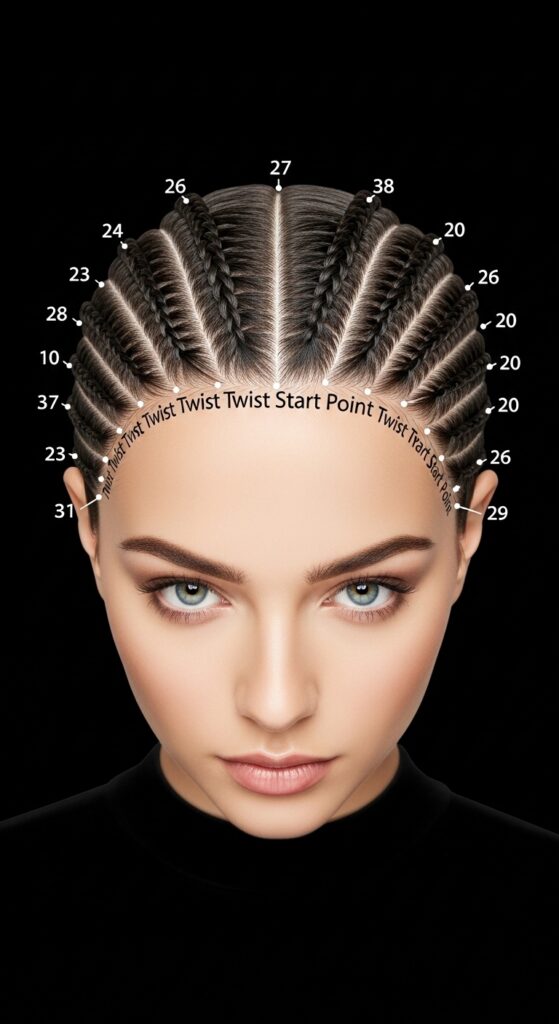
Don’t just start twisting randomly. Plan it. I like to do five twists across the very front hairline, from temple to temple. Then, work backwards in rows.
Your next row will have maybe four twists on each side, and so on. The exact number per row can vary slightly based on your head shape. The goal is even, symmetrical distribution that follows your natural hairline.
How to Create the Perfect, Small Section

For each twist, take a small, triangular section. The point of the triangle should be at your hairline, and the base should be slightly further back. This shape gives the twist a strong anchor.
The section should be no wider than the space between your eyebrow and hairline. If it’s too big, the twist will be bulky and hard to secure. Small and neat is the key to longevity and that polished look.
The Anchor Technique: Locking the Root
This is the game-changer. On that very first cross of your two strands, you must pull firmly and directly away from your scalp. This creates tension at the root, which is what keeps it from lifting.
Imagine you are “locking” that hair in place. Don’t just start twisting loosely. That initial anchor is what separates a twist that lasts from one that fails in an hour. Hold that tension as you make the first two crosses.
Maintaining Consistent Tension
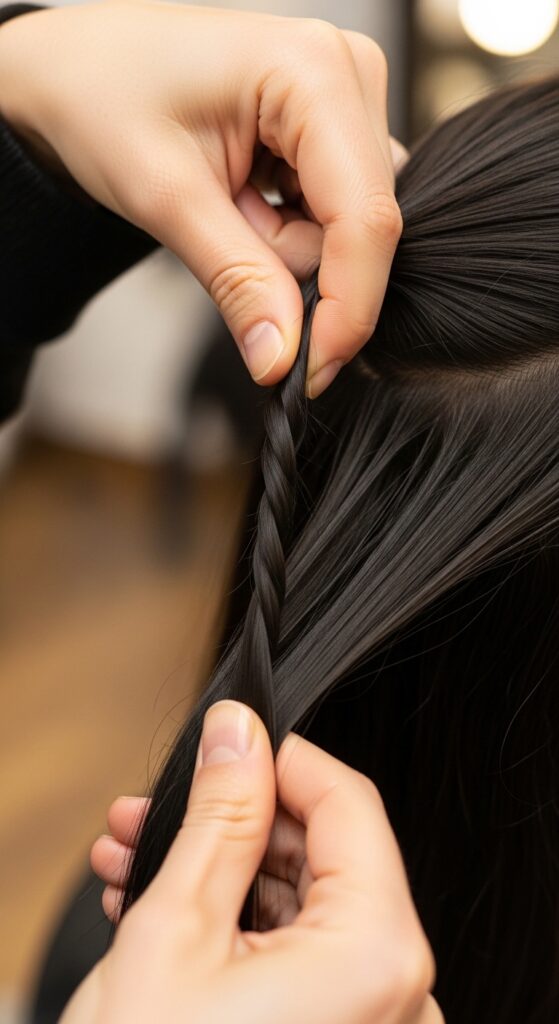
As you continue twisting down the section, keep a steady, firm pull. Your guiding hand should apply gentle pressure on the already-twisted portion to prevent it from loosening.
Think of it like gently squeezing a tube of toothpaste from the bottom up. The tension needs to be even throughout the entire length of the strand. Any weak spot is a potential unraveling point.
Dealing with Slippery or Short Edges
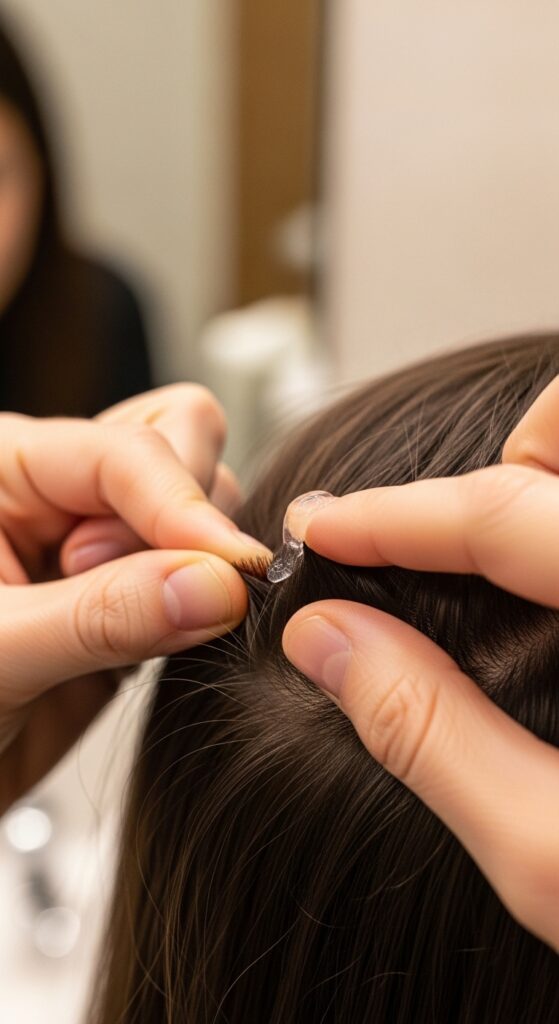
Those baby hairs and shorter pieces at the very front are tricky. For these, apply a tiny dab of your strongest-hold product directly to the root before you section.
Use even smaller sections here. Sometimes, I’ll do an extra “mini twist” within the first inch just to secure those flyaways before incorporating the rest of the hair. Patience here pays off.
The Finishing Move: Sealing the End
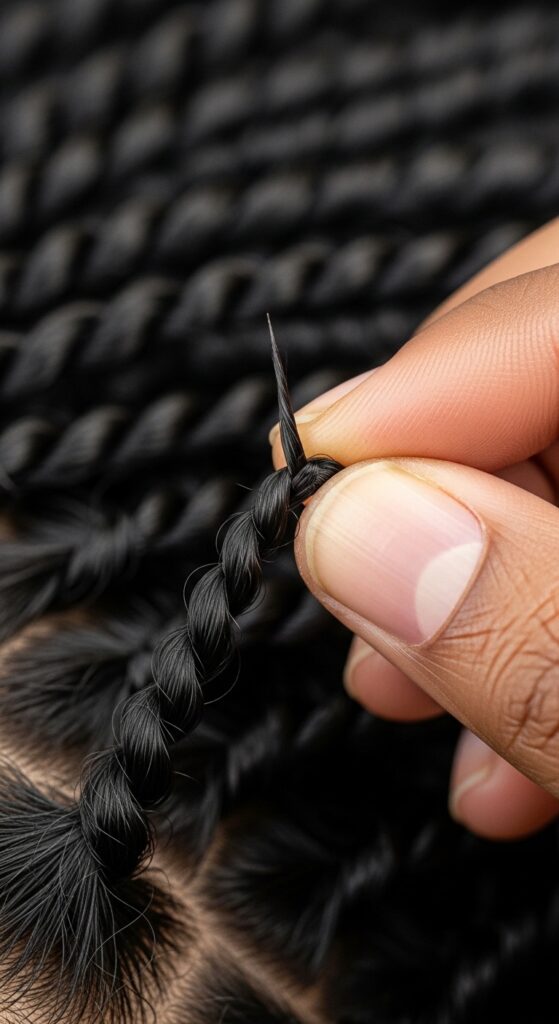
Don’t just stop twisting when you run out of hair. Twist the end tightly between your fingers until it forms a defined, sealed point. This prevents the dreaded frizz-ball at the tip.
If your hair is very soft, you can add a tiny bit more gel to your fingertips before doing this final seal. A clean, pointed end looks professional and helps the twist hold its form.
To Pin or Not to Pin?
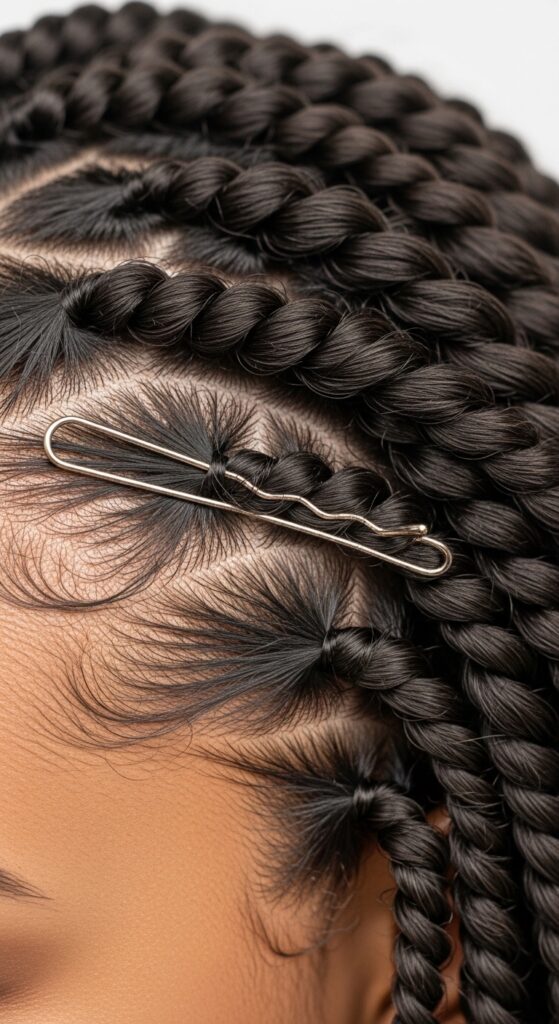
For ultimate security, a bobby pin is your secret weapon. Once a twist is complete, look at its base. If it feels at all loose or is lifting, gently slide a pin under the twist, close to your scalp.
Push it through the base of the twist and then back into your hair, forming a “U” shape. This anchors it directly to your roots. Choose pins that match your hair color so they disappear.
Setting Your Twists for All-Day Hold

After all your twists are done, let them air dry completely or use a hooded dryer on low heat. While they’re still slightly damp, you can lay your edges with a scarf.
Tie a silk or satin scarf around your perimeter for 15-20 minutes. This gentle pressure trains the twists to lay flat and smooth as they dry, giving you that sleek, polished finish.
Nighttime Routine to Preserve Your Style
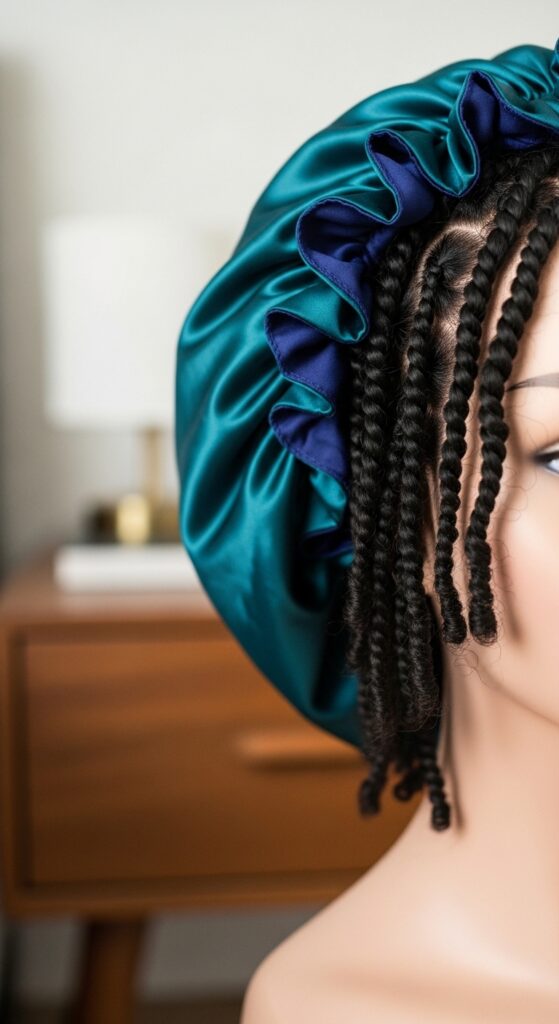
Protect your work! Sleeping on cotton pillows will create frizz and pull your twists loose. Always wrap your hair in a silk or satin scarf or wear a loose bonnet.
If you’re a restless sleeper, you can also try a satin pillowcase as a backup. This simple step adds days to your style and keeps those perimeters crisp.
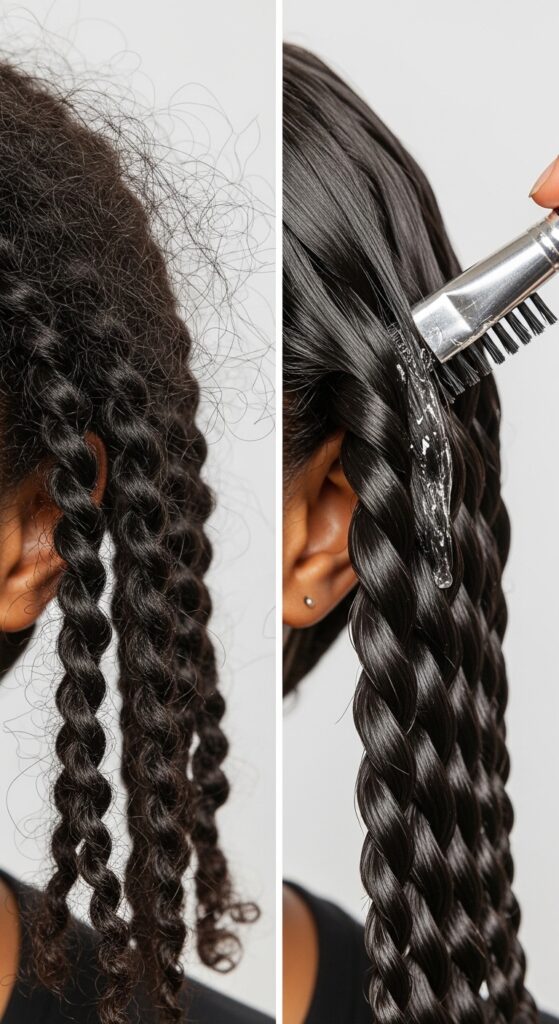
Quick Refresh for Day 3 and Beyond
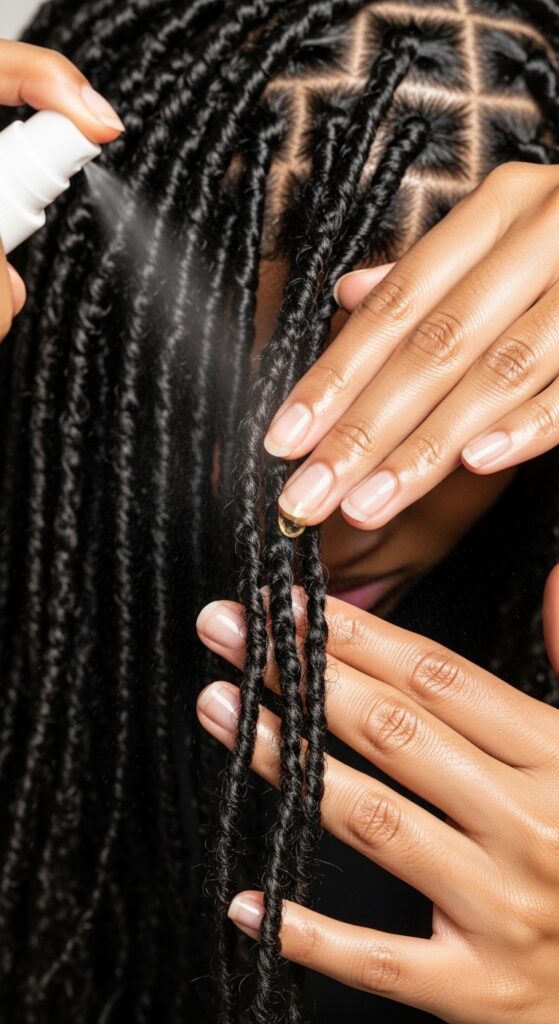
After a few days, you might see a little frizz. Don’t panic! Mix a little water and a drop of light oil in a spray bottle. Lightly mist the front twists.
Then, use your fingers to gently smooth over them, re-laying the hair. You can use the edge of a silk scarf to press them down again. They’ll look freshly done in seconds.
Styling Your Secure Twists: Half-Up, Half-Down
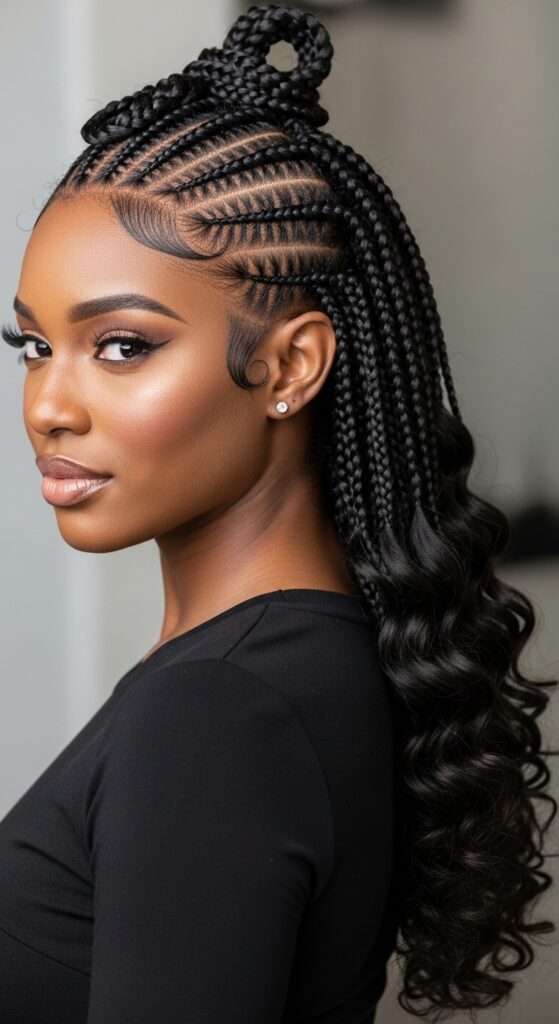
Now for the fun part—styling! With your front twists locked in, you have the perfect base. Gather the ends of a few twists from each side and secure them at the back of your head for a beautiful half-updo.
It looks intricate and elegant, like a built-in headband. This style has major quiet luxury bob energy—polished, intentional, and effortlessly chic.
Pairing with Braided Crowns or Buns
Your secured perimeters are the perfect start for an updo. Continue twisting or braiding the rest of your hair into a crown, or sweep it all into a low bun.
Because the front is so neat, the overall look is incredibly regal and put-together. It gives me old money hair vibes—timeless, groomed, and sophisticated without trying too hard.
Accessorizing Your Precision Twists
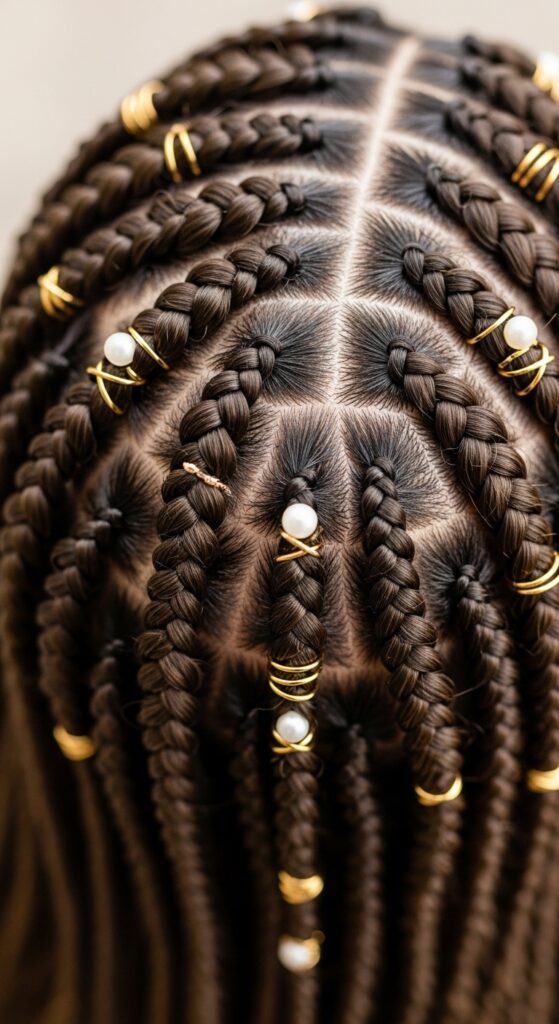
Add some personality! Slide small gold hair cuffs onto a few twists, or use tiny, clear elastics to create a bead-like effect. You can also tuck fresh flowers or delicate pins at the intersections.
This is where you can play with different aesthetics. Delicate jewels lean into romance, while metallic cuffs can edge toward a glitchy glam hair moment—polished with a cool, modern twist.
Adapting This Technique for Different Cuts
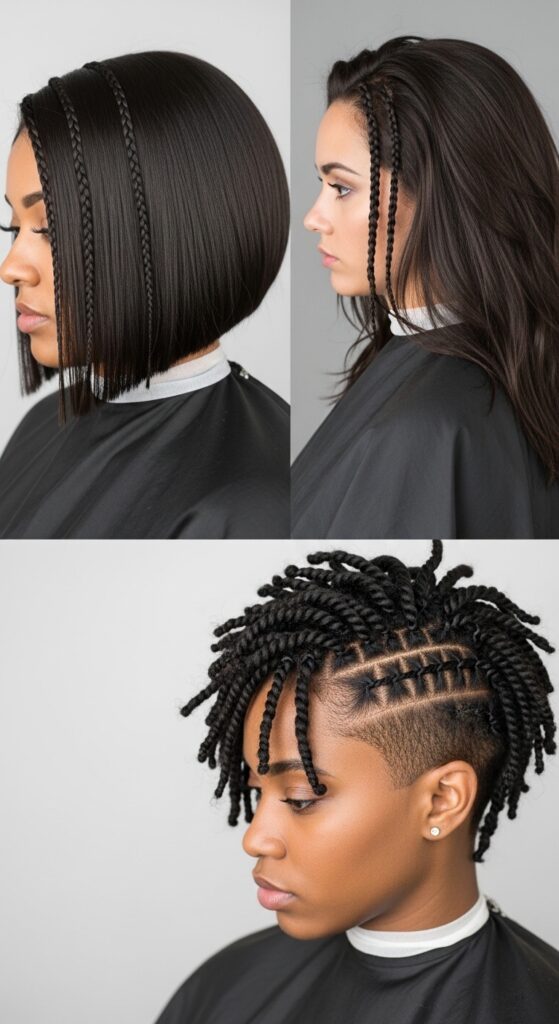
This method isn’t just for long hair. It works beautifully on shorter styles to add detail and definition. On an asymmetrical lob, it can highlight the dramatic angle.
On a blunt vampire haircut or a sharp hime cut, precise front twists can soften the look or add an unexpected textural element. It’s all about framing your specific shape.
Color Play with Your Twists
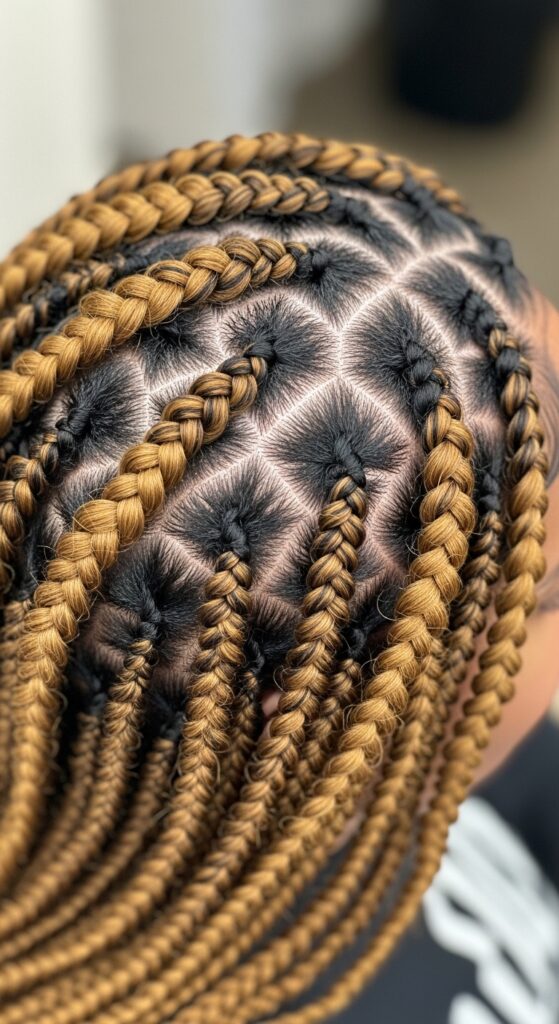
If you have highlights or a bold color, flat twists are a stunning way to show them off. The twisting technique makes the color weave in and out, creating a beautiful, dimensional effect.
It’s a fantastic way to add visual interest to 2026 hairstyles that are all about personalized detail and movement. The color becomes part of the art.
From Day to Night: Adding Glamour
To transition your look for evening, add a touch of sparkle. Use a glitter gel or carefully sprinkle cosmetic glitter along your part or on the twists themselves.
You can also undo the back and let your hair flow into big, romantic waves, keeping the front twists tight. This contrast is pure romantic goth hairstyles inspiration—structured romance meets soft drama.
Troubleshooting Common Problems
Frizz popping up mid-day? Carry a travel-sized edge control and a tiny brush. Smooth a small amount over the problem spot and press it down.
If a twist feels loose, don’t redo the whole thing. Simply take a bobby pin and secure the loose section at the root, tucking it under the existing twist. Quick fixes save the style.
Why This Method Beats a Simple Braid
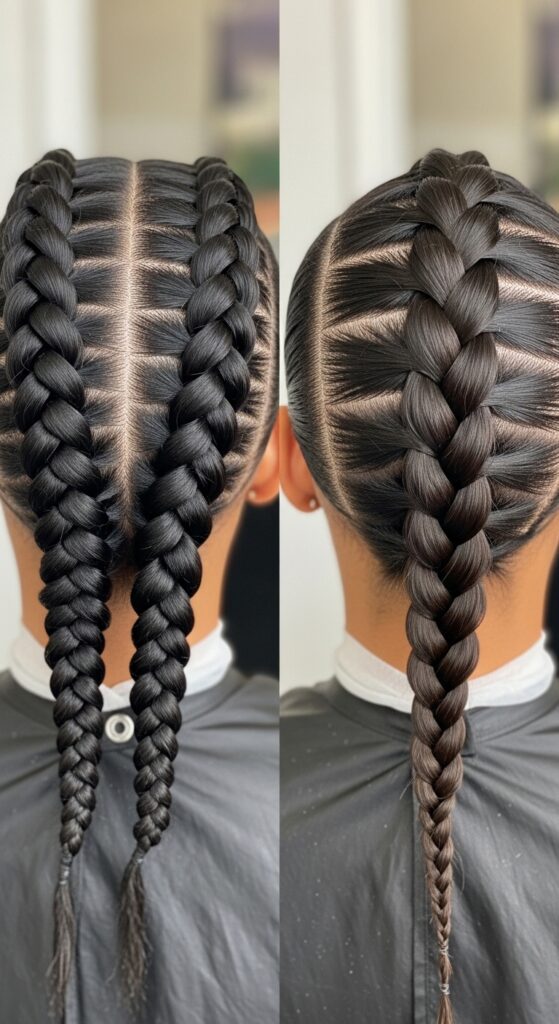
A flat twist, when done with this anchor technique, lies flatter to the scalp than a three-strand braid. It has a wider base of contact, which gives it more stability.
It also creates a different, often more elegant visual pattern. It looks like intricate detailing right at the hairline, whereas a braid can sometimes look more separate from the head.
Your New Go-To Protective Style Base
Mastering this perimeter technique gives you the ultimate protective style foundation. These flat twists are perfect as a standalone look, or as an incredibly neat, flat base for wigs and weaves.
They protect your edges and hairline because the tension is even and controlled. You’re not fighting with loose, pulling hairs, which means less breakage and more hair health.
And there you have it! The step-by-step breakdown to finally getting those front twists to stay flawless from morning until you finally take them out. It feels so good to solve a problem that used to drive you crazy, doesn’t it?
The best part is that once you get the hang of the anchor technique and precise sectioning, it becomes second nature. This method will change the game for all your twisted styles, from simple looks to elaborate updos.
I want to see your results! Did this method work for you? What’s your biggest twist win or challenge? Spill all your tips in the comments below—let’s help each other out.
Save this post to Pinterest so you can always find these steps when you need them. Tag me in your photos—I love seeing your creations!