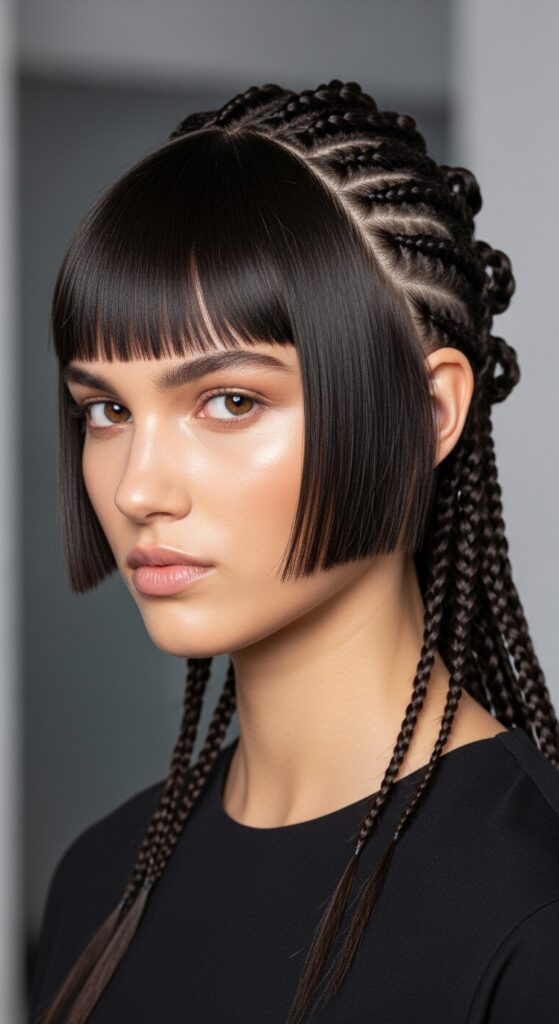
Braid 22 Extension Loop Braiding Minimizing Weight on Roots
Hey friend. Let’s talk about a real problem: you want those gorgeous, long, intricate braids, but your scalp feels like it’s being pulled down by tiny weights by day two. I’ve been there. The tension, the soreness, it’s enough to make you want to cut it all off.
That’s why I became obsessed with finding a better way to add length and volume without the headache—literally. The method I’m sharing today was a total game-changer for me and my team.
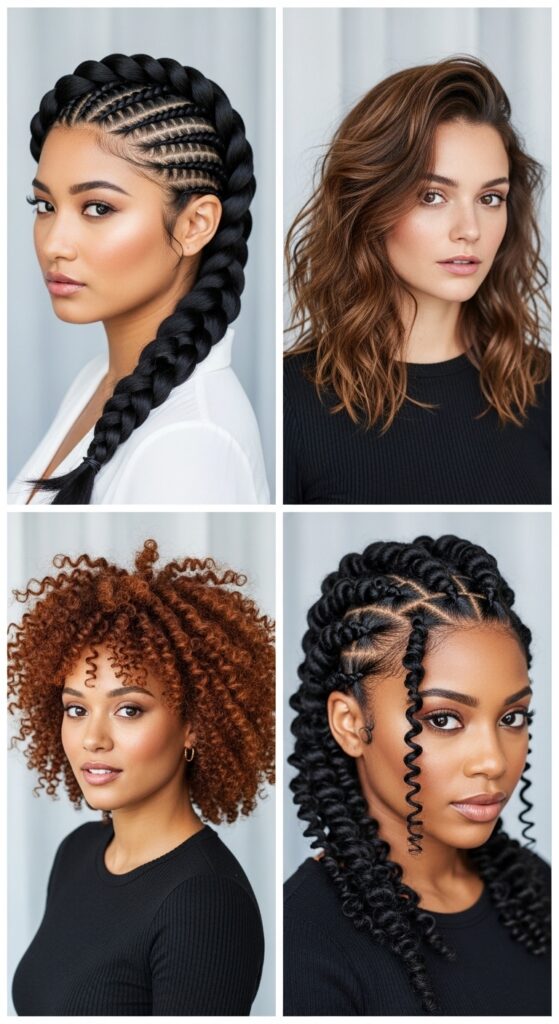
It’s all about the “loop braiding” technique with extensions. This approach strategically minimizes the direct weight on your roots, letting you rock those stunning, heavy-looking styles in total comfort. It’s the secret behind many of those effortless 2026 hairstyles you’re already saving on your mood boards.
Ready to give your scalp a break and get the hair of your dreams? Let’s dive into the details.
Why Traditional Extension Braiding Hurts
Most of us start by just braiding extensions directly into our natural hair at the root. This anchors all the extra weight—the length, the thickness—right onto those delicate follicles. It creates constant tension.
Over hours and days, this leads to that familiar soreness, traction, and even hair loss. It’s the opposite of the healthy, thriving hair we’re going for. This method just doesn’t support the heavier, more luxurious styles we love.
We need a technique that distributes weight smarter. Think of it like building a house; you need a strong, supportive frame before you add the beautiful, heavy bricks.
The Core Idea: The Weight-Bearing Loop
Loop braiding flips the script. Instead of anchoring the extension to your root hair, you create a secure “loop” or anchor point with the extension itself, usually lower down.
Your natural hair then braids around this stable, suspended loop. The loop bears the majority of the weight, not your roots. It’s a simple shift in engineering that makes all the difference in comfort.
This is the foundation for everything that follows. It allows for thicker, longer styles without the dreaded root pull. It’s the insider trick for that coveted old money hair volume—full and rich, never painful.
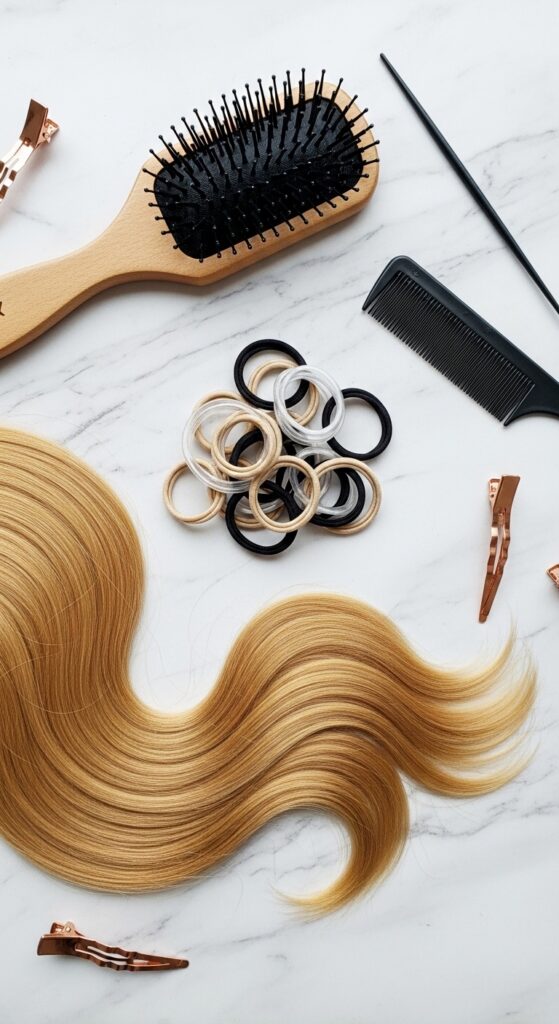
Gathering Your Essential Tools

You don’t need anything fancy, but the right tools make this process smooth. First, choose your extensions. For practice, I recommend seamless or tape-in wefts. They lay flat and are easy to work with.
You’ll also need:
- Strong, snag-free rubber elastics (clear or matching your hair color).
- A fine-tail comb for clean sections.
- Hair clips to keep sections separate.
- A paddle brush to detangle thoroughly beforehand.
Having everything within arm’s reach is key. This isn’t a race, but being organized helps you stay calm and get a perfect result.
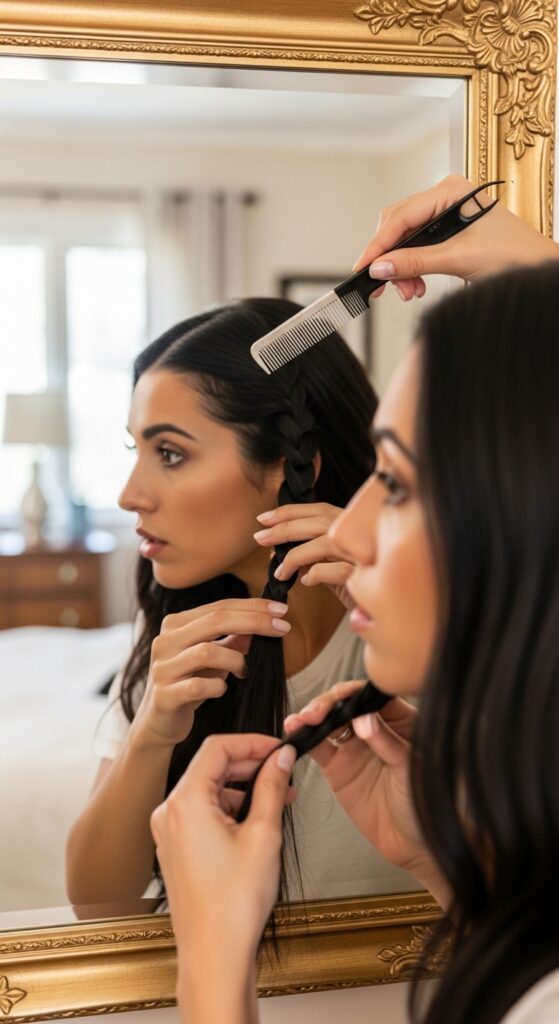
Prepping Your Natural Hair
Start with clean, damp hair. I mean it—this isn’t a style for day-three hair. The natural grip and slight texture of clean hair help the braids hold securely without needing extreme tightness.
Apply a lightweight leave-in conditioner or a heat protectant if you plan to style later. Avoid heavy oils or creams at the root, as they can cause slippage.
Thoroughly detangle from ends to roots. The goal is a smooth, knot-free canvas. This prep work ensures your braids are neat and your natural hair is protected, a non-negotiable step for any quiet luxury bob or longer style.
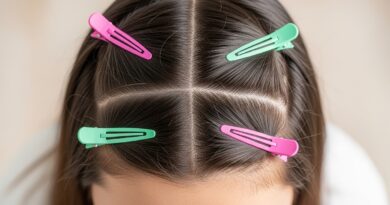
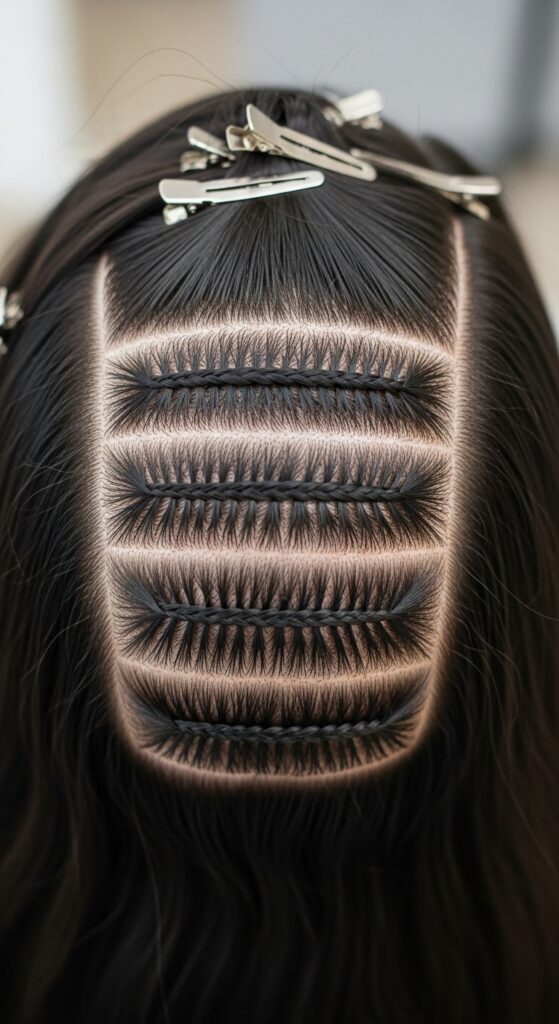
Sectioning Strategically for Support
Don’t just grab random sections. Clean, horizontal partings are your best friend for weight distribution. Start at the nape of your neck and work upwards.
Use the tail of your comb to create sharp, straight parts. Clip the upper hair out of the way. The size of your sections depends on your desired thickness.
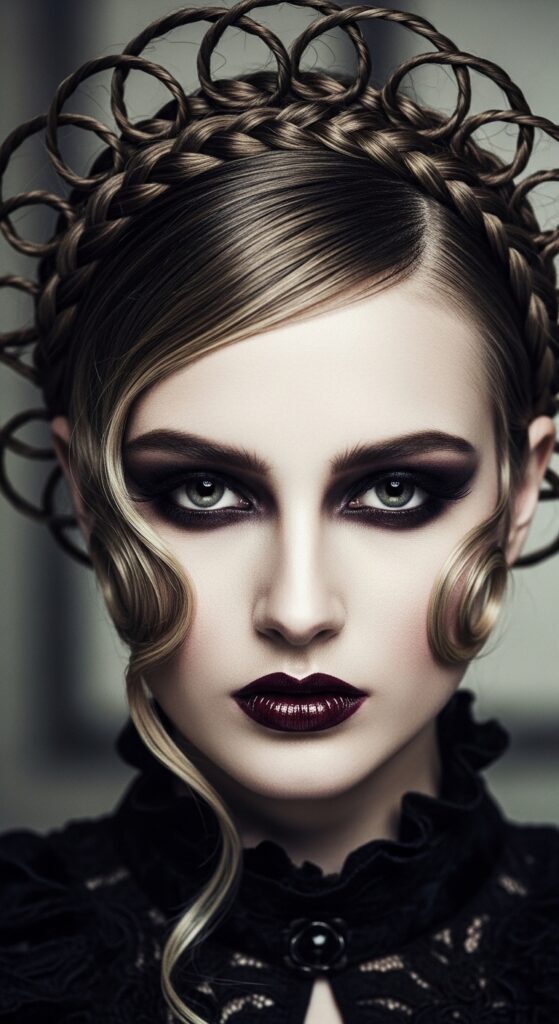
For a fuller look, use wider sections. For a more delicate, intricate braid pattern, go thinner. This organized approach is what gives you that polished, intentional look, whether you’re going for romantic goth hairstyles or something more classic.
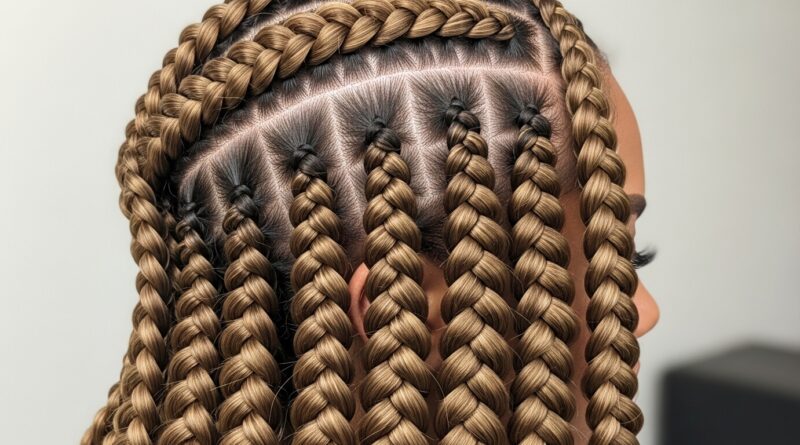
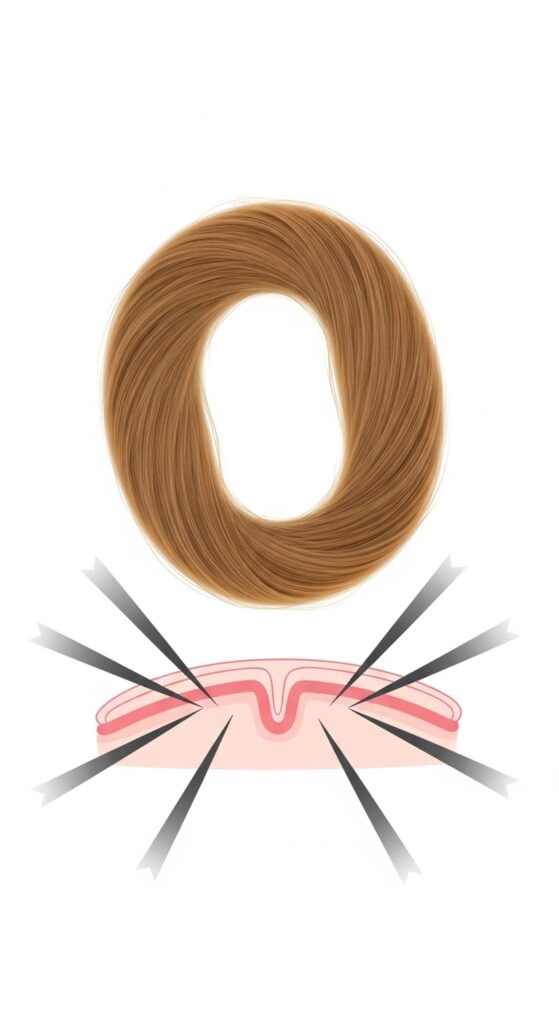
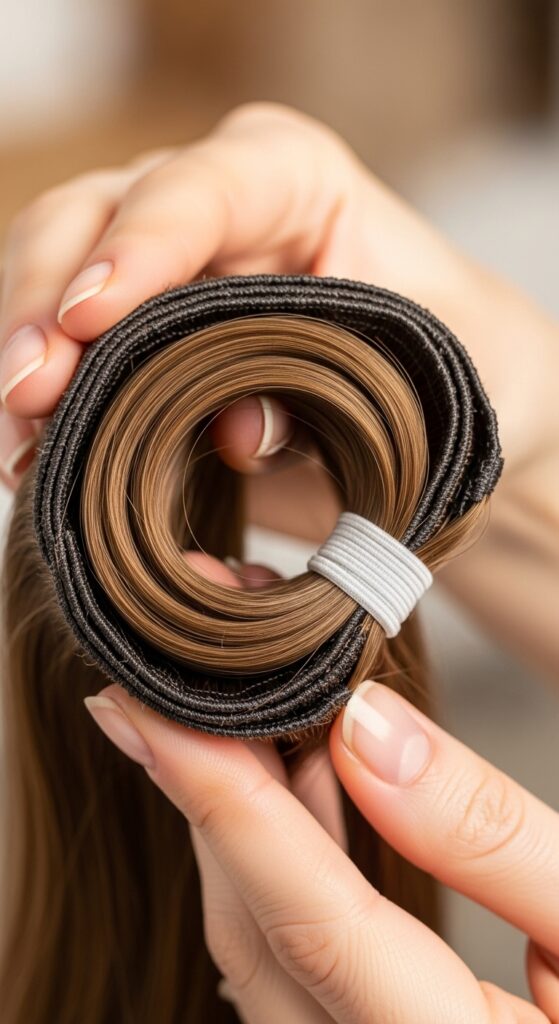
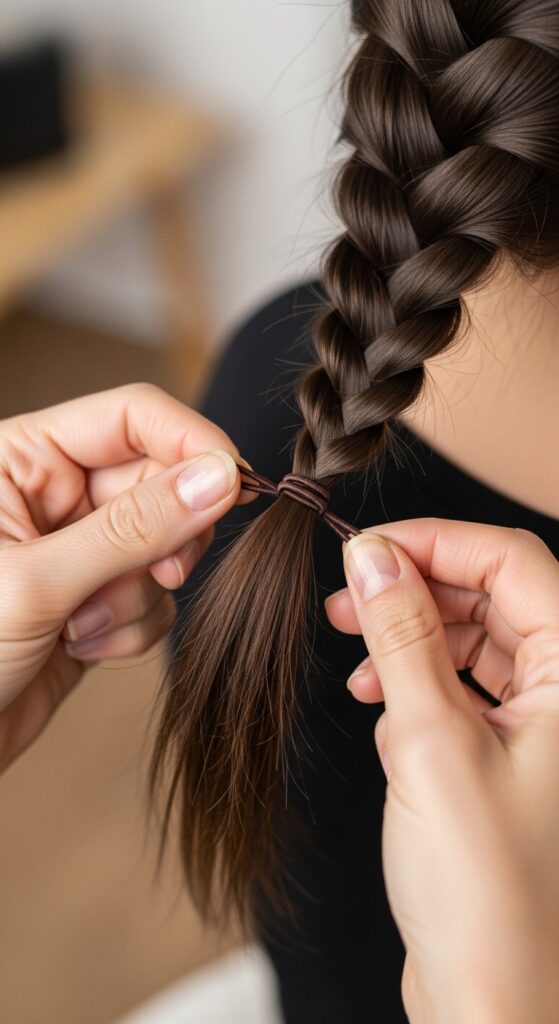
Creating the Perfect Extension Loop
Take your weft of extensions. Fold it in half evenly so the ends meet, creating a “U” shape. Secure this folded base tightly with a snag-free elastic. This forms your weight-bearing loop.
The length of the loop will determine how far from your scalp the weight is suspended. For maximum comfort, I make my loops about 1.5 to 2 inches long.
This loop is your anchor. Make sure it’s secure and the elastic is tight. You’ll be braiding around this, so its stability is everything. This little fold is the hero of the whole technique.
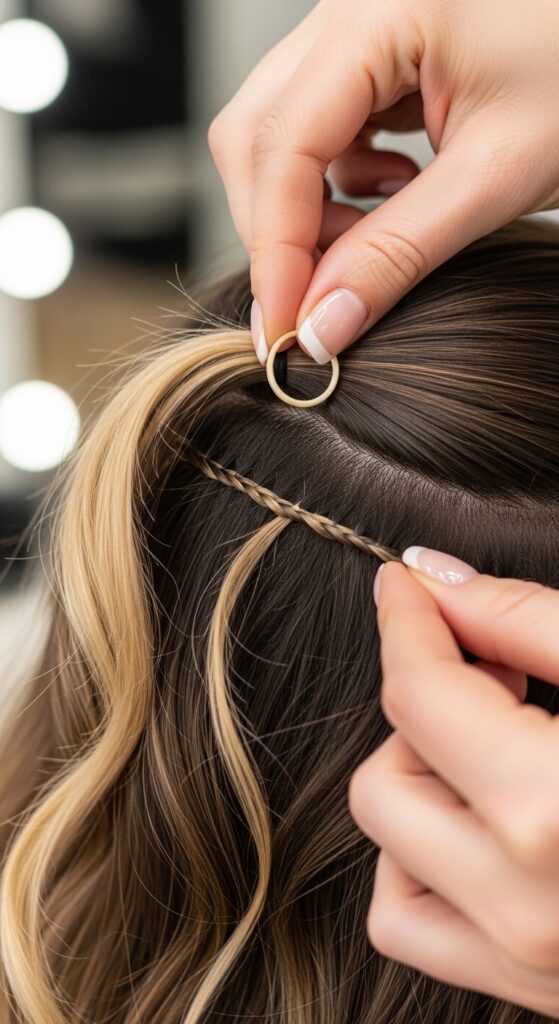
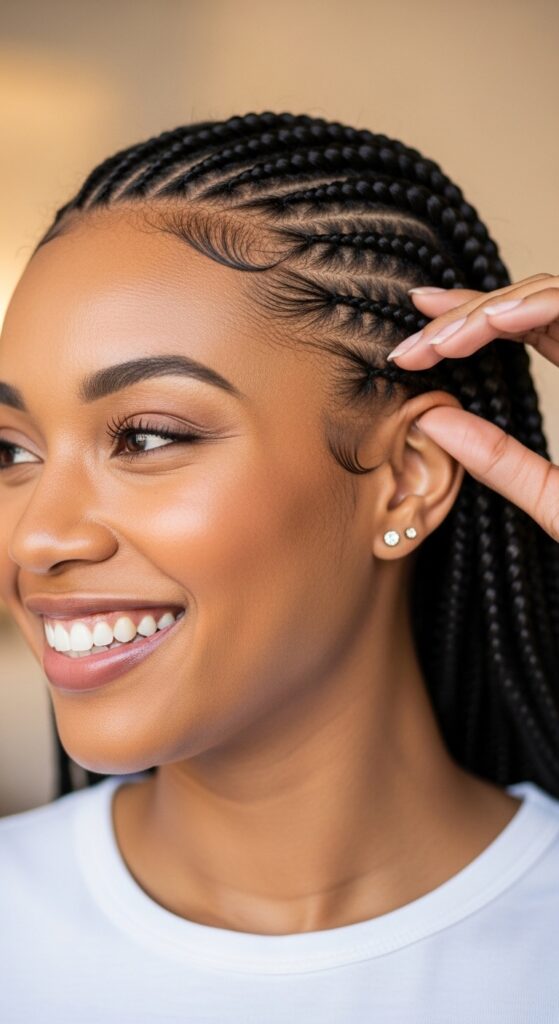
Attaching the Loop to Your Section
Here’s the magic moment. Take your prepared section of natural hair. Instead of placing the extension at your root, slide the base of the loop (where the elastic is) under your natural hair, about an inch or two down from your scalp.
Position the loop so it’s hanging down, with the two tails of the extension and your natural hair all together. Hold everything firmly at this joining point.
You should see the loop sitting between your scalp and your fingers. This is the weight-bearing structure. Your roots are already breathing a sigh of relief.
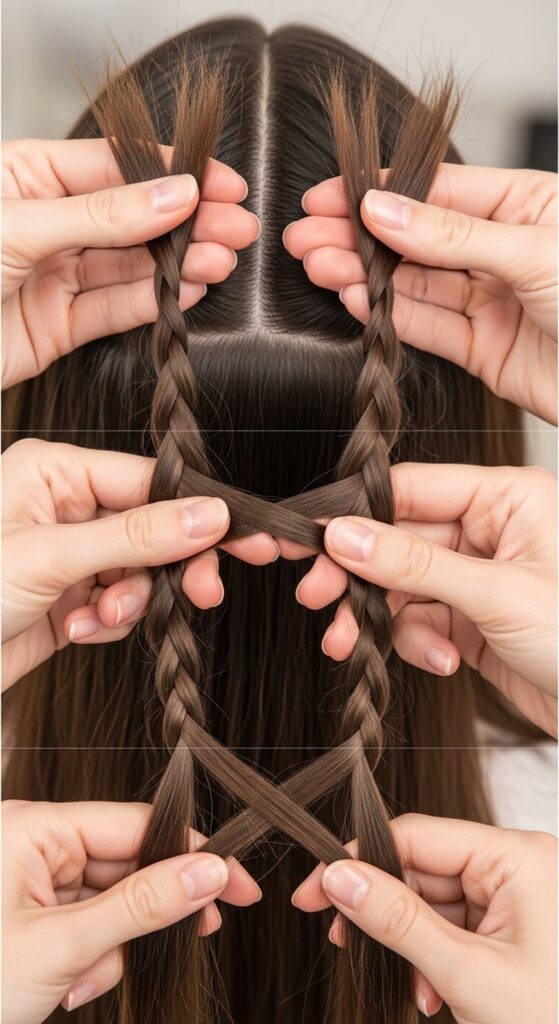
Braiding Around the Suspended Anchor

Now, simply start braiding. Your three strands are: your natural hair, and the two tails of the extension. Braid them together in a standard three-strand pattern.
Keep the tension consistent and braid down over the loop. The loop remains untouched and suspended above your braiding fingers. It acts like a hook holding the weight from above.
Braid all the way to the ends. The result is a braid that feels attached at the mid-lengths, not yanking from the root. This is how you achieve that effortless glitchy glam hair texture—undone but perfectly constructed.
Securing the Braid Comfortably
Once you’ve braided to the ends, secure the tip with another snag-free elastic. Avoid pulling the finished braid tight against your head. Let it have a little natural “drop.”
This slight slack is crucial for comfort. It means no tension is transferred back up to the root. The braid should feel secure but not taut.
You can gently tug on the braid to test. If your scalp moves, it’s too tight. Redo it. The goal is “secure yet separate.” This comfort is the hallmark of a pro job.
Working Row by Row Up Your Head
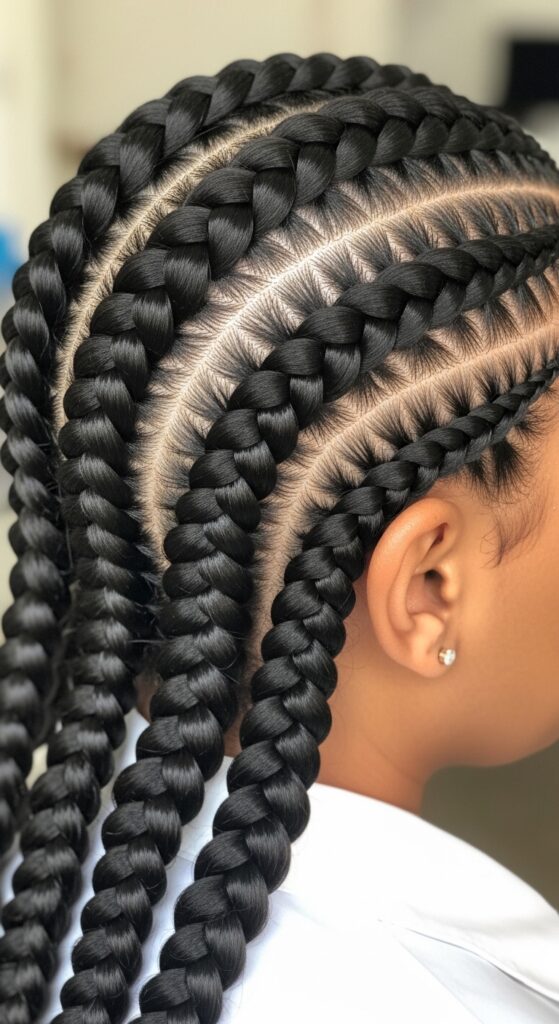
Repeat the process row by row. Complete all the braids in your bottom nape section before moving up to the next horizontal row.
As you move higher, be mindful of the loop placement. You might need to adjust it slightly to follow the curve of your head. The principle remains the same: anchor the loop away from the root.
This systematic approach ensures even weight distribution across your entire scalp. It’s what allows for incredibly full styles, like a voluminous take on the asymmetrical lob, without any one spot bearing the brunt.
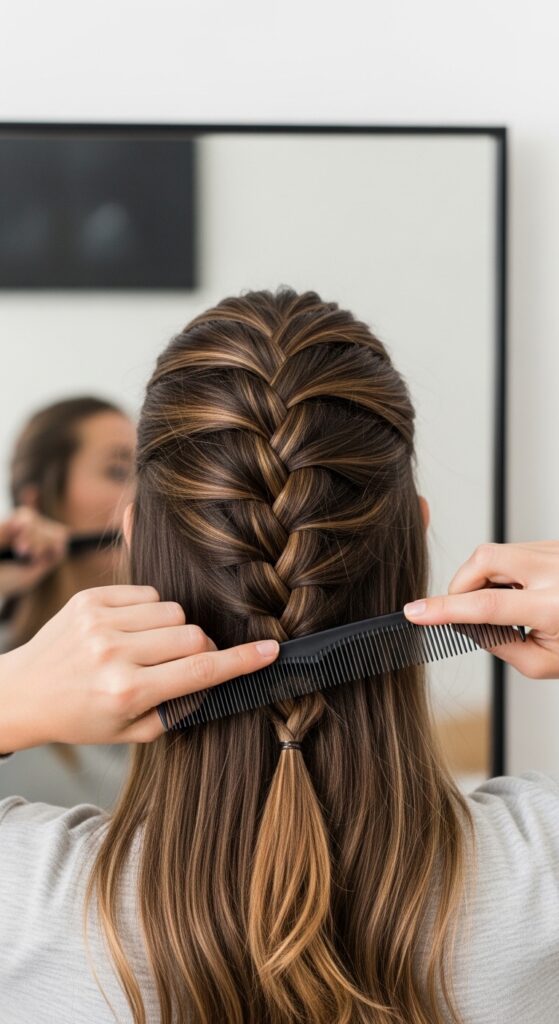
Blending for a Natural Look
Once all braids are in, it’s time to blend. Gently pull on the sides of each braid near the base to loosen and widen them. This helps them merge seamlessly with your natural hair at the roots.
You can also use the tail of your comb to lightly backcomb the very base of your own hair around the braid for extra grip and camouflage. Be gentle.
The aim is to erase any harsh lines or obvious parts. You want it to look like this magnificent hair grew straight from your head, achieving that perfect vampire haircut blend—seamlessly supernatural.
Styling Your New Voluminous Base
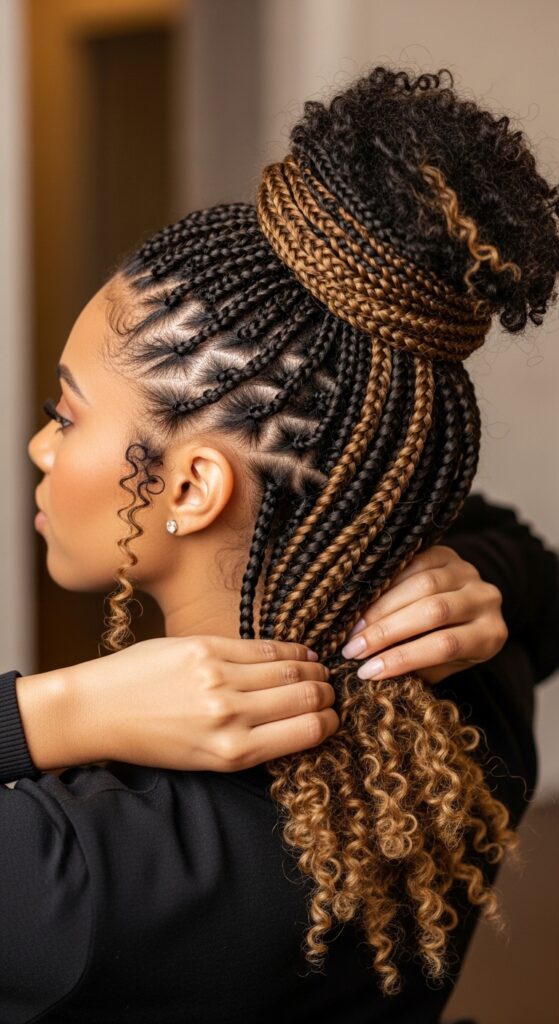
This is the fun part! With the weight off your roots, you can style with freedom. Pull your hair into a high ponytail or bun without that painful tugging feeling.
The added volume from the extensions and the braids gives you a fantastic foundation. Create soft waves, a sleek ponytail, or leave the braids as a stunning protective style.
This technique provides the ultimate versatile base. It’s perfect for experimenting with different parts of the 2026 hairstyles trend, from soft tendrils to structured updos.
Why This Saves Your Edges
Traction alopecia is real, and it often starts at our delicate edges and front hairline. Traditional heavy braiding is a major culprit. The constant pull weakens follicles over time.
By suspending the weight, loop braiding removes that direct tension from your most vulnerable hair. Your edges aren’t holding up the style; the structure of the loops is.
It’s a protective style in the truest sense. You get the look without sacrificing the health of your natural hairline, which is the true secret to lasting hair beauty.
Ideal Hair Types for This Method
This method works beautifully on most hair types, but it’s a superstar for those with fine or medium-density hair. If your hair is thinner and gets weighed down or damaged easily, this is for you.
It’s also excellent for anyone with a sensitive scalp or who has experienced traction from traditional methods. The key is having enough hair to create a secure braid around the loop.
If your hair is very short (less than 2-3 inches), it might be tricky. But for collarbone-length and beyond, it’s a perfect technique to master for any texture.
Choosing the Right Extensions
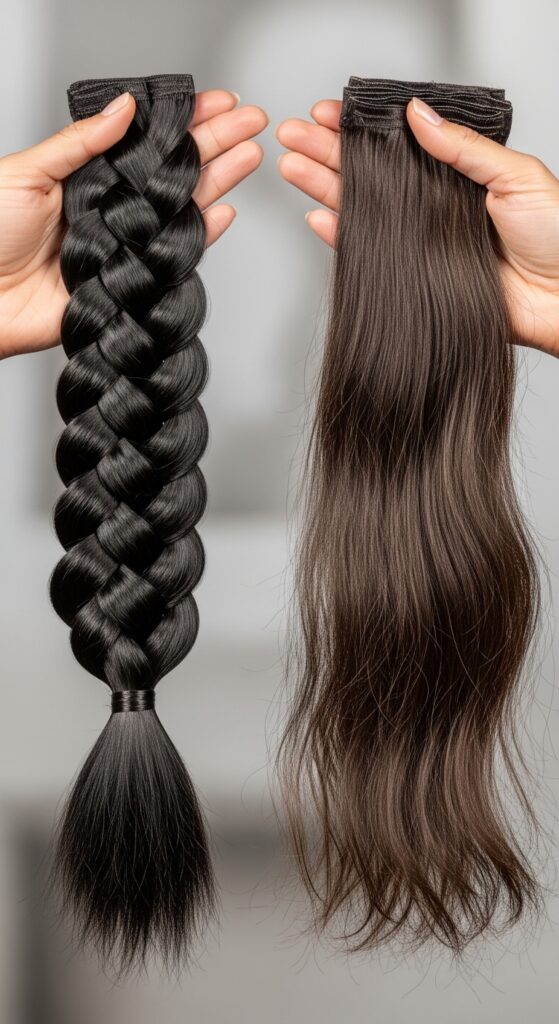
Your results depend heavily on your extensions. For a natural look and feel, 100% human hair is the gold standard. It blends, styles, and moves like your own hair.
For practice or more creative colors, high-quality synthetic can work. Look for “seamless” or “tape-in” wefts, as they are designed to lay flat against the head without bulky clips.
Match the texture to your natural hair as closely as possible. This makes blending effortless and elevates the look to true old money hair sophistication—unfussy and authentic.
Maintenance & Nighttime Care
To make your style last and keep your scalp happy, wrap your hair at night. A silk or satin bonnet is best, or use a silk pillowcase.
This prevents friction, reduces frizz, and helps maintain the integrity of the braids. In the morning, you’ll just need a light fluffing.
If your scalp feels dry, use a lightweight oil on a cotton swab to apply just to the parts—never heavy creams. This simple care routine is a game-changer for longevity.
How Long It Lasts & Safe Removal

With proper care, loop braids can last 2-4 weeks. Listen to your scalp! If you feel itching or significant buildup, it’s time to take them out.
For removal, always cut the elastic at the TIP of the braid first, never pull. Then, gently and slowly unravel the braid from the bottom up.
Apply a detangling conditioner or oil to help the process. Patience here prevents breakage. This respectful removal is as important as the installation.
Adapting the Technique for Different Cuts
This isn’t just for long hair. You can adapt it for shorter cuts! For an asymmetrical lob, use smaller loops and braids just in the longer sections.
For a dramatic hime cut, you could add loop braids to the long back sections while leaving the front shorter pieces out. It’s all about customizing the placement.
Think of the loops as your support system. Place them where you want volume and length, and braid around them. It opens up a world of possibilities beyond just full-head braids.
Combining with Other Trend Styles
Mix and match! Use loop braids to create a voluminous base at your crown, then leave out face-framing layers to style in soft romantic goth hairstyles waves.
Or, create a few hidden loop braids for root lift, then style the rest into a glitchy glam hair look with piece-y texture and accessory pins.
It’s your perfect, comfortable foundation. Once the weight-bearing structure is in place, you can get creative with the rest of your hair without any of the usual strain.
Troubleshooting Common Issues
If a braid feels loose, the loop likely wasn’t secure enough. Take it out, make a new, tighter loop, and re-braid. The base elastic must be super secure.
If your scalp hurts, the braid is too tight or the loop is placed too close to the root. Redo it with the loop further down and braid with less tension.
If extensions are slipping, your natural hair might be too silky. Lightly misting the section with texturizing spray before starting can add grip. Don’t force it—comfort is key.
The Confidence of a Comfortable Style

There’s a different kind of confidence that comes with a comfortable style. When your hair looks amazing AND feels good, you carry yourself differently.
You’re not constantly adjusting, wincing, or counting down the hours until you can take it out. You can forget about it and just enjoy having fabulous hair.
That’s the ultimate goal, right? Beauty that serves you, not the other way around. This technique delivers that feeling every single time.
Your Next Steps & Practice
Don’t be discouraged if it’s tricky the first time. Grab a mannequin head or ask a patient friend to practice on. Master the loop creation and placement first.
Start with just one or two braids at the nape of your neck. Get comfortable with the hand motions before attempting a full head. Speed comes with muscle memory.
You’re learning a new skill, and it’s okay to go slow. The payoff—a lifetime of comfortable, gorgeous hairstyles—is absolutely worth the practice.
So, there you have it, my friend. The not-so-secret secret to having breathtaking, heavy-looking hair without the literal heavy feeling. It all comes down