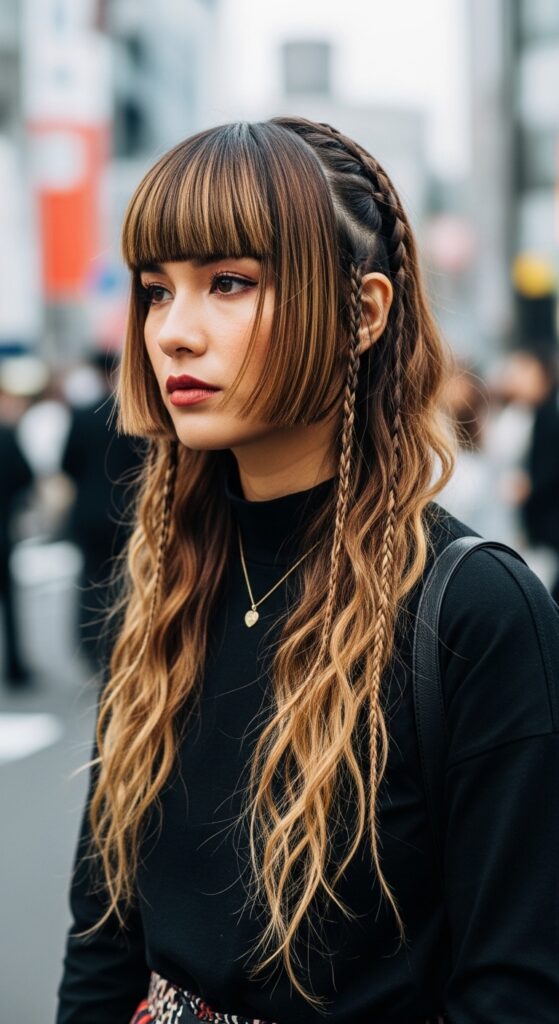
23 Braid Out Hairstyles Long Lasting Waves Protective Styling Natural Textures
Hey friend. Let’s talk about one of the most magical, low-manipulation styles for our natural textures: the braid out. If you’re craving those gorgeous, long-lasting waves without the heat damage, you’re in the right place. This is the ultimate protective styling hack.
It’s perfect for giving your hair a break while still looking put-together. Whether your hair is type 3, 4, or anywhere in between, a braid out can work for you. The best part? The waves get better and more lived-in as the days go on.
I’ve gathered 23 of my favorite braid out looks, from super simple to seriously chic. These styles are all about healthy hair and effortless beauty. Let’s dive in and find your next go-to style.
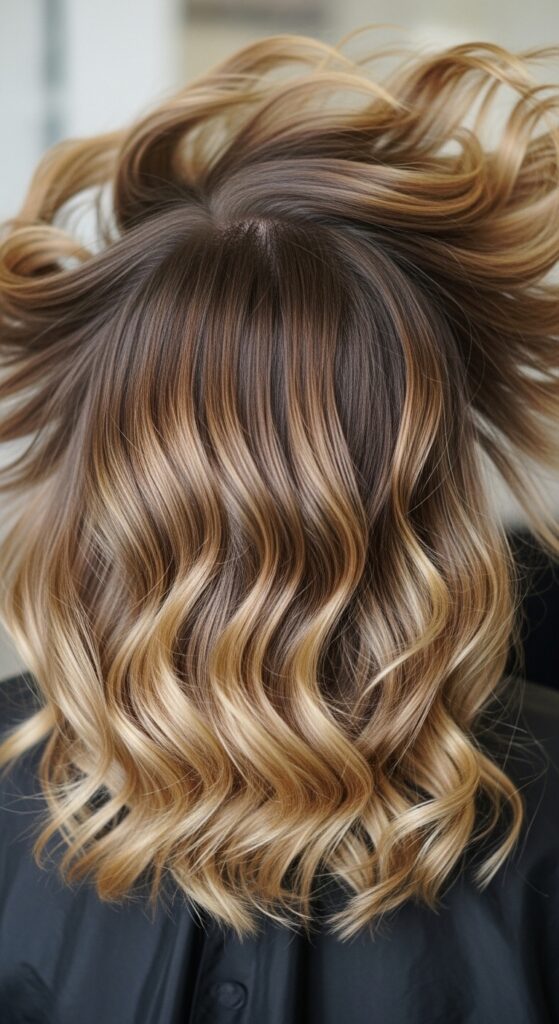
1. The Classic Three-Strand Braid Out
This is where it all begins. The classic three-strand braid is your foundation. It gives you consistent, uniform waves that are perfect for everyday wear. It’s the first technique I ever tried, and it never lets me down.
Start on damp, conditioned hair. The key is to make sure each braid is the same size for even waves. Smaller braids mean tighter waves, larger ones give a looser look.
- Apply a leave-in conditioner and a light gel or mousse.
- Section hair and braid from root to tip.
- Allow to air dry completely or use a diffuser on cool.
- Gently unravel and separate the waves with your fingers.
2. Chunky Jumbo Braid Waves
For a looser, more romantic wave, go big with jumbo braids. This style gives you that “I woke up like this” texture with minimal effort. It’s a fantastic way to get that soft, quiet luxury bob wave effect on longer hair.
I love this for a quick weekend style. You only need a few braids, so it’s fast. The result is big, beautiful waves that feel carefree and look expensive.
- Part hair into four large sections.
- Apply a curl cream for definition and moisture.
- Braid each section loosely—don’t pull too tight.
- Once dry, unravel and shake out at the roots for volume.
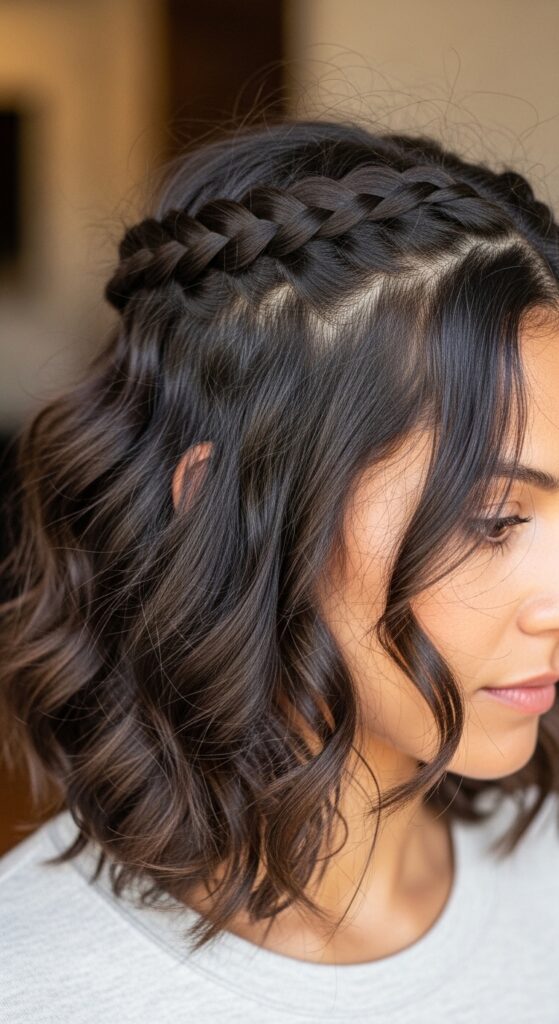
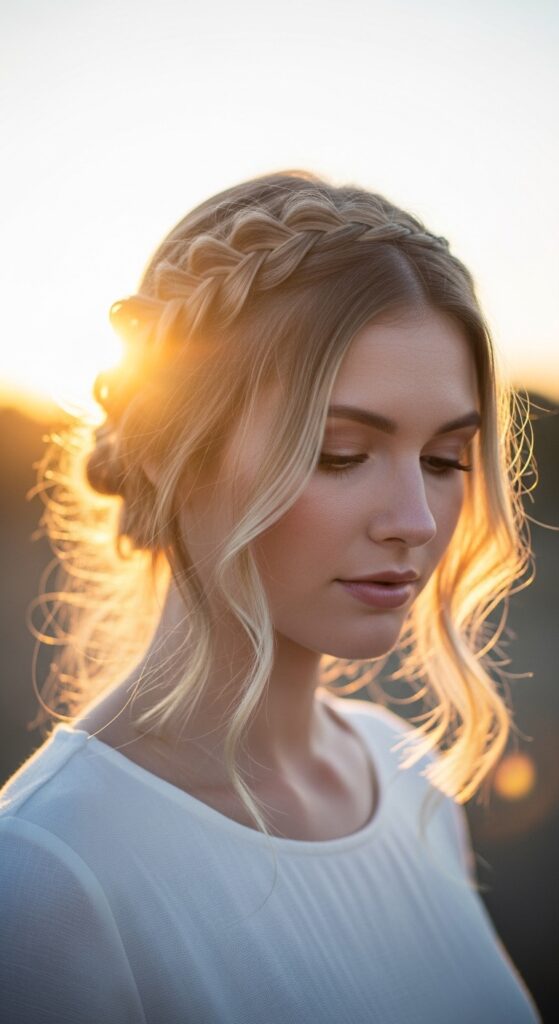
3. Crown Braid Out for Elegant Volume
Want instant volume at the crown? This is your move. By braiding your hair around your head like a crown before bed, you wake up with incredible lift and body. It’s a game-changer for fine or flat hair.
The waves have a beautiful, cascading effect. It looks intricate, but it’s just a simple braid placed strategically. Perfect for when you need your hair to look special with zero morning time.
- Create a deep side part.
- Take a section from the front and braid it back, following your hairline.
- Pin the end securely. Repeat on the other side if desired.
- Sleep on it, unpin, and fluff for majestic volume.
4. Two-Strand Twist Out for Defined Curls
If you have a tighter curl pattern, two-strand twists are often better than braids. They give a more defined, curly result that lasts for over a week. The definition is absolutely stunning.
This is the heart of protective styling for natural textures. It minimizes single-strand knots and keeps your ends safely tucked away. Your hair will thank you with growth and retention.
- Use the L.O.C. (Liquid, Oil, Cream) method on soaking wet hair.
- Section hair into small to medium squares.
- Twist each section from root to end.
- Allow to dry fully for the longest-lasting definition.
5. The Hybrid Braid & Twist Out
Why choose? Mix braids and twists on the same head for a custom, textured look. I use braids on the top layer for wave and twists underneath for tighter curl. It creates amazing dimension.
This is a pro-tip for adding visual interest. It breaks up the pattern in the most beautiful way. Think of it as a glitchy glam hair technique—intentionally irregular and cool.
- Map out your design. Maybe twists in the back, braids on the sides.
- Use the same product base for consistency.
- Apply the technique that suits each area’s density.
- Unravel all at once for a surprising, cohesive finish.
6. Side-Swept Braid Out Waves
For a dose of drama, braid your hair on a deep diagonal part. When you take it down, the waves will all flow in one gorgeous direction. It’s incredibly flattering and feels red-carpet ready.
This style has major old money hair energy—polished, intentional, and timeless. It works beautifully on both blunt cuts and layered styles, adding movement and sophistication.
- Create a deep side part from temple to opposite crown.
- Braid in sections following the direction of the part.
- Keep braids medium-sized for manageable waves.
- Unravel and use a pick to lift the roots on the flatter side.
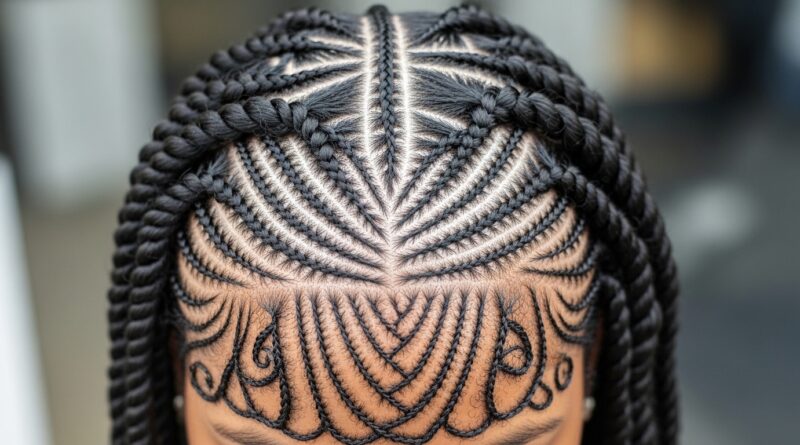
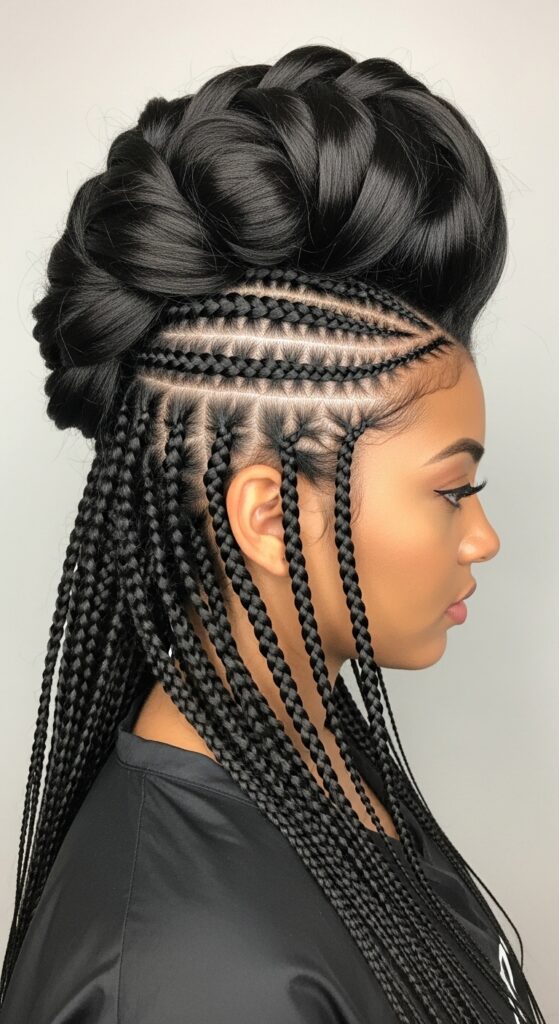
7. Micro Braid Out for Maximum Lasting Power
If your goal is longevity, micro braids are the answer. The smaller the braid, the longer the style lasts. You can easily get 10-14 days of defined waves from this method. It’s an investment of time that pays off.
This is a marathon, not a sprint. Put on a good movie, be patient, and section carefully. The result is a stunning, intricate pattern that slowly softens into a beautiful wave over weeks.
- Use a rat-tail comb for precise, small sections.
- Opt for a lightweight product to avoid heavy build-up.
- Braid from the absolute root to the very tip.
- Protect with a satin scarf or bonnet every night.
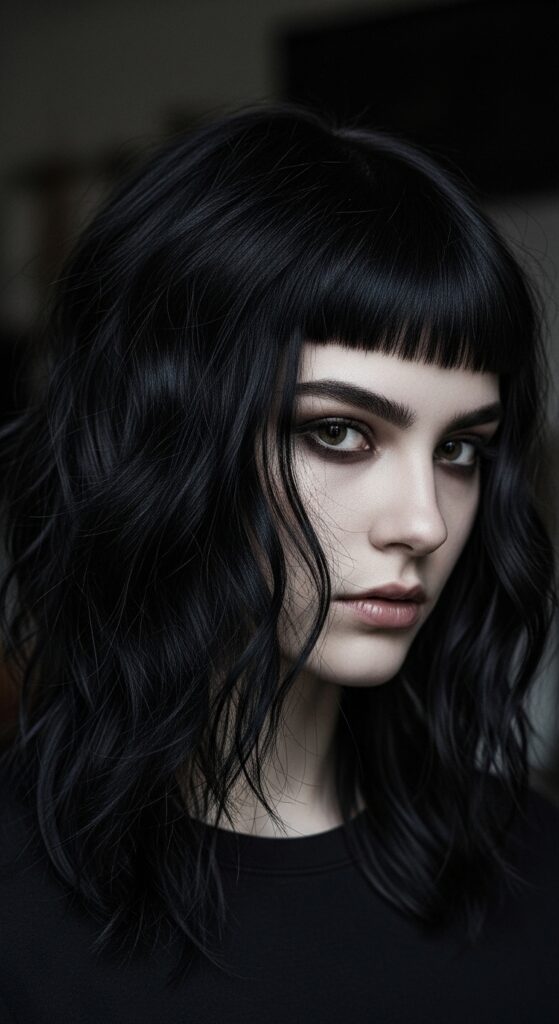
8. Halo Braid Out for a Soft Frame
A single braid wrapped around your head creates the softest, most romantic frame for your face. It’s less voluminous than the crown braid but gives a delicate, angelic effect. Perfect for a soft, feminine look.
I see this as a romantic goth hairstyles adjacent look—it has that soft, Victorian-inspired feel. It’s unexpectedly edgy when paired with a bold lip or strong eyeliner.
- Braid all of your hair into one low, side three-strand braid.
- Gently wrap and pin it around your head like a headband.
- Leave it secured until completely dry.
- Carefully unpin, unravel, and gently separate just the halo section.
9. The Asymmetrical Lob Braid Out
Got an asymmetrical lob? Braid outs are your best friend. They add texture and body that plays perfectly with the dramatic angles of your cut. Braid the longer side in two sections and the shorter side in one.
The waves will accentuate the cut’s shape in the coolest way. It’s a modern, artistic take on waves that feels very now. This is a top contender for 2026 hairstyles—textured, healthy, and sharp.
- On the longer side, create a vertical part for two braids.
- On the shorter side, a single braid going straight back.
- Use a strong-hold mousse to keep the shape.
- Unravel and use a flat iron on cool to flick the ends out.
10. Pineapple Puff Braid Out
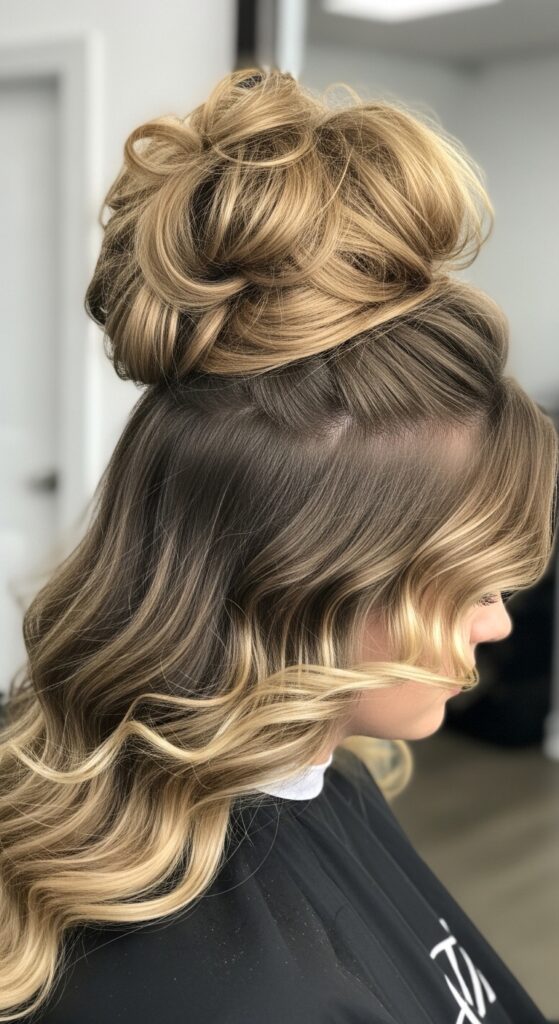
This is a two-in-one style. Create a few large braids at the front and sides, then gather all your hair (including braid ends) into a high pineapple puff overnight. You get a giant, beautiful puff with wavy tendrils in the morning.
It’s fun, protective, and full of personality. The contrast between the sleek puff and the textured waves is so eye-catching. A total mood-lifter.
- Braid the front and side sections you want to be wavy.
- Gather all hair (braided and unbraided) at the very top of your head.
- Secure with a satin scrunchie—never a regular band.
- In the morning, take down the puff and unravel the braids.
11. Vampire Cut Texture with Braids
The vampire haircut is all about textured, lived-in layers. A braid out is the perfect way to enhance that. Focus on braiding the longer layers while leaving the shorter, face-framing pieces out or twisted separately.
When unraveled, you get that perfectly imperfect, “just arose from my coffin” texture. It’s messy, cool, and intentionally disheveled. Pair with curtain bangs for the full effect.
- Apply a texturizing spray for a piece-y, gritty finish.
- Braid random sections, not all of your hair.
- Leave out your shortest layers and bangs.
- Use your fingers to style, never a brush, for separation.
12. Hime Cut Meets Braid Out
The hime cut is a striking blend of blunt, straight front pieces and long back hair. A braid out on the long back section creates a beautiful contrast. Keep the front princess bangs smooth and straight.
The juxtaposition is everything. It’s structured yet soft, edgy yet romantic. This look proves braid outs can be part of highly stylized, artistic looks beyond just wash-and-go texture.
- Flat iron or wrap your hime bangs and front pieces straight.
- Braid the remaining long hair in large sections.
- Protect the straight front pieces with a clip while sleeping.
- In the morning, unravel the back for a dramatic textural contrast.
13. Dutch Braid Out for Raised Waves
Dutch braids (braids done underhand) sit on top of your scalp. This means when you unravel them, you get incredible volume right at the root. It’s like a built-in root lift without any teasing or product.
If your hair tends to go flat, this technique is a lifesaver. The waves have a beautiful, raised quality that looks full and healthy. It adds a whole new dimension to your braid out.
- Section hair. Start each braid by crossing strands under, not over.
- Keep the tension consistent and close to the scalp.
- Braid all the way down and secure.
- When dry, unravel from the bottom up, then gently loosen the braid from your head.
14. The “Wet Look” Braid Out
For a sleek, modern finish, use a strong-hold gel with lots of shine. Braid your hair as usual, but don’t scrunch out the crunch completely. Leave a slight cast for that intentional, wet look wave.
This style feels very high-fashion and editorial. It’s a bold take on the braid out that works amazingly for events or when you want to make a statement. It’s a glitchy glam hair staple—polished with a textural twist.
- Use a maximum-hold, high-shine gel on soaking wet hair.
- Braid tightly for a very defined wave pattern.
- Let it dry 100%—this is crucial.
- Unravel gently. Do not scrunch. Just separate slightly with oiled hands.
15. Braid Out on Short Hair & TWA
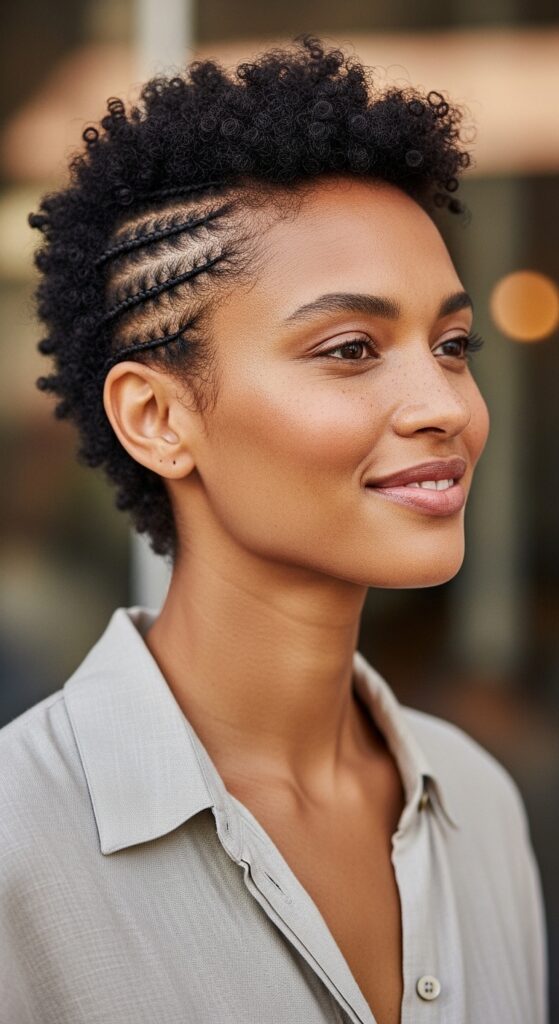
Yes, you can absolutely do a braid out on short hair! On a TWA, small braids or twists will give you beautiful, defined curls and waves as they grow out. It stretches your style and reduces shrinkage beautifully.
It’s a fantastic way to switch up your look without adding length. The key is small sections and patience. You’ll be amazed at the volume and texture you can achieve.
- Use a styling cream with good slip on damp hair.
- Create tiny, palm-sized sections all over your head.
- Braid or twist each section to the end.
- Once dry, unravel and use a pick to shape your glorious halo.
16. Heatless “Blowout” with Large Braids
Want the effect of a blowout without the heat? Braid outs can do that. On stretched hair (maybe from a previous twist out), create large braids. The result is straightened roots with soft, bouncy waves through the ends.
It’s the healthiest way to get a smooth, voluminous look. This method preserves your natural texture while giving you a straighter silhouette. Perfect for when you need a change of pace.
- Start with stretched, detangled hair (from a previous style).
- Apply a light serum to each large section for smoothness.
- Braid tightly from the root to seal in the stretch.
- Sleep with a satin cap. Unravel for smooth, bouncy movement.
17. Braid Out into a Half-Up Style
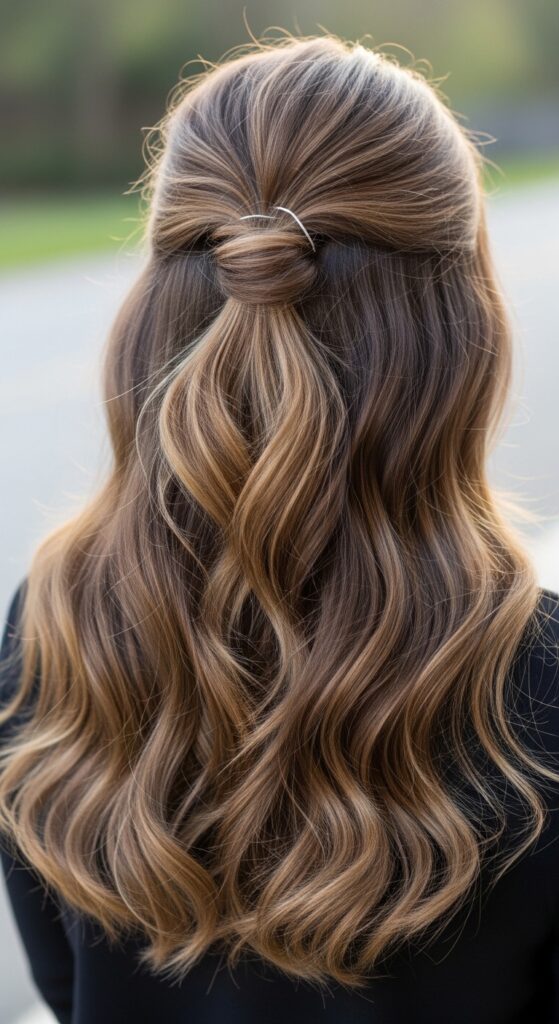
Your second-day braid out is perfect for a half-up style. The waves give the half-updo so much more body and interest than straight hair would. Pull back the top section loosely to show off your texture.
It’s an easy, five-second upgrade that looks like you tried much harder. Use a cute clip or scrunchie to secure it. This is my go-to for looking polished on busy work-from-home days.
- After unraveling your braid out, gently separate waves.
- Take a section from the front and top of your head.
- Pull it back loosely, allowing waves to fall freely.
- Secure at the crown with your favorite accessory.
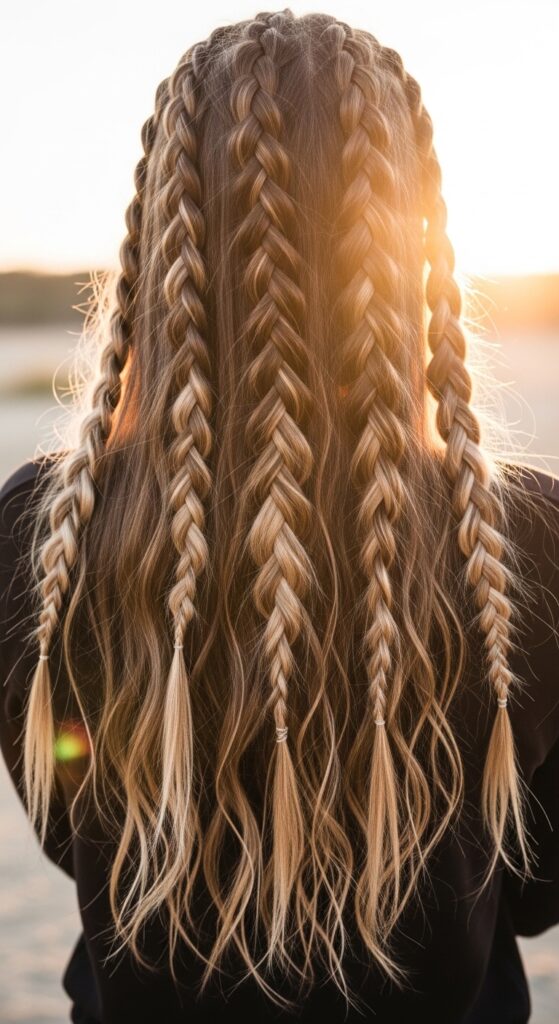
18. Mermaid Braids into Waves
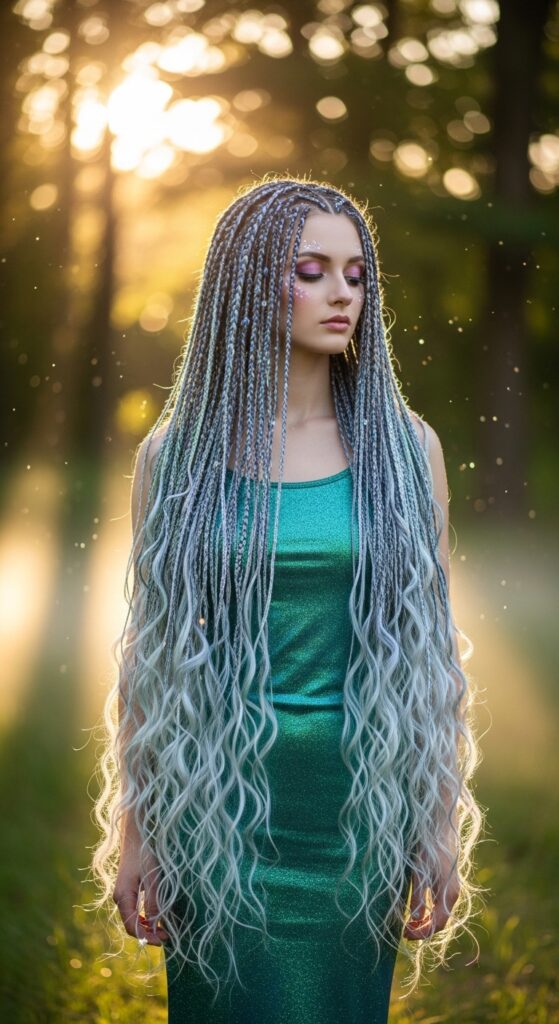
For very long hair, try multiple thin braids all over. When taken down, you get a cascade of delicate, rippling waves that look straight out of a fairy tale. It’s a bohemian dream.
The more braids you do, the more intricate the wave pattern. This takes time but creates a truly special, head-turning result. It’s the ultimate romantic goth hairstyles base—add some dried flowers or dark accessories.
- Part hair down the middle.
- Create many small, three-strand braids on each side.
- Braid all the way to the ends for a seamless wave.
- Unravel carefully, starting from