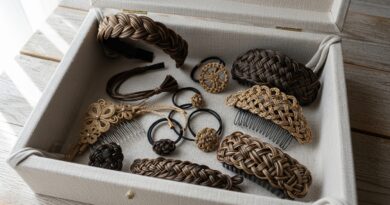
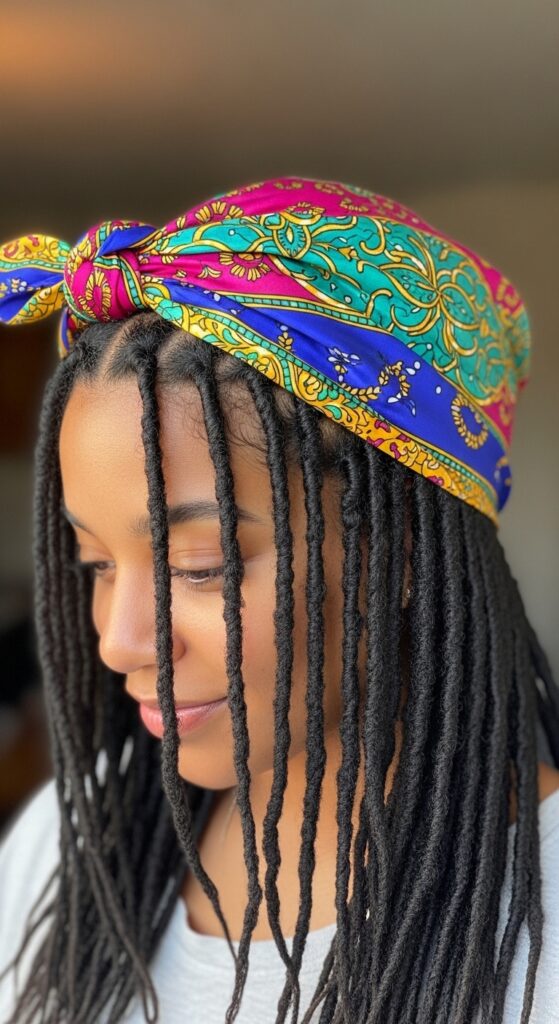
24 Finger Coils Hairstyles Tight Curls Defined Patterns Moisturizing Longevity Tips
Hey friend! Let’s talk about one of my absolute favorite styles for tight, beautiful curls: finger coils. If you’ve ever wanted super defined, bouncy ringlets without using heat, this is your magic method. It’s a game-changer for type 4 hair, but honestly, anyone with a natural curl pattern can rock it.
I know, the idea of coiling each section can seem like a lot. But the payoff is incredible definition and a style that lasts for weeks with the right care. This isn’t just a hairstyle; it’s a low-maintenance, high-impact look.
In this guide, I’m breaking down everything. We’ll look at 24 stunning ways to wear finger coils, from fresh installs to gorgeous second-week styles. Plus, I’m sharing my no-fail tips for moisture and longevity that actually work. Let’s get your coils popping!
What Are Finger Coils, Exactly?
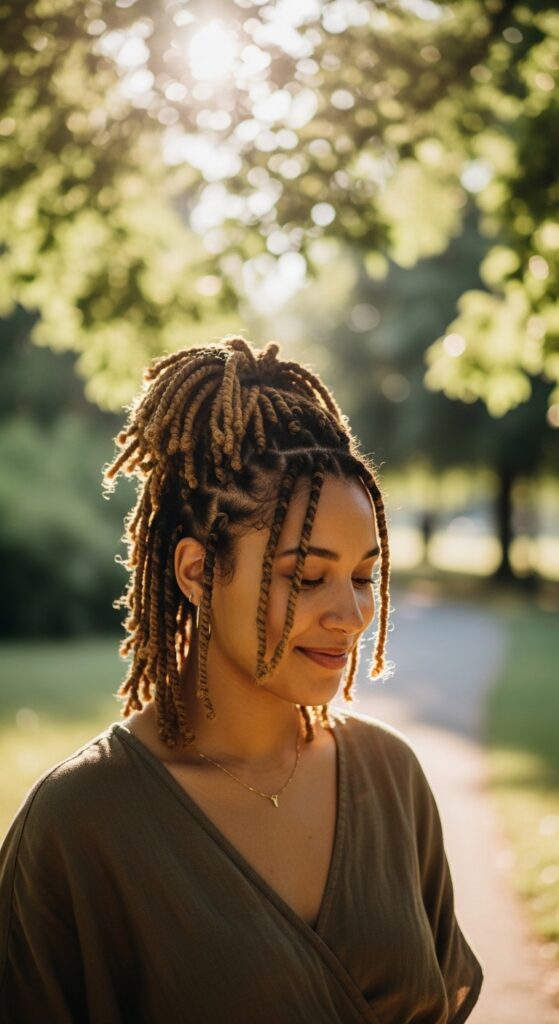
Finger coils are a styling technique where you twist small sections of damp, product-loaded hair around your finger to create springy, uniform curls from root to tip. It’s all about enhancing your natural texture, not changing it. The result is a head full of perfect, shiny ringlets.
This method is perfect for creating defined patterns and can be the foundation for so many looks. It’s a protective style that minimizes daily manipulation, which is a huge win for hair health. The best part? It gets better and softer as the days go by.
The Essential Pre-Wash & Detangle
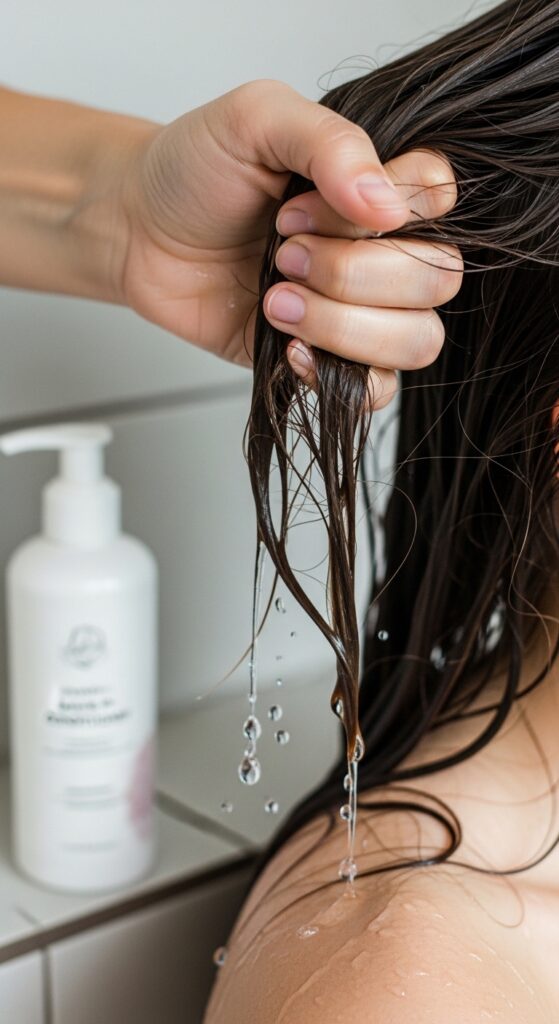
Never, ever start on dry, tangled hair. Your prep work determines everything. I always start with a thorough detangling session using a slippery conditioner or detangling spray. Work in small sections from the ends up to the roots.
Use a wide-tooth comb or your fingers to gently remove knots. This step prevents breakage and ensures your coils start on smooth, defined sections. A good pre-poo treatment with a light oil can also add a layer of protection before shampooing.
Cleansing for the Perfect Canvas
Wash day is sacred. Use a gentle, moisturizing shampoo to cleanse your scalp without stripping your hair. Focus the shampoo on your scalp and let the suds run down the lengths. For a deeper cleanse, a clarifying shampoo once a month removes all product buildup.
Follow with a rich, hydrating conditioner. Let it sit for at least five minutes under a warm towel or a shower cap. This moisture is the foundation your coils will cling to. Rinse with cool water to help seal the hair cuticle for extra shine.

Your Non-Negotiable Leave-In Conditioner
After rinsing, apply your leave-in conditioner to soaking wet hair. This is non-negotiable for moisture. I use the “praying hands” method to smooth it down each section, then follow up with a bit of raking to ensure even distribution from roots to ends.
Your hair should feel cool, slippery, and heavy with water and product. This is the ideal state for coiling. Don’t be shy with the leave-in—it’s the primary moisture source that will be locked in by your styler.
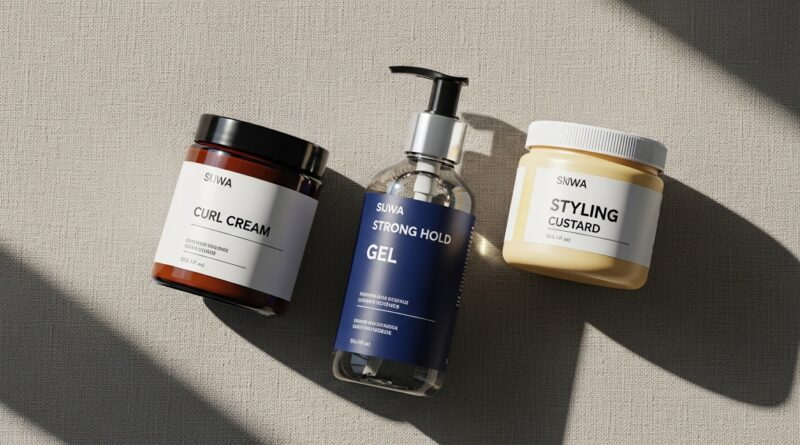
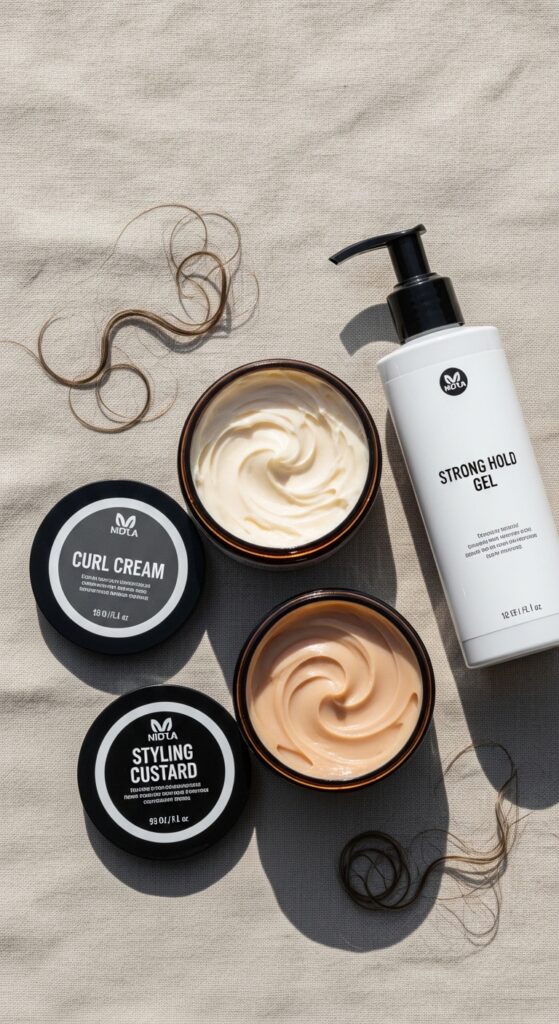
Choosing Your Styling Product (Cream vs. Gel)
The debate is real: cream or gel? For longer-lasting hold, a strong-hold gel is your friend. For a softer, more touchable feel, a defining cream or custard works wonders. My personal favorite is the “gel-over-cream” method for the best of both worlds.
Apply a dollop of cream first, then layer your gel on top. This gives you definition without the crunch. The key is to use enough product so your hair feels coated and slippery as you coil.
- Curl Cream: For softness and moisture.
- Strong-Hold Gel: For maximum definition and longevity.
- Custard: A great middle-ground for hold and movement.
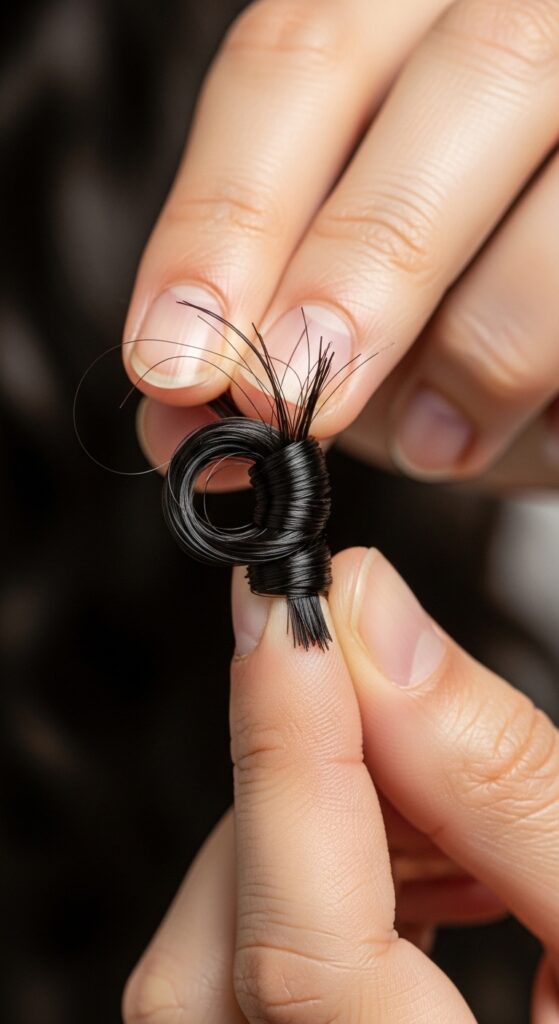
The Basic Finger Coiling Technique Step-by-Step
Start with a small, manageable section—about the width of a pencil. Make sure it’s fully saturated with product. Place your index finger at the root of the section and begin wrapping the hair around it in a spiral motion.
Keep the tension even and coil all the way to the end. The hair should naturally form a tight, springy ringlet around your finger. Gently slide your finger out. Repeat, repeat, repeat! Consistency in section size is key for a uniform pattern.
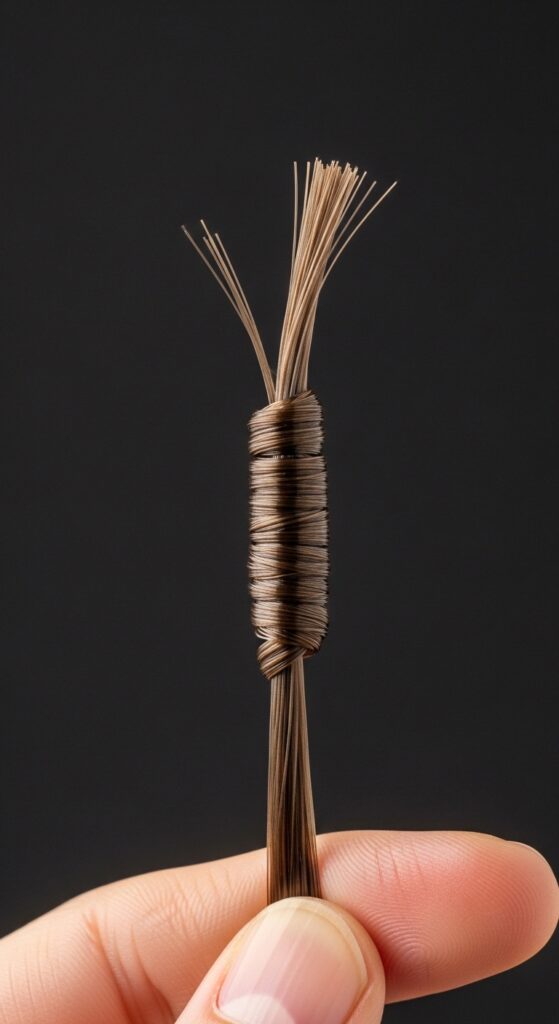
Mastering Tension for Even Coils
Too much tension causes breakage and scalp pain. Too little, and your coil won’t form properly. The sweet spot is a gentle, consistent pull as you wrap. Let the hair guide itself around your finger; don’t force it.
If a section feels too thick, don’t hesitate to split it. Smaller sections often lead to more defined, longer-lasting coils. Your scalp should feel comfortable, not tight, when you’re finished.
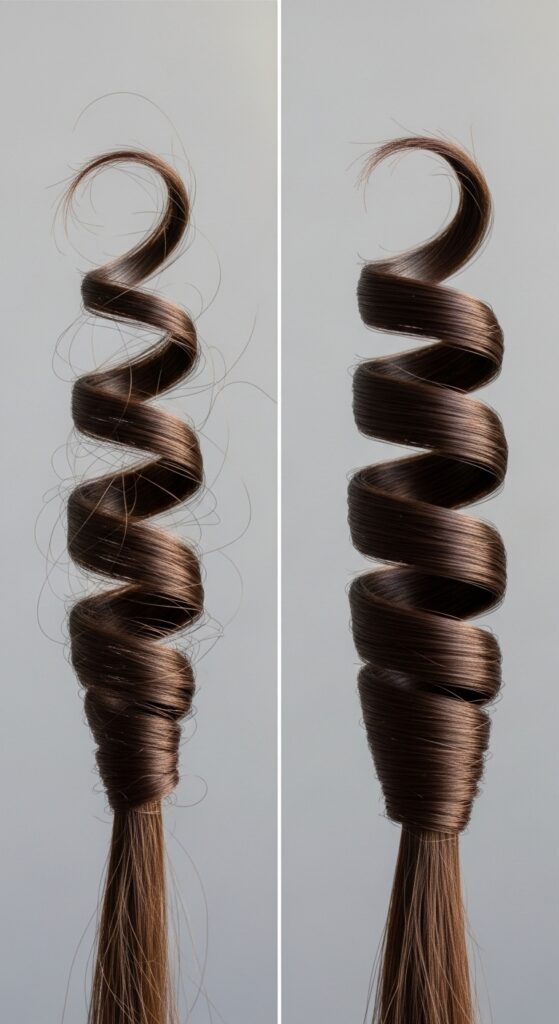
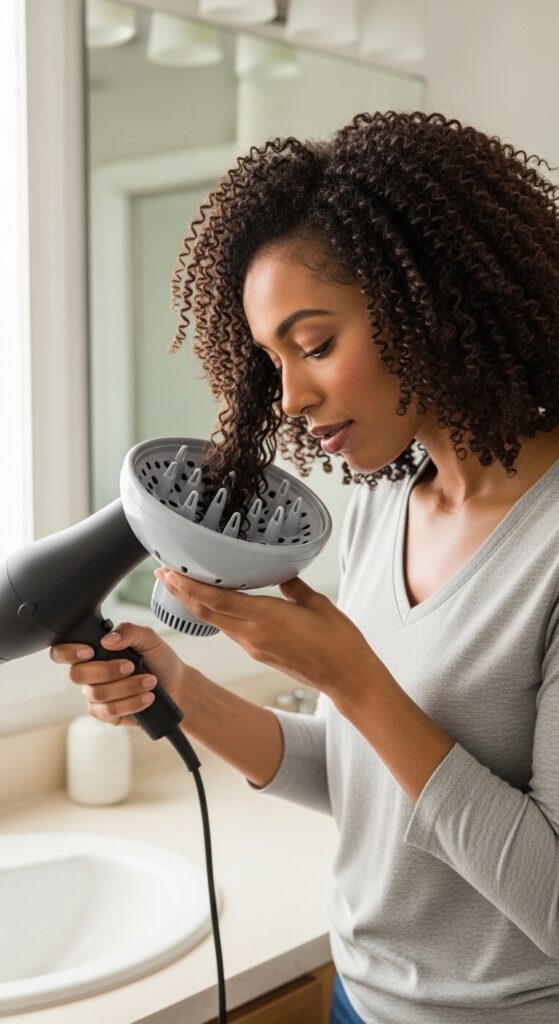
Drying for Maximum Definition (Air Dry vs. Diffuse)
How you dry is crucial. For zero frizz, you can sit under a hooded dryer. For volume at the roots, pixie diffuse on low heat and low speed. Gently cup your coils in the diffuser bowl without disturbing them.
If you have time, air-drying is gentlest. Just be prepared for it to take a while. Never touch your hair while it’s drying! This is when frizz is born. Patience gives you the perfect, crisp definition.
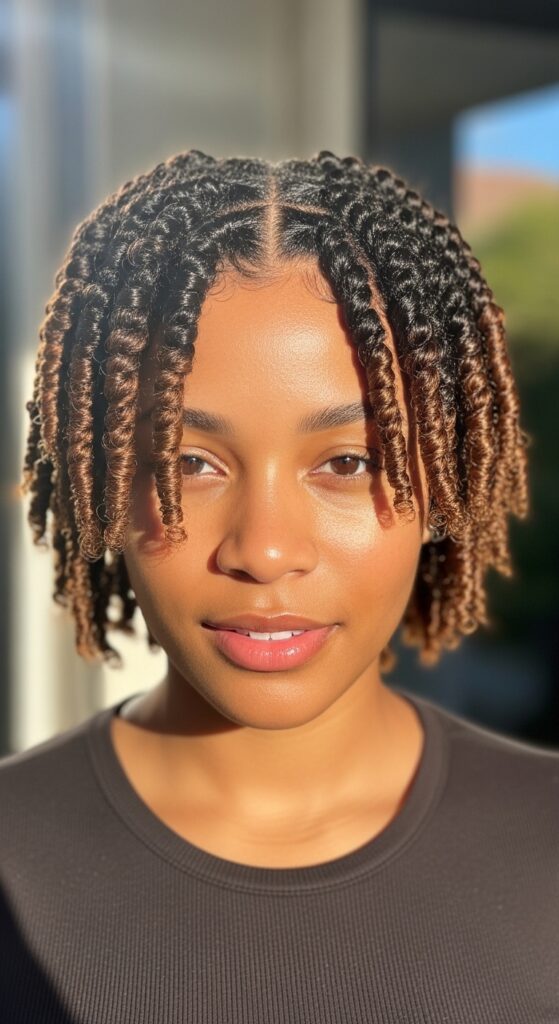
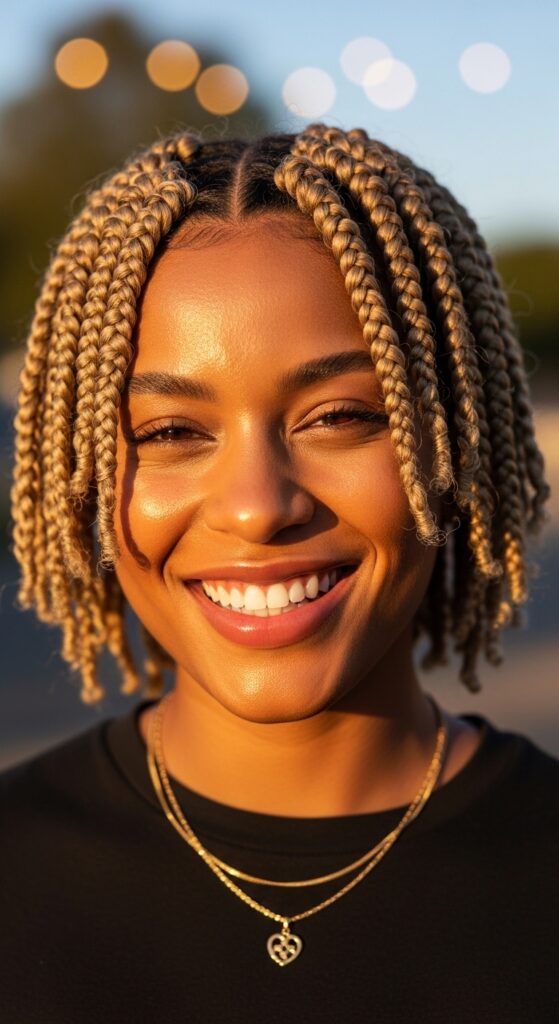
The Classic Full Head of Coils
This is the iconic look. Uniform, bouncy coils from root to tip all over your head. It’s a statement of beautiful, healthy curls. This style works for any length and is the perfect base for all the other looks we’ll talk about.
It gives off major “I know my hair” vibes. It’s a timeless look that never goes out of style and is the ultimate showcase of your natural texture. It’s the foundation for everything else.
Side-Parted Elegance
Switch up your classic coils with a deep side part. It instantly adds a touch of sophistication and volume on one side. This is a great way to transition your look from day to night or just add a little extra something.
It frames your face beautifully and feels like a very intentional, polished style. It’s a simple change that makes a huge impact. Think of it as the quiet luxury bob of the coil world—understated but incredibly chic.
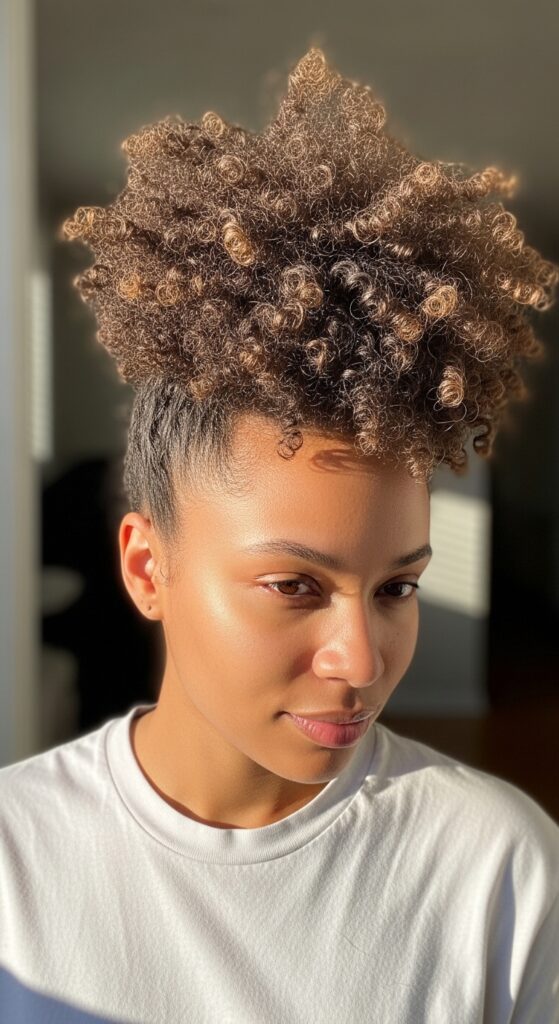
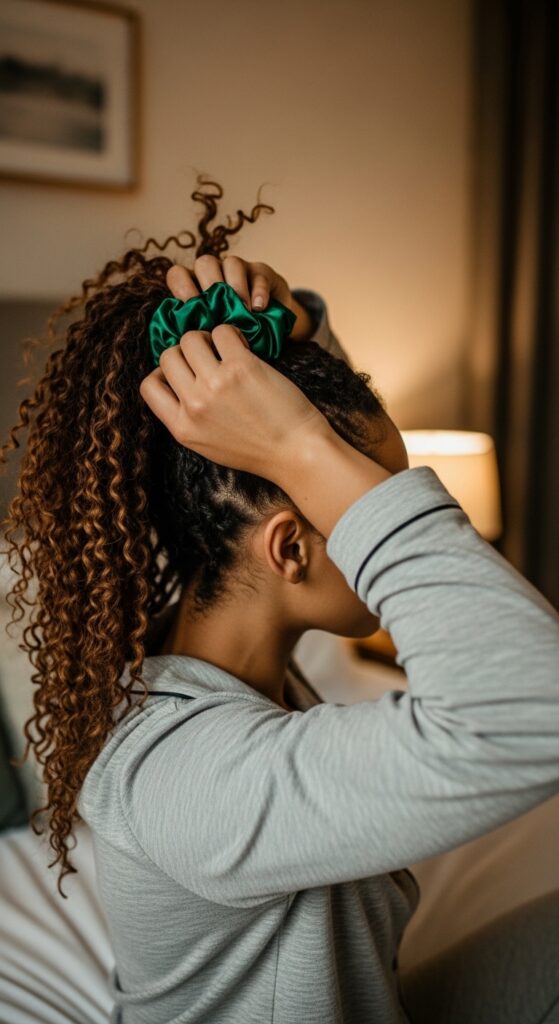
Coiled High Puff or Pineapple
Gather all your coils into a high puff on top of your head. It’s playful, protects your ends, and is perfect for second or third-day hair. Use a coiled-friendly scrunchie or a satin scarf to secure it without breaking your pattern.
This is my go-to gym or “I need my hair out of my face” style. It keeps your coils stretched and intact, ready to bounce back down when you let them loose. It’s practical and super cute.
Half-Up, Half-Down Coiled Style
Take the top half of your coils and secure them into a small puff or bun, leaving the rest down. This look is effortlessly cool and keeps hair out of your face while showing off your length and definition.
It’s a versatile style that works for work, weekends, or a date night. You can make the top section neat or purposely messy for different vibes. It’s a staple in my routine.
Coiled Space Buns
Double the fun! Split your hair into two high pigtails and coil each into a bun. This is a youthful, energetic look that’s perfect for festivals, workouts, or just feeling fun. The coils give the buns amazing texture and volume.
This style definitely leans into the playful side of 2026 hairstyles—think nostalgic but fresh. It’s a guaranteed mood-lifter and so easy to do.

Finger Coil Mohawk or Faux Hawk
For an edgier look, gather the coils along the center of your head into a standing row, while leaving the sides down or even shaved if that’s your style. You can secure the mohawk section with pins or just let it flow freely.
This style has a touch of romantic goth hairstyles or vampire haircut edge—dark, defined, and dramatic. It’s a powerful way to wear your coils and make a serious statement.
Coiled Bangs with Long Hair
If you have longer coils, create defined coiled bangs! This frames your face in the most adorable way and adds a focal point to your style. It gives a modern twist on classic long curls.
This look can channel a hime cut vibe—that mix of structured fringe with flowing length. It’s artistic, intentional, and draws all the right attention to your eyes.
The Tucked Behind-the-Ears Look
Sometimes simplicity is everything. Simply tuck your coiled hair behind both ears. This opens up your face, highlights your features, and lets your coils shine in their purest form. It looks clean, fresh, and put-together with zero effort.
It’s a very old money hair aesthetic—effortless, groomed, and classic. It’s about perfecting the basics and looking inherently polished.
Accessorize with Coils: Scarves & Wraps
Take a long, thin satin scarf and wrap it around your head like a headband, letting your coils flow out the bottom. Or, use it to tie a bow at the back. This adds a pop of color, protects your edges, and looks incredibly stylish.
Accessories elevate your coils from everyday to extraordinary. It’s a simple trick that feels brand new. Think of it as the finishing touch that pulls your whole outfit together.
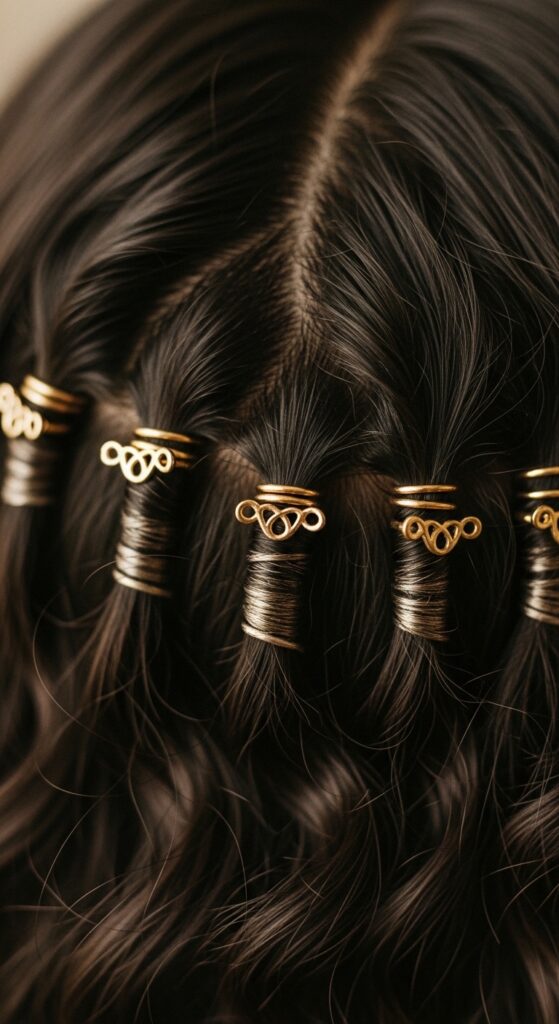
Coils with Gold or Silver Cuffs
Slide small, elegant hair cuffs onto individual coils, especially around your face or in a specific pattern. This adds a touch of metallic glamour and is a form of protective styling that keeps sections separated.
This detail gives off glitchy glam hair energy—a mix of organic texture and futuristic, shiny details. It’s a small addition that makes people look twice.
The Asymmetrical Coiled Lob
If your coils are shoulder-length, style them in an asymmetrical lob (long bob). Angle the cut or simply part and style it so one side is noticeably longer or fuller than the other. The coil texture makes this cut look incredible.
It’s modern, chic, and breaks up the symmetry in a really fashionable way. This cut has movement and attitude, and the coils add unbelievable texture and body to the shape.
Two-Strand Twist-Out from Coils
After a week or two, you can unravel your coils and gently separate them into a lush, voluminous twist-out. This gives you a whole new hairstyle from the same set! The definition from the coils makes the twist-out pattern incredibly uniform and full.
Use a light oil to break the cast and separate for maximum volume. This extends the life of your style and keeps your hair looking fresh. It’s like getting two incredible styles for the work of one.

Coiled Updo for Special Events
Gather your coils into a low, textured bun at the nape of your neck. Leave some tendrils loose around your face. Or, create a beautiful updo with pinned sections. The texture of the coils gives any updo amazing grip and body.
This is an elegant, grown-up way to wear your coils to a wedding, party, or fancy dinner. It’s sophisticated and shows off the beautiful pattern of your hair. You’ll feel incredibly put-together.
The Pineapple Method for Night
This is the #1 tip for longevity. Before bed, gather your hair into a very loose, high “pineapple” on top of your head using a satin scrunchie. The goal is to prevent flattening at the roots and protect the coils from friction.
Always, always sleep on a satin or silk pillowcase. This single habit reduces frizz and breakage dramatically. It’s the simplest thing you can do to make your style last.
- Step 1: Lean forward and gather hair at the crown.
- Step 2: Secure loosely with a satin tie.
- Step 3: Cover with a satin bonnet or scarf.
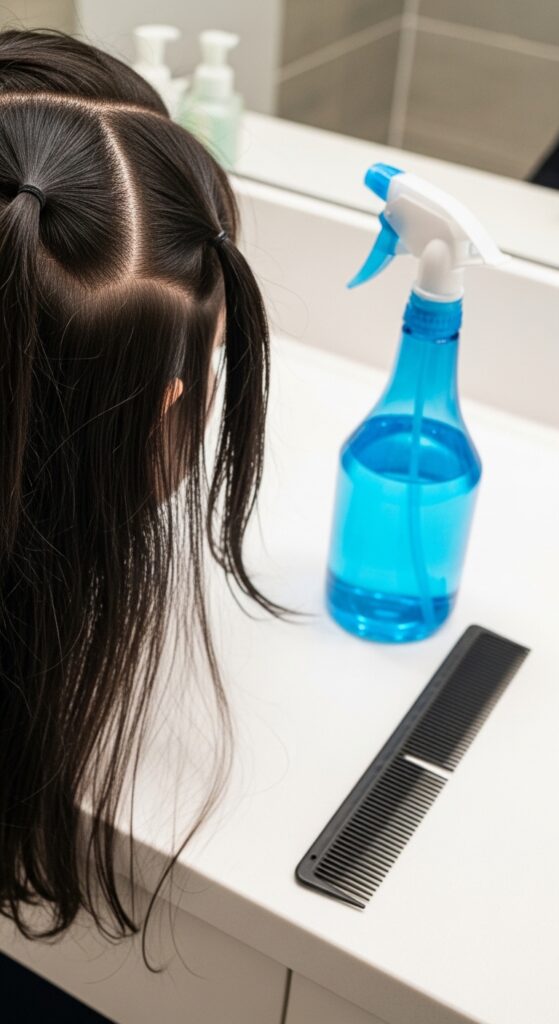
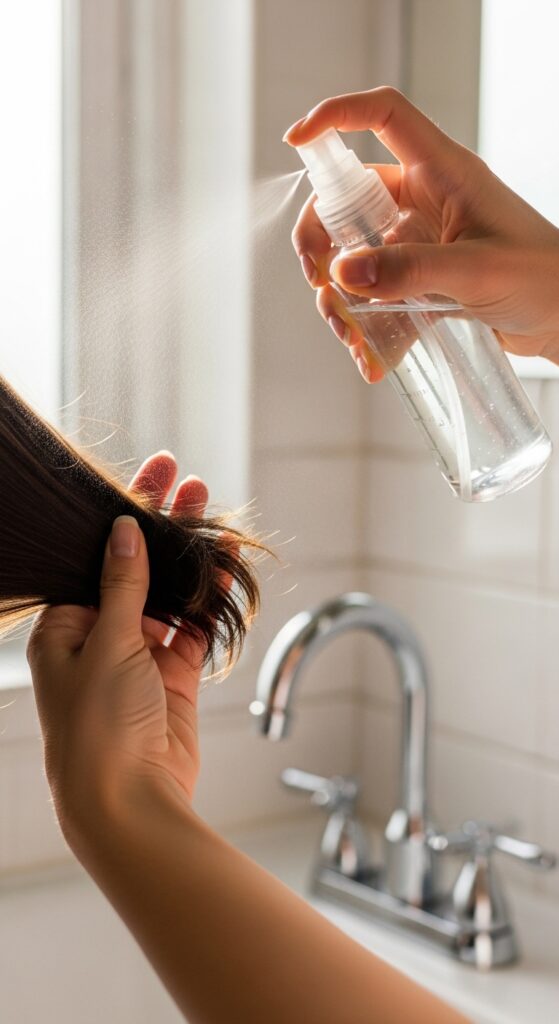
Refreshing Your Coils in the Morning
Morning refresh is easy. Mix water with a little leave-in conditioner in a spray bottle. Lightly mist your hair—don’t soak it. Then, use a tiny bit of oil or cream on your hands to “pray” over any frizzy sections and recoil any that have loosened.
Focus on the canopy (top layer) and your edges. Often, you just need to redefine a few key coils to make the whole head look fresh. This takes 5 minutes max.
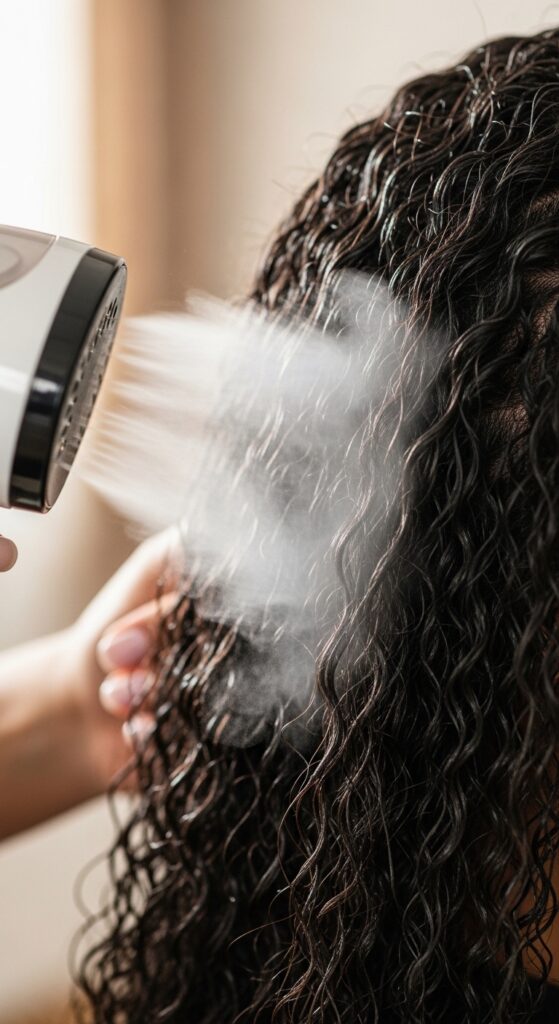
Weekly Moisture Boost Routine
Around day 5-7, your coils might need a drink. Use a moisturizing spray or a light foam to add hydration without weighing them down. You can also do a “steam refresh” by hovering your head over a bowl of warm water or using a handheld steamer.
This re-activates the product in your hair and adds moisture directly to the strands. Follow up with a light sealing oil on your ends. This weekly boost is key for preventing dryness and crunchiness.
How to Wash Your Hair WITH Coils In
Yes, you can wash your scalp without ruining your coils! Dilute your shampoo with water in an applicator bottle. Part your hair and apply the mixture directly to your scalp, massaging with your fingertips.
Let the water rinse the suds through your coils—don’t scrub the lengths. Follow with a light conditioner, again focusing on the scalp. Your coils will stay mostly intact and just look refreshed and fuller.

Knowing When It’s Time to Take Them Down
Your coils will tell you when they’re done. Look for significant frizz that won’t smooth, matting at the roots, or an itchy, flaky scalp that needs a proper wash. Usually, you get a good 2-3 weeks of