Mastered 21 Braided End Caps Protecting Tips From Splitting
Okay, let’s be real for a second. You’ve spent time perfecting those gorgeous braids, and the last thing you want is to see them turn into a fuzzy, split-ended mess. I’ve been there, staring at my ends after a few days and wondering where all the neatness went. But I’ve finally cracked the code with 21 braided end caps that actually protect your hair from splitting. These aren’t just pretty; they are your hair’s new best friend. I’m sharing everything I’ve learned so you can keep your braids looking fresh, strong, and expensive for way longer. No more sad, frayed ends.
Think of this as your practical, no-nonsense guide to saving your hair while keeping it stylish, from my braiding chair to yours. We’re going to cover everything from the classic to the totally unexpected. By the end, you’ll have a whole toolkit of ways to seal the deal on your braids, and I promise, none of them are complicated.
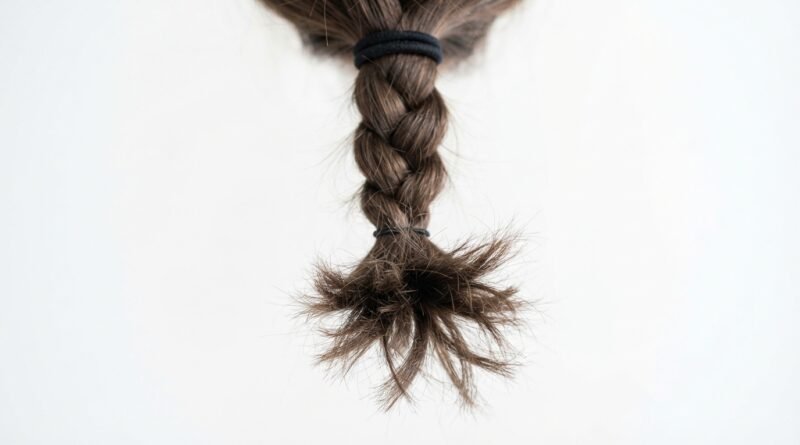
Why Your Braid Ends Really Split

It’s not just “bad hair days.” Split ends in braids happen because the hair shaft at the very end is more exposed to friction, dryness, and breakage. When you braid, you’re essentially twisting and pulling those tiny ends, which can cause them to weaken over time.
Think of it like the corner of a well-loved blanket. It gets all the wear. Using a simple end cap stops that friction dead in its tracks, locking in moisture and keeping that perfect line from unraveling into a frizz ball.
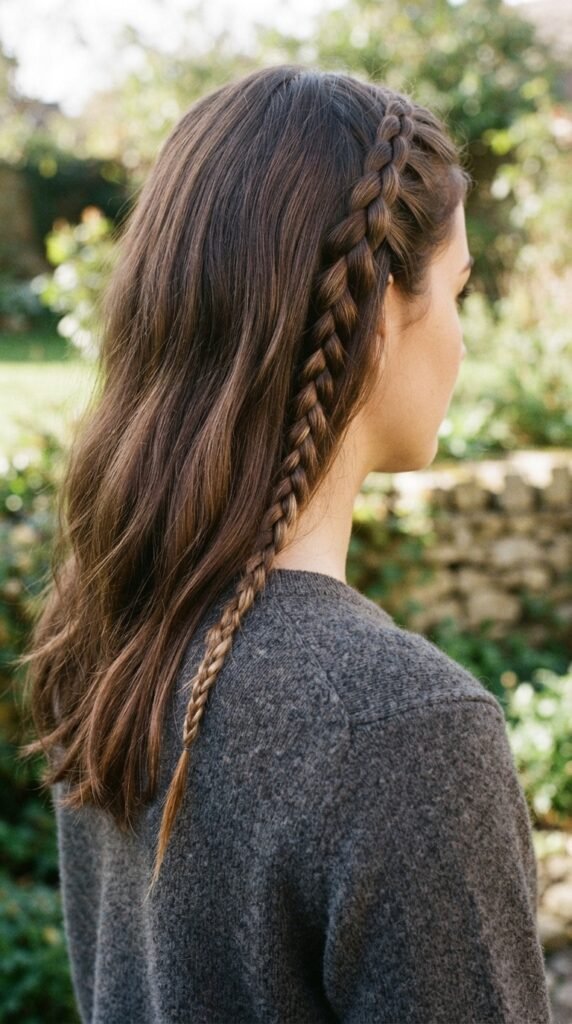
The Silk Ribbon Wrap for Old Money Hair
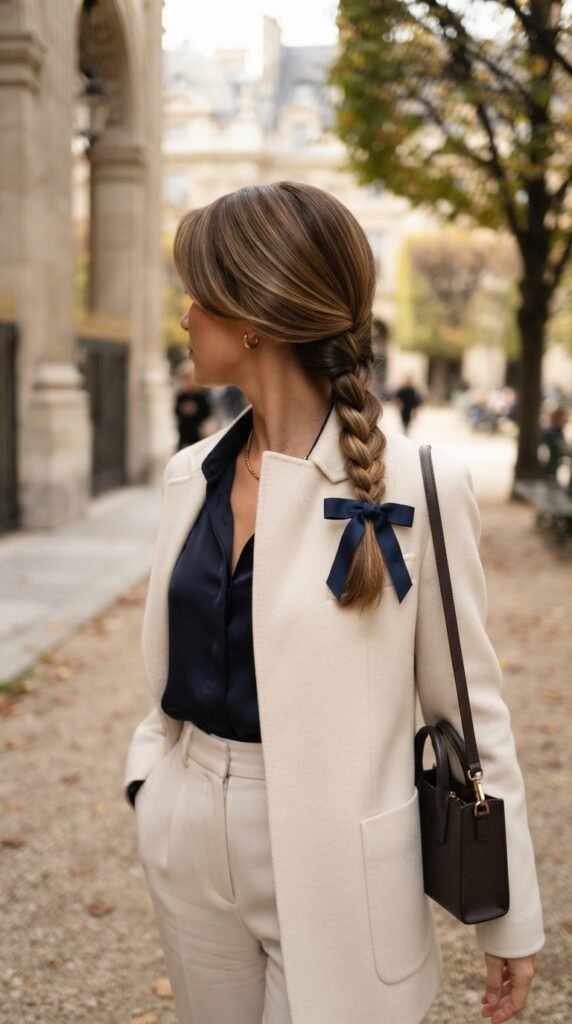
We’re talking about that classic, polished vibe that never goes out of style. The silk ribbon wrap is the ultimate quiet luxury bob move for your braids. It’s simple: take a 12-inch piece of silk ribbon and tightly wrap it around the base of your braid for about an inch.
- It creates a gorgeous, finished look.
- The silk prevents friction, unlike cotton or elastic.
- It pairs perfectly with a low, elegant braid or even an asymmetrical lob in a ponytail.
This is the trick for keeping those ends looking like fresh out of the salon for a full week.
Heat-Free Elastic End Seals for 2026 Hairstyles
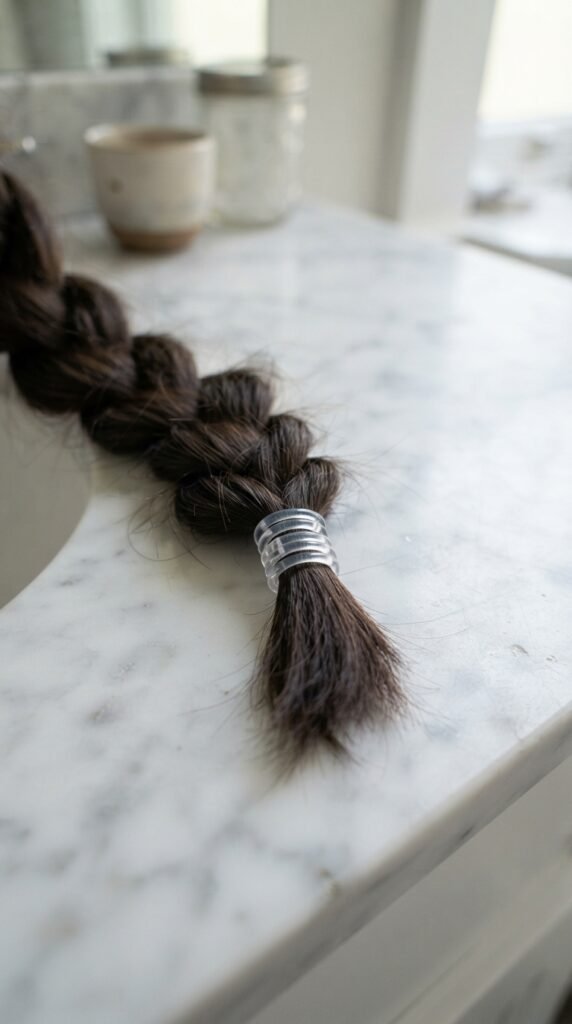
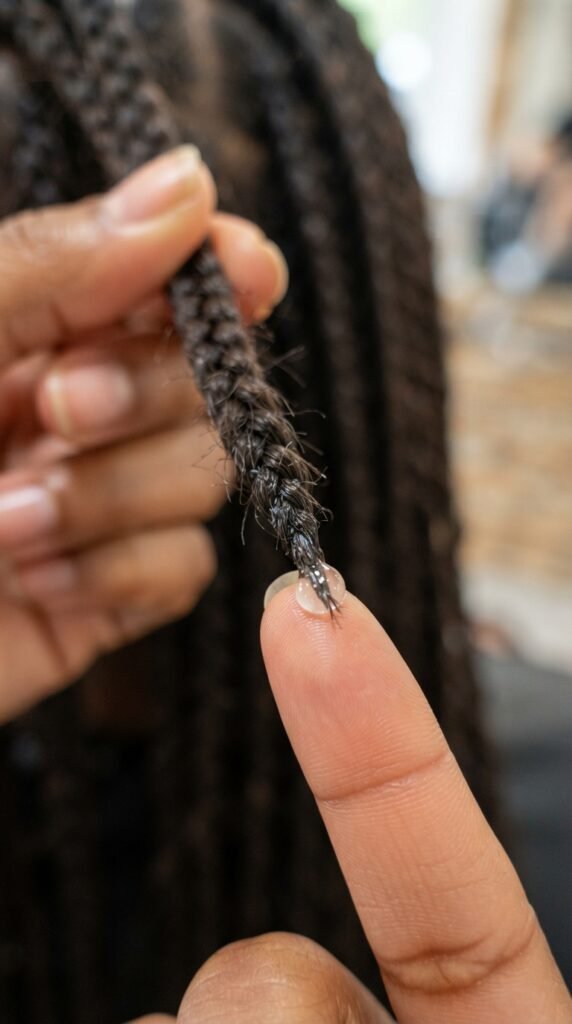
For the 2026 hairstyles that are all about natural texture and low manipulation, heat-free elastic end seals are your go-to. Instead of burning or gluing, simply slide a tiny, clear elastic band about a half-inch from the very tip of your braid.
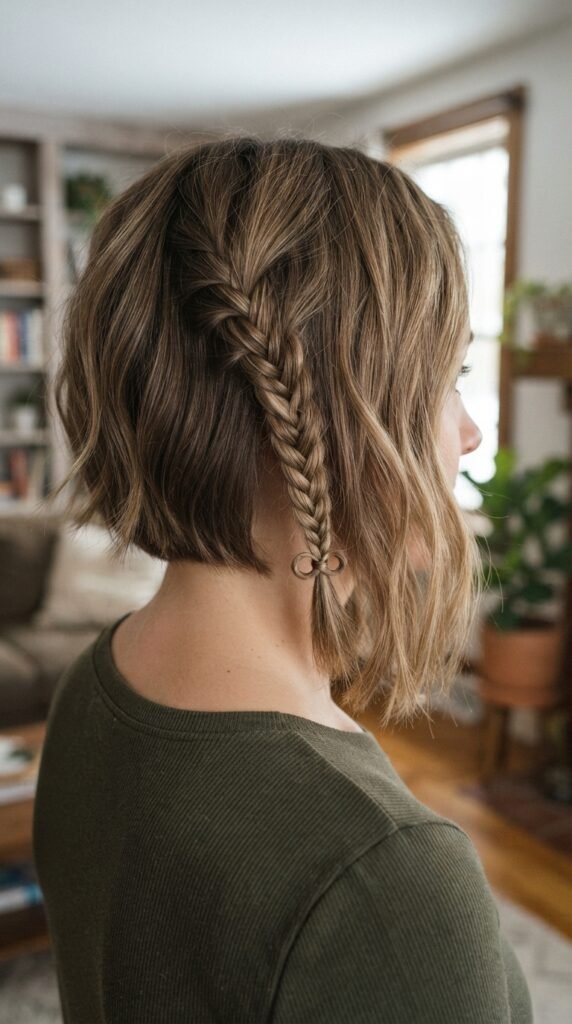
It’s almost invisible but holds that end like a little hug. You can even double up for extra security. This is my favorite for a messy, romantic goth hairstyle braid because it looks effortless but stays put without any damage.
The Quick Knot Method for Glitchy Glam Hair
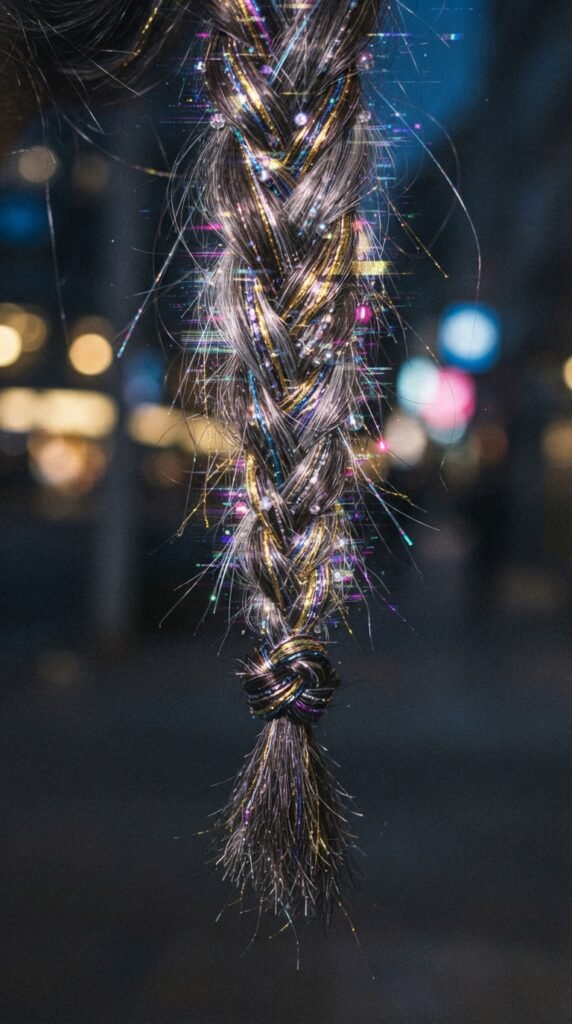
This works best for box braids, twists, or any single strand of braided hair. At the very end of your braid, tie a small, tight knot. It’s that simple. This prevents the hair from unraveling at the tip.
For a glitchy glam hair look, you can tie the knot with a tiny piece of metallic thread or a colored string. It adds a subtle, cool detail. It’s not fancy, but it’s incredibly effective and takes two seconds. Just make sure the knot is super snug against the last twist of your braid.
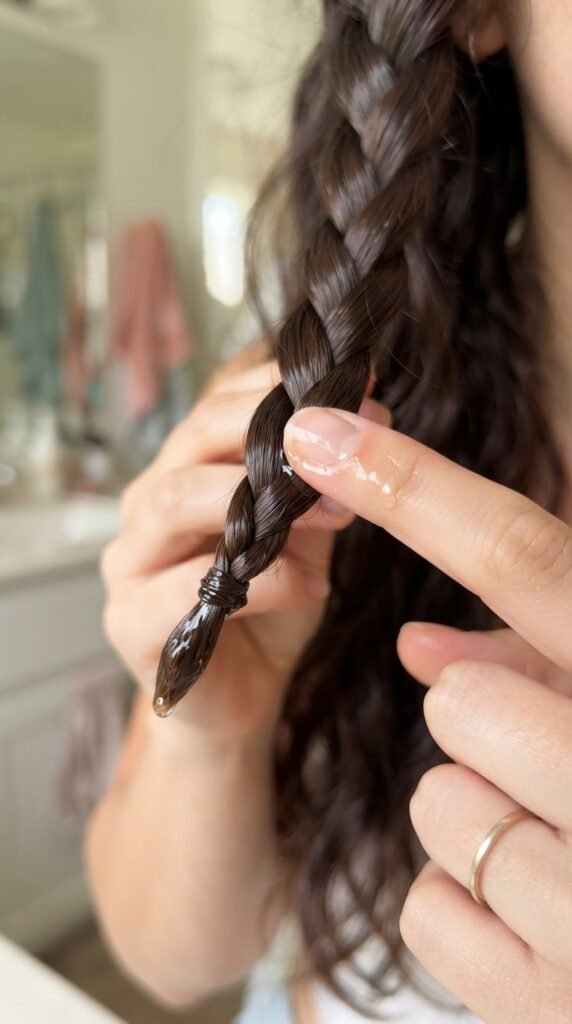
Applying a Tiny Drop of Hair Glue for Durability
Okay, this sounds extreme, but bear with me. A tiny, tiny drop of clear hair glue just at the tip of your braid can be a lifesaver for a vampire haircut or any style where you need perfect, sharp ends. Apply it sparingly.
- Use a toothpick for precision.
- Only apply to the very tip.
- Let it dry completely before touching.
It creates a protective seal that lasts through washes and styling. Just don’t overdo it, or it can get crunchy and stiff. A little goes a very, very long way.
Using a Blow Dryer to Set the End Cap
This is less of a physical cap and more of a setting trick. After you’ve wrapped your end cap (like the ribbon or elastic), give it a quick, cool blast from a hairdryer for about 10 seconds. This helps smooth the hair fibers and lock in the shape.
For a hime cut inspired braid where ends are super straight, this is magic. It also works well after using a small elastic. The heat helps the hair lay flat and prevents that little puff from forming right above the cap.
The Double-Braid Approach for Extra Strength
Instead of one single braid end, split the last three inches of your braid into two smaller braids. Secure each of those little braids with a tiny elastic or knot. This distributes the tension.
It’s a fantastic look for a romantic goth hairstyle where you want a bit of drama. Plus, it adds a ton of thickness and visual interest to the end of your hair. It’s protective because no single strand is taking all the wear and tear.
Fabric-Wrapped Hair Ties for a Quiet Luxury Vibe

Forget the rubber bands. A fabric scrunchie or a piece of soft fabric tied around the end of your braid is the ultimate old money hair hack. It’s gentle on the hair but secure enough to keep everything in place.
- Choose silk, velvet, or satin.
- Match the fabric to your outfit for a coordinated look.
- It doubles as a cute accessory.
This is perfect for a quiet luxury bob or any style where you want soft, protected ends that still look polished. It feels expensive and looks like you put in actual effort.
Crochet Thread End Caps for Precision
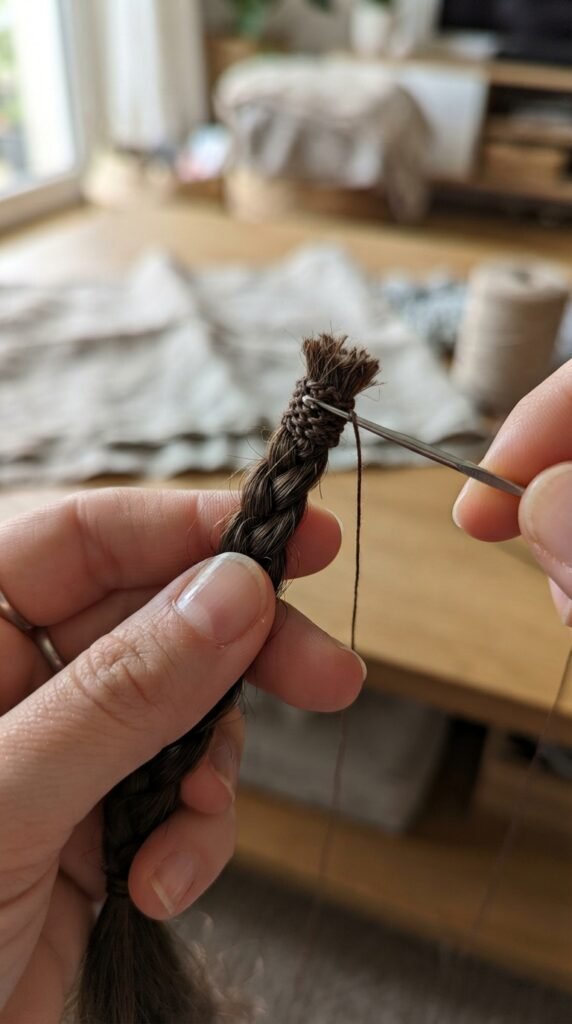
If you have access to a crochet hook, this is a genius trick for micro braids or thin braids. Take a thin strand of yarn or thread and weave it through the last inch of your braid, pulling it tight to create a smooth, capped end.
This is especially good for a hime cut that has delicate, face-framing braids. It completely seals the end. It’s a bit more work, but the result is an incredibly durable, split-proof finish that looks neat for weeks.
The Booby-Trap Loop for Asymmetrical Lob Braids
This works best when you have just a few inches of hair left. After finishing your braid, take the last two inches and loop them back through the braid itself, creating a small knot. This locks the end without any extra tools.
It’s perfect for an asymmetrical lob since the shorter length makes it easy to tuck. It looks clean, prevents fraying, and is completely heat-free. Just make sure you pull the loop tight enough so it doesn’t slip out.
Metal Cuffs as Decorative End Protectors
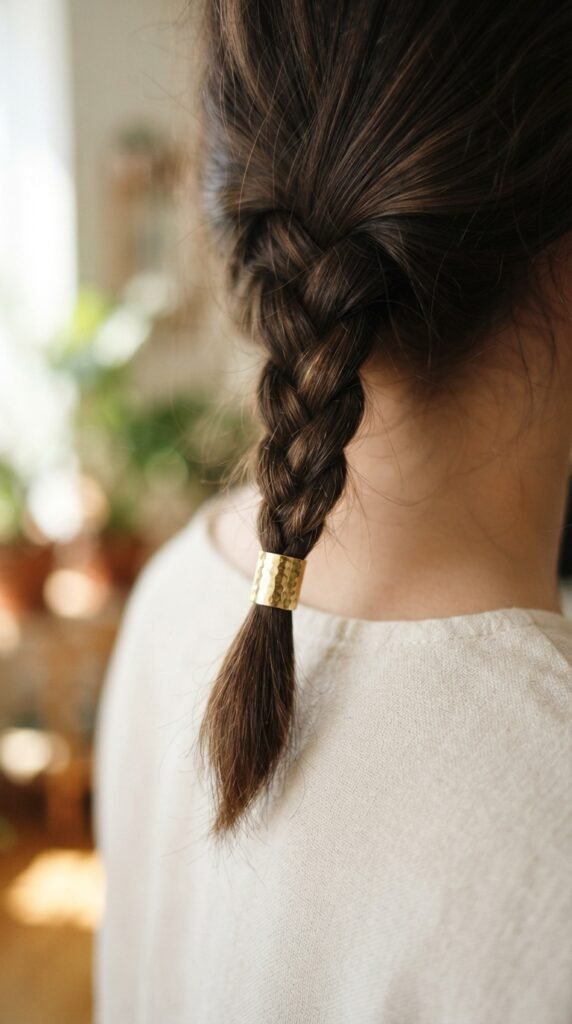
This is where style meets function. A small metal hair cuff, designed for braids, can be clamped right at the end. It acts as a physical barrier against friction and snagging. Plus, it looks incredible.
- Choose metals that match your jewelry.
- Make sure they are made for hair (smooth edges).
- They work wonderfully for a glitchy glam hair aesthetic.
These little cuffs are so easy to put on and take off, and they completely transform a basic braid into a piece of jewelry. Your ends will thank you.
The Taper Method for a Vampire Haircut Finish
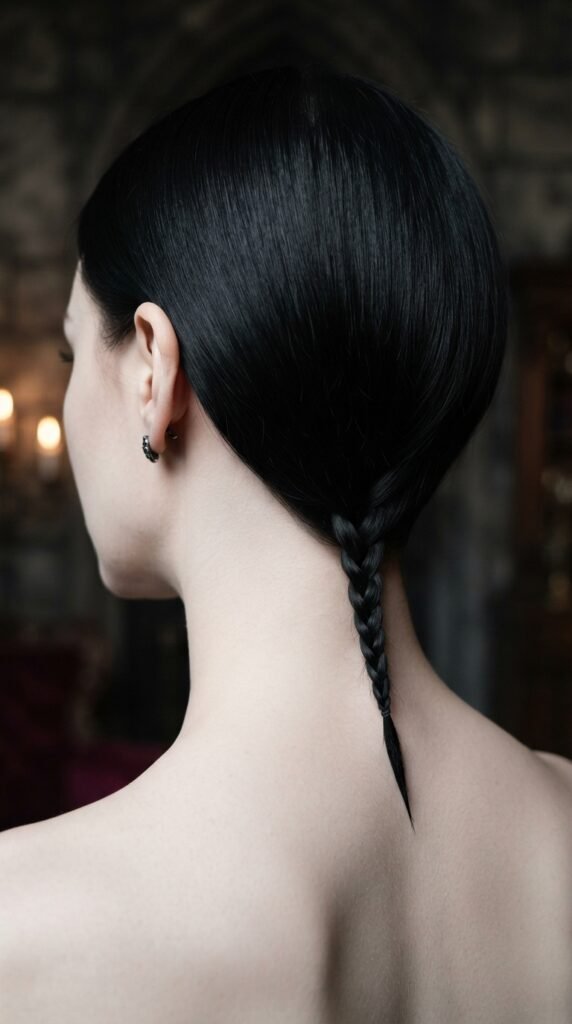
Before you even start braiding, consider the shape of your hair ends. If you’re doing a vampire haircut style, having a naturally tapered end (like a V-shape) will make your braid automatically look more finished.
When you braid a taper, the very tip is already a single thin point that is less likely to split. It creates a perfect, sharp point. You can enhance this by braiding very tightly towards the end. This is a pre-emptive strike against split ends.
Using a Lighter or Candle for Synthetic Hair
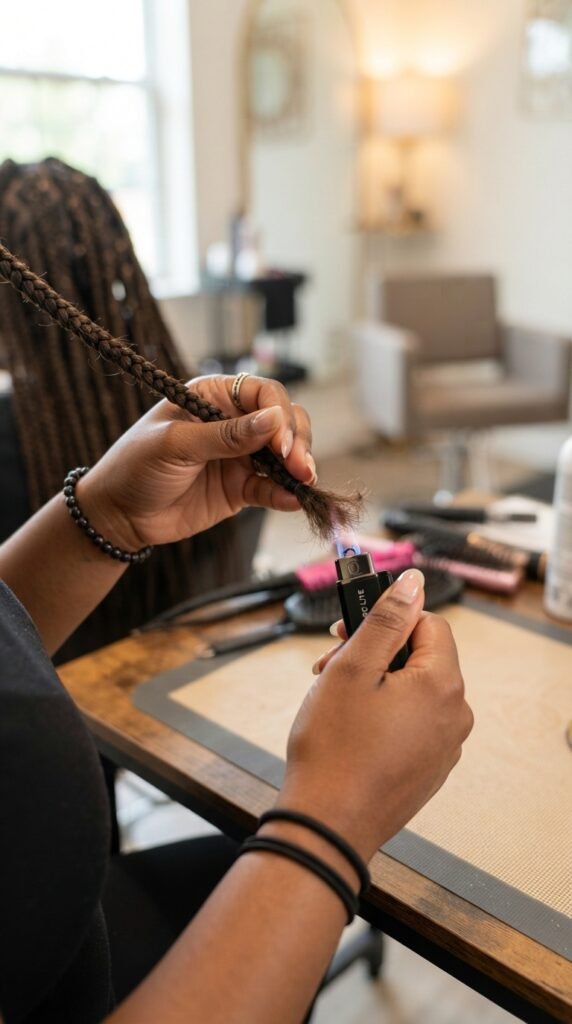
This is for synthetic braids only. Never use this on natural hair. Hold a flame briefly (like a split second) to the very tip of a synthetic braid. The heat will melt the plastic fibers, sealing them into a small, rounded bead.
This is a professional technique to prevent fraying. It creates a smooth, hard end cap that won’t split. For a romantic goth hairstyle or 2026 hairstyles with synthetic colors, this is the gold standard for a perfect finish.
Braiding with Elastic at Every Step
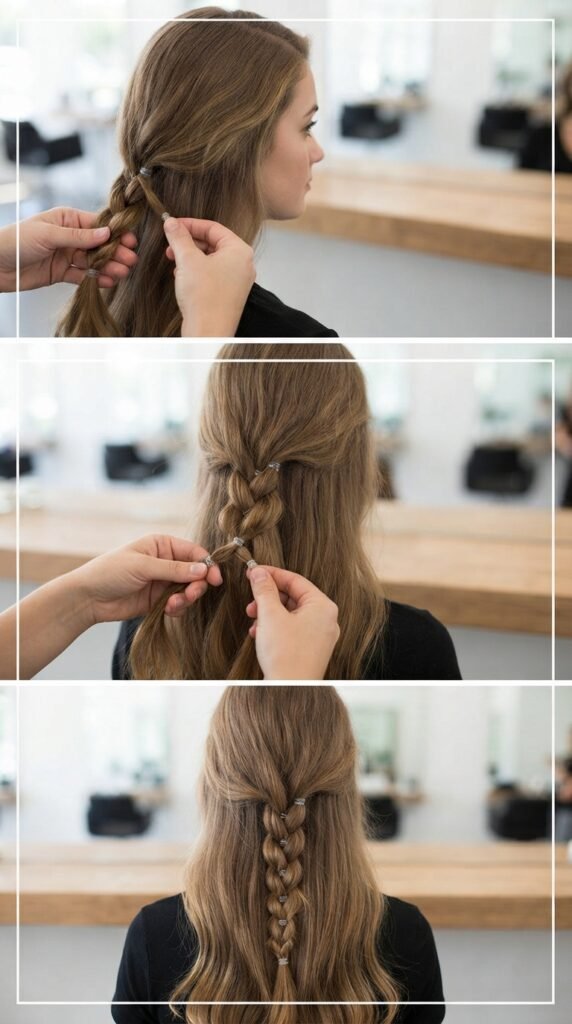
Instead of just one elastic at the bottom, use small, clear elastics every two inches down the braid. This distributes the tension evenly. The very last elastic at the tip acts as your end cap.
This is incredibly effective for preventing breakage in long braids. It also creates a cool, segmented look that’s popular in asymmetrical lob styles. It keeps every part of the braid secure, not just the end. It takes a few extra seconds but pays off hugely.
The “Tiny Hat” Method with Fabric Glue
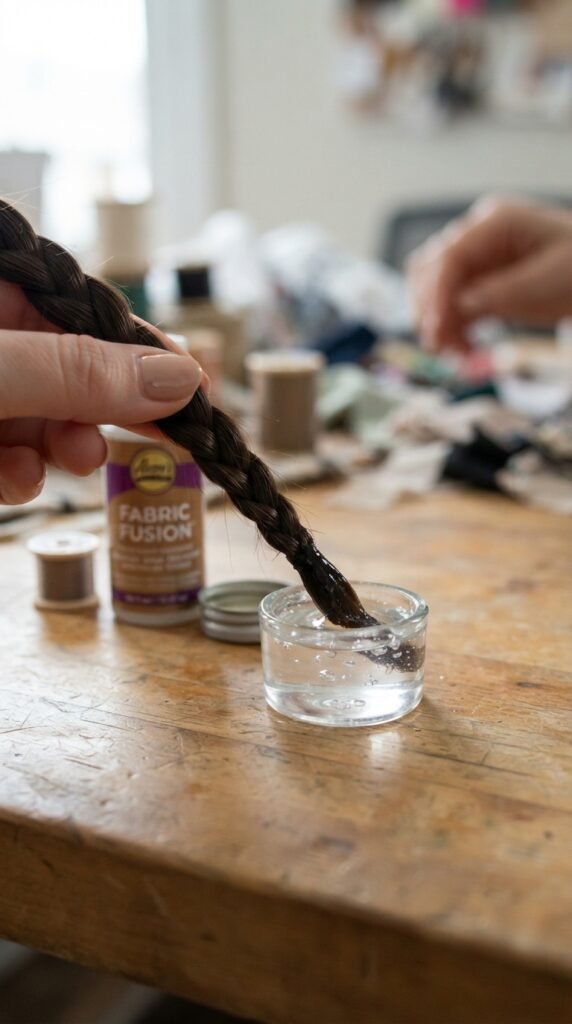
This is another technique for synthetic or very thick braids. Use a drop of fabric glue (not super glue) to coat the last quarter-inch of your braid. Spread it with your finger or a tool. Let it dry. It creates a flexible, clear cap.
It’s like a little helmet for your hair ends. It’s completely invisible and prevents any strand from poking out. This works best for a glitchy glam hair look where you want a very smooth, uniform texture from root to tip.
Fishtail End Caps for a Gentle Finish
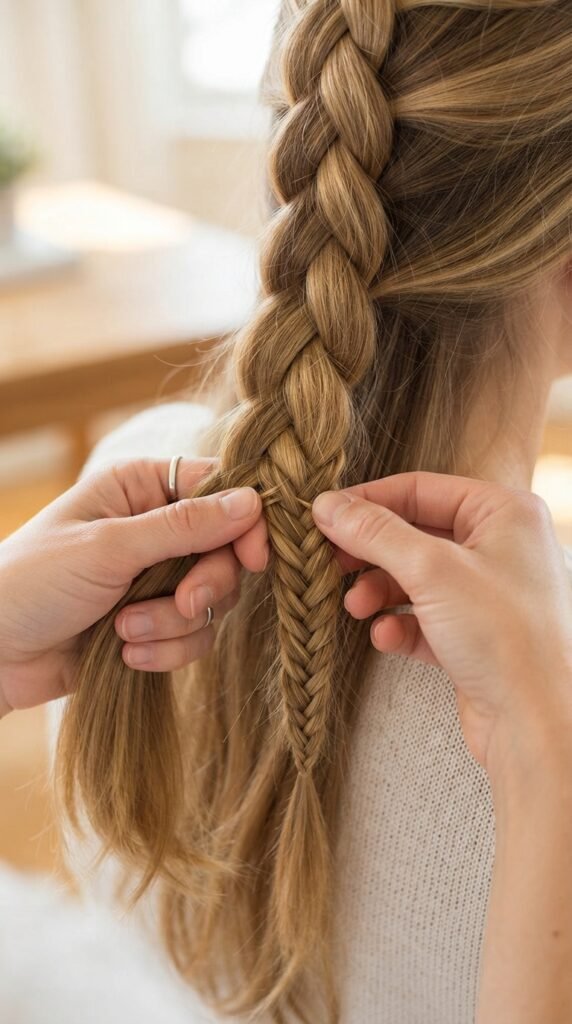
Instead of stopping your braid abruptly, transition it into a tiny fishtail braid for the last two inches. The fishtail weave is very secure and holds its shape without falling apart. It naturally prevents splitting.
- It looks intricate and beautiful.
- It requires no extra materials.
- It works great for a hime cut with long, loose hair.
The tight, interlocking pattern of the fishtail acts as a natural barrier. It’s a gentle, creative way to protect your ends without any harsh tools.
Applying a Silicone-Based End Serum as a Cap
While not a physical cap, a good silicone-based serum creates a protective barrier. Rub a tiny drop between your fingers and then pinch it onto the last half-inch of your braid. It smooths down flyaways.
This is perfect for everyday maintenance. It seals the cuticle and prevents moisture loss, which is a major cause of splitting. For a quiet luxury bob braid, this keeps the ends looking sleek and healthy, not greasy. A little goes a long way.
Thread-Wrapped Embroidery End Caps
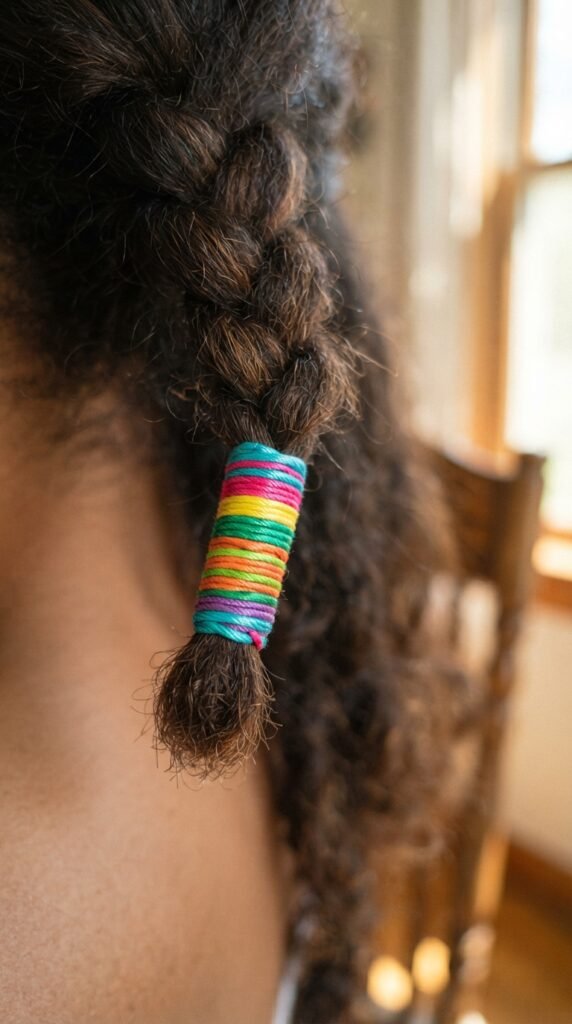
This is a fun, decorative twist. Take a length of embroidery thread and tightly wrap it around the end of your braid for about an inch. Secure it with a knot. The thread acts as a physical stop.
It’s perfect for 2026 hairstyles that are all about personal expression. You can match the thread to your outfit or go for a bright contrast. It’s strong, durable, and completely prevents the hair from splitting at that point. It’s also a great way to use up leftover craft supplies.
The Braid-Inside-Braid Method for Extreme Protection
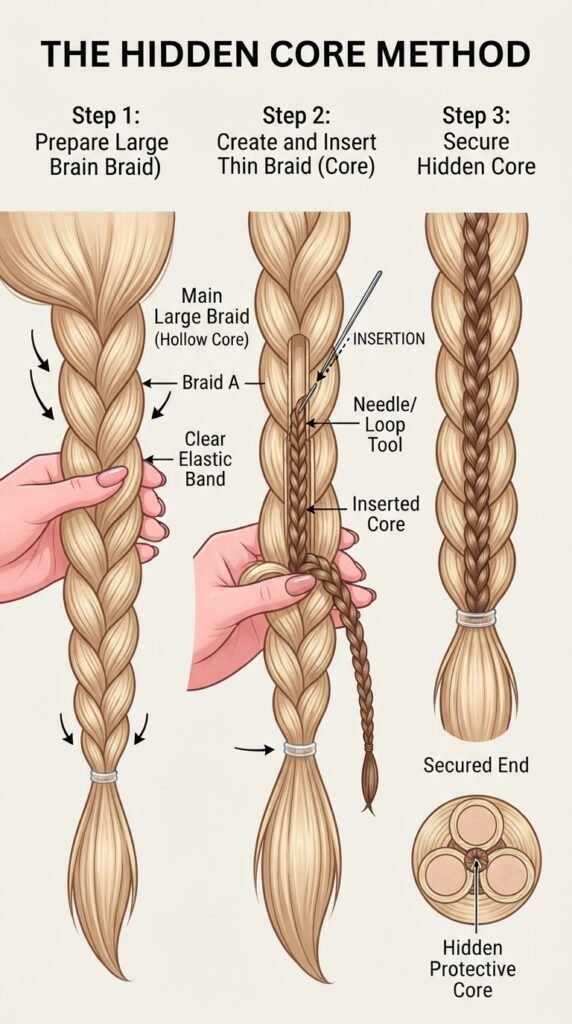
This is a bit more advanced. Braid the last four inches of your hair into a tiny, tight braid. Then, take that tiny braid and braid it into the rest of your hair. The smaller braid becomes a hidden core at the end.
It’s like a protective sleeve for your ends. The outer braid protects the inner braid. This is perfect for a romantic goth hairstyle with complicated braiding. It’s incredibly secure and looks like a thick, solid braid when finished.
Using a Small C-Clip as a Removable Cap
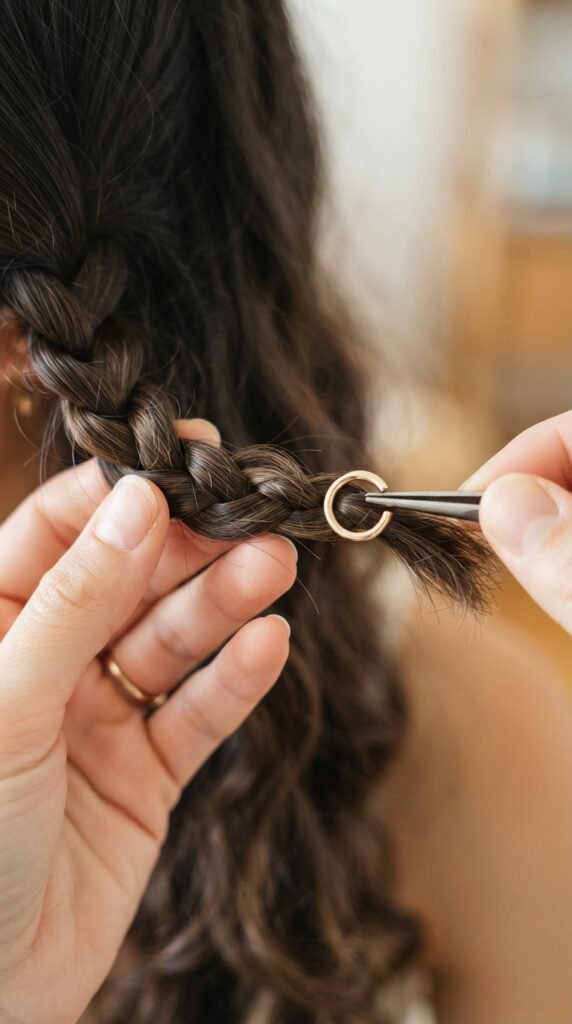
Think of these as the jewelry for your braid ends. A smooth C-clip (like for making jewelry) can be gently squeezed onto the very end of your braid. It’s removable and reusable. It completely covers the last section.
It’s a quick fix that instantly upgrades any style, from a simple ponytail to a detailed asymmetrical lob. They come in gold, silver, or black. It’s a no-commitment way to protect your ends that looks intentional and chic.
The “No-Cap” Cap: Braiding to a Point
Sometimes the best protection is no protection at all. If your hair is long enough and you braid it very tightly all the way to the end, it will naturally taper into a point. This is the most minimalist protector.
By braiding the very last strands into a fine point, you remove the blunt edge that is prone to splitting. For a vampire haircut or hime cut, this creates a sharp, dramatic finish. It’s simple, effective, and completely tool-free.
Final Thoughts on Saving Your Ends
I hope you feel a little bit more empowered to protect your gorgeous braids. Honestly, once you try a few of these, you’ll wonder why you ever let your ends get fuzzy in the first place. My personal favorite is the silk ribbon wrap, but I’ve been loving the metal cuffs for a little glitchy glam hair moment lately.
Remember, healthy ends are the foundation of any beautiful hairstyle, whether you’re going for a quiet luxury bob or a full romantic goth look. Taking that extra minute to seal your braids will keep your hair stronger and your style looking intentional.
Save this post to Pinterest so you never lose these tips.
Which end cap trick are you going to try first? Let me know in the comments, I’d love to hear about your braid adventures.