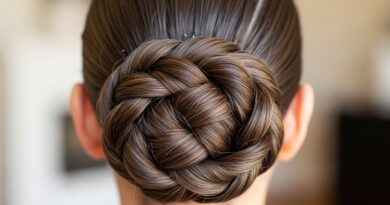
Blowout 26 Velcro Roller Sets Achieving Salon Bounce at Home
Okay, let’s be real. How many times have you left the salon feeling like a million bucks, only to have that perfect blowout fall flat by morning? I’ve been there more times than I can count. That’s why I became obsessed with mastering the at-home blowout.
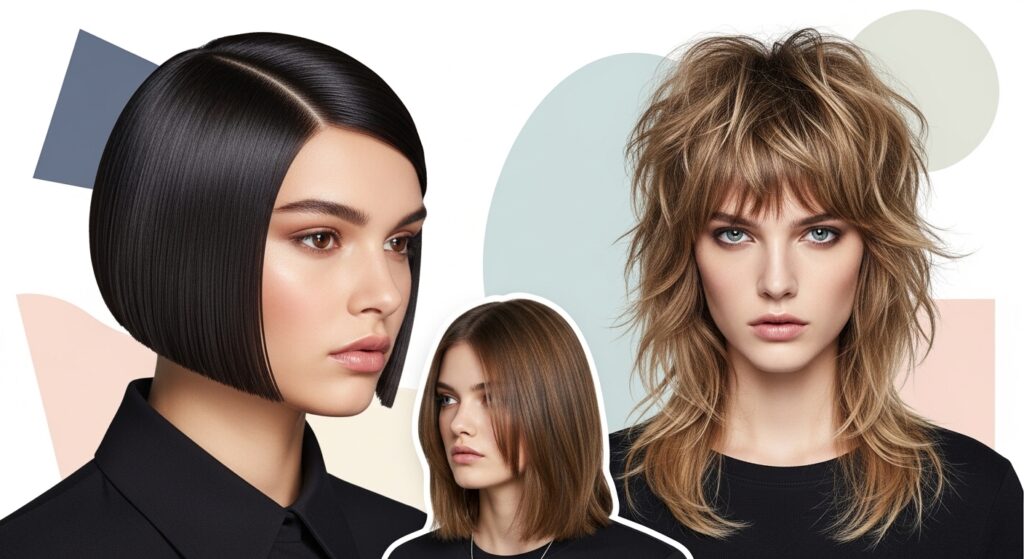
It’s the ultimate foundation for so many looks, from that old money hair vibe to the sleekest asymmetrical lob. But getting that lasting volume and bounce? That’s the real trick.
Today, I’m sharing my absolute secret weapon: Velcro rollers. This isn’t about complicated techniques. It’s a simple, 20-minute set that locks in salon-level body. Trust me, once you get this down, you’ll have the perfect canvas for any style, whether you’re feeling a quiet luxury bob or full glitchy glam hair drama.
Why Velcro Rollers Are a Game-Changer

You might remember these from your mom or grandma. Well, they were onto something! Unlike hot tools that can fry your hair, Velcro rollers use no heat to set the style. They work with the residual heat from your blow-dry to mold your hair into bouncy, lasting curls and volume.
The best part? They’re incredibly cheap, easy to use, and gentle. You get that incredible lift at the root and a soft, bouncy wave through the ends. It’s the exact technique many salons use right before you walk out the door. This method is the key to achieving that coveted “salon bounce” at home, every single time.
The Exact Tools You Need to Start
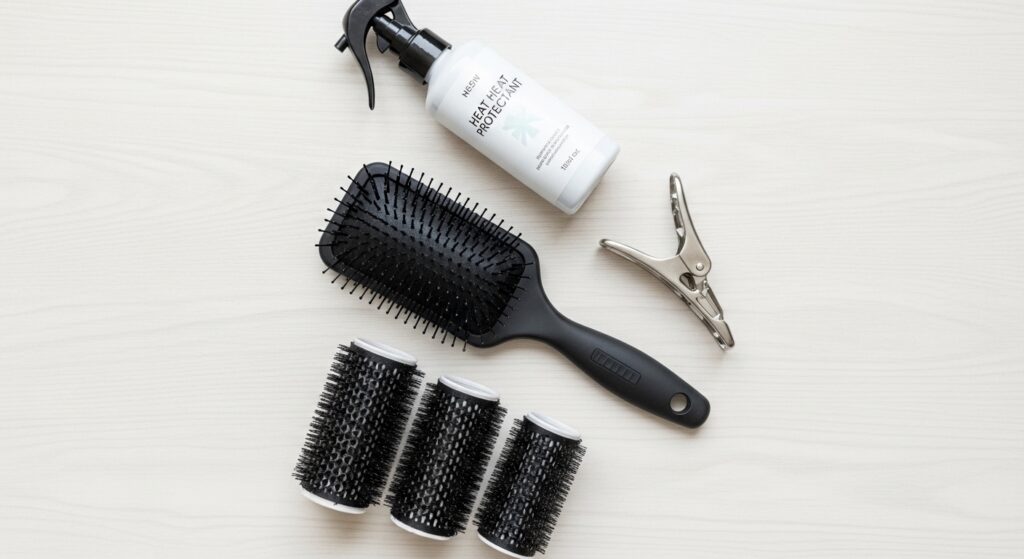
You don’t need a pro kit. Here’s my simple, non-negotiable list. First, a good hair dryer with a concentrator nozzle. This directs the airflow for smoothness. Second, a thermal protectant spray. Always protect your hair!
For the rollers themselves, I recommend a mixed-size set. You’ll use different sizes for different areas:
- Large rollers for the crown and bottom layers for soft volume.
- Medium rollers for the mid-sections and sides for balanced bounce.
- Small rollers at the very front and nape for tighter, lasting lift.
Finally, a paddle brush for smoothing and a clip for sectioning. That’s it! You likely have most of this already.
Step 1: Prep & Protect Your Hair
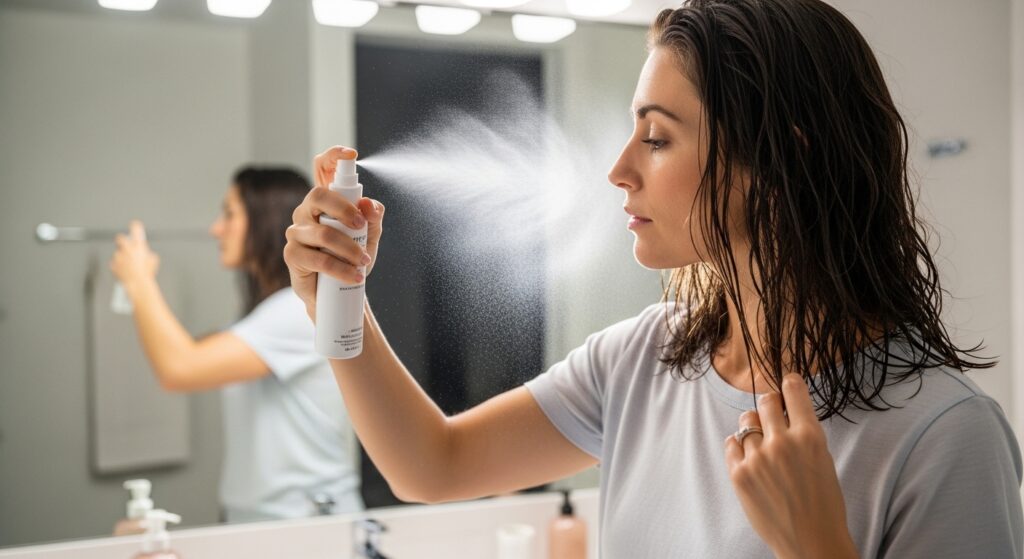
This step is everything. Start with hair that’s about 90% dry. Towel-dry gently, then use your dryer on a medium heat setting to get it mostly there. Hair that’s too wet won’t set; hair that’s bone-dry won’t hold the shape.
Now, protection. Spritz a heat protectant from mid-lengths to ends, and a little at the roots. This creates a barrier against the dryer’s heat. If you have fine hair, a light volumizing mousse at the roots is a miracle worker. For thicker hair, a smoothing cream on the ends will fight frizz. Prep is what makes the result last all day or night.
Step 2: Section Your Hair Like a Pro
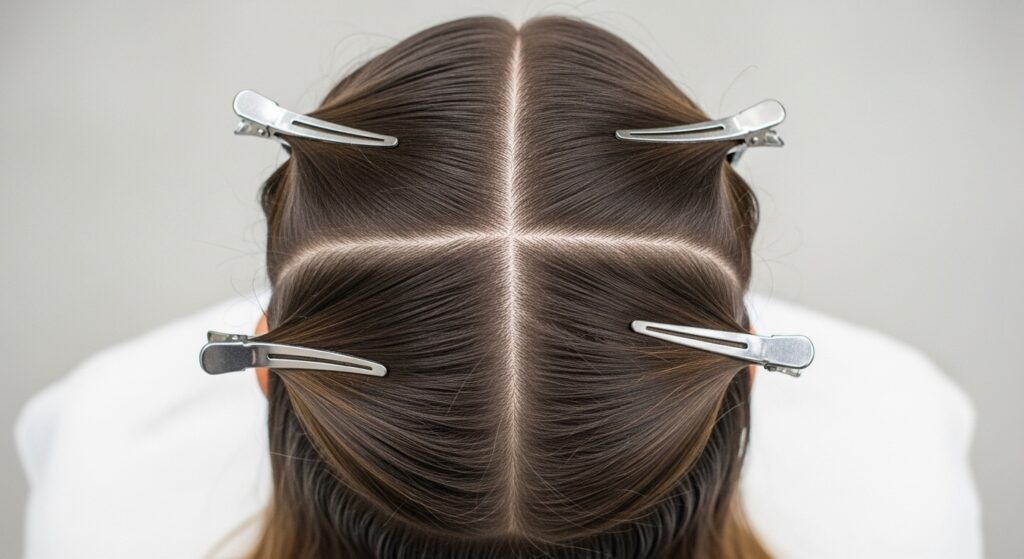
Don’t just start rolling randomly. Sectioning is what gives you an even, polished result. Use a tail comb or your fingers to create a clean part. Then, divide your hair into four main sections.
- Create a part from ear to ear across the crown. Clip the top section up.
- Divide the remaining bottom hair into two sections (left and right).
- You’ll work with the bottom sections first, then move to the top crown section.
This keeps everything manageable and ensures you don’t miss any spots. It feels very salon-like and makes the whole process faster and more effective.
Step 3: The Perfect Blow-Dry Technique
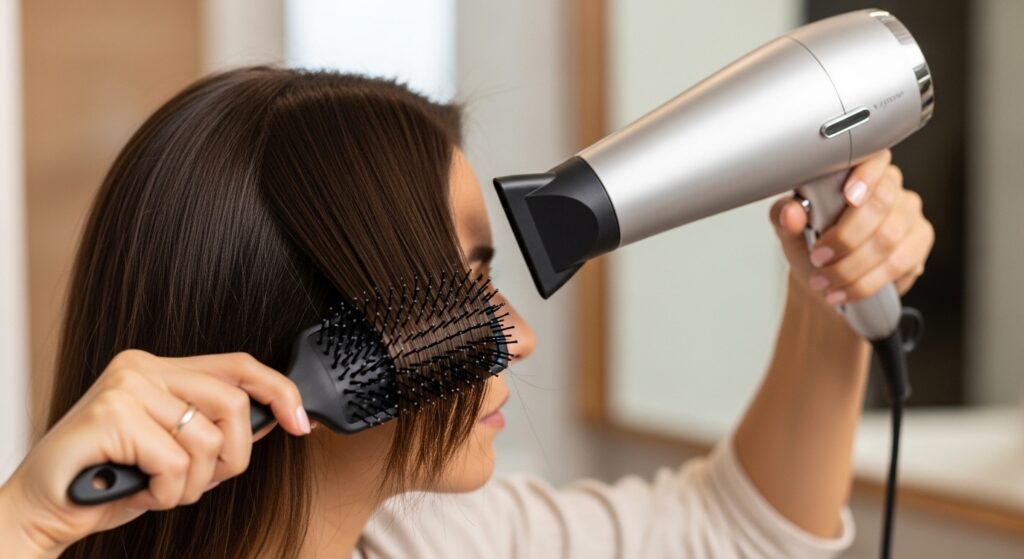
Now, take down one of the bottom sections. Using your paddle brush and dryer, blow-dry this section completely smooth and 100% dry. The key is to direct the hair down the hair shaft, following with the brush, to seal the cuticle.
This creates a smooth base for the roller. Focus on getting the roots dry. Use the concentrator nozzle pointed downward to minimize frizz. You want the hair to be perfectly dry before it touches the roller. This “sets” the smoothness, and the roller will then set the volume. Do this for all sections before you even pick up a roller.
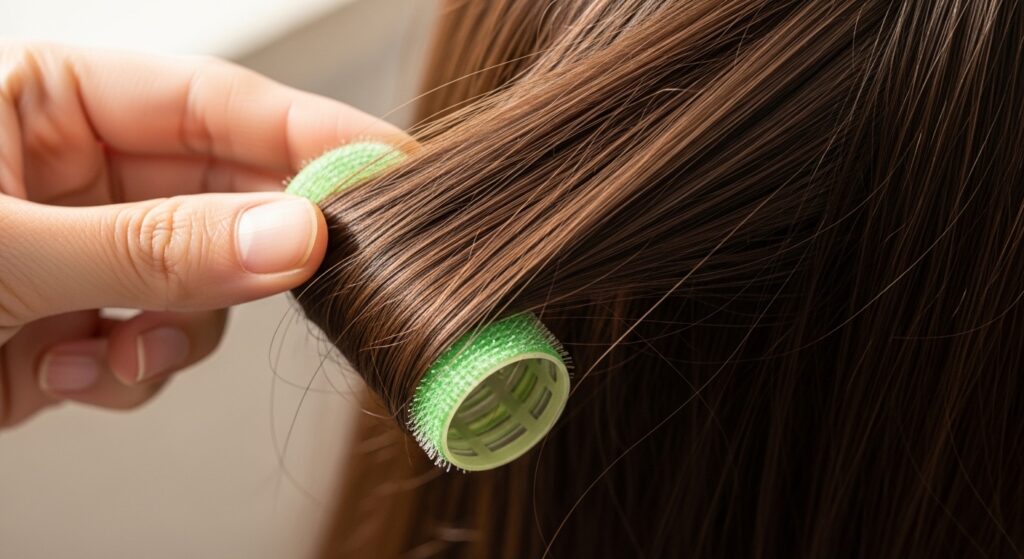
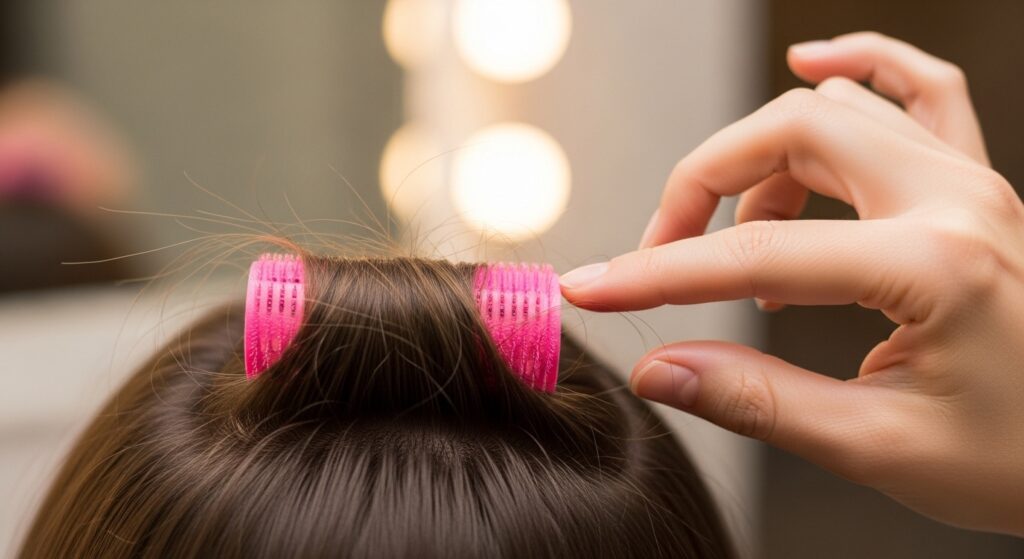
Step 4: How to Roll for Maximum Root Lift
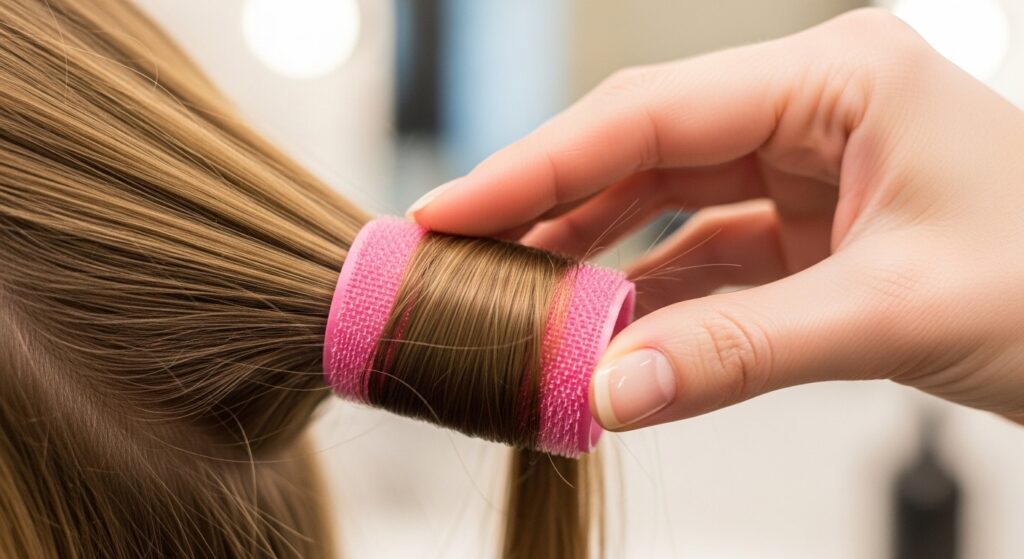
This is the magic moment. Take a 1-2 inch section of your fully dried hair. Place the roller at the ends of the section. Now, roll smoothly and firmly down toward your scalp.
You want the roller to sit right at the root, but not so tight it’s pulling. The velcro will grip. For the most lift, roll the hair up and back, not straight down. For example, for the front sections, roll back away from your face. For the sides, roll up and back toward the crown. This placement dictates the final direction of your volume.
Step 5: The All-Important “Cool Shot”
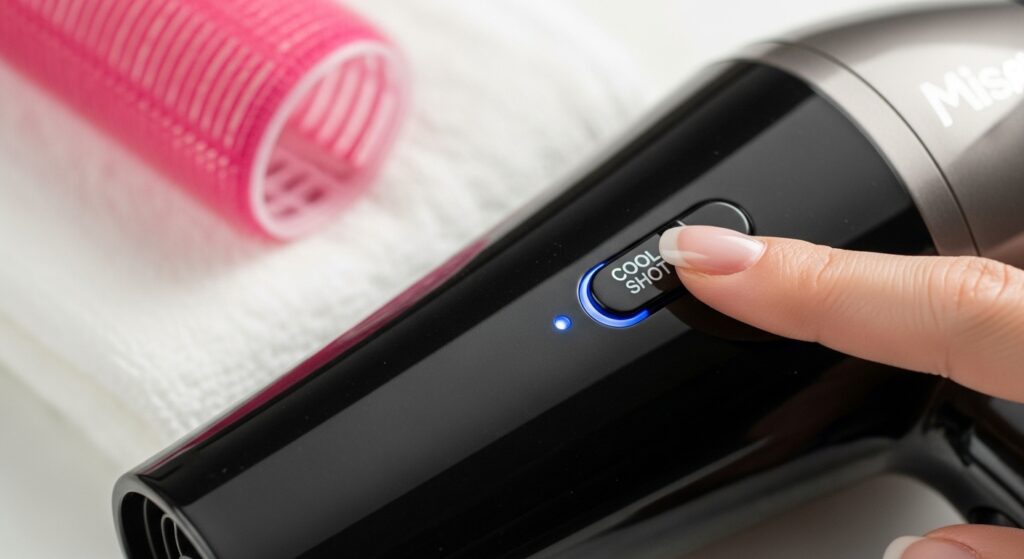
Before you let go of the roller, grab your dryer. Hit the “cool shot” button for a good 10-15 seconds per roller. This blast of cold air is non-negotiable.
It shocks the hair shaft, locking in the shape you just created. It’s what makes the curl and volume last for hours instead of minutes. Think of it like setting your makeup with setting spray. It makes everything hold. Don’t skip this, even if you’re in a hurry! It’s the secret to all-day bounce.
Step 6: Let Your Set Fully Cool
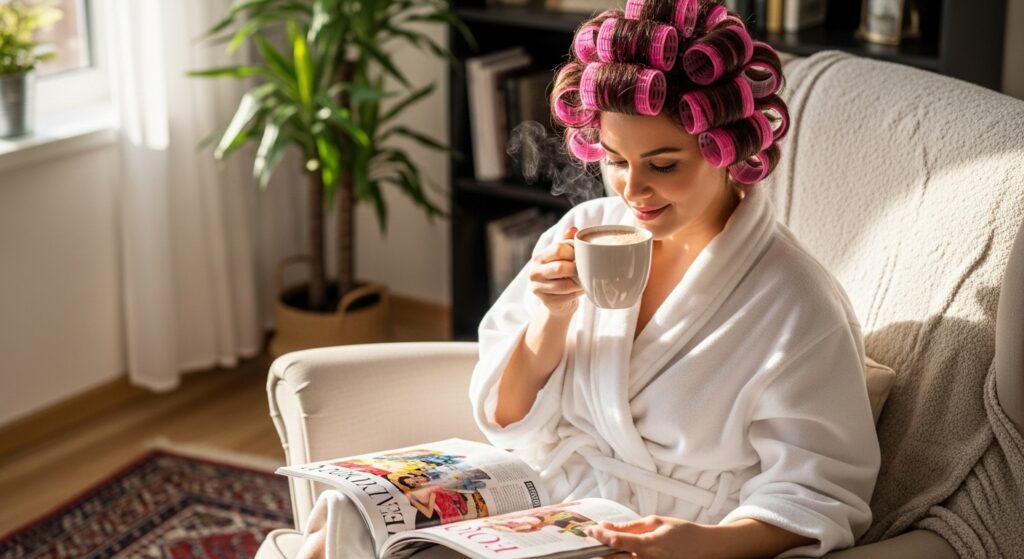
Once all your rollers are in and cooled with the dryer, walk away. Seriously, set a timer for 15-20 minutes. Let your hair cool down completely inside the rollers.
This is when the style truly sets. Use this time to do your makeup, get dressed, have a coffee. The longer you can leave them in (within reason), the longer your style will last. The heat from your scalp and the cooling action work together to create a lasting memory in your hair. Patience pays off with insane volume.
Step 7: The Grand Reveal & Take-Down
Time for the fun part! Start by gently removing the rollers. Don’t just yank them out. Unroll them in the opposite direction you rolled them in to avoid tangling.
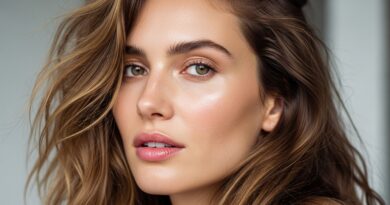
Once all rollers are out, don’t touch your hair yet! Let the curls fall and settle for a minute. You’ll see amazing volume and a head full of uniform waves. At this point, your hair has that classic “salon set” look. It might feel a bit too perfect or set. That’s exactly what we want. Now, we’re going to make it look naturally gorgeous.
Step 8: Shake It Out & Break the Set
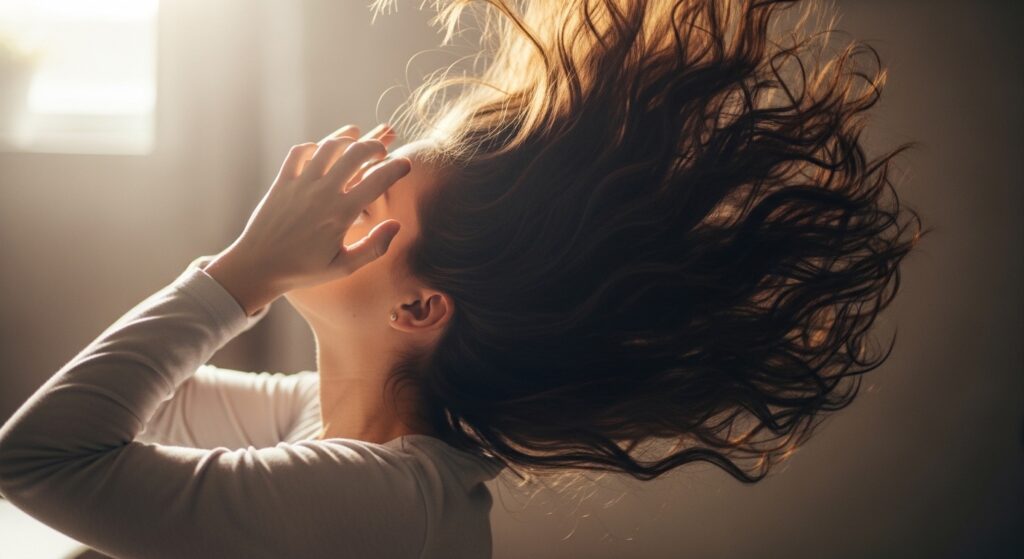
Flip your head upside down. Gently shake your roots with your fingertips. This breaks up the uniformity and adds even more volume at the crown. It’s the key to avoiding a “roller helmet” look.
Flip back up. Now, use a wide-tooth comb or just your fingers to gently separate the waves. Don’t brush it all out! You want to soften the curls into loose, touchable waves. Start from the ends and work up carefully if you need to detangle. The goal is effortless, bouncy movement.
Step 9: Final Touch-Ups & Hairspray
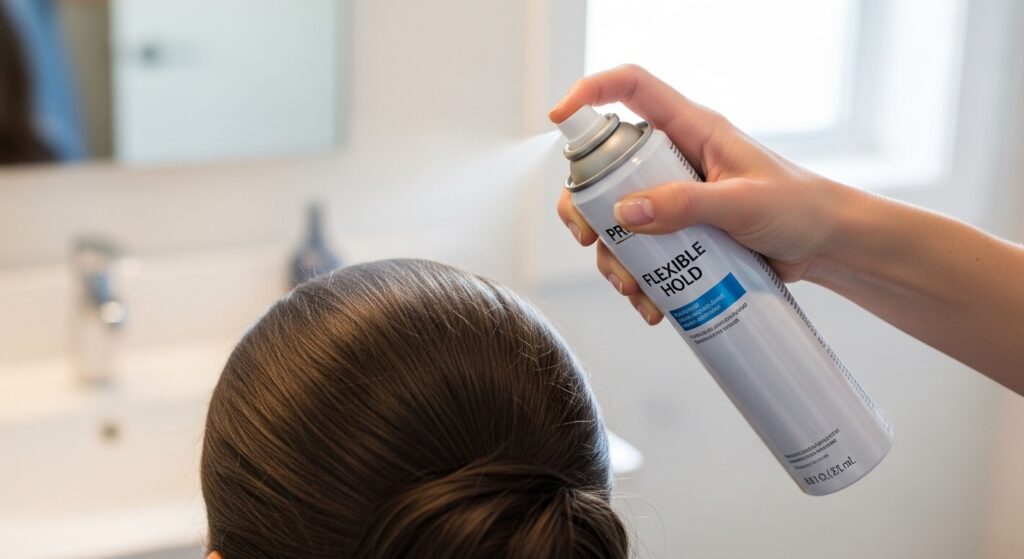
Look in the mirror. See any flat spots? Use the back of your comb or your fingers to gently lift the roots at the crown. You can also use a tiny bit of dry shampoo for extra texture and grip.
Finally, lock it all in. Hold a flexible-hold hairspray about 10 inches away and give a light, all-over mist. Focus a little extra on the roots at the crown and at the nape of your neck. This isn’t about making it stiff—it’s about preserving all that beautiful bounce you just worked so hard to create.
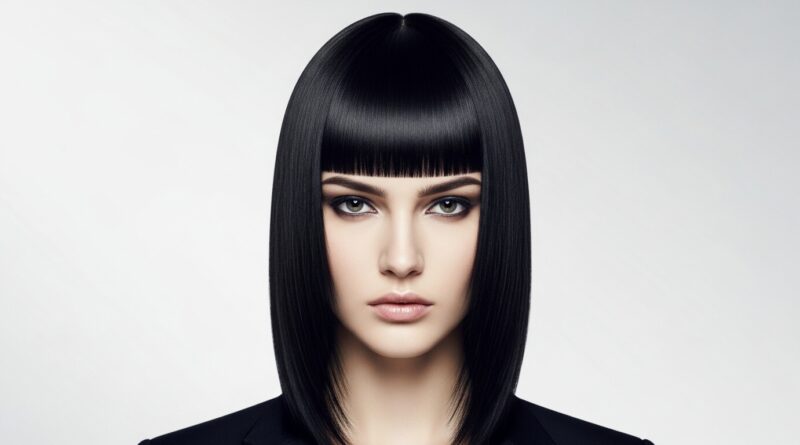
Adapting the Blowout for an Asymmetrical Lob

The beauty of this base is how it works for any cut. For an asymmetrical lob, the technique is slightly different. When you section, pay attention to the shorter side.
Use smaller rollers on the shorter side to ensure you get enough curl and lift that won’t fall flat. On the longer side, you can use medium or large rollers. When you take the rollers out and shake, use your fingers to style the longer piece forward over your shoulder. The volume will make the cut look even more dynamic and modern.
Creating Old Money Hair Vibes
That old money hair look is all about pristine, healthy, “undone” perfection. This blowout is the perfect start. After setting and shaking, brush your hair back into a low, soft ponytail or chignon.
Leave a few face-framing pieces out. Or, simply part it deeply to the side and tuck one side behind your ear. The key is the quality of the wave—smooth, shiny, and buoyant, not overly curled. It looks expensive because it looks incredibly healthy and effortlessly put-together.
Building Volume for a Romantic Goth Style
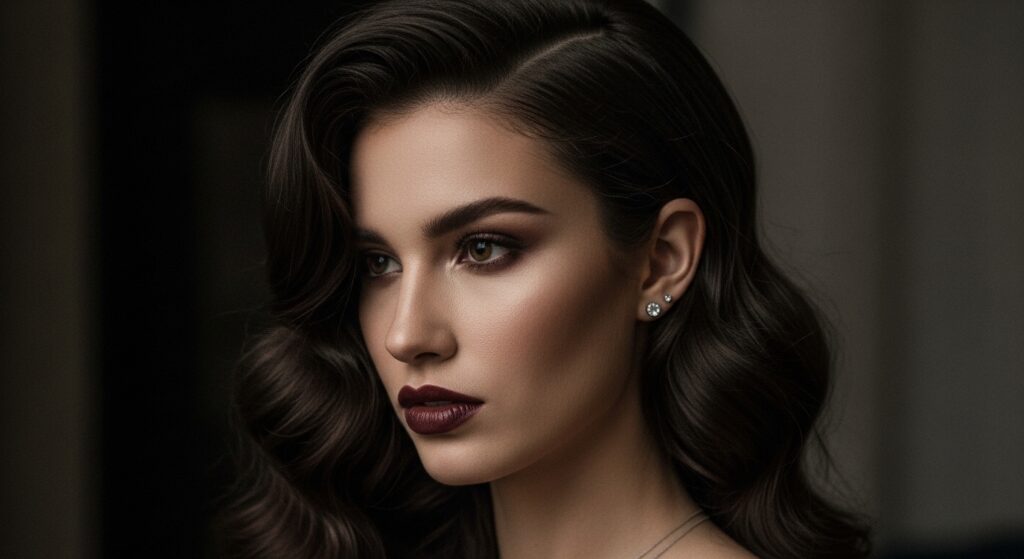
Think romantic goth hairstyles or a vampire haircut need that dramatic, lush volume. This set is your foundation. For this look, focus on using smaller rollers at the roots all over for maximum lift.
After removing rollers, don’t shake it out as much. Keep the waves more defined and separated with your fingers. Add a shine serum or a pomade to dark hair to make it look rich and dramatic. Pair it with a deep side part for that iconic, moody vibe. The body you get from this set is perfect for it.
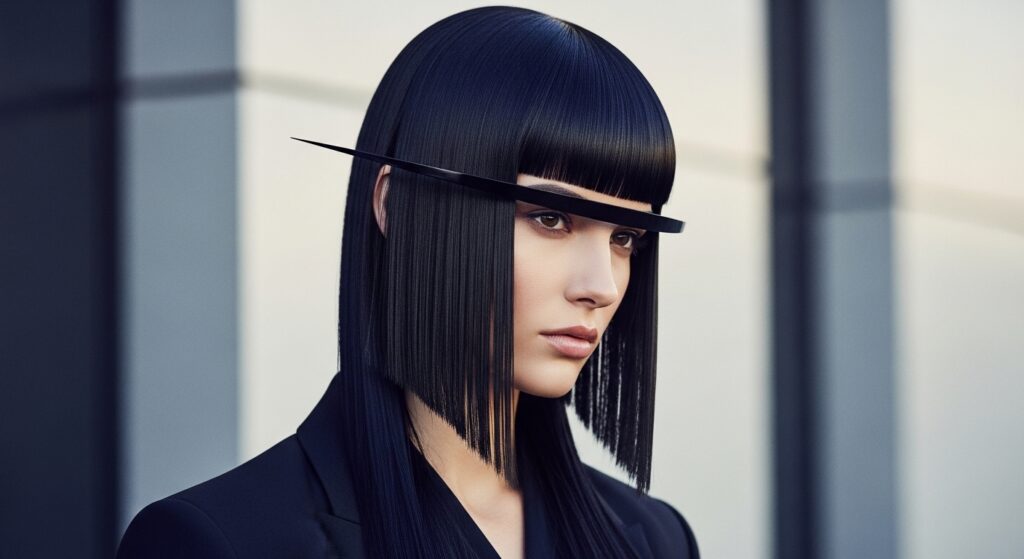
Getting the Glitchy Glam Texture
Glitchy glam hair is playful and textured. Start with your perfect blowout set. Once you’ve broken the set with your fingers, take a flat iron and randomly straighten a few small, face-framing pieces.
It’s about contrast. The smooth pieces against the voluminous waves create that “glitch” effect. Finish with a texturizing spray, focusing on the ends, and pinch a few waves to separate them even more. The blowout gives you the controlled base to then get creatively messy with.
Styling a Hime Cut with This Method
The hime cut is so graphic, and it needs sleekness with volume at the crown. Use your rollers specifically on the crown area and the long side sections. Blow-dry your blunt bangs straight down smooth.
When you set, use medium rollers on the crown rolling backward, and large rollers on the long lengths, rolling under. This gives a slight bend to the lengths without frizz, making them look fuller. The crown volume balances the dramatic lines of the cut perfectly.
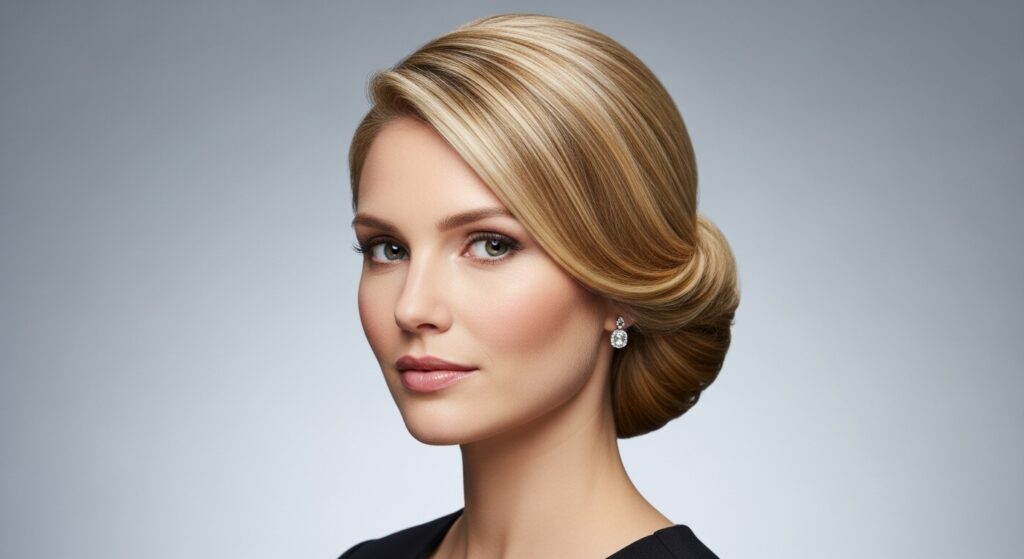
Making a Quiet Luxury Bob Last All Day
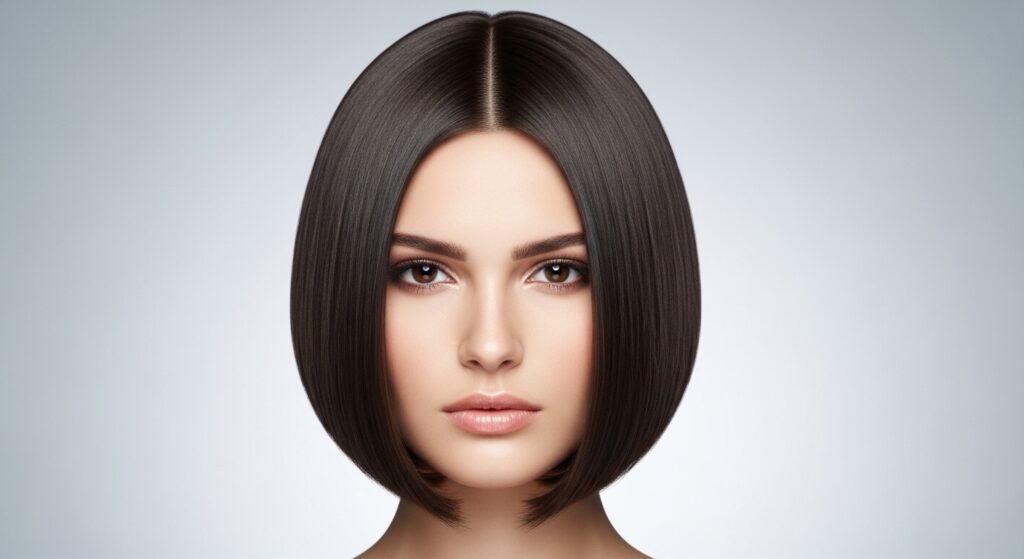
A quiet luxury bob is defined by its impeccable line and shine. This roller set is actually the best way to achieve that. It smooths the hair from root to tip without needing a flat iron, which can flatten it.
For a bob, use large rollers and roll all sections under (toward your neck). The cool shot sets that smooth, rounded-under shape. When you take them out, you’ll have a smooth, bouncy curve with no kinks. Just a light brush through gives you that iconic, expensive-looking swing.
Quick Refresh for Day 2 & 3 Hair

Your blowout can last for days! Before bed, loosely pull your hair into a high, loose ponytail on top of your head (a “pineapple”) or wrap it in a silk scarf. This preserves the waves and volume.
In the morning, refresh with dry shampoo at the roots to soak up oil and add lift. Then, use a large-barrel curling iron to touch up any waves that have fallen, focusing on the front pieces. You’re not re-doing it, just enhancing what’s already there. It takes 5 minutes.
Common Mistakes & How to Fix Them
Mistake #1: Rolling wet hair. It won’t dry and will cause frizz. Always pre-dry. Mistake #2: Using rollers that are too big for short hair. They won’t grip. Match the roller size to your hair length.
Mistake #3: Yanking rollers out. Always unroll gently! If you get tangling, spray a tiny bit of detangler on the roller itself and slowly work it out. Mistake #4: Not using the cool shot. This is the most common error. That cold air is what locks in your style.
My Favorite Products for This Routine
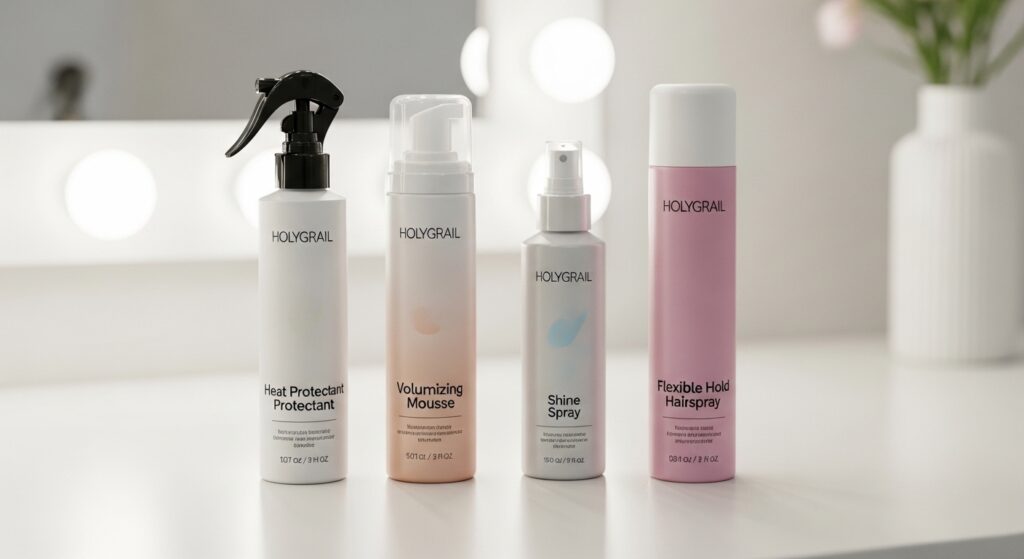
I’ve tested so many. Here are my ride-or-dies. For heat protectant, I love a lightweight spray that doesn’t weigh hair down. A volumizing mousse is a must for fine hair—apply to damp roots before blowing dry.
After the set, a single drop of shine serum on the ends makes everything look expensive. Finally, a flexible-hold hairspray that doesn’t make hair crunchy. These four products, combined with the roller technique, create a foolproof system for amazing hair days.
How This Fits Into 2026 Hairstyle Trends
Looking at 2026 hairstyles predictions, it’s all about individuality and hair health. This technique is the foundation for so many of them. Whether you’re into the softness of quiet luxury, the edge of a vampire cut, or the drama of romantic goth, it starts with great hair.
A healthy, voluminous blowout gives you the canvas to express any trend. It’s about having the body and shine to make any style look intentional and high-end, not flat and tired. Mastering this is like mastering your skincare routine—it’s the base of everything else.
Your Questions, Answered
Can I do this on fine hair? Absolutely! Use a root-lifting mousse and smaller rollers for more hold. How often can I do this? Since it’s heat-free setting, you can do it as often as you blow-dry. It’s gentle.
My hair