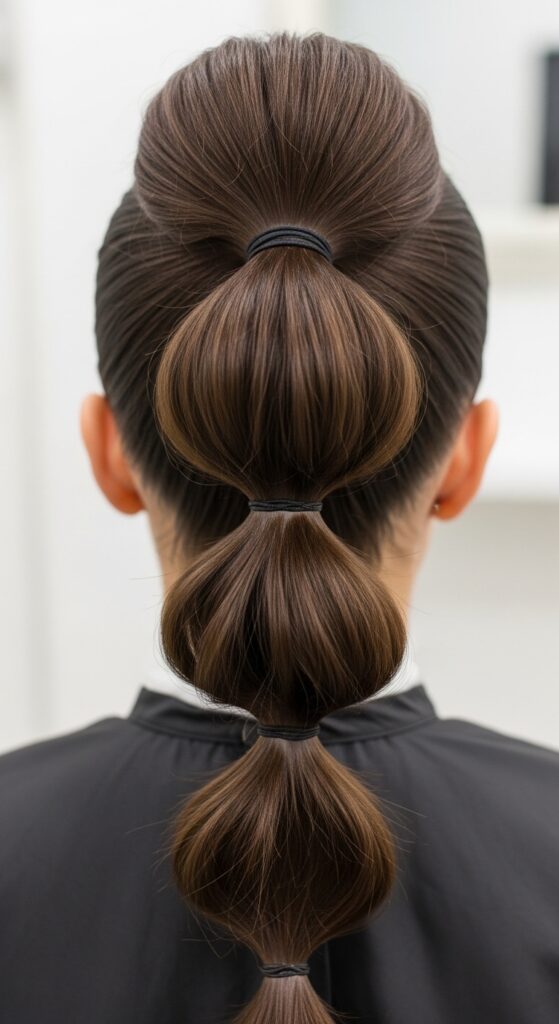
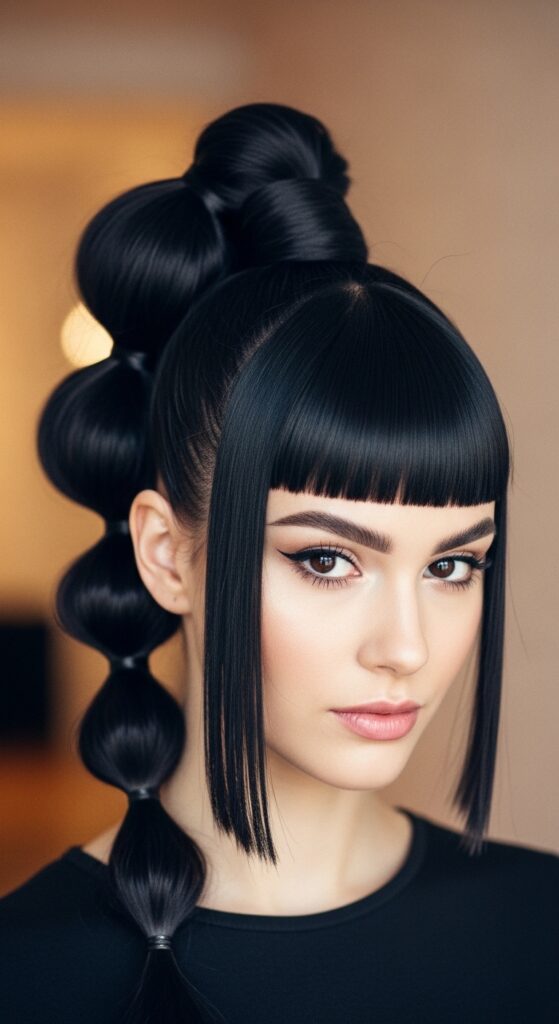
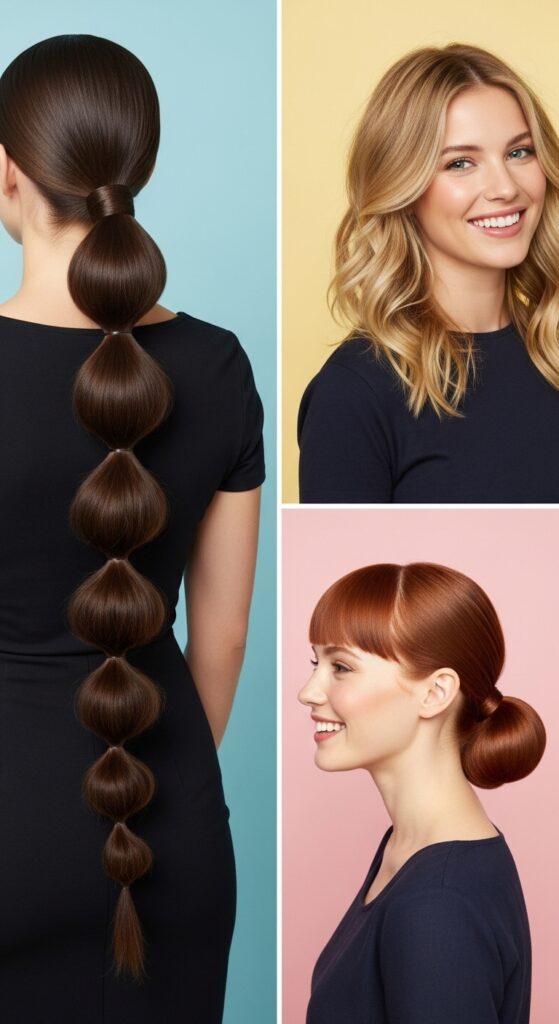
Bubble 20 Puff Sleeve Ponytails Voluminous Mid-Shaft Bulging
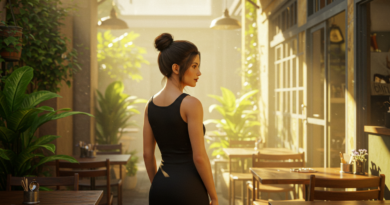
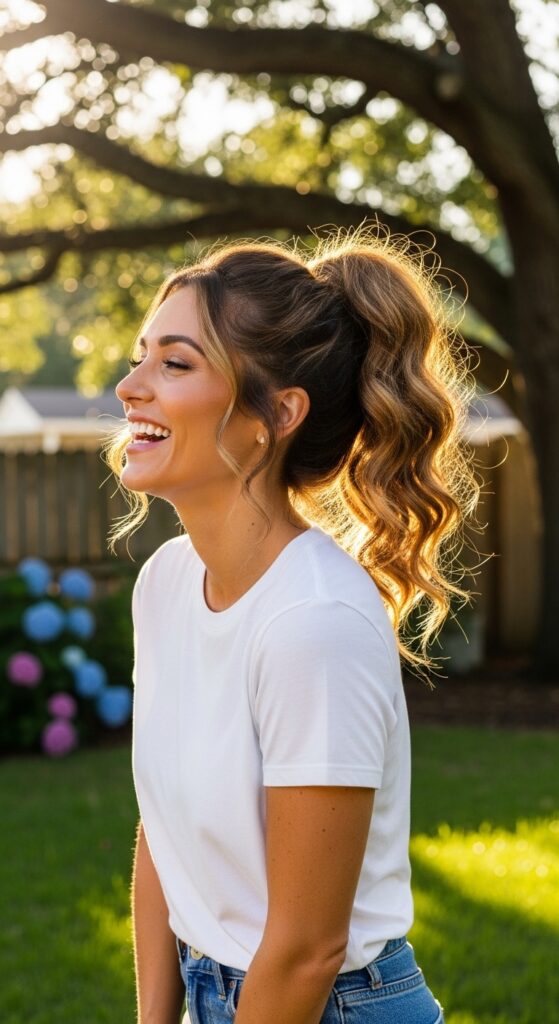
Okay, let’s talk about the one hairstyle that’s absolutely everywhere right now. You’ve seen it on your feed, on the runway, and on your favorite cool-girl influencers. It’s the bubble puff sleeve ponytail, and I’m obsessed.
It sounds complicated, but I promise it’s not. It’s that gorgeous, voluminous, mid-shaft bulging style that looks like a chic, structural masterpiece. Think of it as the “quiet luxury” of ponytails.
If you’re tired of the same old look and want something that feels fresh, editorial, and surprisingly doable, you’re in the perfect spot. I’m breaking down everything, from the tools you need to the exact steps to get that perfect, bulging bubble. Let’s get into it.
What Is This Bubble Ponytail Trend, Really?
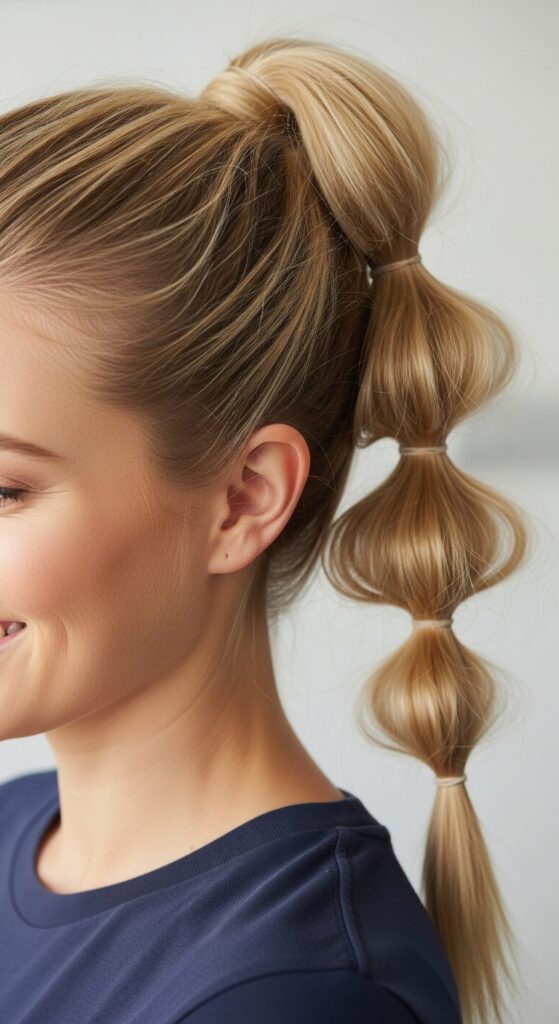
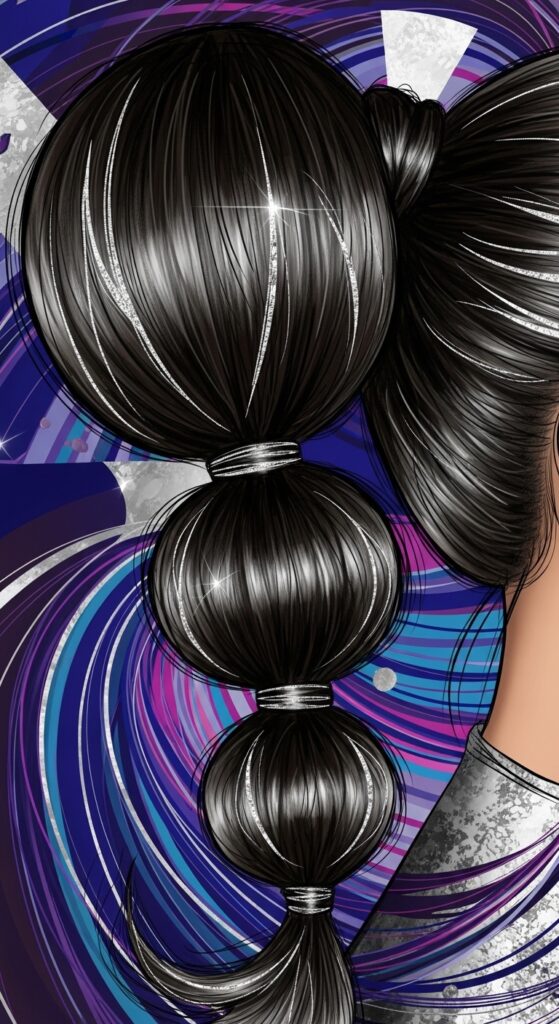
At its core, this style is all about controlled volume and shape. Instead of a sleek or messy ponytail, you create distinct, rounded “bubbles” or “puffs” along the length of the ponytail, secured between hair ties.
The “mid-shaft bulging” part is key—the fullest part of the bubble sits in the middle of each section, not at the base. This creates that modern, architectural look that’s dominating 2026 hairstyle previews. It’s a playful twist on classic elegance.
Why This Style is a Total Game-Changer
This isn’t just another passing fad. This hairstyle works for so many occasions and hair types. It elevates a simple ponytail into a statement look in under 15 minutes.
It gives the illusion of incredible thickness, even if your hair is fine. It keeps hair securely off your face in a chic way, and it pairs perfectly with everything from athleisure to an evening dress. It’s the versatility we all need.
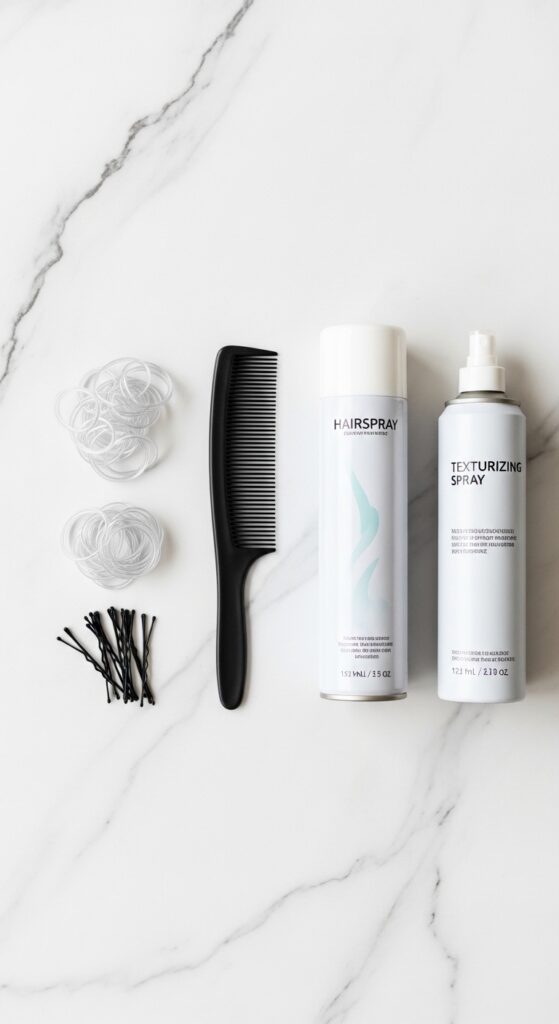
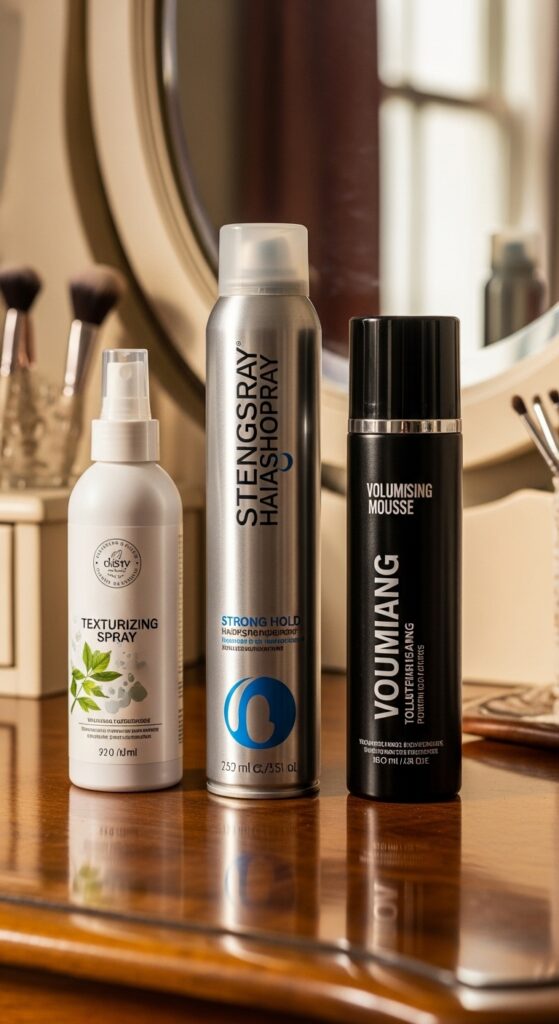
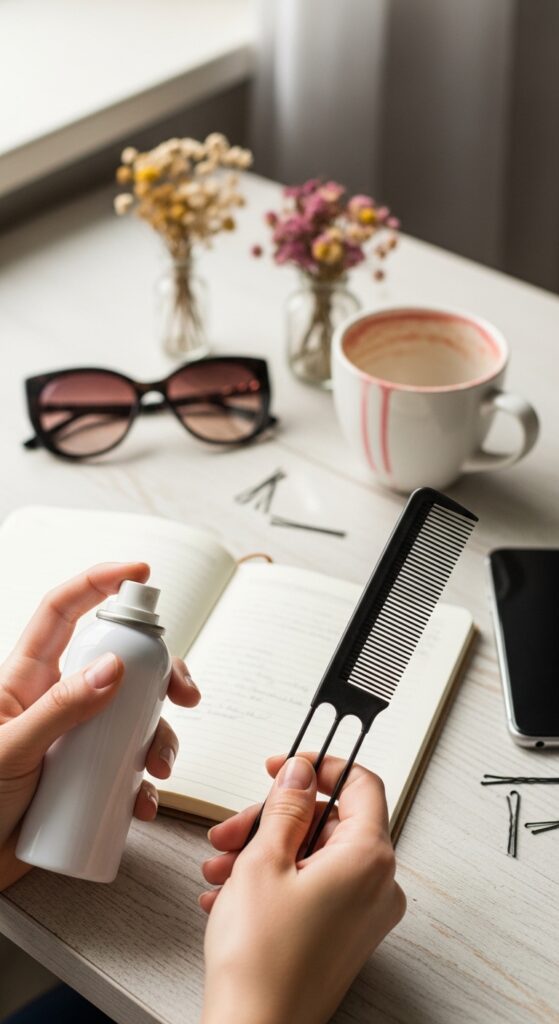
The Non-Negotiable Tools You’ll Need
Gathering the right stuff first makes the process smooth. You don’t need anything crazy, but these items are essential for the right structure and hold.
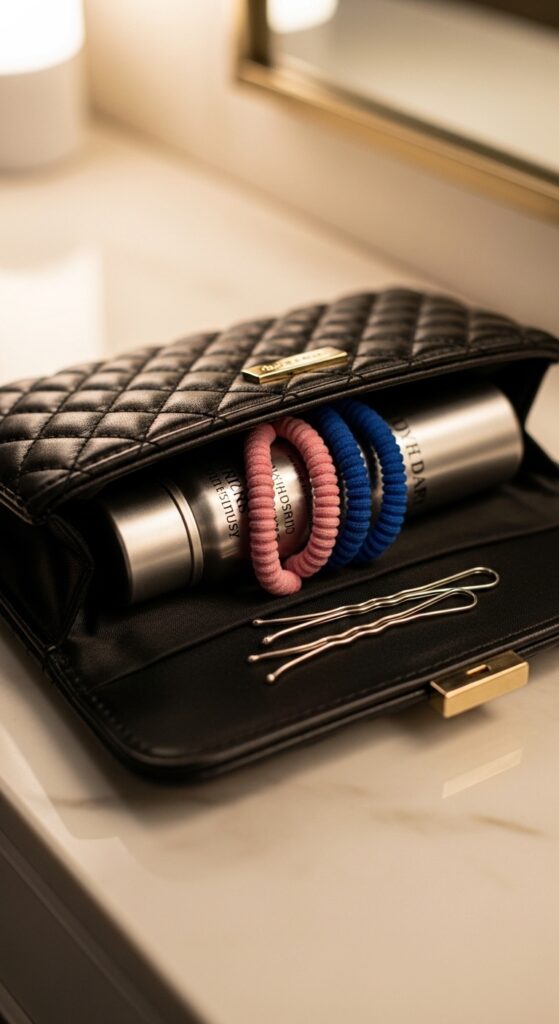
- Small, Snag-Free Hair Elastics: You’ll need several that match your hair color.
- A Fine-Tooth Comb: For precise sectioning and smoothing.
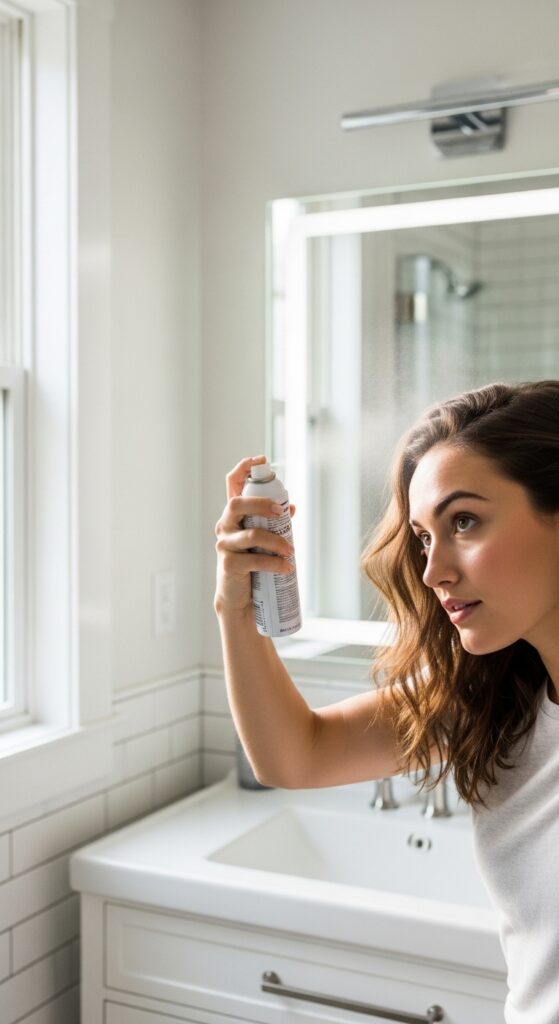
- Strong-Hold Hairspray: Aerosol works best for all-over hold.
- Texturizing Spray or Dry Shampoo: To add grit and grip, especially on clean hair.
- Bobby Pins (Optional): For securing any loose pieces.
Step 1: Start with Day-Old Hair (Seriously)
The best base for this style is hair that isn’t freshly washed. Day-two or day-three hair has natural oils and texture that help the elastics grip and prevent slipping.
If your hair is clean, don’t worry! Just spray a generous amount of texturizing or dry shampoo at the roots and through the mid-lengths. Work it in with your fingers to create that needed friction.
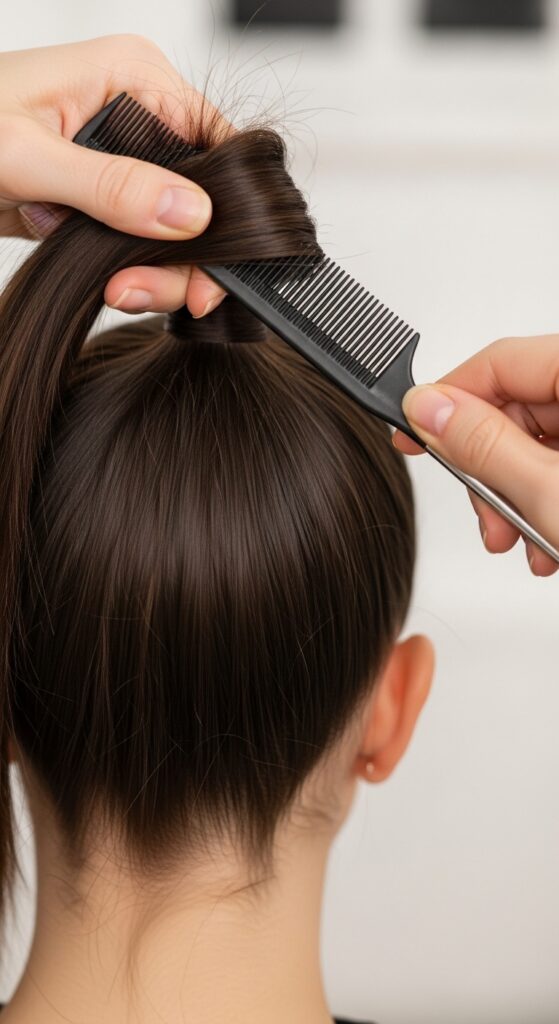
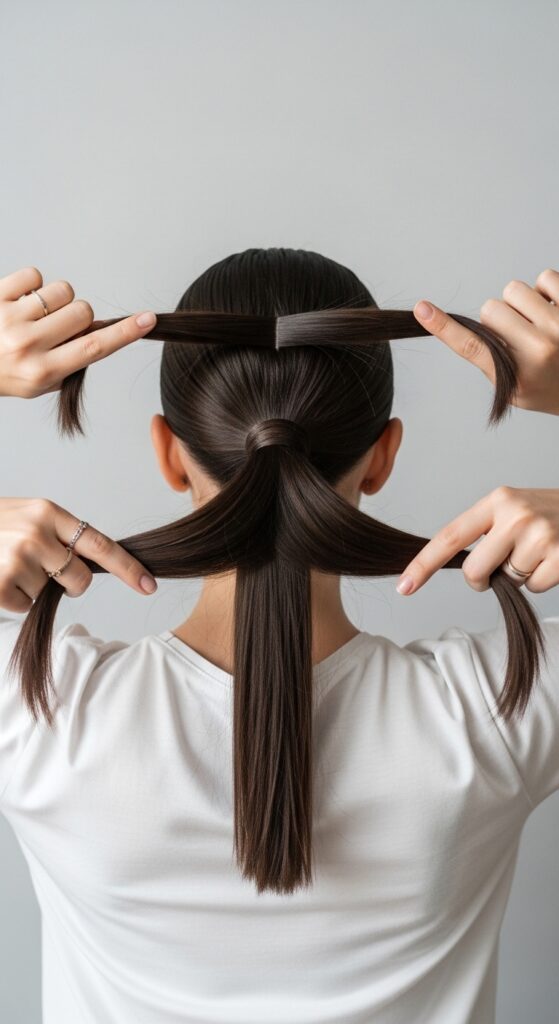
Step 2: Create a Super Smooth Base Ponytail
This is the foundation. Brush all your hair back to your desired height—high, mid, or low. Use your fine-tooth comb to smooth away every bump and flyaway.
Secure it with your first elastic. For extra polish, you can take a small section of hair from underneath the ponytail and wrap it around the elastic, securing it with a bobby pin. This gives an instant “old money hair” touch.
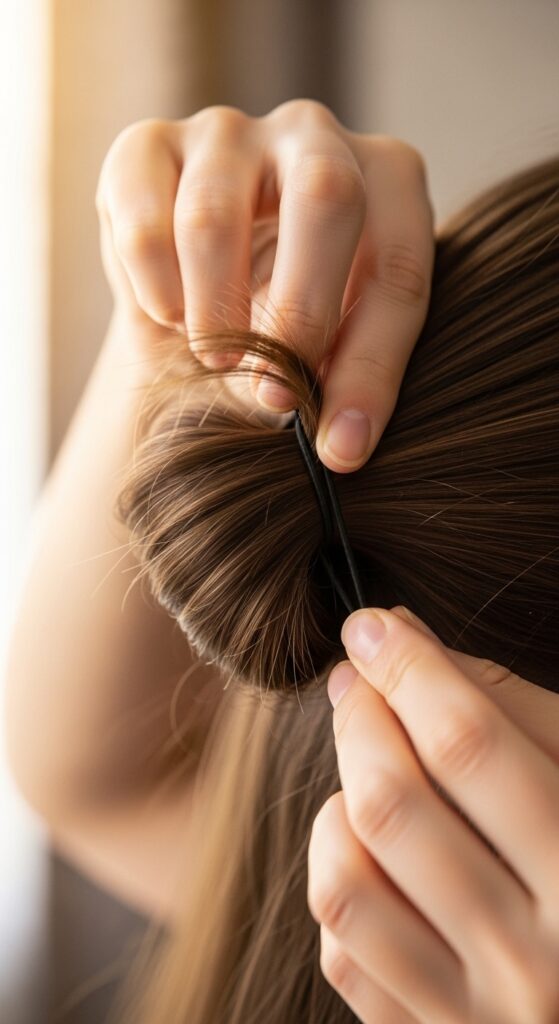
Step 3: Section Your Ponytail for Bubbles
Decide how many bubbles you want. Three is a classic, chic look. Use the comb to create a clean horizontal part about 2-3 inches down from the first elastic.
Gently separate that top section from the rest of the ponytail. Hold it away for a moment. This is where you’ll create your first bubble. The size of the sections determines the bubble size, so keep them even.
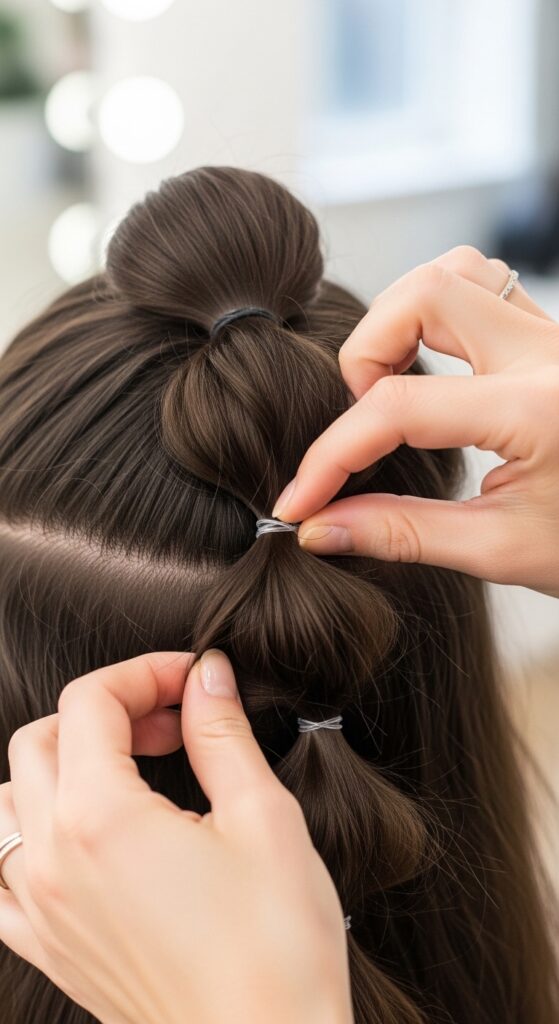
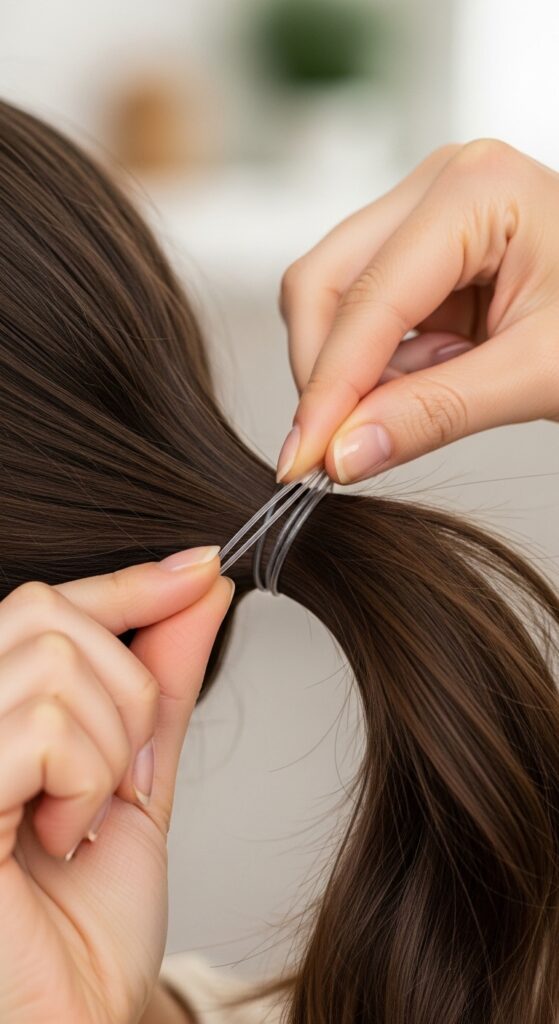
Step 4: Create the First Bulging Bubble
Take that top section you separated. Gently backcomb or “tease” the hair at the MIDDLE of the section, not the base. Just a few strokes to add internal volume.
Then, carefully smooth the outer layer of hair over the teased part with your palms, forming a rounded, puffy shape. Secure this bubble by placing a new elastic right below the teased volume, creating the bulge.
Step 5: Repeat Down the Length of the Tail
Move down to the next section. Repeat the exact same process: separate, lightly tease the mid-shaft for internal volume, smooth over, and secure with an elastic below the bulge.
The key is consistency. Try to make each bubble a similar size and distance apart for that intentional, designer look. This isn’t messy; it’s precise volume.
Step 6: The Final Touch & Lock It In
Once all your bubbles are secured, take a step back and assess the shape. Gently adjust any bubbles by pulling lightly on the sides to make them rounder.
Then, hold your hairspray about 10 inches away and give the entire style a light, misting spray. Pay extra attention to the areas around the elastics to tame any wisps and lock in the structure all day.

Pro Tip: The Teasing Secret for Lasting Volume
When you tease, don’t just rake the comb downward. Insert the comb about halfway down the hair section and push it gently upward toward the roots in short strokes. This builds a hidden cushion of volume.
Always smooth over the top layer gently afterward. This technique is what gives you that lasting, bulging shape instead of a messy, tangled look. It’s the difference between “glitchy glam hair” and just messy.
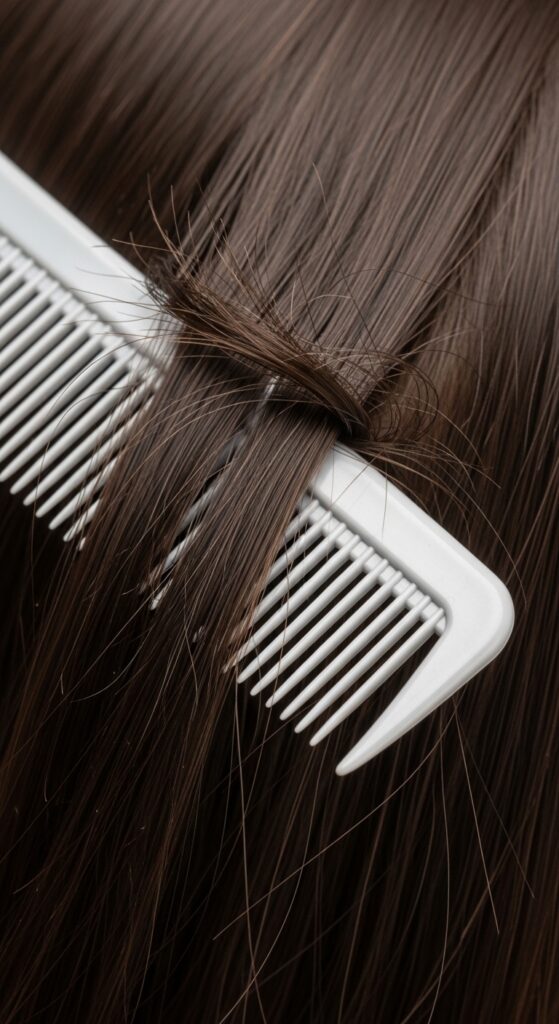
How to Hide Your Hair Elastics Perfectly
If you don’t wrap a piece of hair around the base, your elastics will show. To make them disappear, gently stretch the bubble section just above the elastic.
This loosens the hair and allows the elastic to sink in and become nearly invisible. You can also use a crochet hook to pull a tiny strand of hair from the bubble to wrap around the band.
Adapting the Style for Fine or Thin Hair
If you have fine hair, texture is your best friend. Use a volumizing mousse at the roots before starting. When you create your bubbles, make the sections smaller.
More, smaller bubbles will give the illusion of more fullness and length. A light dusting of texturizing powder on each section before teasing can also work miracles for grip and body.
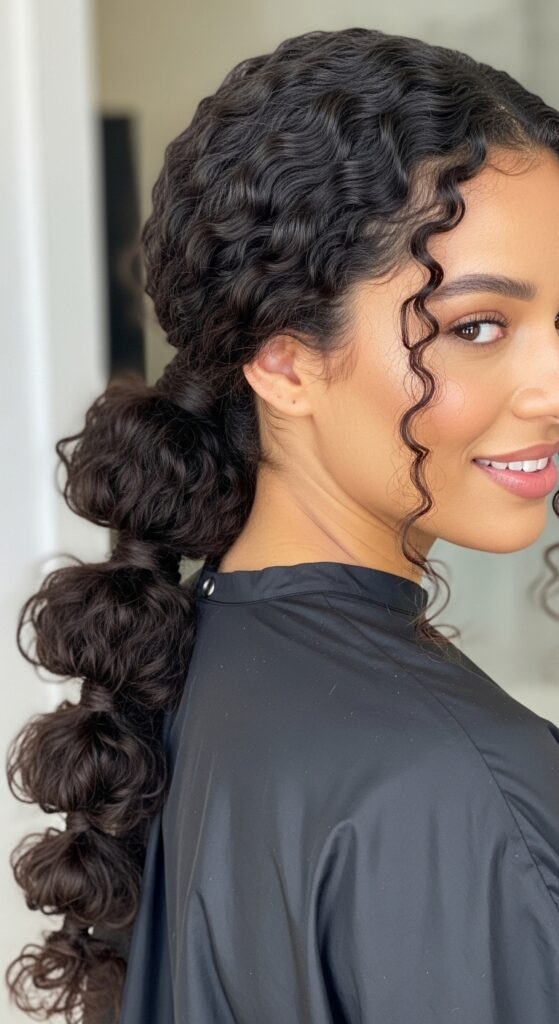
Adapting the Style for Thick or Curly Hair
You have a natural advantage! Your hair already has volume. Focus on control. Use strong-hold elastics and consider lightly flat-ironing your ponytail before sectioning if you want a smoother bubble look.
For curly hair, embrace the texture! Skip the heavy teasing. Instead, gently pull each section to extend the curl and create the bubble shape, securing it loosely to maintain your curl pattern.
Taking It From Day to Night in Seconds
This style transitions beautifully. For evening, add a sleek accessory like a minimalist claw clip at the base or a thin, silky scarf tied around the first elastic.
You can also pull out a few face-framing tendrils for a softer, more romantic goth hairstyles vibe. A switch to a deep side part before making the initial ponytail also feels instantly glamorous.
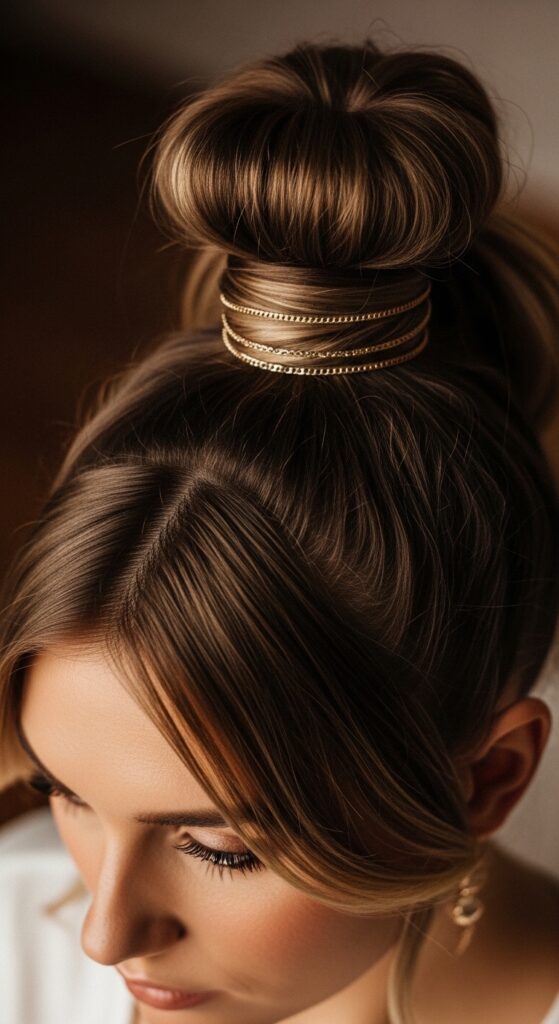
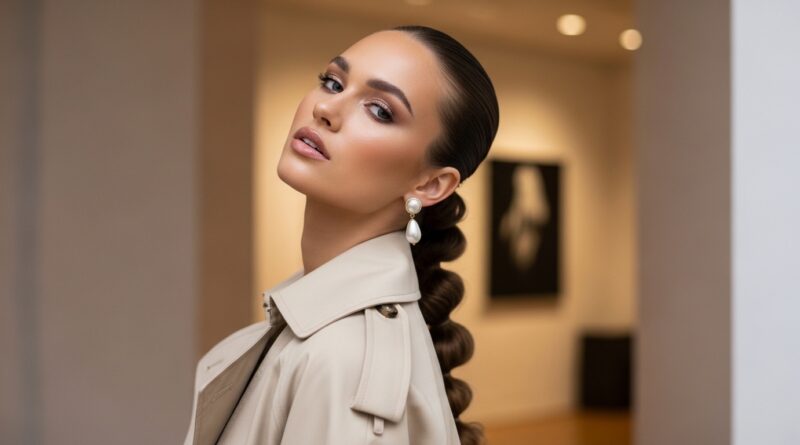
The “Quiet Luxury” Version of This Look
For that understated, old money hair aesthetic, keep the bubbles minimal and polished. Opt for a low ponytail at the nape of the neck with just two, subtle bubbles.
Every hair should be in place. This is a perfect pairing with a crisp button-down or a cashmere sweater. It’s the cousin of the quiet luxury bob, but in ponytail form.
The Edgy, “Glitchy Glam” Variation
Lean into the artificial, sculptural feel. Create uneven bubbles—one large, one small. Use contrasting hair ties. Leave out strategic, jagged pieces.
This plays with the “glitchy glam hair” trend, where perfection is disrupted in a cool way. Pair it with a stark asymmetrical lob-inspired makeup look for full effect.
Pairing It with Other Major Trends
This style is a great base for other trends. Add blunt bangs for a hime cut influence. Or, ask your stylist to cut sharp, dramatic face-framing layers that will pop when pulled back into this style.
It also complements the shaggy layers of a vampire haircut, as those pieces will naturally fall out around your face. It’s incredibly versatile.
My Favorite Products for Maximum Hold
Over the years, I’ve tested everything. For this style, my team and I always reach for a strong-hold aerosol hairspray. It gives an all-over, flexible hold without stickiness.
A good dry texturizing spray is also a must. It gives hair that “grip” without weighing it down. For fine hair, a volumizing mousse at the roots is a game-changer before you even make the first ponytail.
Quick Fixes for Common Problems
- Bubble Deflating? Spritz a little hairspray on your fingers and gently re-mold it.
- Elastic Slipping? Cross the elastic twice on the first pass, then finish tying. More grip.
- Too Much Flyaways? Use a tiny bit of hair gel or pomade on a toothbrush to smooth them.
- Looks Too “Done”? Gently tug the sides of each bubble to loosen it for a softer feel.
How to Make It Last All Day & Night
Prep is everything. The texturizing spray on clean hair is the first step to longevity. When you secure each elastic, make sure it’s tight enough that the bubble doesn’t spin around.
Carry a few extra elastics and a travel hairspray for touch-ups. If you’re dancing all night, a second, light hairspray mist at the midpoint of the evening will save the look.
This Style on Different Hair Lengths
Long Hair: You have the most canvas! Play with 4-5 bubbles for a truly dramatic look.
Medium-Length Hair (Like a Lob): Stick to 2-3 bubbles max. This is a perfect way to add interest to an asymmetrical lob length.
Shorter Hair: You can still participate! Create a mini, half-up version with just one or two bubbles on top. It’s adorable.
Why This is More Than Just a 2026 Trend
While it’s pegged as a huge 2026 hairstyles trend, this technique is a timeless way to add volume and interest. It teaches you about structure and control.
The skills you learn—strategic teasing, sectioning, and securing—can be applied to so many other styles, from updos to braids. It’s an investment in your styling toolkit.
Your Turn to Try It!
Don’t be intimidated. The first time might take 20 minutes, but you’ll get faster. Start on a day when you’re not rushing out the door.
Practice the teasing and smoothing technique on one section. Remember, it’s just hair! You can always take it out and try again. I want to see your creations.
And that’s the full scoop on the bubble puff sleeve ponytail! It’s one of those looks that seems high-fashion but is truly just a few clever tricks stacked together. I love how it can be adapted to anyone’s personal style, from minimalist to full-on dramatic.
It’s proof that sometimes the best style updates aren’t about a big chop (though I love a good asymmetrical lob), but about reimagining what you can do with the hair you already have. I hope this breakdown gives you the confidence to play with volume and shape in a whole new way.
If you found this guide helpful, save this post to Pinterest so you can easily find the steps later! Did you try it? Let me know in the comments below—what was the trickiest part for you, or what variation did you create? Can’t wait to hear from you.
XOXO, Hailey & Team