Curly Hair Care Routine: Step-by-Step Guide for Perfect Curls Every Day
If you have curly hair, you know it’s not just a hair type—it’s a statement. It’s a personality. It’s a beautiful, unpredictable, and sometimes utterly frustrating force of nature. One day you wake up with bouncy, defined ringlets worthy of a shampoo commercial, and the next, you’re grappling with a frizzy, shapeless cloud. Sound familiar? You are not alone.
The secret to taming the chaos and unlocking your best curls lies in a consistent, well-crafted curly hair care routine. It’s not about fighting your natural texture, but about understanding it, nurturing it, and giving it exactly what it needs to thrive. This step-by-step guide is your roadmap to ditching the bad hair days and embracing hydrated, defined, and enviable curls every single day.
Understanding Your Curl Pattern: The Foundation of Your Routine
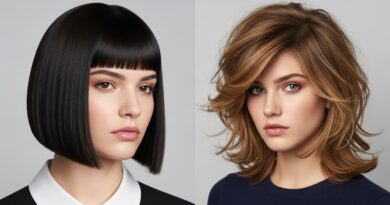
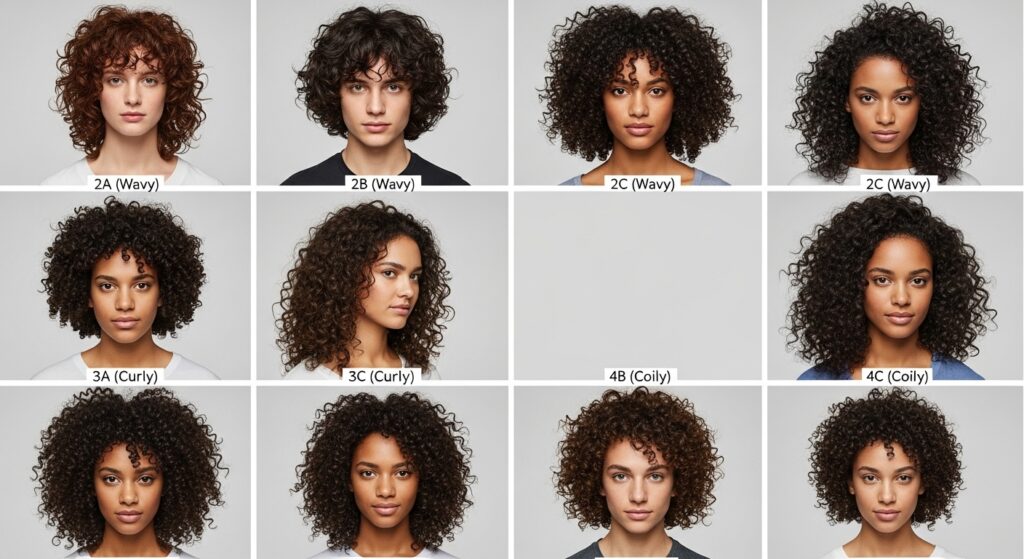
Before we dive into the steps, it’s crucial to understand that not all curls are created equal. Your curl pattern is as unique as your fingerprint, and what works for tight, coily curls might not be ideal for loose, wavy hair. The general classification system (Type 2 wavy, Type 3 curly, Type 4 coily) is a great starting point.
Type 2 (Wavy) hair often struggles with volume at the root and definition in the lengths. It can be easily weighed down by heavy products. Type 3 (Curly) hair forms definite ringlets and spirals and is prone to frizz and dryness. Type 4 (Coily) hair has a very tight zig-zag pattern, is incredibly fragile, and requires the most moisture to maintain its shape and health.
Knowing your curl type helps you choose the right products and techniques. However, also pay attention to your hair’s porosity (how well it absorbs moisture) and density (how many strands you have on your head). This deeper understanding will supercharge your routine.
Step 1: The Cleanse – It All Starts in the Shower
Forget everything you thought you knew about washing your hair. For curly hair, the goal of cleansing isn’t to strip it squeaky clean every day. In fact, overwashing is a primary culprit behind dry, frizzy curls. The key is to use the right cleanser for your hair’s needs.
Shampoo or Co-Wash? This is the first big decision. A traditional sulfate-free shampoo is great for a deep cleanse, especially if you have product buildup or a oily scalp. Use this once a week or every few washes. On other wash days, consider co-washing, which means using a conditioner to wash your hair. Co-washing gently cleanses the hair and scalp without stripping away its natural, essential oils, keeping your curls hydrated and happy.
When you do shampoo, focus the product on your scalp, massaging it gently to lift dirt and oil. Let the suds run through the lengths of your hair when you rinse—this is enough to clean the strands without causing unnecessary dryness.

Step 2: The Condition – Your Curl’s Best Friend
This is the most critical step for moisture and detangling. After rinsing out your cleanser, apply a generous amount of a rich, moisturizing conditioner from mid-lengths to ends. These areas are the oldest and most fragile parts of your hair and need the most love.
Use a wide-tooth comb or your fingers to gently detangle your hair while the conditioner is still in. Start from the ends and work your way up to the roots to prevent breakage. Let the conditioner sit for a few minutes—this is a perfect time to do the rest of your shower routine—to allow the moisture to penetrate the hair shaft. Don’t be afraid to rinse thoroughly with cool water; cool water helps to seal the hair cuticle, locking in moisture and enhancing shine.

Step 3: The Deep Treatment – Weekly Hydration Boost
Think of a deep conditioning treatment as a super-charged meal for your curls. Once a week, swap out your regular conditioner for a deep conditioner or hair mask. This intensive treatment helps to repair damage, restore elasticity, and provide a surge of hydration that regular conditioner can’t match.
Apply the mask to clean, damp hair, focusing on the areas that need it most (usually your ends). You can cover your hair with a plastic cap and apply gentle heat from a hooded dryer or a warm towel for 15-30 minutes. The heat helps the cuticle open up and absorb the treatment more effectively. Rinse thoroughly and feel the incredible softness and manageability it imparts to your curls.

Step 4: The Leave-In & Styling Products – Locking in the Magic
Now that your hair is clean and conditioned, it’s time to style. The golden rule for this step is to apply all styling products to soaking wet hair. This helps to lock in water, which is the ultimate moisturizer, and prevents the formation of frizz.
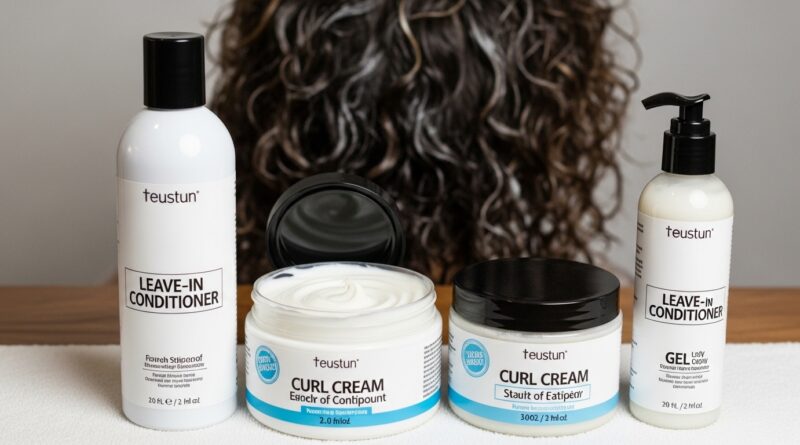
Step 4a: Leave-In Conditioner This is your curl’s daily dose of hydration. A good leave-in conditioner provides a lightweight moisture base, protects your hair from heat (if you use it), and makes detangling a breeze.
Step 4b: Curl Cream or Gel? This depends on the hold and definition you want. A curl cream provides light to medium hold and enhances your natural curl pattern while adding moisture. A styling gel provides a stronger cast that, once dried and “scrunched out,” leaves you with defined, frizz-free curls that last for days. Many curlies even use both—a technique called “the cocktail”—applying cream first for moisture and gel second for hold.
Use the “praying hands” method to smooth the product over your hair sections, then scrunch your curls upwards towards your scalp to encourage formation and clumping.

Step 5: The Drying Technique – Patience is a Virtue
How you dry your hair can make or break your curl definition. Rubbing your hair vigorously with a regular bath towel is a big no-no; the rough texture creates friction and frizz. Instead, use a soft, microfiber towel or an old cotton t-shirt to gently scrunch out the excess water.
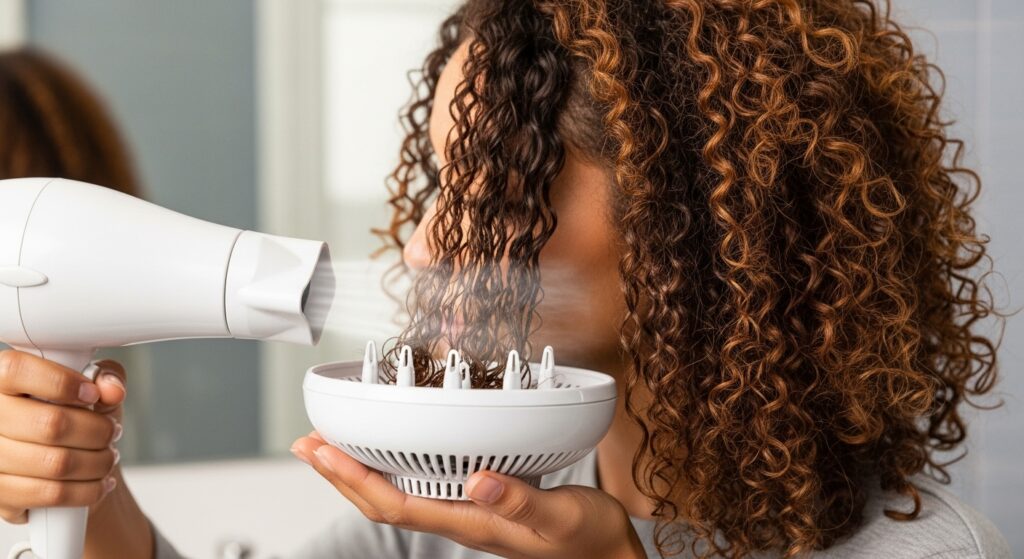
Air Drying vs. Diffusing: Air drying is the gentlest method. Simply scrunch your hair with your t-shirt and let it dry naturally. For more volume and a faster dry time, use a diffuser attachment on your hairdryer. Set the dryer to low heat and low speed. Place your curls in the diffuser bowl, bring it up to your scalp, and hold it there for a few minutes before moving to the next section. Don’t move the diffuser around constantly, as this can cause frizz. The goal is to let the curls set in the bowl.
Once your hair is 100% dry, you may feel a “cast” from the gel. This is a good thing! Gently scrunch your hair to break this cast and reveal soft, touchable, yet perfectly defined curls.
Step 6: The Maintenance & Refresh – Making Your Style Last
Your curly hair care routine doesn’t end when your hair is dry. To make your beautiful curls last for several days, you need a solid maintenance plan. The key is to protect your hair while you sleep.
Sleep on a satin or silk pillowcase, or wrap your hair in a satin or silk scarf. These materials create less friction than cotton, preventing frizz and helping your curls retain their shape overnight.
On days two, three, and beyond, you likely won’t need to fully wash your hair. Instead, refresh your curls. Mix a little leave-in conditioner with water in a spray bottle. Lightly mist your hair until it’s damp (not soaking wet). Then, gently scrunch your curls to reactivate the stylers from the previous day. You can add a tiny bit more gel or cream to any particularly frizzy sections.

Common Curly Hair Mistakes to Avoid
Even with the best routine, small mistakes can hold you back. Here are the big ones to watch out for:
Over-brushing or combing dry hair: This is a surefire way to create a frizzy triangle. Only detangle when your hair is wet and saturated with conditioner.
Using harsh sulfates and silicones: Sulfates strip your hair of natural oils, and non-water-soluble silicones create buildup that prevents moisture from getting in. Stick to sulfate-free and silicone-free formulas.
Not getting regular trims: Split ends travel up the hair shaft, causing breakage and ruining your curl pattern. Get a trim every 3-4 months to keep your ends healthy.
Touching your curls while they dry: It’s tempting, but touching your hair while it dries disrupts the curl formation and introduces frizz. Let them be!

Embrace Your Beautiful Curls
Perfecting your curly hair care routine is a journey of experimentation and patience. It might take a few weeks for your hair to adjust and show you its full potential. Listen to your hair—it will tell you what it needs. Whether it’s more moisture, less product, or a different technique, be willing to adapt.
Remember, the goal isn’t to achieve someone else’s curls. It’s to celebrate and enhance the unique, beautiful texture that is entirely your own. So, arm yourself with these steps, be consistent, and get ready to fall in love with your curls all over again.