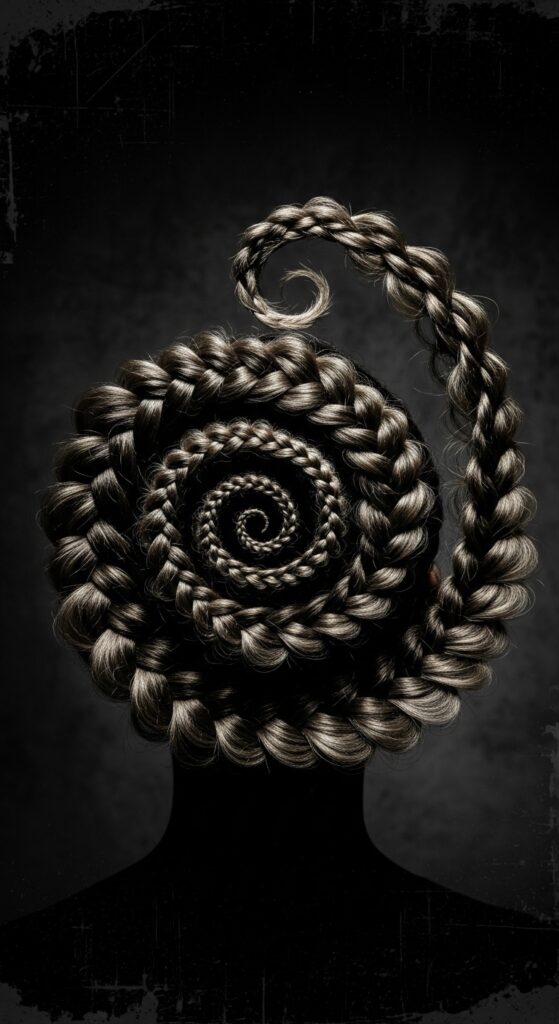
Discover 19 Spiral Staircase Braids Twisting Upward Intricately Beautiful
Okay, let’s be real. Sometimes you see a hairstyle and you just have to stop scrolling. That’s exactly what happened to me when I first saw a spiral staircase braid. It’s one of those intricate, beautiful looks that seems impossible to do yourself.
But guess what? It’s totally possible. And it’s not just for special occasions. This style is a stunning way to elevate your everyday look, blending that “old money hair” elegance with a touch of fairytale romance.
I’ve been obsessed with finding all the different ways to wear this braid. So, I pulled together 19 gorgeous variations that twist upward in the most beautiful ways. Whether your vibe is “quiet luxury bob” or “romantic goth hairstyles,” there’s a version here for you. Let’s dive in and find your next signature look.
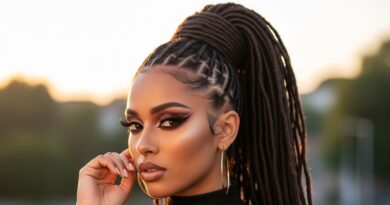
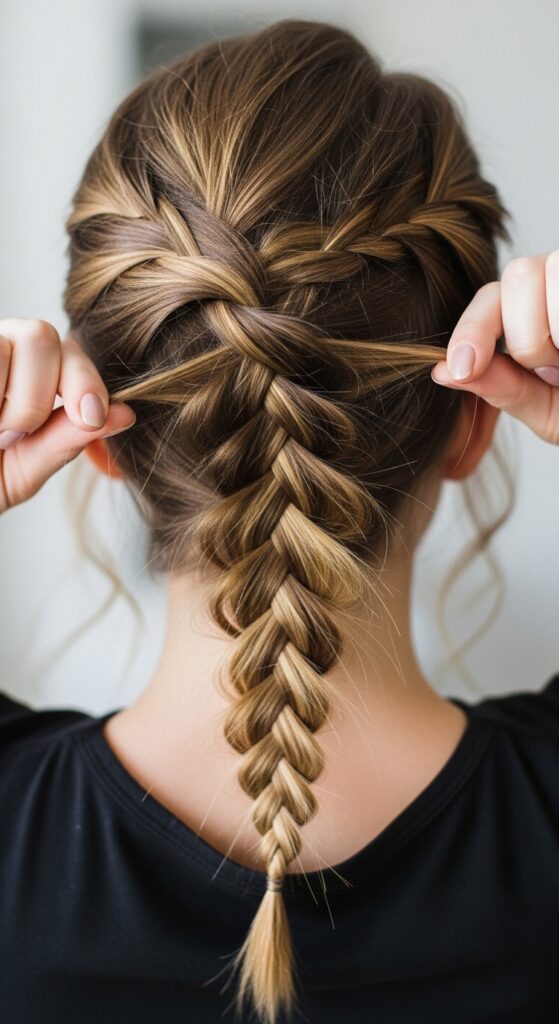
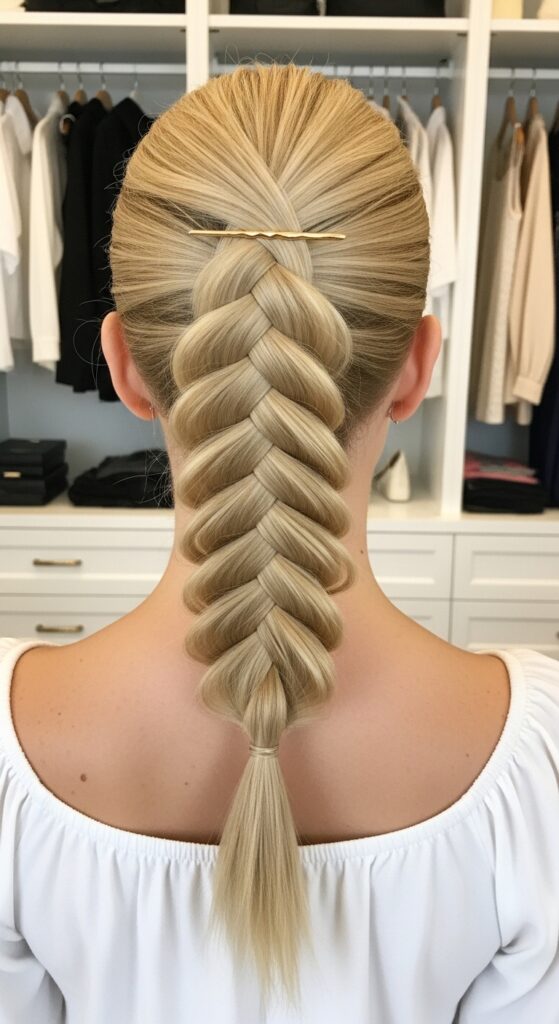
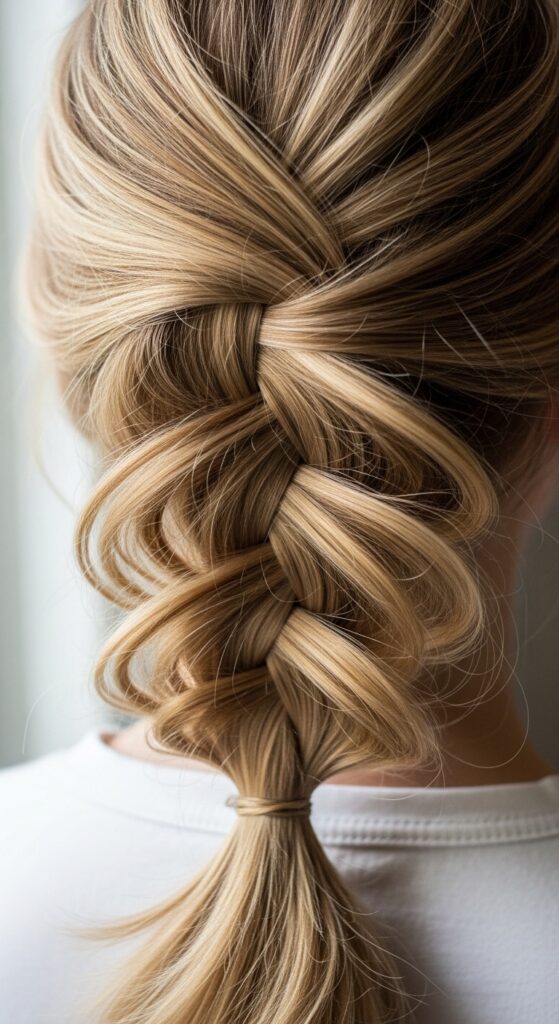
1. The Classic Single Spiral
This is where it all begins. A single, perfect spiral braid starting at your nape and twisting up along your hairline to the crown. It’s the foundational style that looks incredible on its own or as a base for more elaborate looks.
It works best on medium to long hair and adds instant sophistication. Think of it as the ultimate upgrade to a simple ponytail.
- Start with slightly textured hair for better grip.
- Begin braiding at the lowest point you want the spiral to start.
- Keep the sections small and even as you curve the braid upward.

2. Boho Loose & Textured
For a softer, more relaxed feel, pull gently on the edges of your spiral braid after securing it. This creates a wider, more bohemian look that’s less structured and perfectly undone.
It pairs beautifully with waves and face-framing pieces. This style is all about effortless, “I just woke up like this” charm, but way more intentional.
- Braids tightly, then gently tug the outer loops to loosen.
- Use a texturizing spray before braiding for extra grip and volume.
- Leave out a few wispy strands around your face.
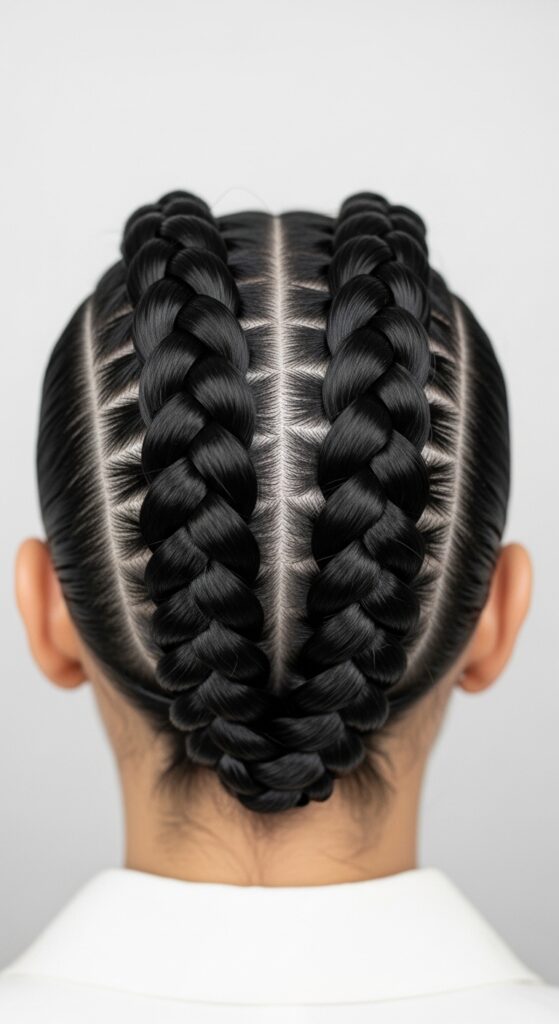
3. Double Spiral Statement
Double the fun, double the impact. Create two spiral braids starting on either side of your part, mirroring each other as they twist up your head. This symmetrical look is bold and beautifully balanced.
It’s a stunning choice for an event or when you really want to make a statement. It feels both regal and modern at the same time.
- Part your hair cleanly down the middle first.
- Use clips to separate the two sections as you work.
- Try to keep the braids the same size and tension for symmetry.
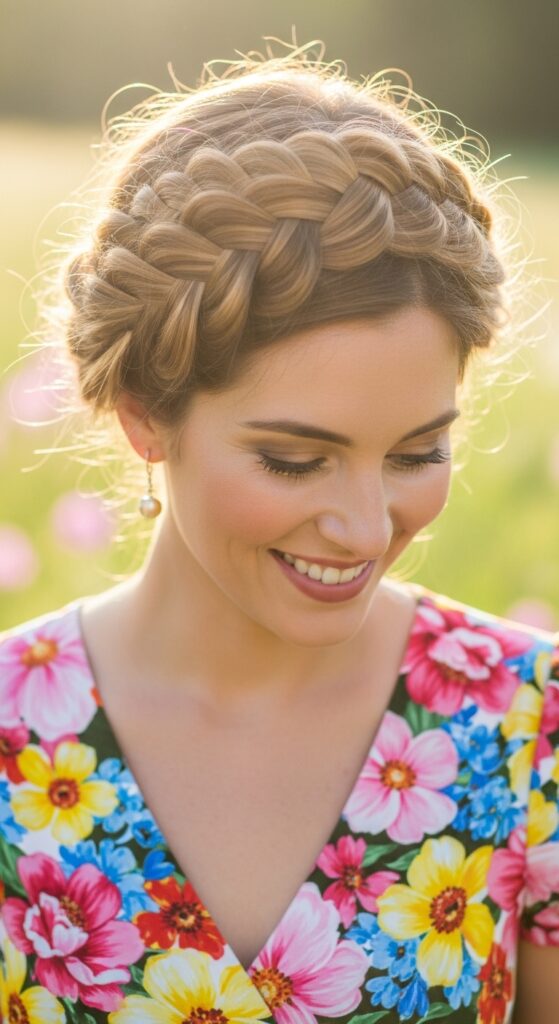
4. Spiral Crown Braid
Take the spiral all the way around! Start at one temple and braid in a spiral that circles your entire head like a crown, tucking the end under. It’s a gorgeous, ethereal look that keeps all your hair perfectly in place.
This is my go-to for garden parties or hot summer days when I want to feel like a queen. It’s pure, wearable romance.
- Start braiding just above your ear.
- Keep adding small sections of hair as you curve around your head.
- Secure the end with bobby pins hidden underneath the braid.
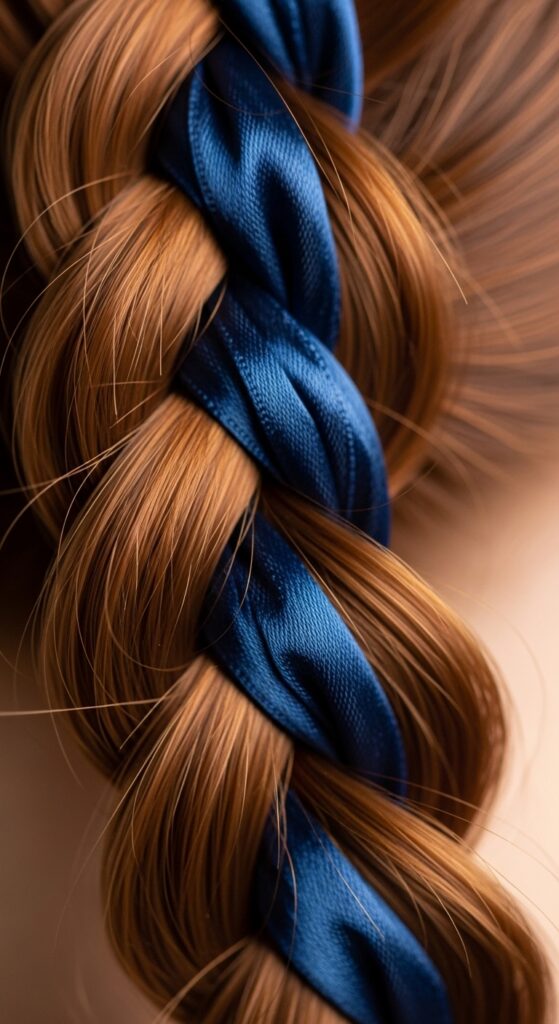
5. With Ribbon Weaved In
Add a pop of color or a touch of luxe with a satin ribbon. Weave it into your braid as you go for a beautiful, detailed effect. This simple addition transforms the style completely.
Choose a ribbon color that complements your outfit or go for a classic black or white for that timeless feel. It’s such an easy way to personalize the look.
- Choose a thin, long ribbon (about 1cm wide).
- Tie it at the root of your braid and treat it as one of the three braiding sections.
- Keep the ribbon flat as you braid for a seamless weave.
6. The “Glitchy Glam” Version
For a modern, edgy twist, create intentional gaps or “glitches” in your braid. Gently pull out small, strategic pieces after braiding to create a deconstructed, artistic effect.
This is a perfect example of glitchy glam hair—beautiful but imperfect, sleek but undone. It’s ideal for a night out or a creative photoshoot.
- Braid very neatly first.
- Use the tip of a tail comb to carefully pull out tiny loops of hair.
- Focus on one side of the braid for an asymmetrical “glitch.”
7. On an Asymmetrical Lob
Short hair can absolutely rock this! A spiral braid looks amazing snaking up the side of an asymmetrical lob. It adds intricate detail to a chic, geometric cut.
You might not get a full spiral to the crown, but even a partial one from the nape to the ear is stunning. It’s a brilliant way to add flair to your short hair.
- Work on the longer side of your lob.
- Use a strong-hold gel or wax to control shorter layers.
- Secure with mini clear elastics that blend with your hair.
8. Half-Up Spiral Perfection
Not ready to commit to a full updo? Try a half-up version. Create a spiral braid with the top section of your hair, letting the rest flow freely down your back.
This is the perfect balance between done and undone. It keeps hair out of your face while showing off your length and texture. So pretty and practical.
- Section off the hair from your temples back.
- Braid that section into a spiral that ends at the back of your crown.
- Secure it, then gently pull on the braid to widen it and blend with your down hair.
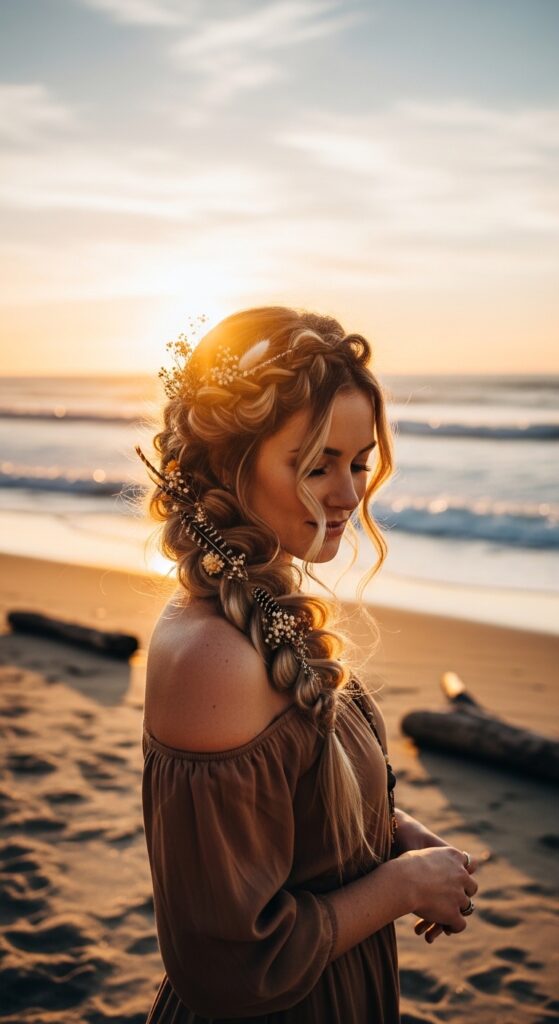
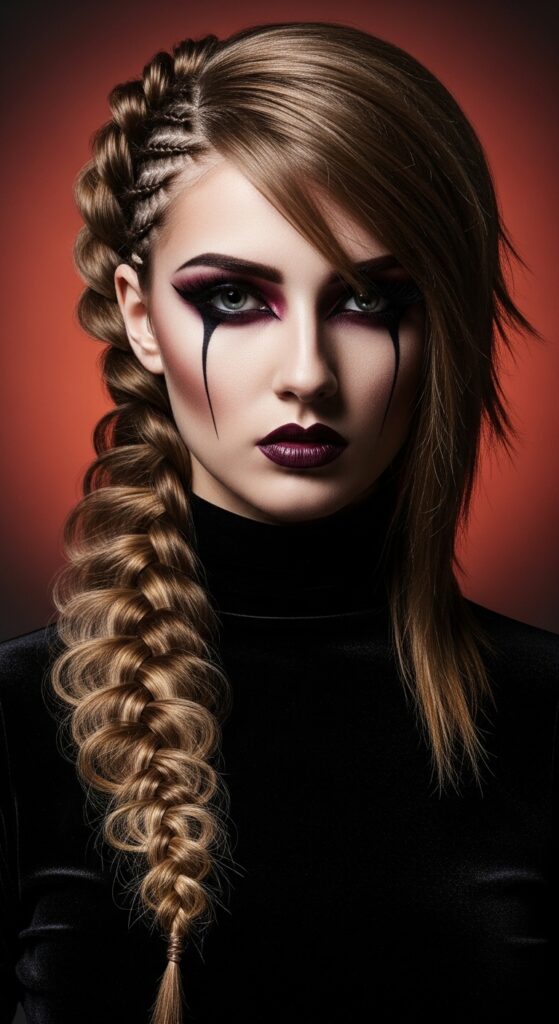
9. The Romantic Goth Twist
Incorporate deep black ribbons, small velvet flowers, or silver cuffs into your spiral braid. This merges intricate braiding with the darkly romantic aesthetic of romantic goth hairstyles.
It’s elegant, moody, and utterly captivating. Perfect for a concert, a themed event, or just expressing your personal style in a beautiful way.
- Start with deep, dark hair color or a wig for maximum effect.
- Weave in black lace ribbon or attach small, delicate gothic accessories with pins.
- Keep the braid itself very neat and precise to contrast with the dark romance elements.

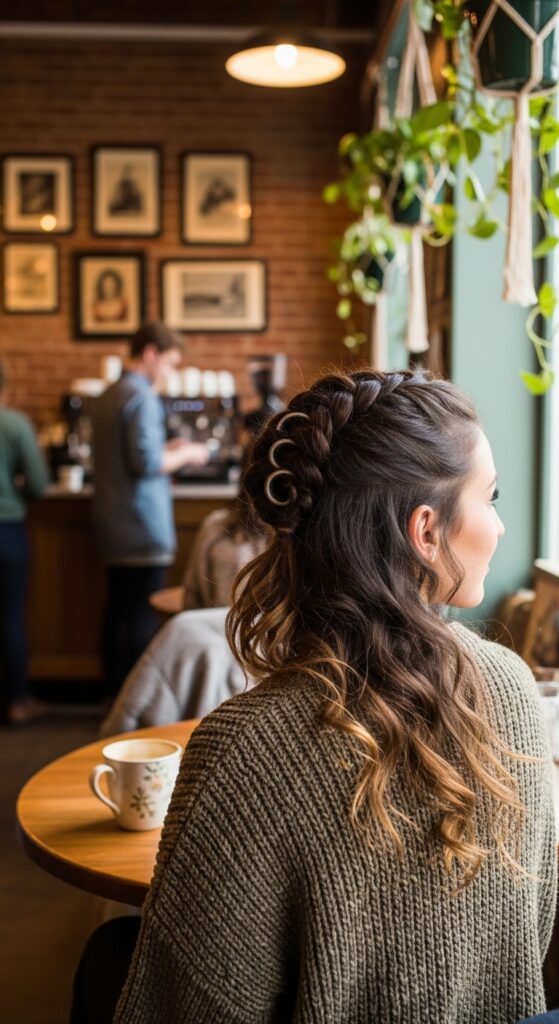
10. Micro Spiral Accents
Instead of one large braid, create several tiny spiral braids scattered throughout your hair. They can curve in different directions for a playful, modern look.
This is a fantastic way to add texture and interest to an otherwise simple hairstyle. It’s like jewelry for your hair.
- Create small, clean partings for each micro braid.
- Use a tiny bit of edge control gel for super sleek, baby-hair spirals.
- Let them end at different points and secure with clear micro bands.
11. The “Old Money Hair” Elegance
For that timeless, old money hair vibe, the key is sleek perfection. Create a flawless spiral braid on perfectly blown-out, smooth hair. No flyaways, no texture—just shine and precision.
Pair it with a pearl hairpin or a simple, expensive-looking barrette where the braid ends. It’s understated luxury at its best.
- Start with a thorough blow-dry using a round brush for maximum smoothness.
- Apply a light shine serum before braiding.
- Braid tightly and cleanly, using a fine-tooth comb to smooth each section.
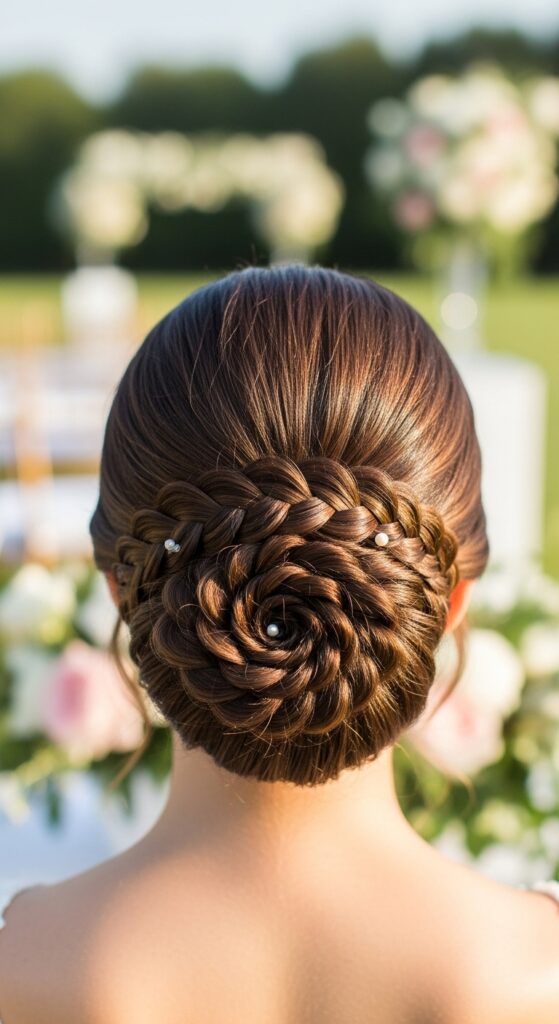
12. Wrapped Low Bun
Let your spiral braid become the wrapping for a low bun. Spiral braid a section of hair, then wrap it around the base of a classic low bun or chignon.
This adds incredible detail to an elegant updo. It looks complex but is just a clever twist on two classic styles. Perfect for weddings or formal dinners.
- Create a low ponytail and twist it into a bun, securing with pins.
- Braid a separate section of hair (from the side or nape) into a spiral.
- Wrap the braid around the base of the bun and pin it securely underneath.
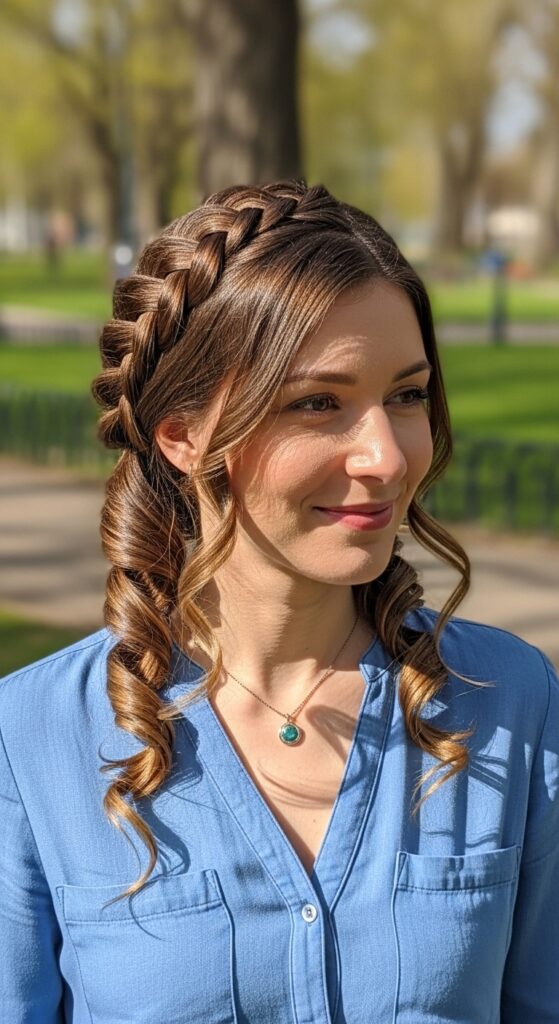
13. With Face-Framing Tendrils
Before you start your spiral braid, deliberately leave out two front sections. Curl them loosely or let them fall naturally to frame your face.
This softens the entire look and is super flattering. It adds a touch of romance and ensures the braid doesn’t feel too severe or tight.
- Leave out the hair from your temples forward before sectioning for the braid.
- You can curl these pieces or just twist them for a soft wave.
- Use a light-hold hairspray to keep them in place without being stiff.
14. The Hime Cut Fusion
The hime cut—with its dramatic front locks—is a statement on its own. Add a delicate spiral braid just behind one of these long front sections, leading back into the shorter hair.
It blends traditional Japanese inspiration with modern braiding art. The contrast between the straight, blunt hime locks and the intricate braid is stunning.
- This works best on a true hime cut with straight, sleek hair.
- Braid a very fine section just behind the long front lock.
- Keep the braid small and tight so it doesn’t overpower the cut’s lines.
15. For Thin Hair: The Illusion of Volume
If you have fine or thin hair, don’t skip this! A spiral braid can actually create the illusion of more hair. The key is to braid loosely and pancake (gently pull) the braid wide after.
Teasing the hair at the crown before you start can also give you more volume to work with. It’s all about technique, not thickness.
- Lightly backcomb the roots at your crown for lift.
- Braid with a light hand—don’t pull too tight.
- After securing, gently pull the sides of the braid apart to make it look wider and fuller.
16. The Modern Vampire Cut
Pair a sharp, layered vampire haircut (think mullet-shag hybrid) with a chunky spiral braid on one side. The mix of edgy, piecey layers and a beautiful, structured braid is next-level cool.
This is for the bold and the brave. It’s a defining look of alternative 2026 hairstyles that’s happening right now.
- Embrace the texture of your vampire cut—use texturizing spray.
- Take a larger section for a chunkier, more noticeable braid.
- Let the braid sit over the dramatic shag layers for contrast.
17. Colorful Spiral Highlights
If you have balayage, highlights, or fantasy colors, a spiral braid is the best way to show them off! The twisting pattern creates a mesmerizing display of your color dimension.
The braid acts like a canvas for your hair color. Blues, pinks, blondes—they all look incredible woven into this pattern.
- Braiding can slightly alter how color is perceived, making it look more blended.
- For best effect, have your colorist place highlights with movement in mind.
- Use a color-protecting spray before styling.

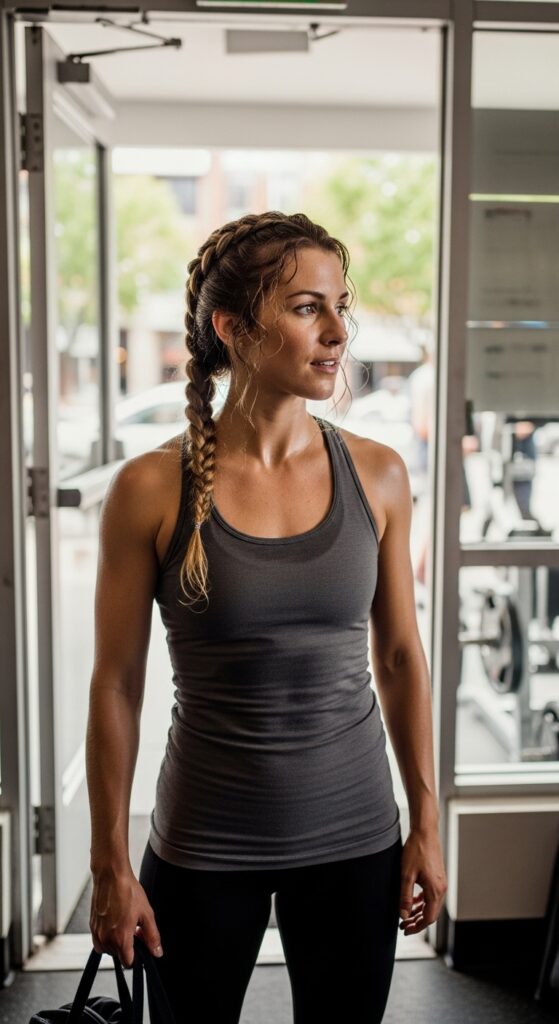
18. The Gym-to-Go Hybrid
This is my secret for looking put-together after a workout. Do a spiral braid on slightly damp, post-gym hair. As it dries, it gets that perfect, lived-in texture.
You get a gorgeous, intentional hairstyle that also manages your hair. It’s the ultimate practical beauty hack for busy lives.
- After the gym, detangle damp hair with a wide-tooth comb.
- Apply a curl cream or light mousse for definition.
- Braid while damp. Let it air dry or use a diffuser on low heat.
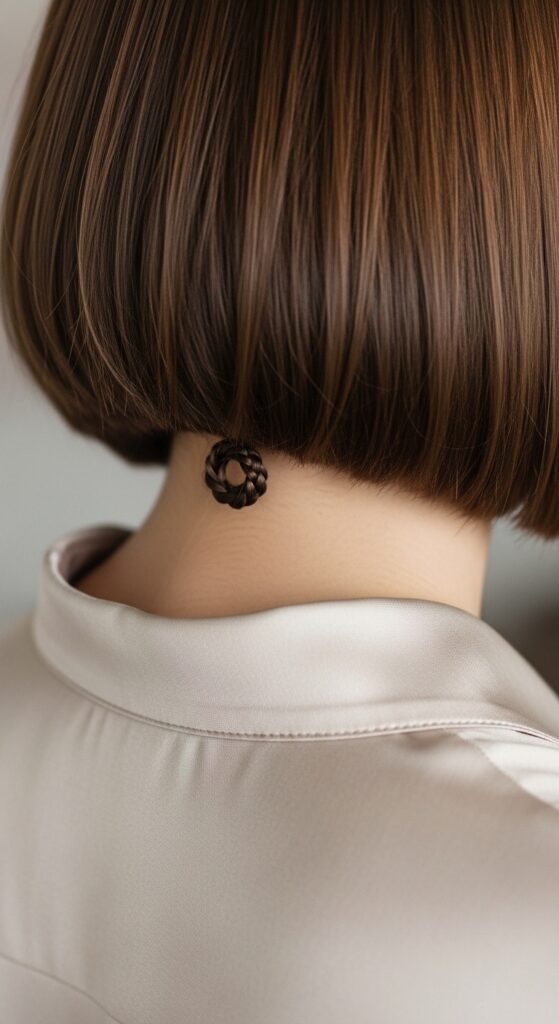
19. The Quiet Luxury Bob Version
Yes, you can do this on a bob! For a quiet luxury bob, create a small, ear-hugging spiral braid along the back of your hairline. It’s a subtle, hidden detail that’s discovered only on closer look.
It’s the epitome of quiet luxury—beautiful craftsmanship that isn’t loud or flashy. It speaks to a personal appreciation for detail.
- This works on bobs that are at least chin-length.
- Take a very fine section at the very nape of your neck.
- Braid tightly and close to the head, ending just behind the ear and securing discreetly.
Your Quick-Start Braiding Guide
Feeling inspired but need the basics? Here’s the fastest way to get started. Don’t aim for perfection on the first try. Practice makes progress, I promise.
The most important thing is to start with detangled, second-day hair (or use texturizing spray) for the best grip. Clean hair can be too slippery.
- Brush your hair thoroughly and decide on your spiral’s starting point (nape, temple, etc.).
- Section off the hair for your braid. Clip the rest away.
- Begin a standard three-strand braid, but slowly curve its direction upward as you go.
- Add in small pieces of hair from the top side only to create the upward curve.
- Secure the end with a clear elastic and gently pull on the braid edges to widen it.
Products I Swear By For Hold & Shine
You don’t need a lot, but the right products make a world of difference. These are my holy-grail items that live in my styling kit.
They help with grip, fight flyaways, and add that final touch of polish without making hair feel crunchy or heavy.
- Texture Spray: For grip and volume. I use