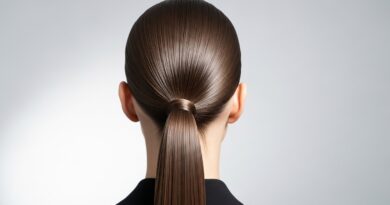
Double 14 Ladder Twist Sides Climbing Symmetrically Balanced
Okay, let’s be real. We’ve all seen those intricate, gravity-defying braids on Pinterest and thought, “Absolutely not. I don’t have six hands or three hours.” I feel you. That’s why I’m obsessed with this Double 14 Ladder Twist. It sounds fancy, but it’s just two simple braids climbing up your head in perfect balance.
It’s the ultimate “looks like you tried” style that’s secretly super practical. You get that put-together, symmetrical vibe that feels both elegant and edgy. Think of it as your gateway to more adventurous styles.
Whether you’re into the clean lines of an old money hair look or the detailed flair of romantic goth hairstyles, this technique is your new best friend. I’ll walk you through it, step-by-step. You can totally do this.
What Is The Double 14 Ladder Twist?
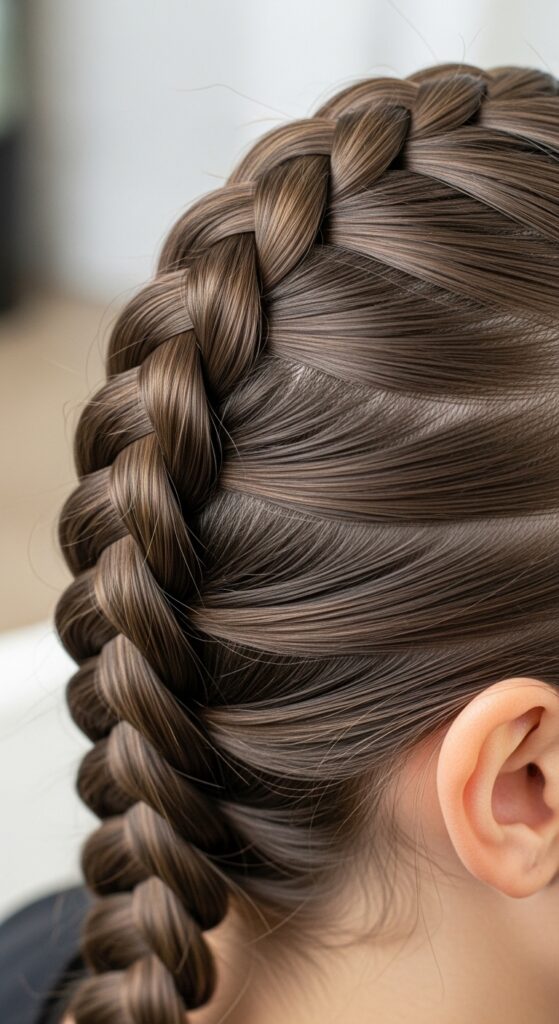
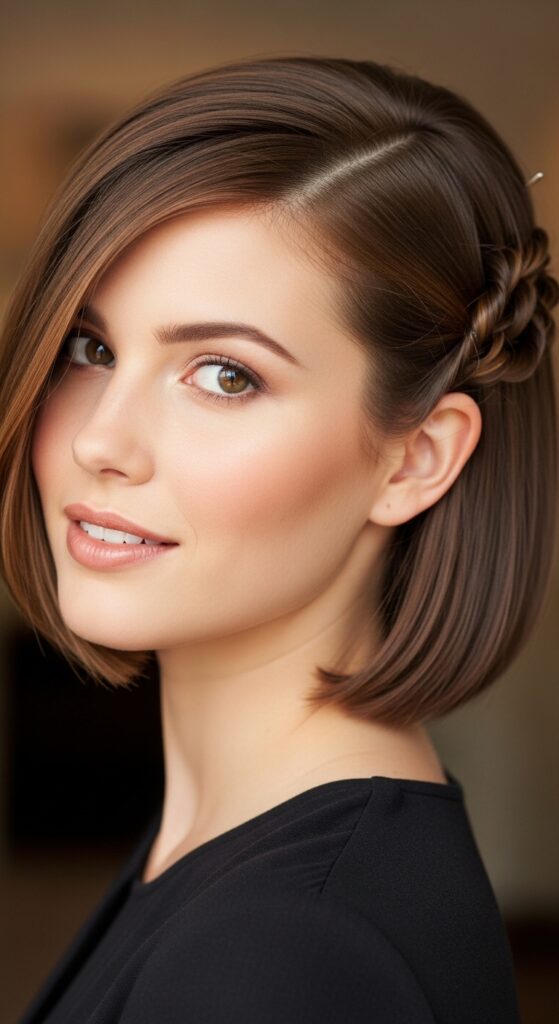
At its core, it’s two French or Dutch braids that start at your temples and climb upwards towards the crown, creating a “ladder” effect on each side. The “14” often refers to the number of crossover sections, giving it a specific, intricate length. The magic is in the symmetry.
Both braids mirror each other perfectly, creating a stunning, balanced frame for your face. It’s a detailed look that bridges so many aesthetics, from ethereal to sleek. It’s a foundational skill that opens doors to so many 2026 hairstyles trends we’re starting to see.
Why This Symmetrical Style is a Game-Changer
First, it’s surprisingly secure. Once pinned, this style lasts through workouts, workdays, and windy weather. Second, it’s incredibly versatile. Dress it up with pearls for a quiet luxury bob adjacent vibe, or add some leather cords for a glitchy glam hair twist.
It also gives the illusion of a more intricate, time-consuming hairstyle. That symmetrical balance just looks expensive and intentional. It’s a powerful style that works on almost every hair length and texture.
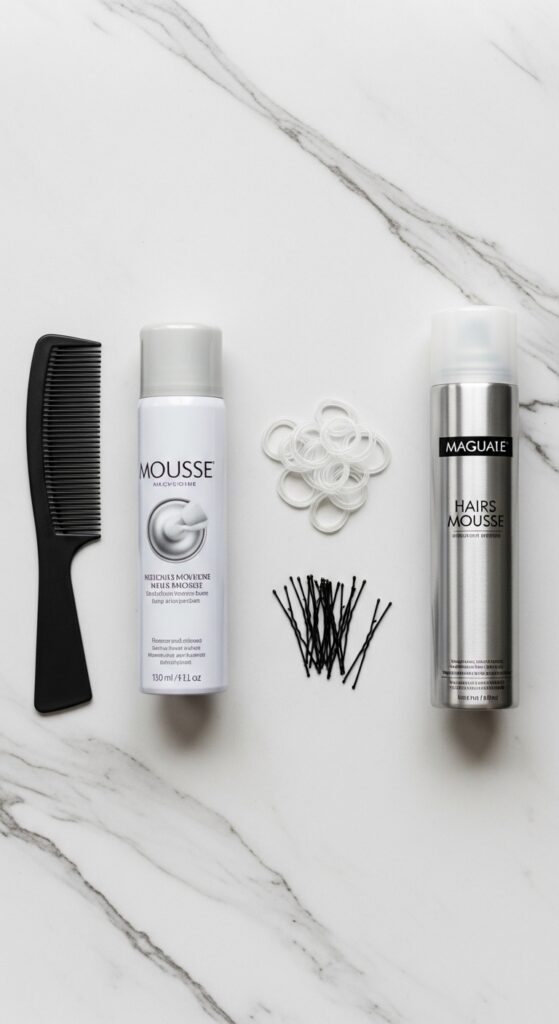
Tools You Absolutely Need (And Don’t)
- Fine-Tooth Comb: For clean, sharp parts. This is non-negotiable for symmetry.
- Strong Hold Mousse or Gel: A light formula to tame flyaways and give grip, especially on day-old hair.
- Small, Clear Elastic Bands: Two to secure the ends of your braids temporarily.
- Hair Pins (Bobby Pins): Matched to your hair color. You’ll need about 8-10.
- Light-Hold Hairspray: For a final mist to lock it all in without crunch.
You don’t need a fancy curling iron or any heat tools. This is all about technique, not gadgets.
Step 1: Start With The Perfect Base
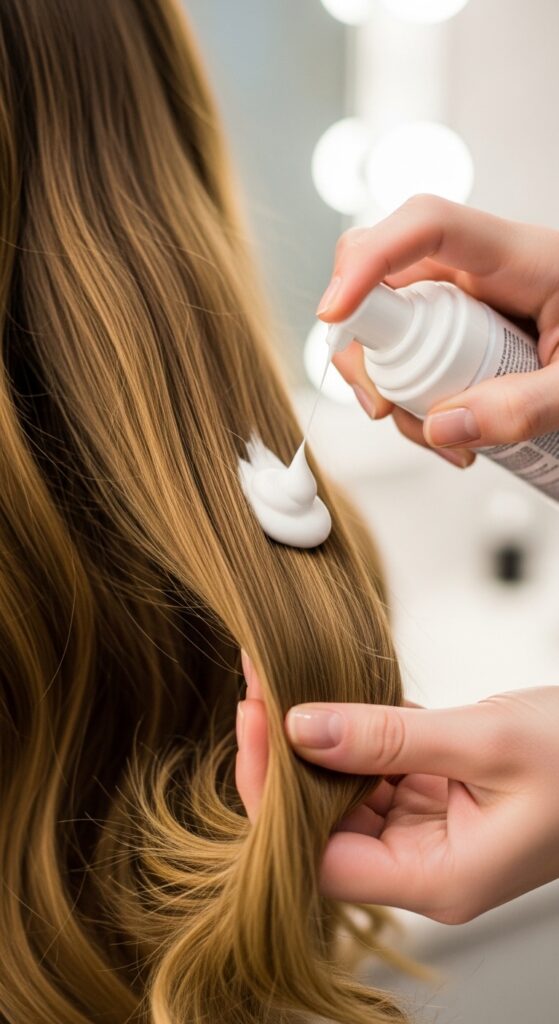
Always begin on day-two or day-three hair. The natural oils give you the best texture and grip. If your hair is freshly washed, spray a little dry shampoo at the roots. Brush through to remove all tangles.
Apply a golf-ball-sized amount of mousse or a light gel through your mid-lengths and ends. This gives the hair something to hold onto as you braid. Comb it through evenly for a uniform base.
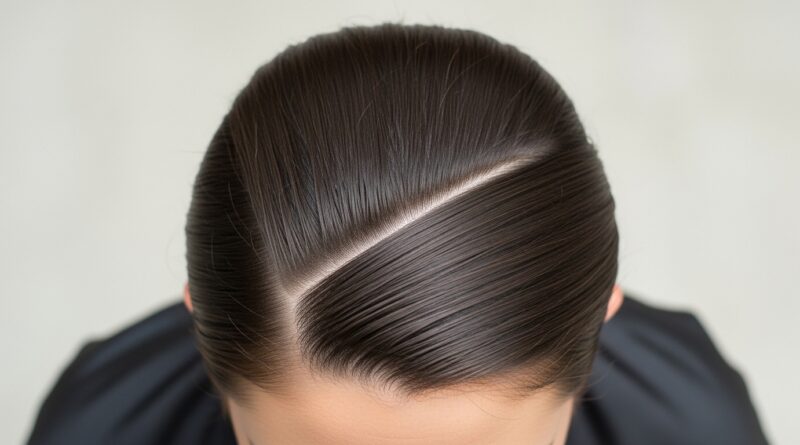
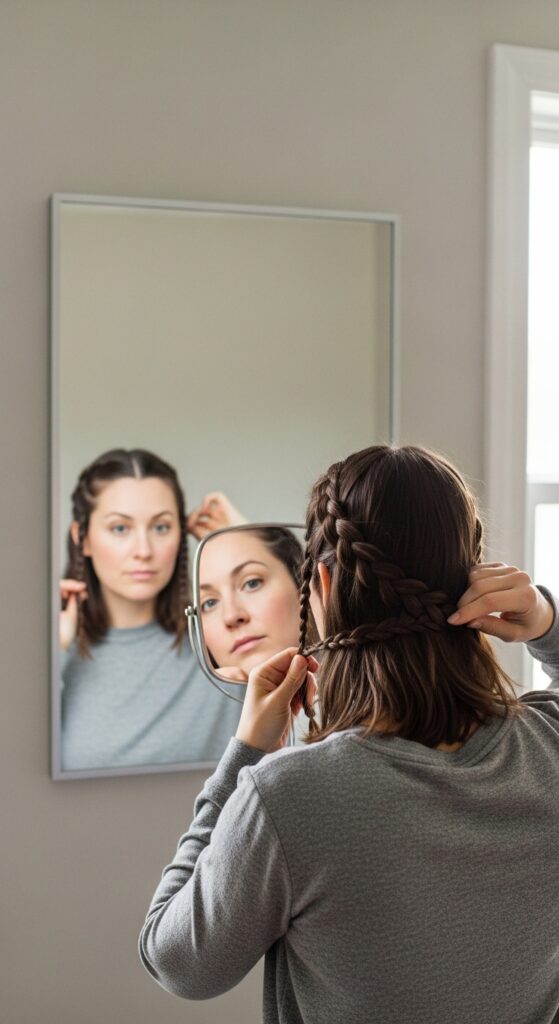
Step 2: Find Your Starting Points
Using the fine end of your comb, draw a clean, diagonal part from the top of your ear up to your crown. Do this on both sides. The section in front of this part, from your temple back, is what you’ll braid.
The back section of your hair can be loosely clipped away for now. This focused approach keeps you from getting overwhelmed. Precision here makes the whole process smoother.
Step 3: Section Your First Braid
On one side, take a triangular section of hair at your temple. This will be the start of your first ladder twist. Divide this triangle into three even strands. This is your starting point.
Keep the rest of the front section neatly combed and separate. It’s helpful to mist your fingers lightly with water or a texturizing spray for extra control as you begin the braid.
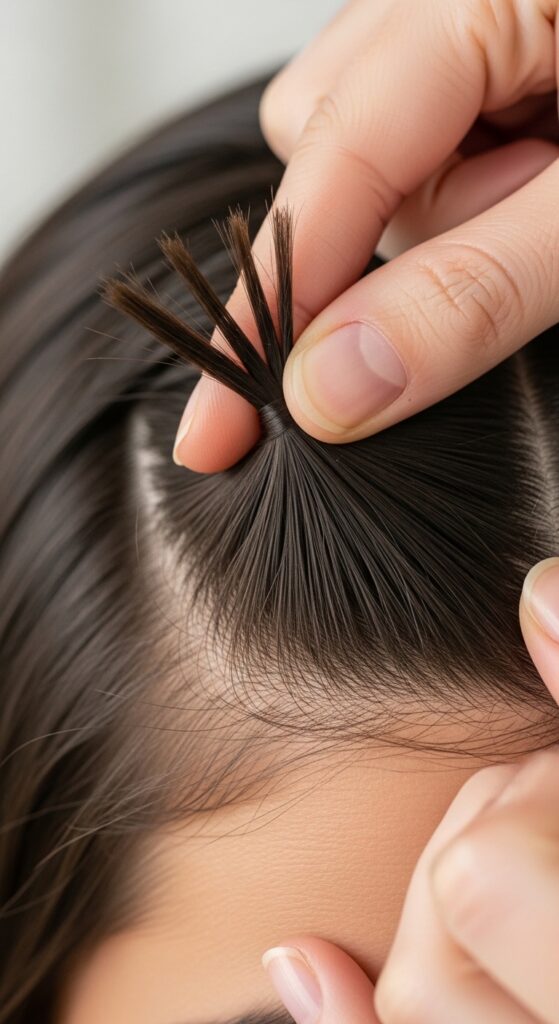
Step 4: Begin The Ladder Technique
- Start a regular three-strand braid: cross the right strand over the middle, then the left over the new middle.
- On your next crossover, before you pull the strand tight, pick up a thin, horizontal section of hair from the front section you left out.
- Add this new hair to the strand you’re about to cross over. This is how you “climb” and build the ladder.
Keep your tension firm and even. This addition of hair with each stitch is the heart of the style.
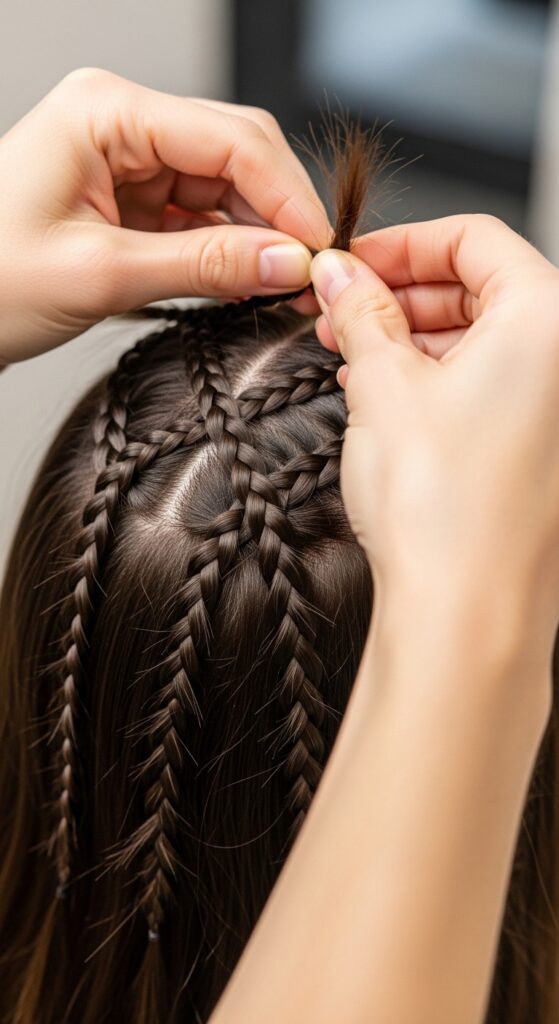
Step 5: Climb Up Towards Your Crown
Continue this process: braid, pick up a new section, incorporate it. Always pick up these new sections from the front, untouched hair. Guide the braid diagonally upwards along the part you created.
Your braid should start to lie flat against your head, creating that beautiful ladder or rope effect. Stop adding new hair once you reach the point at your crown where the two braids will meet.
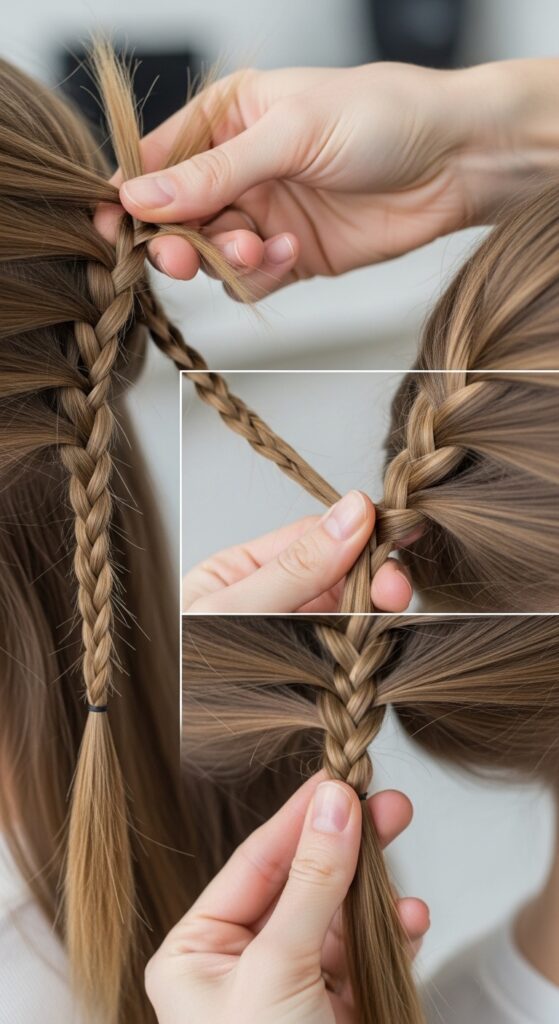
Step 6: Finish and Secure The First Braid
Once you stop adding hair, simply continue with a regular three-strand braid for a few more inches. Secure the end tightly with a clear elastic band. Don’t worry about how it looks yet.
Gently tug on the outer loops of the braid to “pancake” it slightly. This makes the braid look fuller and highlights the ladder detail. Repeat all steps on the opposite side.
Step 7: Create Perfect Mirror-Image Symmetry
This is the key to the “symmetrically balanced” look. As you braid the second side, constantly check it against the first. Count your crossovers or feel the rhythm.
Are they climbing at the same angle? Are they the same thickness? A small mirror held in your hand can help you check the back view. Take your time here—precision pays off.
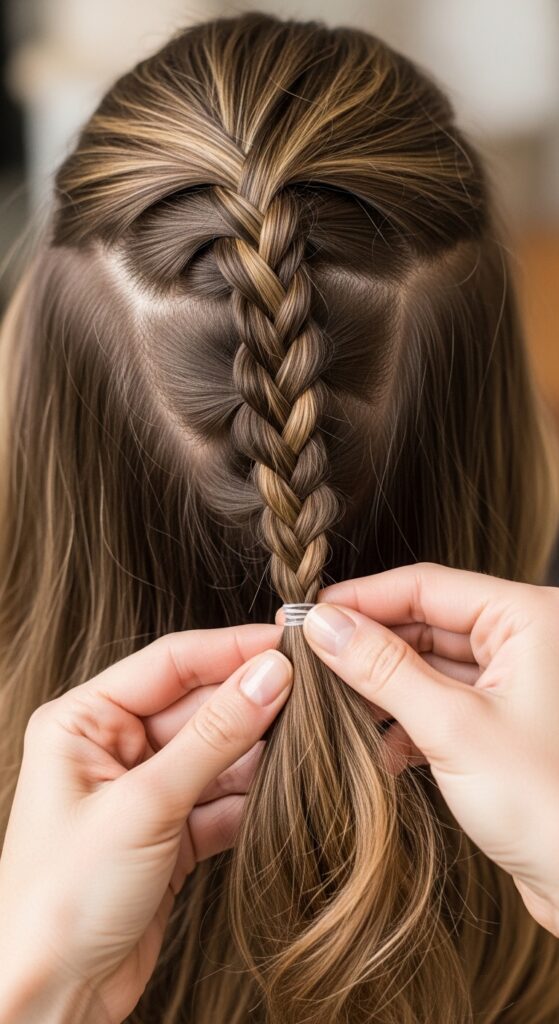
Step 8: The Secret to Joining Them Flawlessly
Once both braids are done and secured with elastics, bring them together at the crown. Cross them over each other once, as if you’re starting to tie them in a knot, but don’t pull it tight.
This creates a natural, integrated look. It’s much more elegant than just gathering them into a ponytail. This is where the magic of balance really comes together.
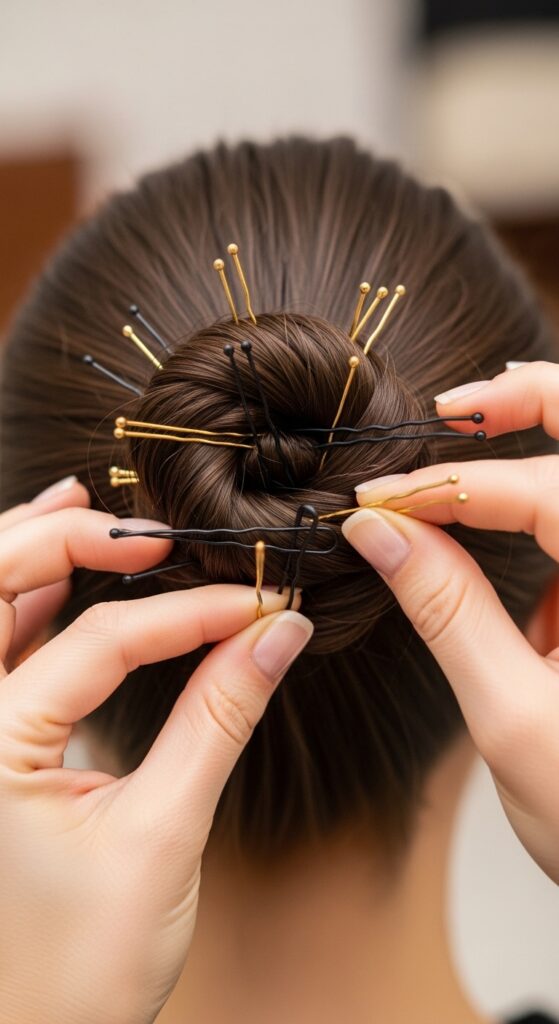
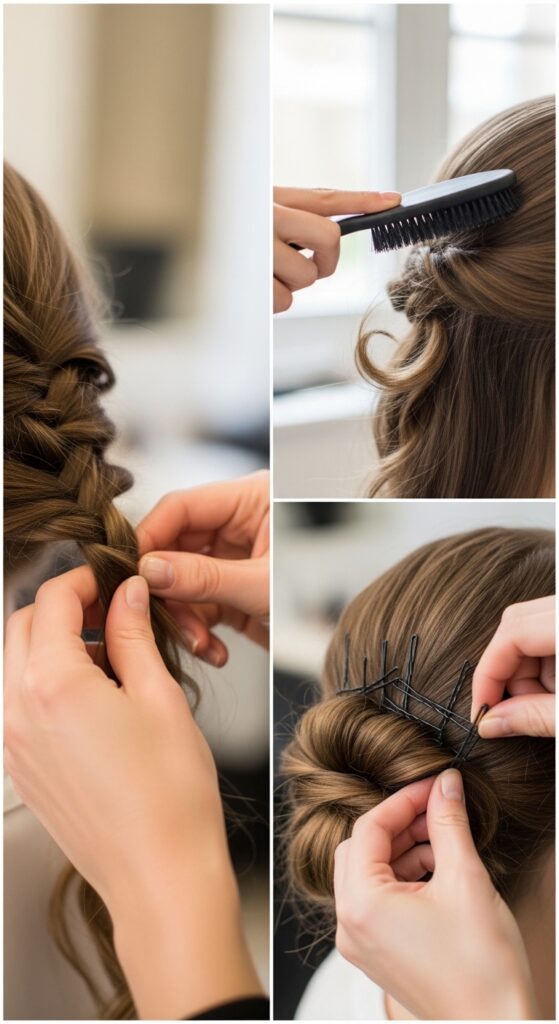
Step 9: Hide the Ends & Pin Like a Pro
Twist the remaining lengths of the two braids together. Then, coil this twisted section into a small, flat bun or knot. Tuck the elastic-bound ends underneath.
Use your bobby pins in a “criss-cross” pattern to secure the knot against your head. Push them through the knot and into the base of your hair underneath. They should be virtually invisible.
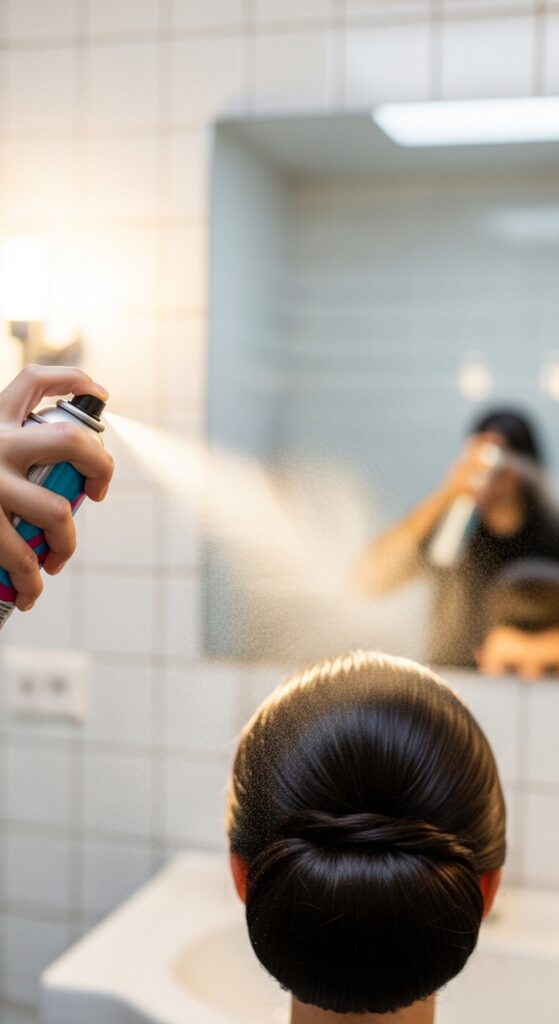
Step 10: The Final Touch for Lasting Hold
Lightly mist your entire head with a flexible-hold hairspray from about 12 inches away. This sets the style without making it stiff. If you have any wispy baby hairs, you can use a tiny bit of gel on a toothbrush to smooth them.
Finally, give the braids one last gentle tug to accentuate their volume. You’re done! This style is now locked in for the day.
Adapting It For Shorter Hair (Lobs & Bobs)
If you have an asymmetrical lob or a bob, you can still rock this! Just modify the “ladder.” Start your braid higher, closer to your part, and only add hair for 3-4 crossovers instead of 14.
Finish by pinning the short braid ends back behind your ear, or let them blend into your natural texture. It becomes a gorgeous, detailed accent rather than a full head style.
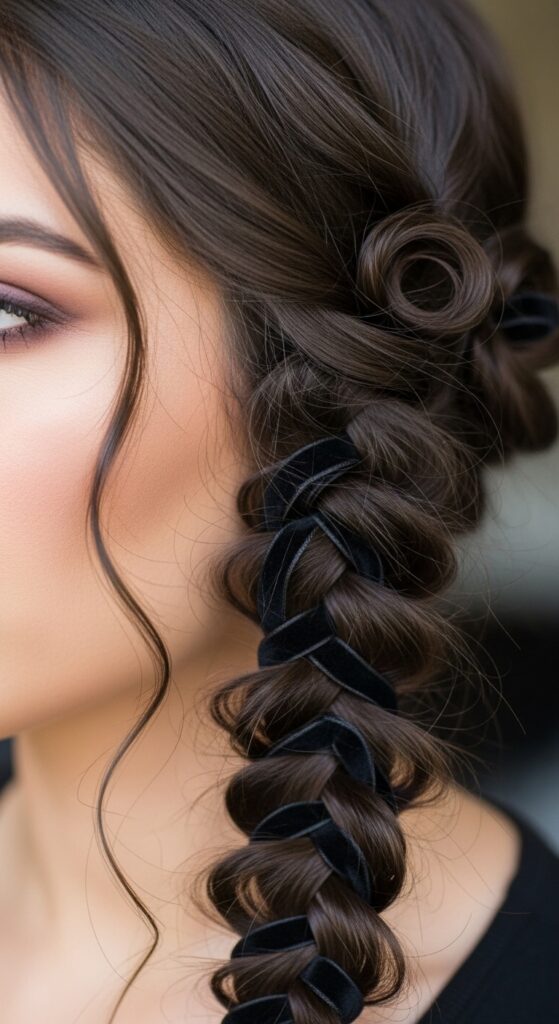
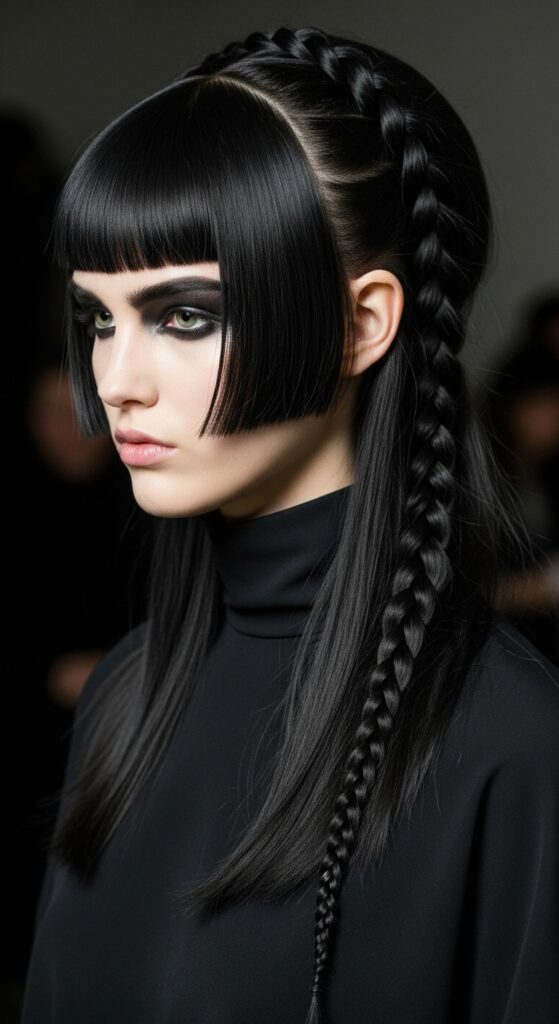
Channel Your Inner Romantic Goth Vibe
This style is a perfect base for romantic goth hairstyles. Before you start, weave a thin, black velvet ribbon or a delicate chain into the sections of your hair. Braid it right in.
Once finished, pull out a few soft, face-framing pieces and curl them loosely. Add a dark, dramatic lip. The contrast of the structured, symmetrical braids with soft, romantic details is everything.
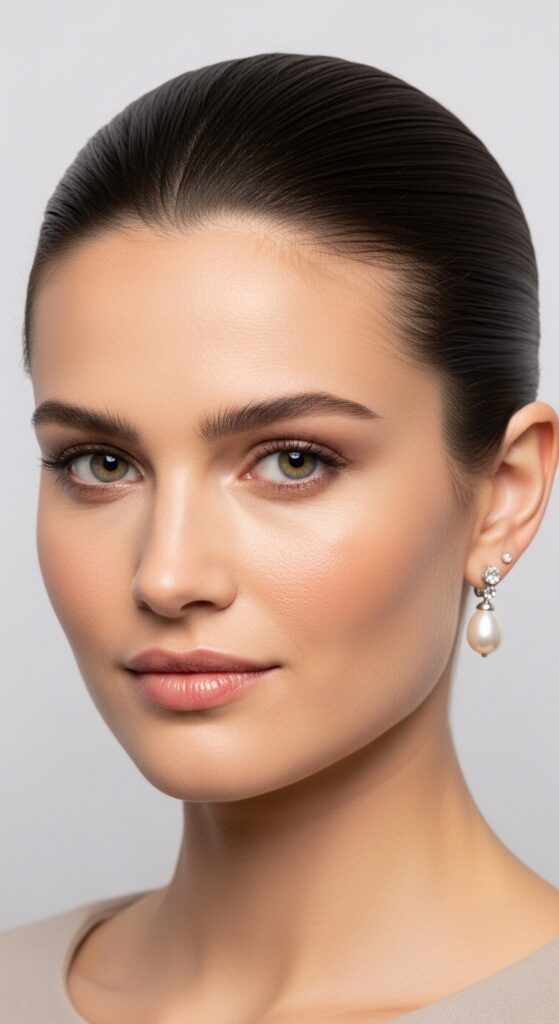
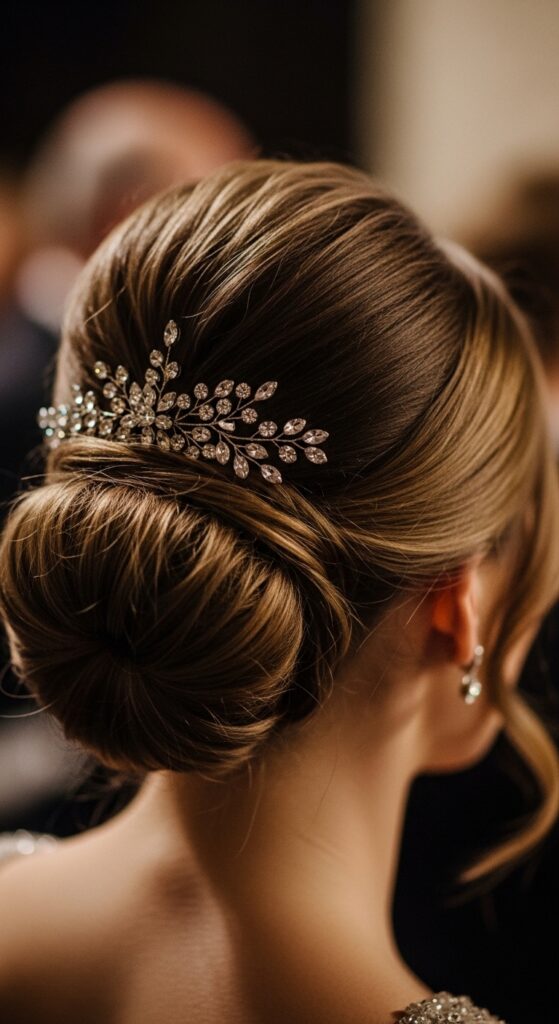
Elevate It to Quiet Luxury Status
For that old money hair or quiet luxury bob feeling, perfection is key. Ensure every hair is sleek. Use a stronger gel for a slicked-back, polished start.
Keep the braids tight and perfectly mirrored. Instead of a messy knot, tuck the ends under and pin them so flawlessly it looks like your hair just grows that way. Pair with minimalist gold jewelry.
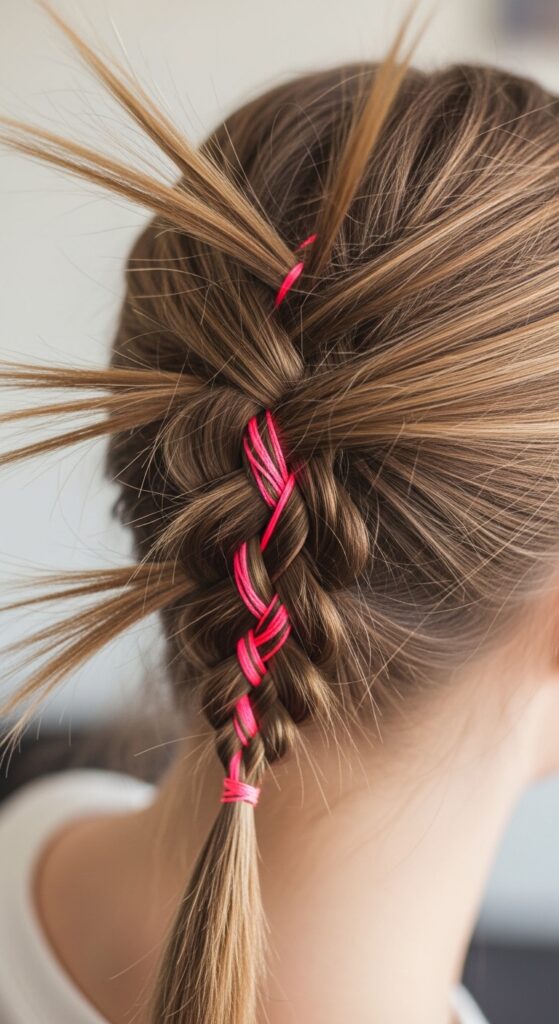
Try The Glitchy Glam Hair Interpretation
Glitchy glam hair is all about intentional imperfection. After braiding, aggressively “pancake” or pull apart sections of the ladder to make it look deconstructed. Leave out chunky, uneven pieces.
Use a texturizing spray for a piece-y, lived-in feel. Maybe even braid in a few strands of metallic silver or neon thread for a literal “glitch.” It’s cool, unexpected, and so fun.
Make It Edgy: The Vampire Haircut Cousin
This symmetrical braid is a natural partner to the sharp, vampire haircut. If you have a heavy fringe or curtain bangs, this style makes them pop. Keep the braids very tight and close to the head.
Pair it with a deep side part for extra drama. The look is structured, a little severe, and utterly captivating—perfect for making a statement.
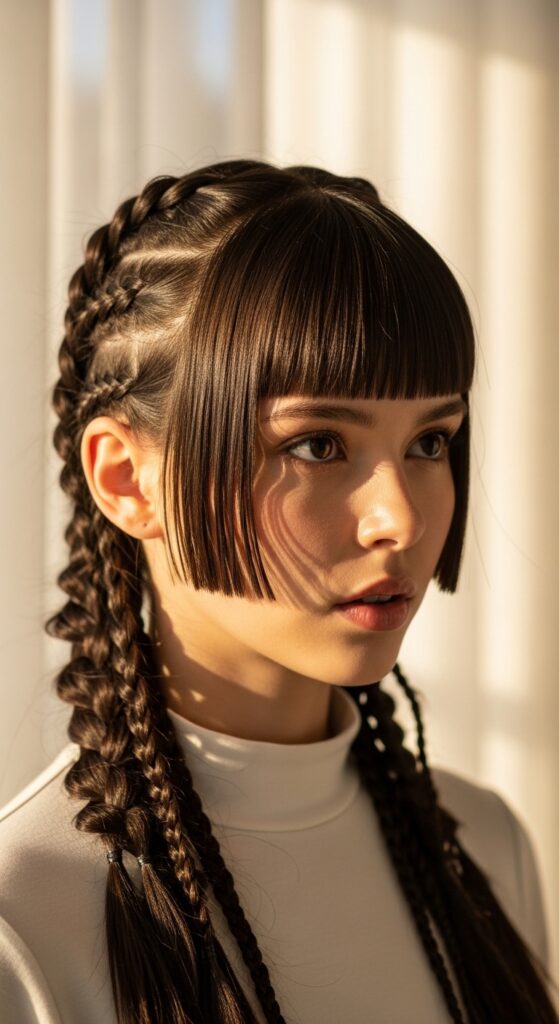
Play With Hime Cut Energy
The hime cut is all about dramatic, straight-across blocks of hair. If you have this cut or something similar, this braid style beautifully highlights those graphic lines.
Braid from your temple back, letting the straight, untouched front pieces (the hime) frame your face in a stark contrast to the intricate braid. It’s a gorgeous mix of simplicity and detail.
Quick Fixes For Common Braiding Problems
- Braids Too Loose? Braid slightly damp hair or use more product next time. You can gently tighten by pulling the braid sections upwards.
- Uneven Sections? Use the comb to re-part and start over on that small section. It’s worth the extra minute.
- Flyaways Everywhere? A tiny bit of hairspray on a clean toothbrush tames them instantly.
- Braids Won’t Stay Pinned? Make sure your pins are going through the braid and into your base hair. Criss-cross them for security.
How to Make This Style Last All Night
To go from day to night, this style has your back. Carry a few extra bobby pins and a travel hairspray. If the braids loosen, you can often tighten them by gently pulling sideways on the outer loops.
For a night out, carefully pull out a few more pieces around your face for a softer look. Add some sparkly clips where the braids meet at the crown for instant evening glam.
My Final Pep Talk For You
Your first try might not be perfect, and that’s 100% okay. Braiding is a muscle memory skill. The second and third time will be exponentially easier. Practice while watching TV.
Focus on getting the “add-in” technique down first, then work on symmetry. This isn’t just a hairstyle; it’s a confidence-builder. Mastering this makes you feel like you can tackle any look.
So there you have it—your complete guide to conquering the Double 14 Ladder Twist. It’s more than just a braid; it’s a versatile tool in your style toolkit that can morph to fit any aesthetic you’re feeling, from luxe to goth to glam.
Remember, the best hair looks come from playing, practicing, and making a style your own. Don’t stress about getting every single crossover exactly right. The beauty is in the balanced, handcrafted feel it gives.
Save this post to Pinterest so you can always find these steps when you need them! Did you try it? I’d love to know—tag me on social or leave a comment below telling me which vibe you went for: quiet luxury or romantic goth?