
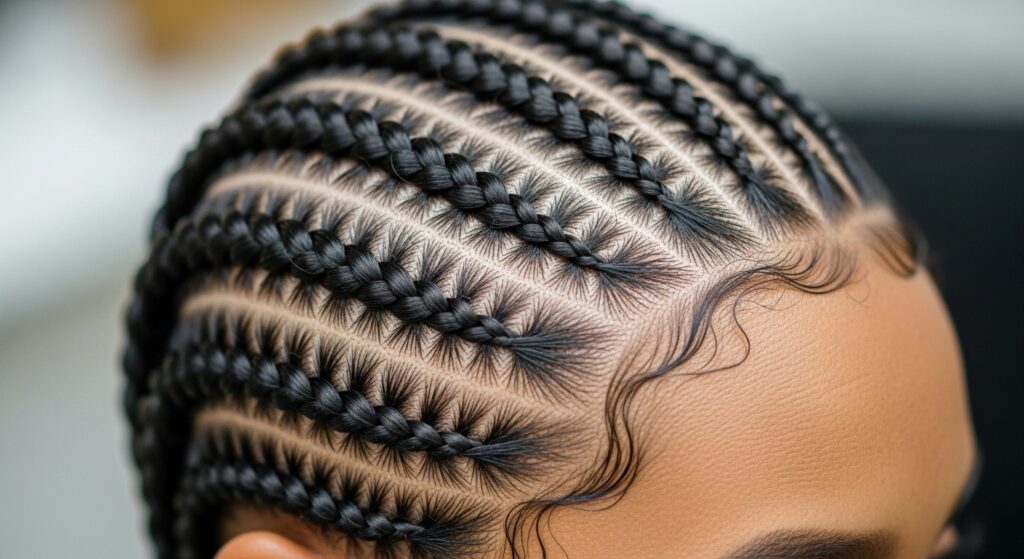
Double 16 Ladder Cornrows Climbing Sides for Architectural Precision
Okay, let’s be real. Sometimes a hairstyle is more than just a look—it’s a statement. It’s wearable art. And if you’re scrolling through 2026 hairstyle predictions or dreaming of that architectural, clean-girl aesthetic, you’ve probably seen the vibe. It’s sharp, it’s precise, and it makes you look like you have your entire life together.
Today, we’re diving deep into one of the most stunning techniques to nail that look: Double 16 Ladder Cornrows Climbing Sides. Sounds intricate? It is. But it’s also incredibly achievable and unbelievably chic.
Whether you’re drawn to the drama of romantic goth hairstyles or the sleekness of old money hair, this style bridges the gap. It’s structural, it’s bold, and it teaches you a skill you can use in so many ways. Let’s break it down, step-by-step, so you can master it at home.
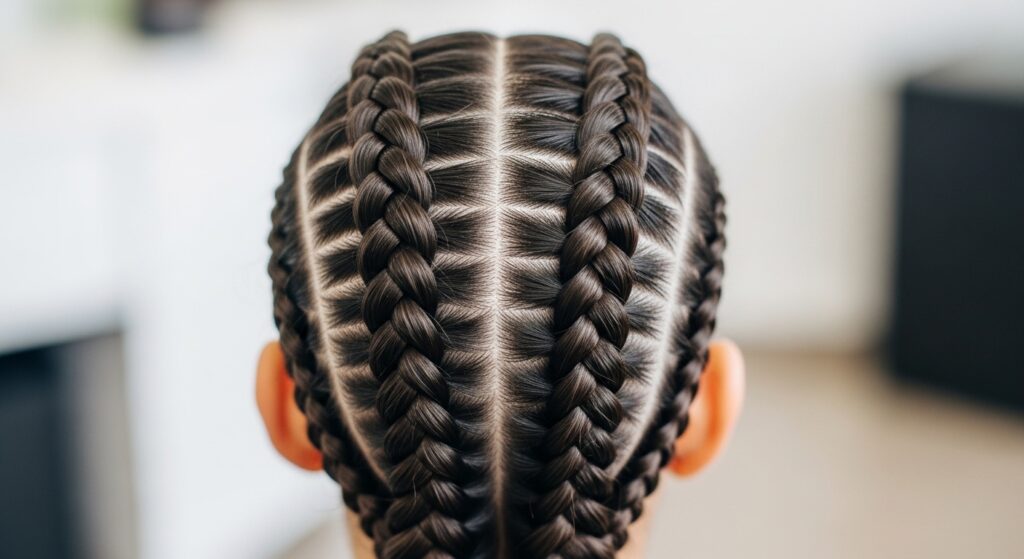
What Are Double 16 Ladder Cornrows?
First, the name explains a lot. “Double 16” means you’re creating two sets of 16 individual braids—eight on each side of your head. The “ladder” part refers to the technique where the cornrows are connected horizontally, creating a climbing, lattice-like effect up the sides of your head.
It’s not your everyday cornrow. This is about architectural precision. Think of it as the hairstyle equivalent of a perfectly tailored blazer. It’s structured, intentional, and commands attention without saying a word.
Why This Style is a Total Game-Changer
This look is versatile. It works for a high-fashion event, a music festival, or just as a powerful everyday style if you’re feeling bold. It takes the foundational idea of protective styling and elevates it into high art.
You’re also learning a technique. Once you get the ladder method down, you can apply it to simpler styles, like an asymmetrical lob with a single accent braid. It’s a skill that unlocks creativity.
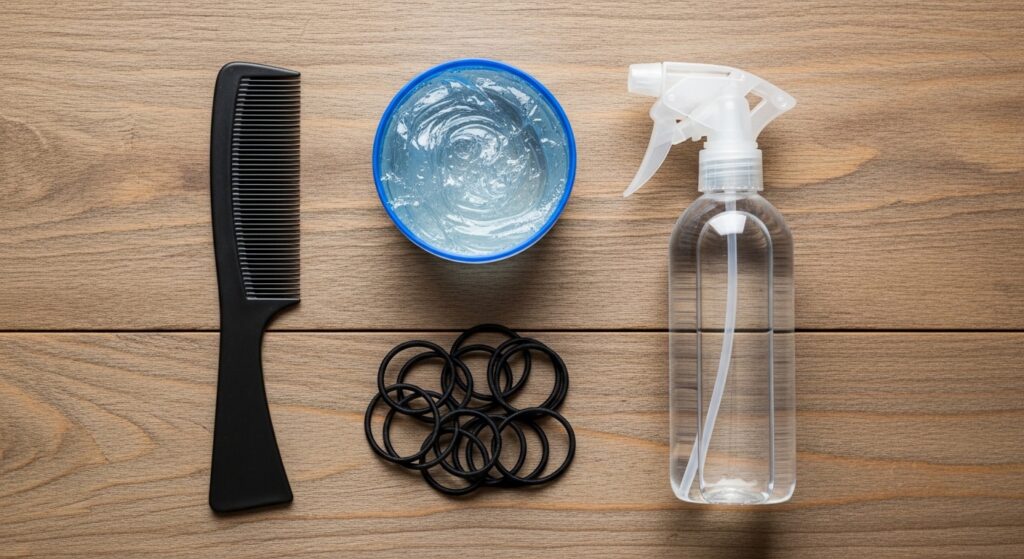
The Tools You Absolutely Need
Don’t try to wing this with the wrong tools. You’ll just get frustrated. Here’s your non-negotiable kit list:
- Rat-tail comb: For those super clean, sharp parts. This is key for the architectural look.
- Strong-hold edge control or gel: A lightweight gel works best to lay edges without flaking.
- Small hair elastics: Clear or black ones to secure the ends of each braid neatly.
- Mist spray bottle with water: Keep the hair damp for easier manipulation.
- Good lighting and a mirror: You need to see what you’re doing from all angles.
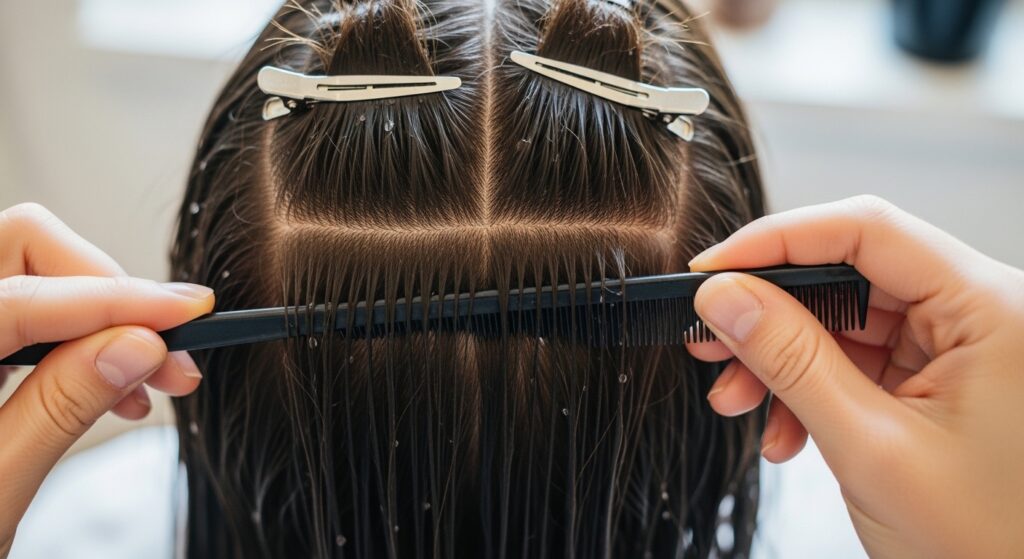
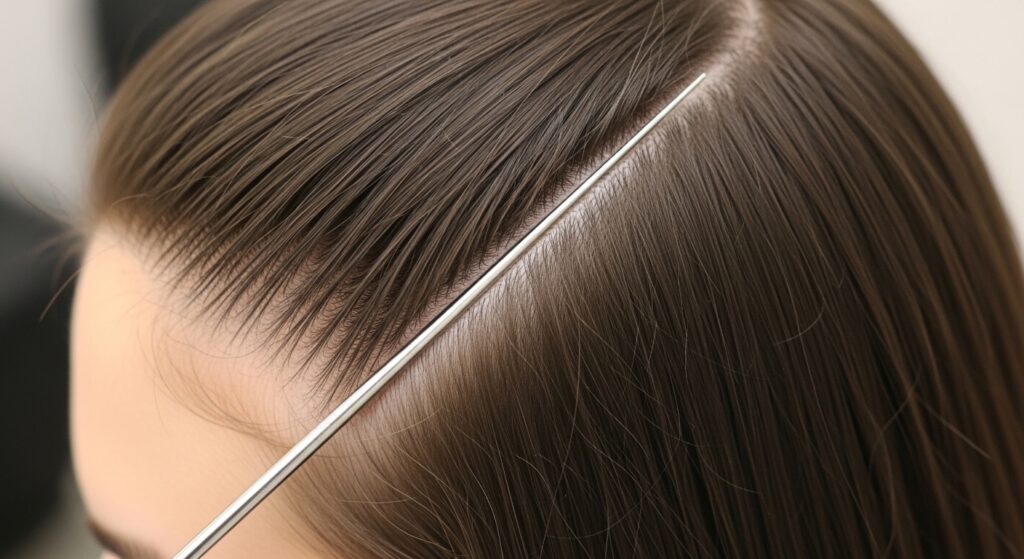
Prepping Your Hair is Everything
Start with clean, detangled hair. If your hair is dry, a light conditioner spray can help. The goal is hair that’s manageable but not slippery.
Section your hair into four main quadrants first: top left, top right, bottom left, bottom right. Clip the top sections away. We always start at the bottom to build a solid foundation. Apply a little gel to the section you’re working on first.
Mapping Out Your First Section
Take your first bottom section. Using the tail of your comb, map out a diagonal line from the nape of your neck up towards your temple. This will be the path your first ladder climbs.
The width of each braid section should be even. I use the comb’s teeth as a guide. Mark this section with the comb before you even pick up hair to braid. Precision here saves time later.
Starting Your First Base Cornrow
Begin your first cornrow at the very bottom, following that diagonal line. Braid tightly and cleanly, adding in hair as you go. This first braid is the “rung” of your ladder.
Braid it all the way to the ends and secure it with a small elastic. Don’t worry about connecting it yet. We’re just establishing the first line. Keep the tension even for a smooth look.
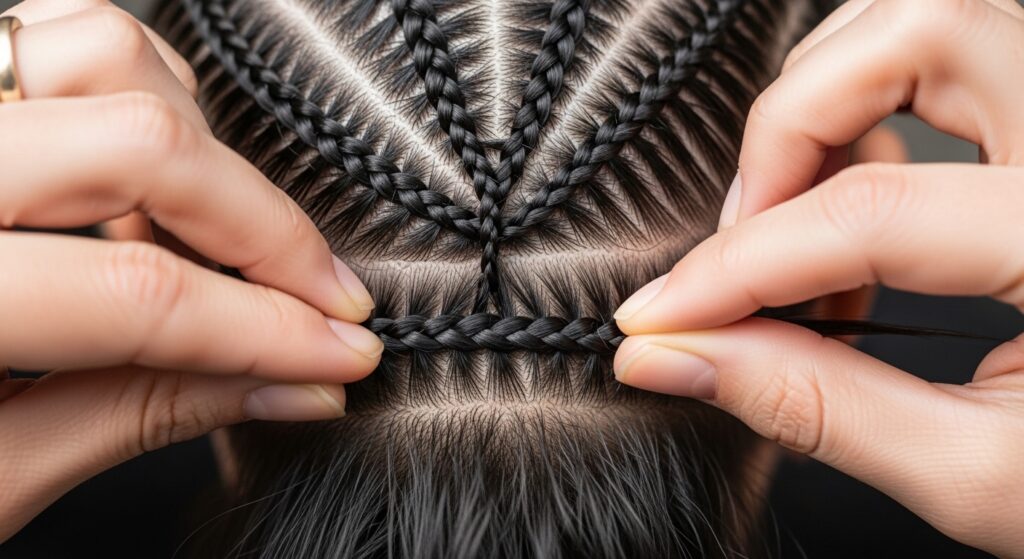
Creating the Second Braid & The Ladder
Now, directly above your first braid, map out a parallel part. This creates the next section of hair. Start braiding this second cornrow. Here’s the magic: as you braid, you will incorporate the tail of the first braid into it.
Pick up the tail of the first braid as if it’s a strand of hair, weaving it horizontally into the base of the second braid. This creates the “ladder” connection. It should look like the braids are linked.

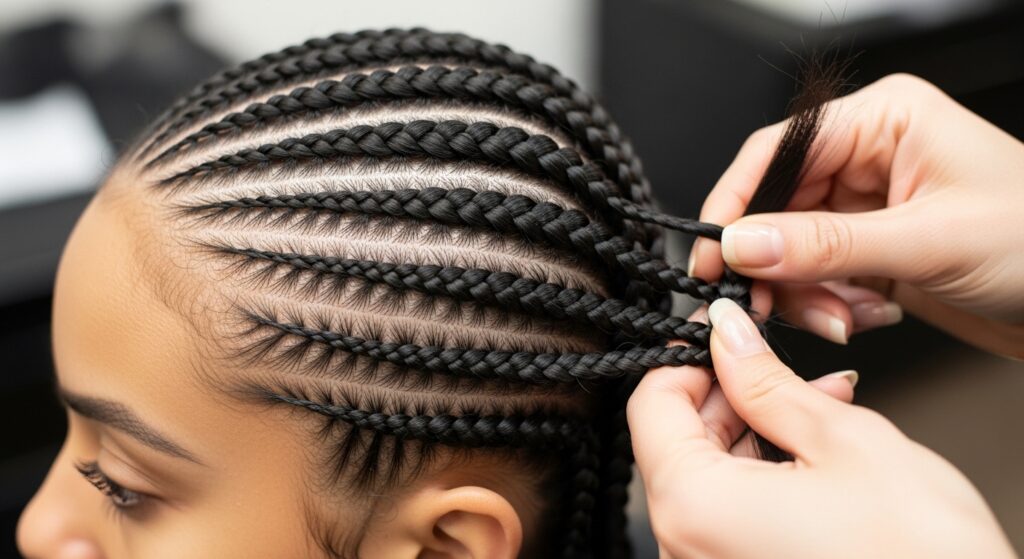
Repeating the Ladder Process
Continue this exact process. Braid a rung, secure it. Start the next braid above it, and as you do, pick up the tail of the braid below to connect them. This creates the climbing effect.
Work your way up this diagonal line until you have eight connected cornrows on this one side. That’s your first set of 8. Consistency in the size and spacing of each braid is what makes it look professional.
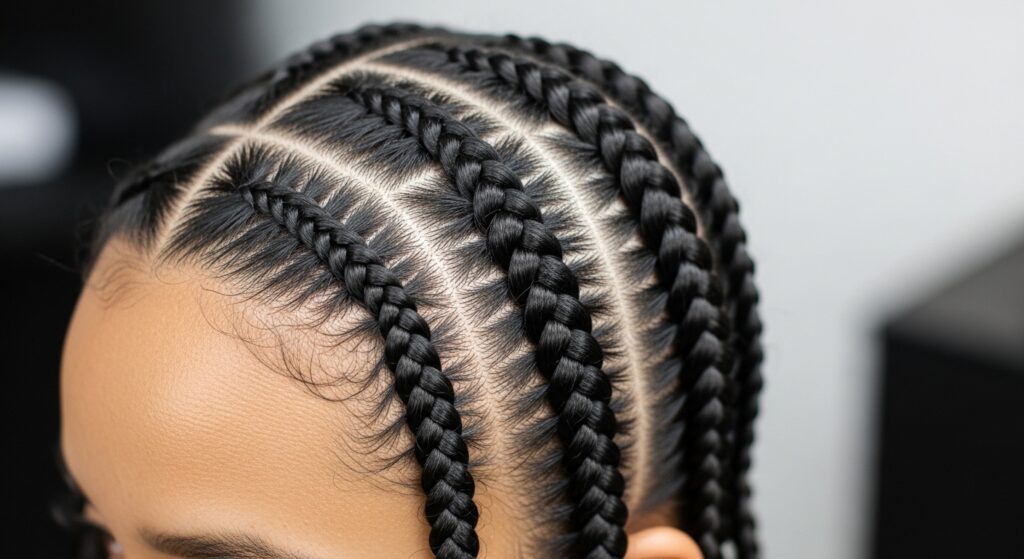
Moving to the Second Diagonal Line
Once your first ladder of eight is complete, move to the section directly behind it. Create a new, parallel diagonal line. You will now create a second ladder of eight cornrows right next to the first one.
This second set should mirror the first perfectly. The goal is to have two distinct “columns” of ladder braids climbing the side of your head. This is the “Double 16.”
Mirroring on the Other Side
Repeat the entire process on the opposite side of your head. This is where patience pays off. Try to match the angle, braid size, and tension as closely as possible to the first side for symmetry.
It might feel slower the second time, but you’ve already practiced! Use your first side as a visual guide to keep everything balanced.
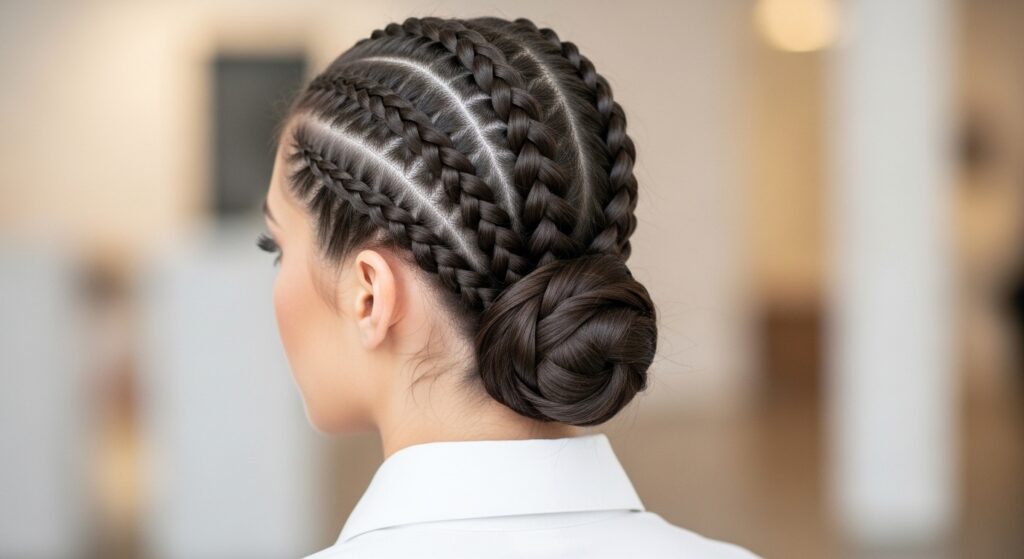
Dealing with the Crown & Back Hair
Once all four ladders (two on each side) are complete, you’ll have hair left in the center crown and back. You have options here. For a ultra-clean look, continue the cornrows back into a single, gathered braid or ponytail.
For a more deconstructed vibe—think glitchy glam hair—you can leave the back hair in a sleek, textured bun or even down, contrasting the structured sides.
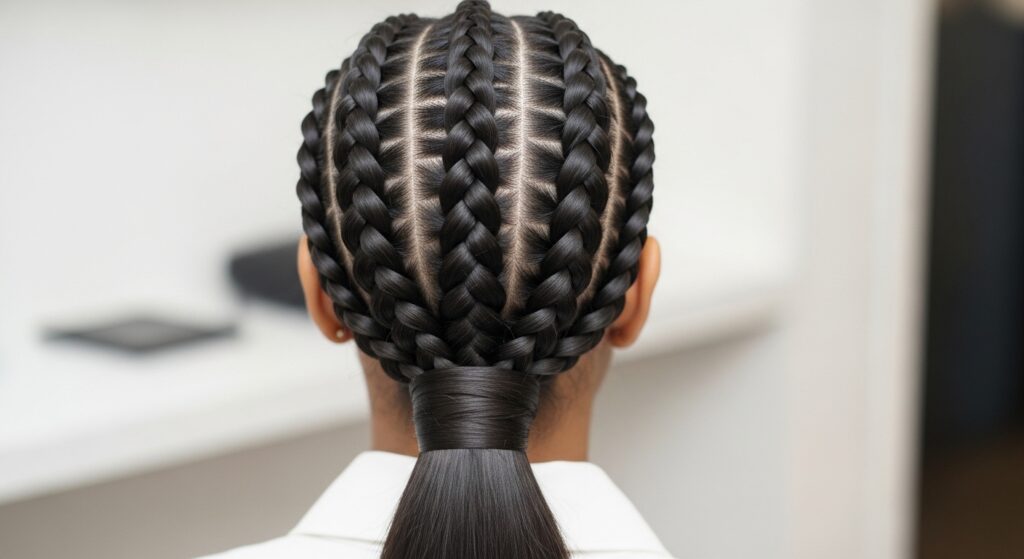
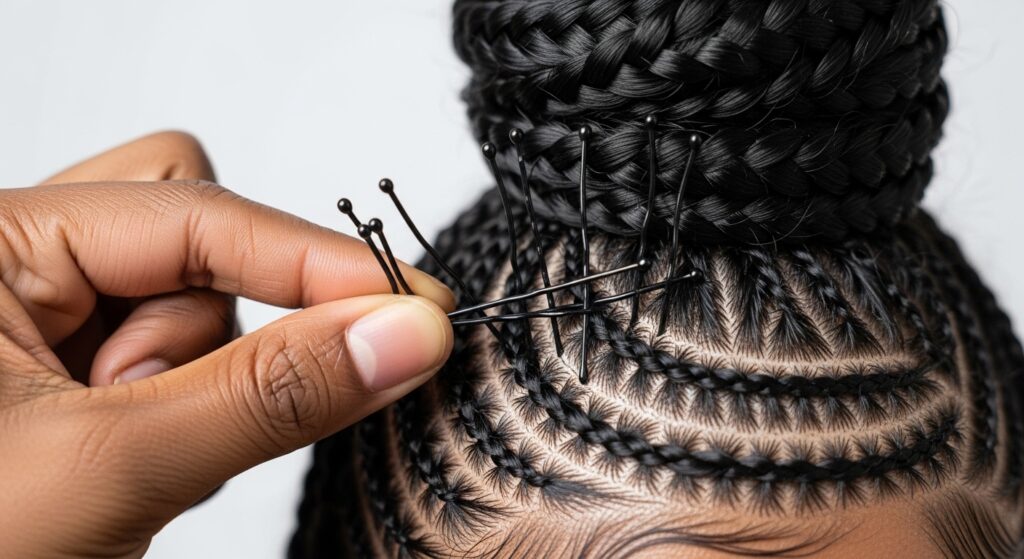
Securing and Tucking Ends
However you style the back, make sure all your braid ends are secured and tucked in neatly. You can coil them under and pin them with bobby pins, or gather them all into the base of your ponytail or bun.
The key is no loose ends. This ensures the style lasts for days and looks polished from every single angle. A little gel on a toothbrush can smooth any flyaways around your edges.
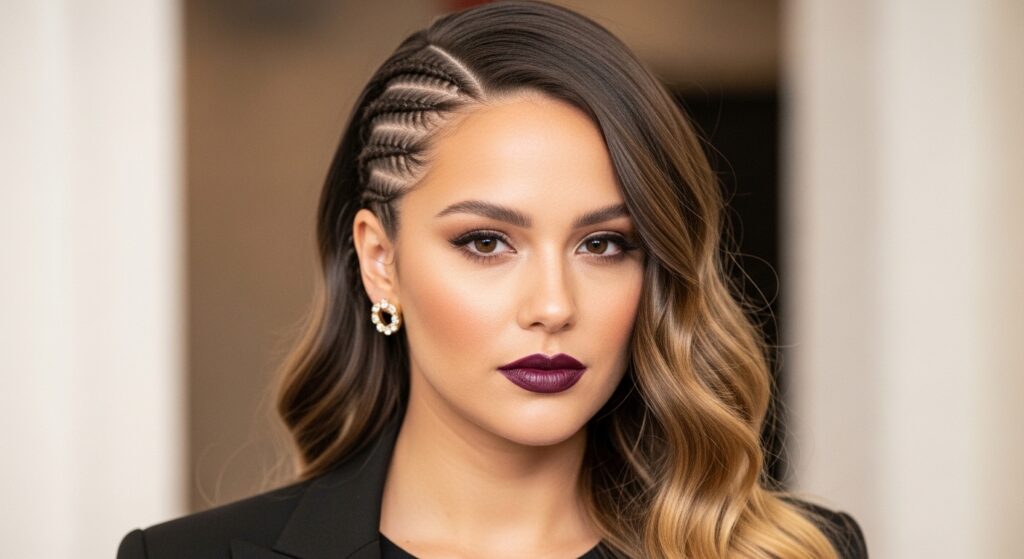
Styling for Different Vibes
This is where it gets fun. This base style is a chameleon. Pair it with dramatic makeup for a vampire haircut feel. Add tiny gold cuffs to the braids for a quiet luxury bob twist.
Or, let the back hair be a soft, romantic wave to edge into romantic goth hairstyles territory. The structured sides do all the talking.
How to Make It Last All Week
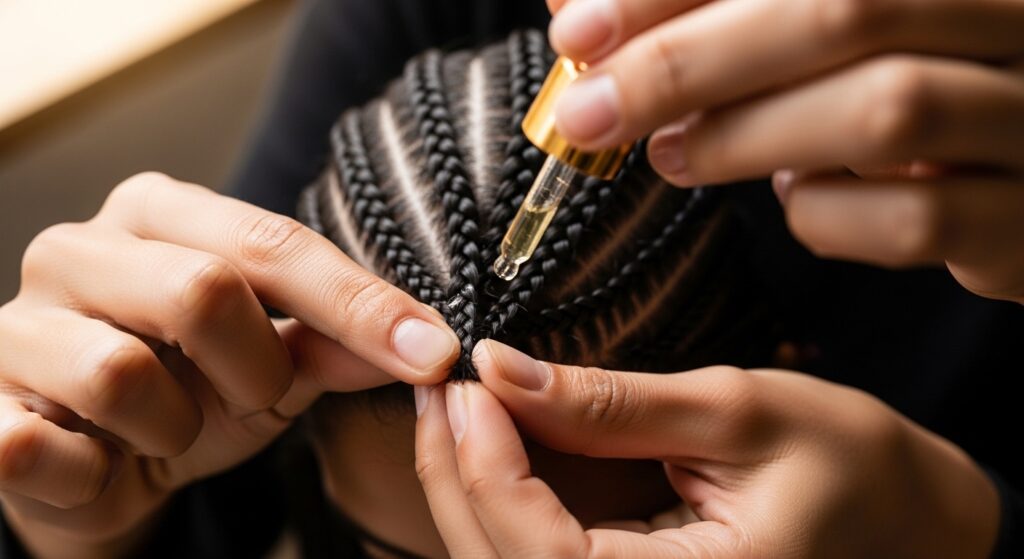
This is a protective style meant to last. At night, wrap your head in a silk or satin scarf. This reduces friction and keeps the braids from frizzing.
Use a light oil spray on your scalp between the braids for moisture. If the front edges get loose, you can lightly re-gel them without redoing the whole style.

Common Mistakes to Avoid
- Parts that are too wide: Makes braids bulky and hard to connect neatly.
- Uneven tension: Causes braids to look wavy or bumpy instead of flat.
- Starting with dirty or dry hair: Leads to frizz and a shorter wear time.
- Rushing the ladder connection: Take your time to pick up the previous tail cleanly.
Adapting for Shorter Hair
Have an asymmetrical lob or a hime cut? You can still rock this! The ladders will just be shorter. Focus the braids on the longer side of your cut for a dramatic, architectural effect.
You may only get 4-5 “rungs” per ladder instead of 8, but the impact will be just as strong. It’s a perfect way to add edge to a precision cut.
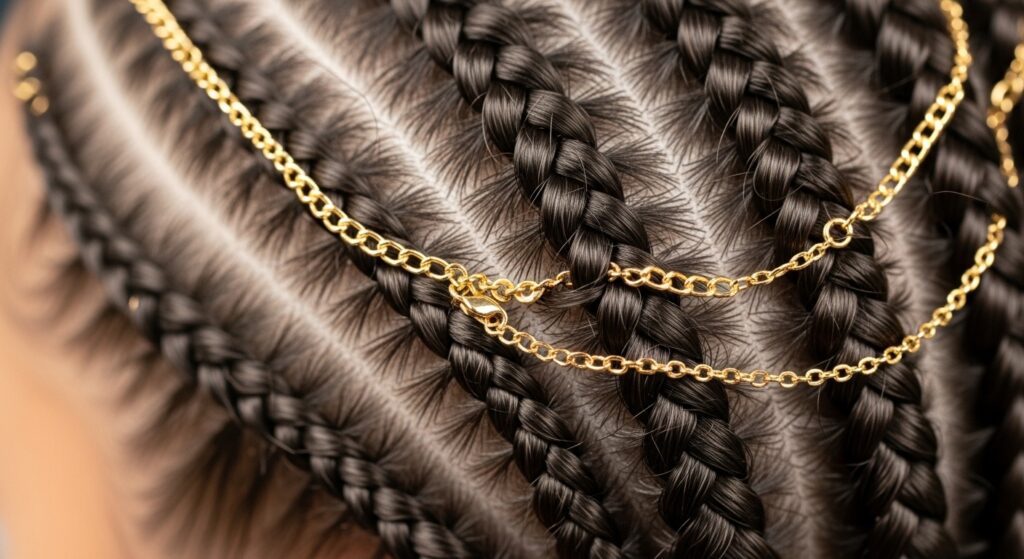
Pairing with Hair Accessories
Once the braids are in, it’s accessory time. Think minimalist. Thin, metallic chain accessories woven through the ladders are stunning. Or, small pearl-ended pins placed at the junctions of the ladder.
Less is more. The style itself is the star. An accessory should accent, not overwhelm, the geometric lines you’ve created.
Taking It Down Gently
When it’s time to remove the style, be patient. Carefully cut the elastics (don’t pull!). Use a detangling conditioner or oil and slowly unravel each braid from the bottom up.
Detangle with your fingers first, then a wide-tooth comb. Your hair has been protected, so treat it gently to maintain all that health and length.
How This Fits Into 2026 Trends
We’re moving towards styles that are intentional and artful. This isn’t a passing fad. It’s part of the movement towards hair that looks designed—whether that’s the clean geometry of this or the soft layers of a hime cut.
It mixes the DIY spirit with high-fashion execution. It’s personal, it’s powerful, and it perfectly captures the blend of structure and individuality we’re seeing everywhere.

Your Confidence is the Best Accessory
Walking out with a style this detailed, you will get looks. Own it. This hairstyle says you pay attention to detail, you value craftsmanship, and you’re not afraid to stand out.
That confidence transforms any look from a mere hairstyle into a part of your personal brand. It’s the ultimate quiet luxury—knowing your own skill and wearing it proudly.

Ready to Try It? Your Game Plan
- Block out time: Set aside 2-3 hours for your first attempt. Don’t rush.
- Gather your tools: Have everything from the list within arm’s reach.
- Watch a visual guide: Read this, then search “ladder cornrow tutorial” to see it in motion.
- Start on a weekend: Give yourself the grace to learn and maybe even re-do a section.
- Show it off: Tag us @HaileyAndTeam when you do! We love to see your creations.
So, there you have it. What seemed like an impossibly intricate style is now a set of clear, manageable steps. The beauty of a look like this is in the doing—the focus it requires, the skill it builds, and the stunning result you get to wear.
It’s more than just braids. It’s a lesson in patience and precision that leaves you with a head-turning masterpiece. And honestly, what’s better than that feeling?
I hope this guide gives you the courage to try it. Remember, the first time is always a learning experience. Be kind to yourself, and have fun with the process. You’ve got this.
Save this post to Pinterest to keep this guide handy for your next braiding session! And tell me in the comments—what’s the most adventurous hairstyle you’ve ever tried at home?