Embrace 27 Dutch Ladder Braids Climbing Gracefully Up Your Head
Okay, let’s be real. We’ve all seen that one stunning photo of a girl with intricate braids climbing up her head and thought, “That’s gorgeous, but I could never.” I’m here to tell you that you absolutely can. This isn’t just a fantasy hairstyle; it’s a totally achievable, show-stopping look.
Dutch ladder braids are the secret. They look complex, but the technique is just a simple twist on a classic Dutch braid. The “ladder” effect creates these beautiful, airy windows that make the style feel light, romantic, and incredibly elegant.
Whether you’re prepping for a wedding, a festival, or just want to feel like a queen on a Tuesday, this guide will walk you through it, step-by-step. I promise it’s easier than it looks, and the result is pure magic. Let’s get your hair game to a whole new level.
What Are Dutch Ladder Braids, Exactly?
Think of a Dutch braid, which is an inside-out French braid where you cross sections under, not over. Now, imagine leaving deliberate, intentional gaps as you braid. That’s the ladder part.
Instead of adding in all your hair tightly, you drop small sections at regular intervals. This creates those stunning “rungs” or open spaces along the braid. It’s a gorgeous mix of intricate and effortless, perfect for adding texture and interest.
Why This Style is a Total 2026 Hair Trend
We’re moving towards styles that feel personal and artful. This braid fits right into the 2026 hairstyles forecast, which is all about detailed craftsmanship and wearable art. It’s not just a braid; it’s a statement.
It also taps into the quiet luxury hair trend—it’s sophisticated without screaming for attention. The look says you put in thought and care, which is the ultimate vibe. It’s romantic, it’s graceful, and it’s about to be everywhere.
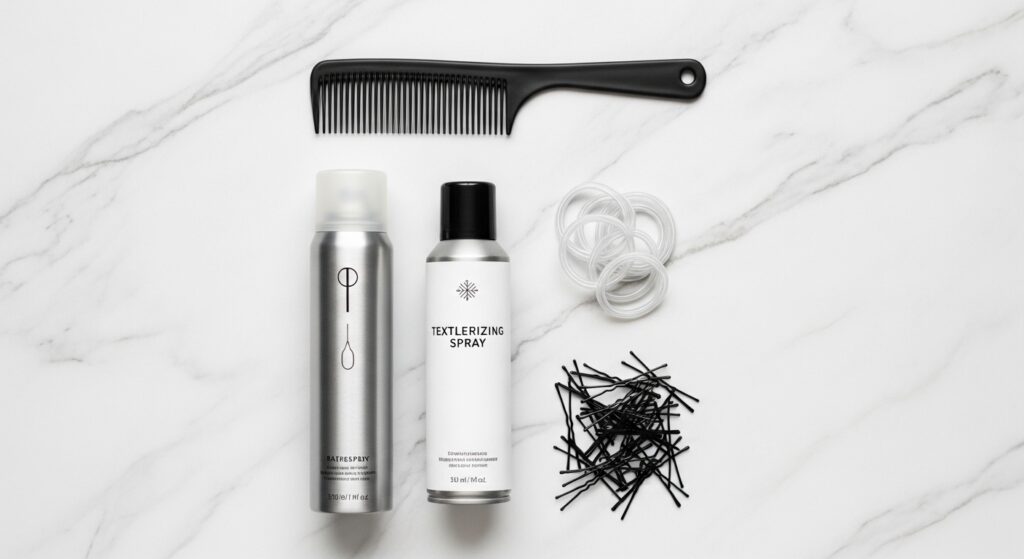
Gathering Your Simple Tool Kit
You don’t need much! Here’s your checklist:
- A fine-tooth comb for clean parts
- Strong-hold hairspray (a must for flyaways)
- Light-hold texturizing spray for grip
- Small clear elastic bands
- Bobby pins that match your hair color
- A mirror you can turn to see the back
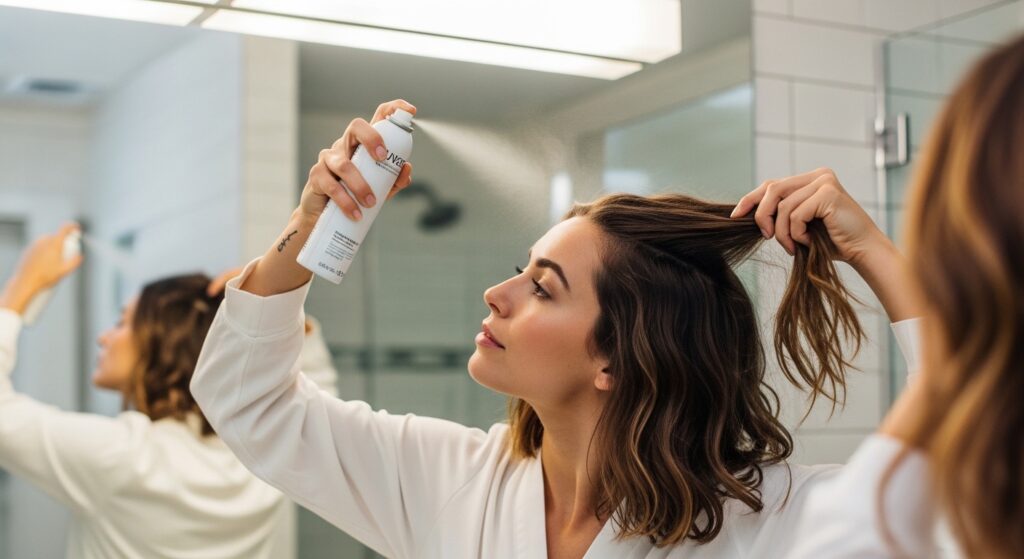
Start with the Perfect Hair Prep
This style works best on day-old hair that has a bit of natural texture and oil. If your hair is freshly washed, spray in some texturizing spray or dry shampoo at the roots. Slightly gritty hair holds braids so much better.
Brush through any tangles completely. You want smooth sections to work with. I don’t recommend using any heavy creams or oils, as they can make the hair too slippery for the braid to hold its shape.
Mapping Out Your Braid Paths
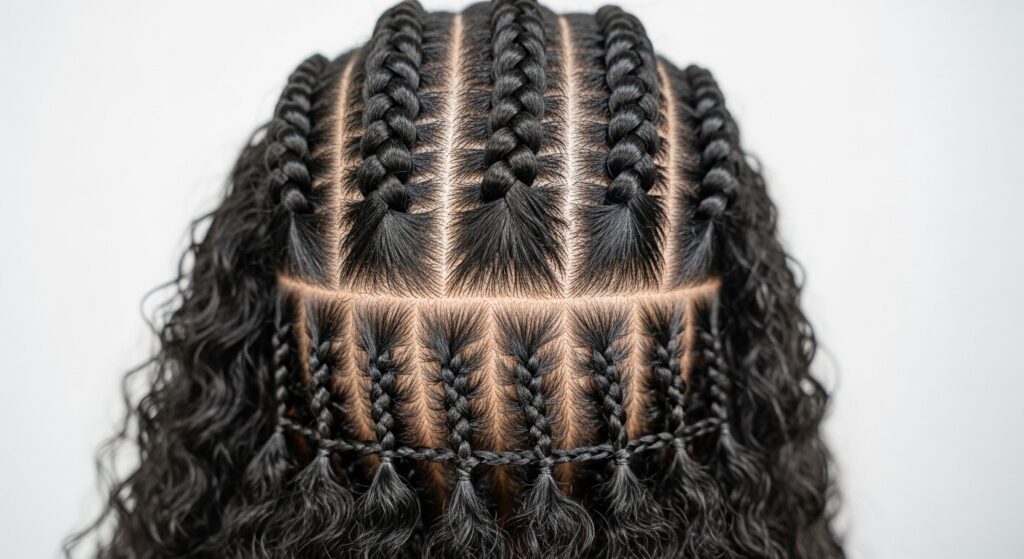
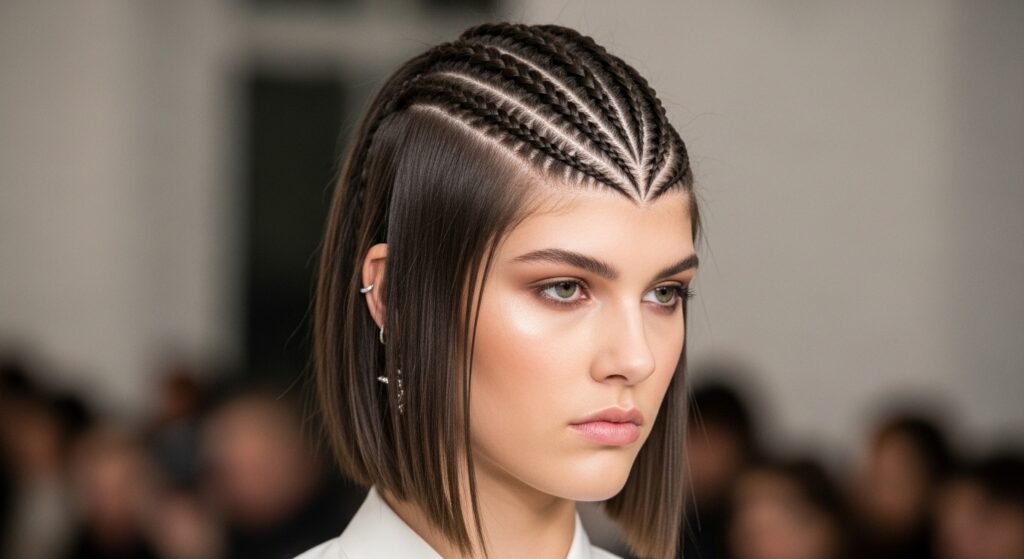
Before you start, decide on your pattern. For the classic look, you’ll create multiple braids that start at the nape of your neck and climb upwards. Use the end of your comb to draw clean, straight part lines.
You can do as many braids as you like, but 27 is a fantastic, full number that covers the head beautifully. Don’t let the number scare you—once you get the rhythm, each braid goes quickly. Think of it as a relaxing, repetitive craft.
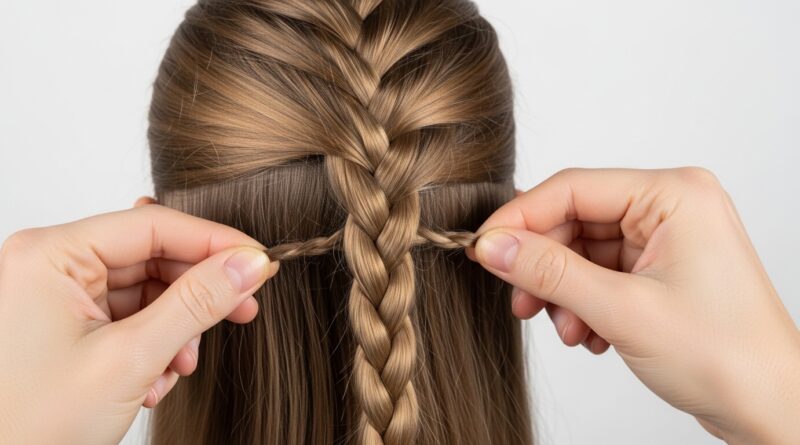
Mastering the Core Braiding Technique
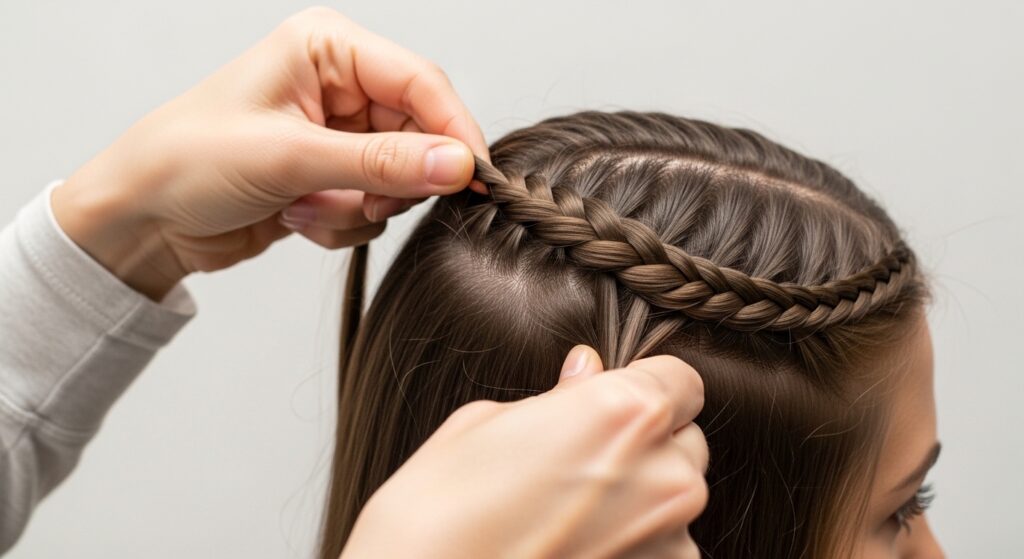
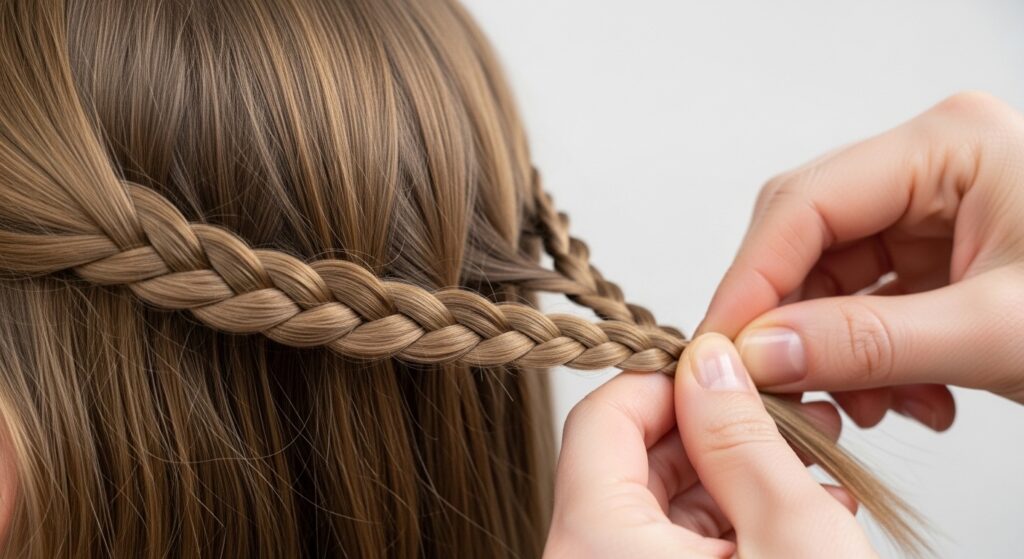
Start your first braid at the lowest central point. Take a small, rectangular section of hair and split it into three equal strands. Begin a standard Dutch braid: cross the right strand under the center, then the left strand under the new center.
After one or two under-crosses, it’s time to create the first “rung.” As you go to add hair into the braid on your next stitch, simply don’t pick it up. Drop that small section of hair and continue braiding with just the three core strands.
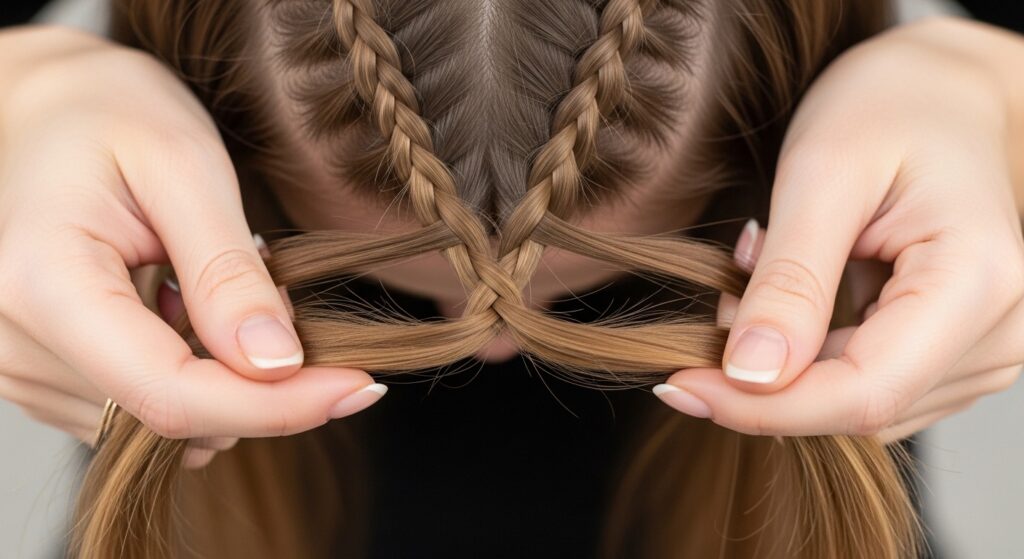
Creating Those Beautiful “Rung” Gaps
The key is consistency. Each time you are about to gather hair from the side of your head to add into the braid, skip it. Let that hair fall free. Continue braiding the three strands you have for one or two more stitches.
Then, on the next stitch, go back to normal and add hair from your scalp into the braid again. This alternation—add hair, skip a section—is what builds the ladder. The skipped hair forms the beautiful, loose gaps.
Keeping Tension Even and Controlled
Don’t pull too tight! The braid should be secure but not scalping. Consistent, medium tension is your friend. If you braid too tightly, the ladder gaps won’t look soft and intentional; they’ll look strained.
If you braid too loosely, the whole style will fall apart quickly. Find a gentle, firm pull that feels comfortable on your scalp. Practice makes perfect here. Your first braid is always the learning one.
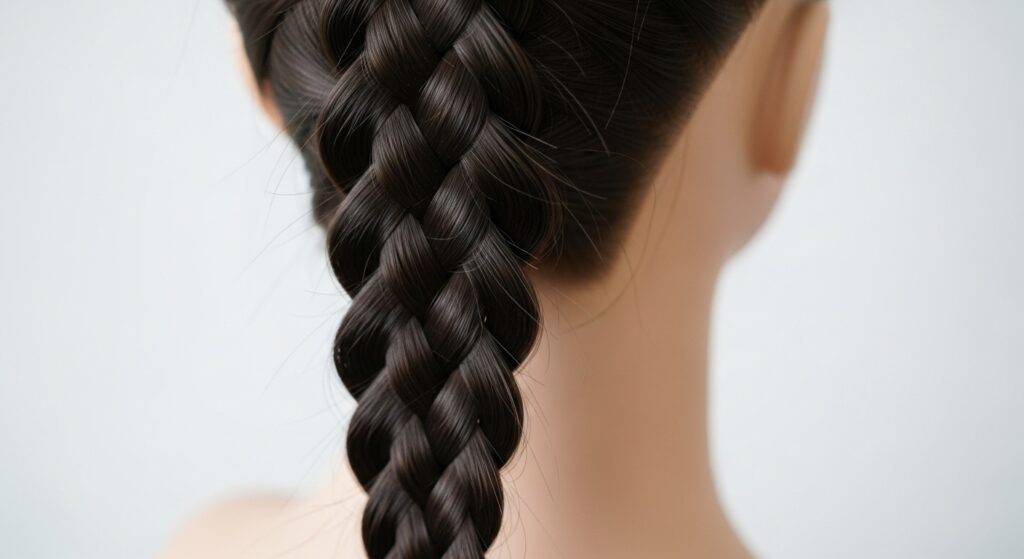
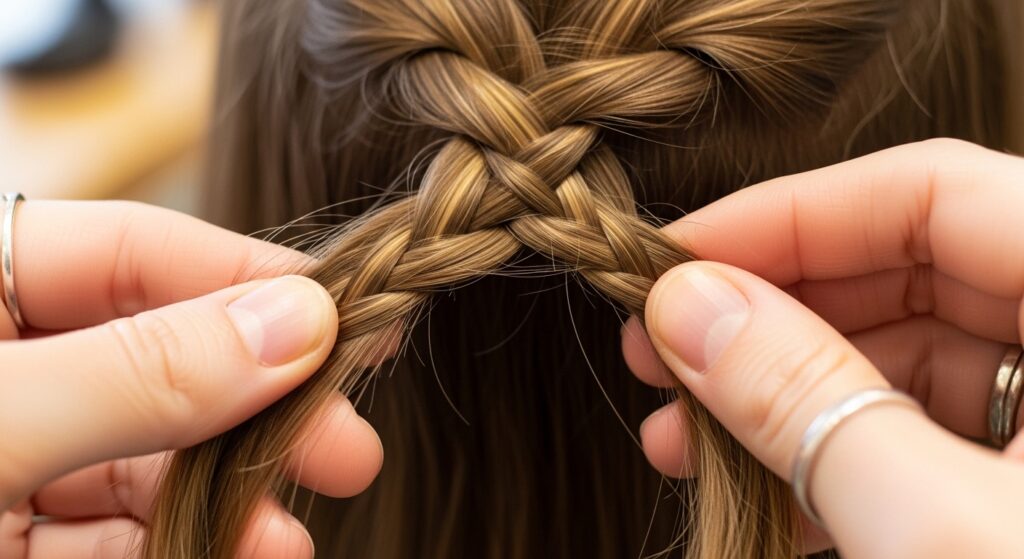
Working Your Way Up the Head
Continue the “add-skip” pattern all the way up the section of hair. As you move up your head, you’ll be incorporating less and less new hair from the sides, because you’re running out of scalp! The final part of the braid, near the crown, will be a regular three-strand braid.
Secure the end with a small, clear elastic. Don’t worry about the tail yet; we’ll style it later. Gently tug on the sides of the braid to pancake it, making it look wider and the gaps more pronounced.
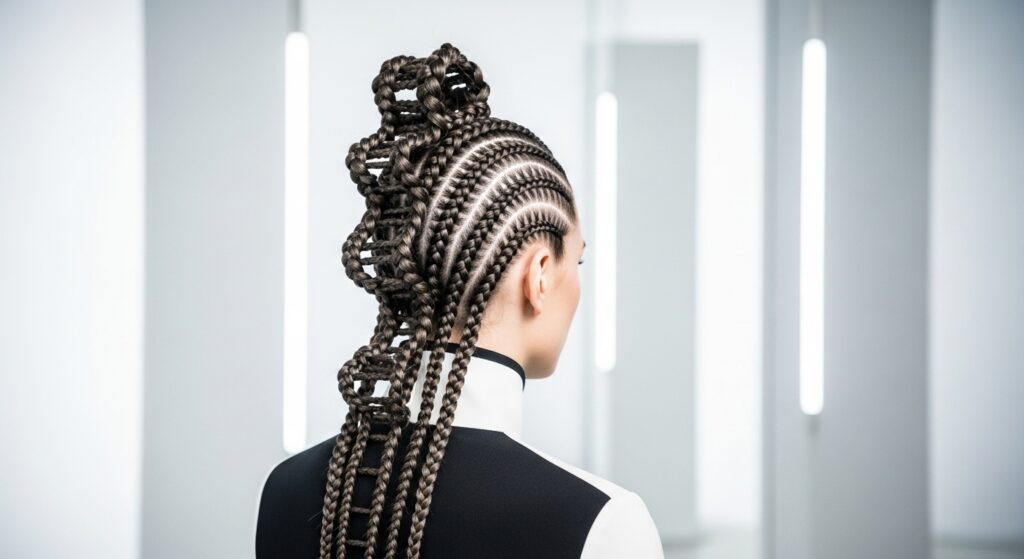
Repeating for a Full, Luxurious Look
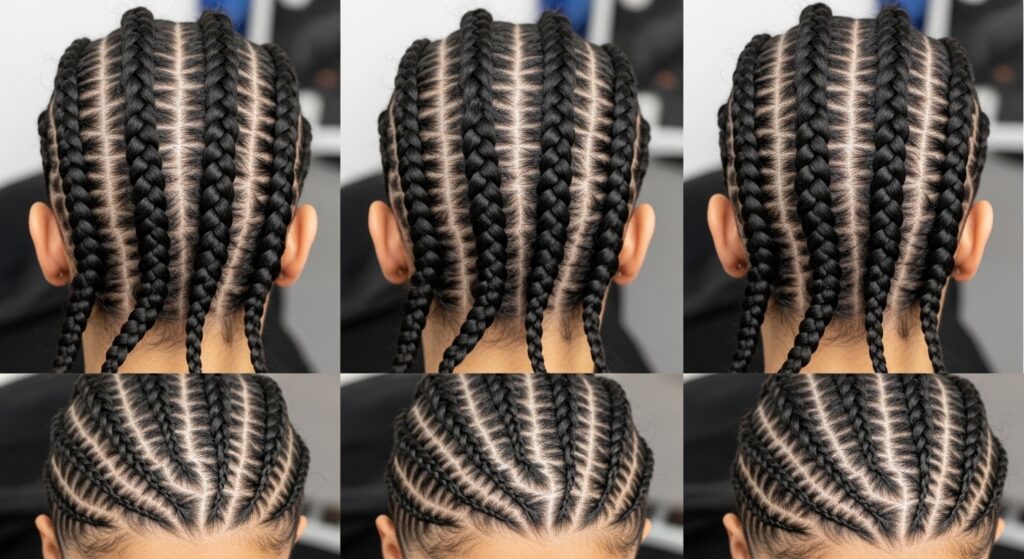
Move to the next section. This is where the magic happens. Complete one braid, then start the one right next to it. The braids should sit parallel, like elegant columns climbing your head.
The repetition is actually meditative. Put on some music or a podcast. By braid number five, your fingers will be flying. The goal is 27, but even 15 will look incredibly stunning and full.
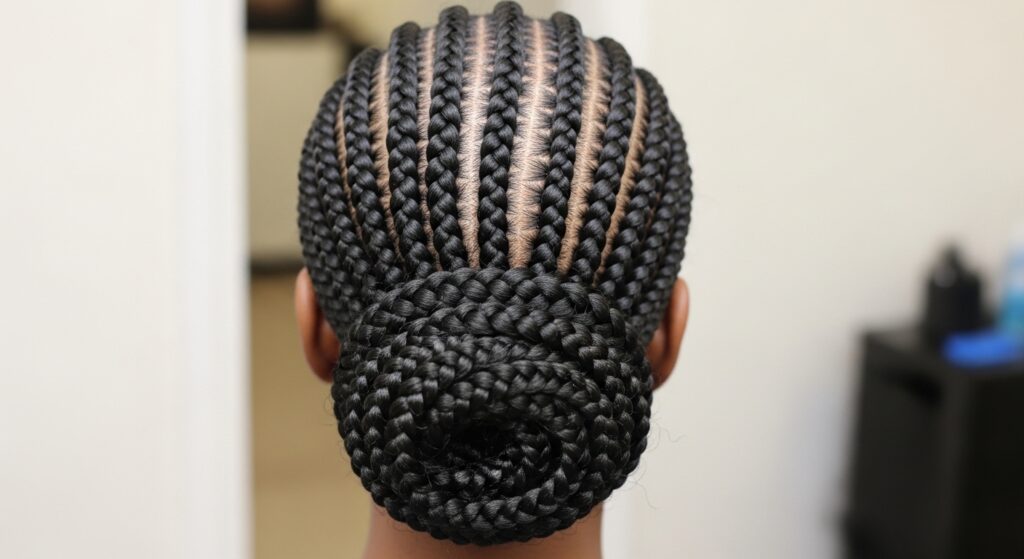
Securing and Hiding the Ends
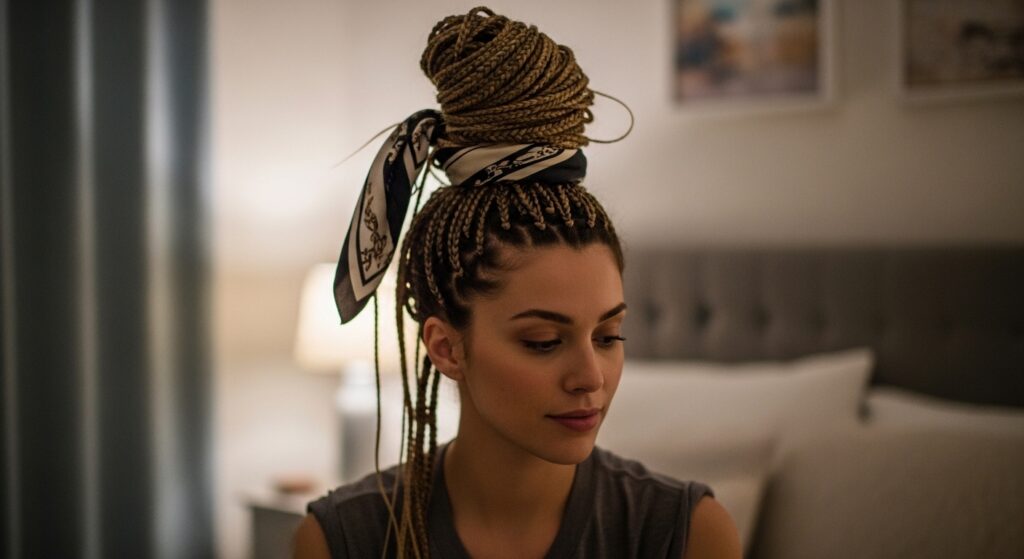
Once all your braids are complete, you have a crown of little tails. You have options! You can gather them all into a low, elegant bun or a chic ponytail. Twist the tails together before wrapping them for extra security.
Alternatively, you can coil each tail individually and pin it flat against your scalp underneath the braid above it. This creates a seamless, “where does it end?” look that is pure old money hair elegance.
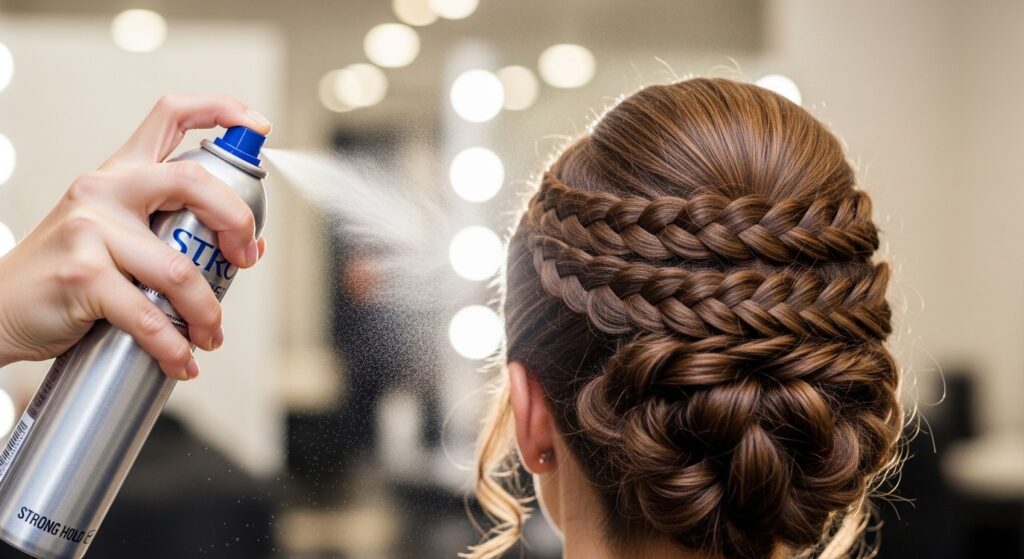
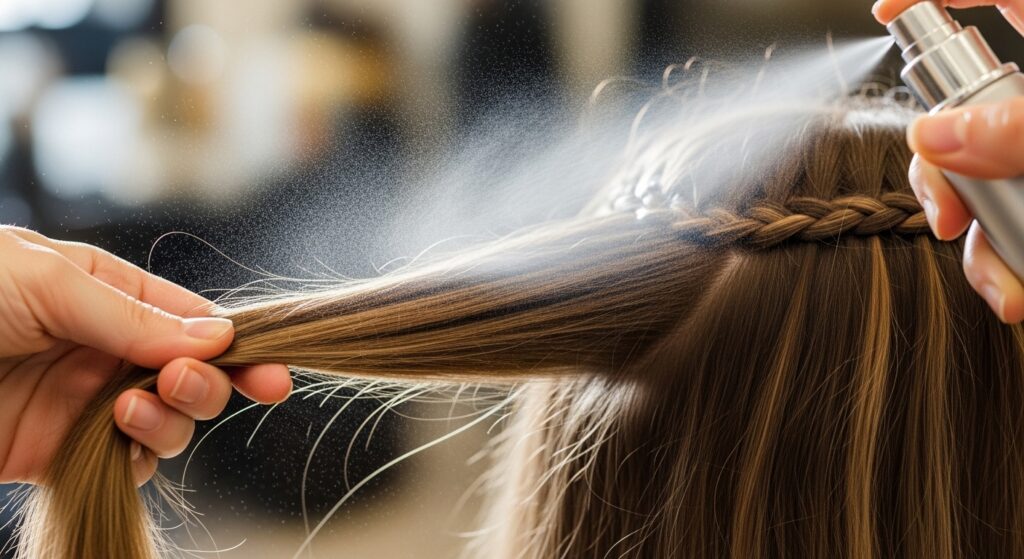
Locking It All in Place
This is non-negotiable. Take a strong-hold hairspray and mist it over the entire style from about 10 inches away. Pay special attention to the roots near your part lines and the ends you’ve tucked away.
For any flyaways or baby hairs, spray a bit of hairspray on your finger tips or a toothbrush and gently smooth them down. You want the look to be polished and last all day (or night!).
Adapting for Fine or Slippery Hair
If your hair is fine or silky, prep is even more important. Use a texturizing spray on dry hair before you start. You can also try braiding on slightly damp hair, but be sure to let it dry completely before taking it down to avoid mildew.
Another trick is to make your sections a tiny bit smaller. More, slightly thinner braids will hold better and create an even fuller look. Don’t be afraid to use a few extra bobby pins as you go for security.
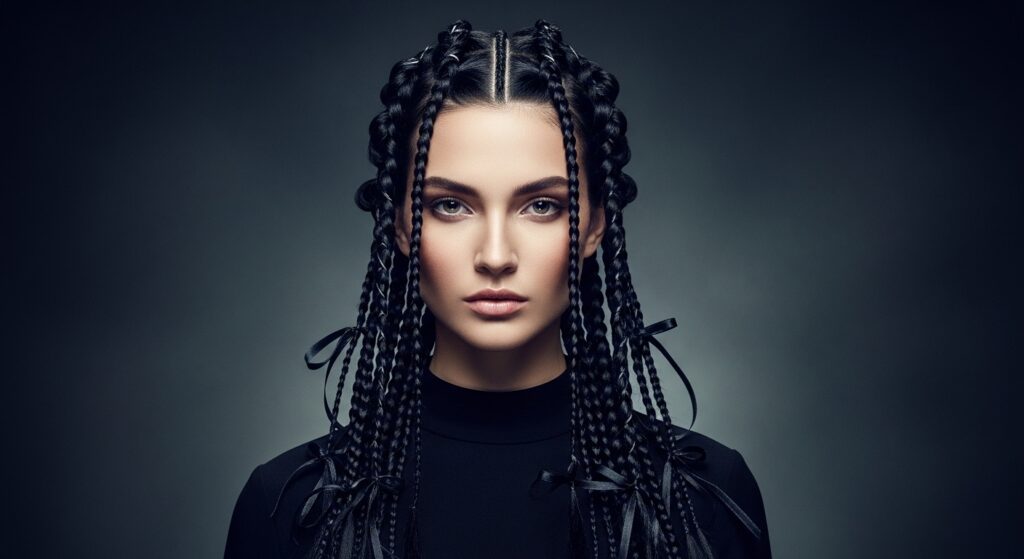
Making It Edgy: The Romantic Goth Twist
This style can easily lean into romantic goth hairstyles. Start with deep, dark hair or add temporary color spray. Weave in tiny, delicate black ribbons or silver charms into the braids as you go.
Pair it with deep, smoky makeup and you have a look that’s straight out of a modern fairy tale. It’s soft but with a dark edge—perfect for anyone who loves the vampire haircut aesthetic but wants something more intricate.
Adding Glitchy Glam Hair Accents
For a futuristic twist, incorporate the glitchy glam hair trend. Use small, colored hair wires or metallic threads in neon or silver. Weave them into a few select braids, letting them peek out of the ladder gaps.
You can also use a tiny bit of iridescent hair gel on the baby hairs around your face for a cyber, wet-look effect. It’s a cool way to mix organic texture with a digital-inspired vibe.
Pairing with Other Major Cuts
This style works with almost any haircut! If you have an asymmetrical lob, the braids will look incredibly chic cascading up one side. With a sharp hime cut, the braids will contrast beautifully with the straight, blunt front sections.
Even a classic quiet luxury bob becomes instantly more interesting with a few of these braids incorporated as accent pieces. It’s a versatile technique that elevates any base haircut.
From Daytime Chic to Night Out
This is a true all-day style. For daytime, keep it clean and paired with minimal makeup and a crisp white shirt. It looks professional and put-together. For night, amp it up.
Pull out a few face-framing tendrils for softness. Add dramatic earrings. You can even gently backcomb the “rungs” to make them bigger and more dramatic for a true red-carpet feel.
Making It Last Overnight
Want to save your masterpiece for a second day? Sleep on a silk or satin pillowcase to reduce friction. You can also loosely gather all the braids into a very high, loose ponytail on top of your head (a “pineapple”) before bed.
In the morning, just take it down, give it a light spray with texturizing spray, and smooth any frizz with a tiny bit of hair oil on your fingertips. It might look even better on day two!
Troubleshooting Common Issues
If your gaps are messy, you’re likely skipping uneven sections of hair. Be deliberate. If the braid feels loose, check your tension and make sure you’re crossing under tightly enough.
If your scalp hurts, you’re braiding way too tightly. Loosen up! This should feel good. Remember, the first few braids are your practice round. You can always re-do them.
Your Quick-Start Cheat Sheet
- Prep with texturizing spray.
- Section hair with clean parts.
- Start a Dutch braid at the nape.
- After 1-2 stitches, skip adding hair to create a gap.
- Braid the core strands 1-2 times.
- Resume adding hair on the next stitch.
- Repeat the “add-skip” pattern to the crown.
- Secure with a clear elastic.
- Pancake the braid gently.
- Repeat x27!
Why This Style Feels So Empowering
There’s something about mastering a complex-looking skill that just makes you stand taller. This hairstyle is a form of self-care and creativity. It takes time you’ve dedicated just for you.
Walking out the door knowing you created this beautiful, intricate art on your own head is a confidence boost like no other. It’s your secret armor, made of your own hair.
And there you have it—your complete guide to creating a head-turning masterpiece. Remember, your first attempt doesn’t have to be perfect. The beauty is in the handmade, slightly imperfect nature of it. That’s what makes it uniquely yours.
This style is proof that the most stunning looks often come from patience and a little bit of practice. So grab your comb, put on your favorite playlist, and give yourself the gift of creating something beautiful today.
Save this post to Pinterest to keep this guide handy for your next big day (or any day you need a boost!). Did you try it? I’d love to hear how it went—tell me about your braiding journey in the comments below!