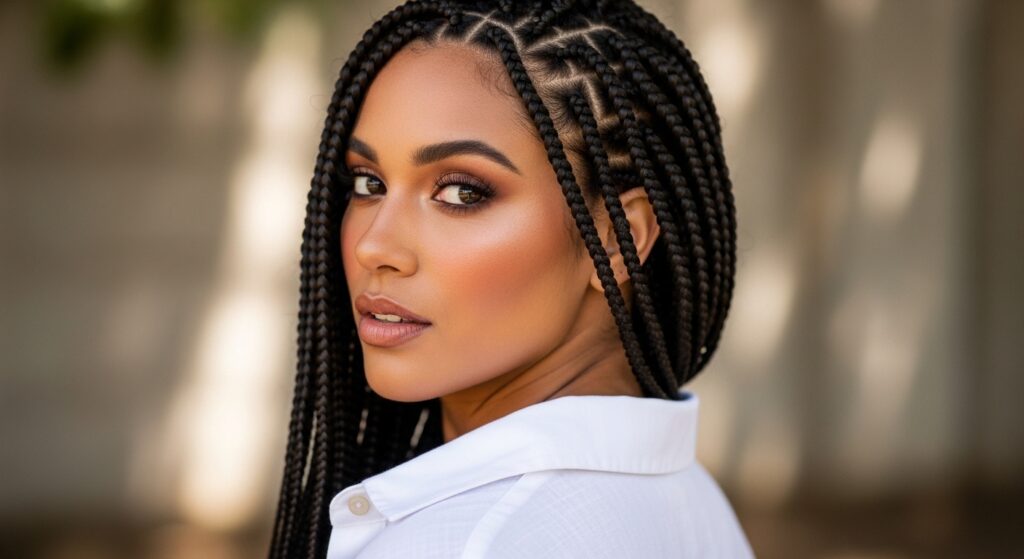
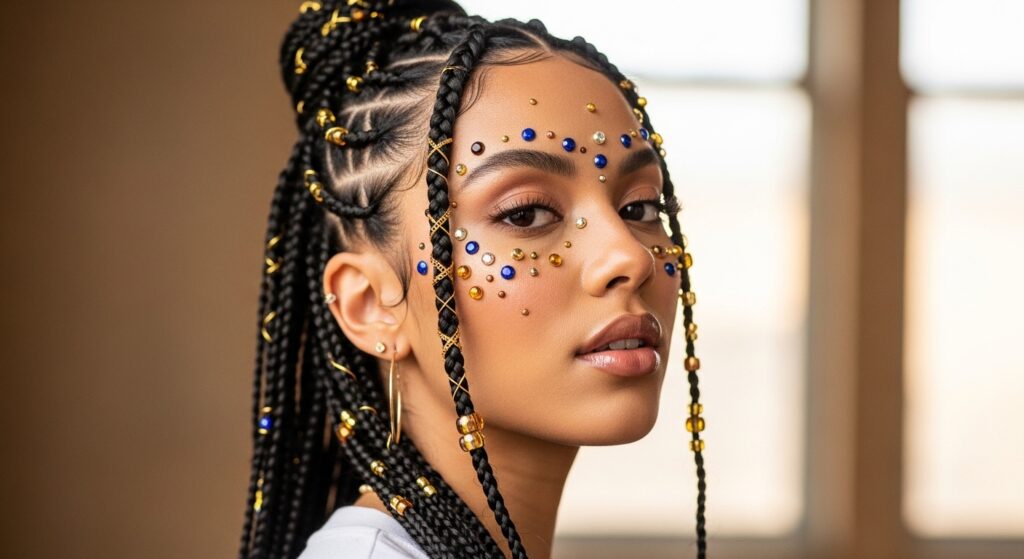
Glam 21 Beaded Fulani Braids Celebrating Heritage with Modern Flair
Okay, let’s be real. Sometimes you see a hairstyle and it just stops you in your tracks. That was me the first time I saw Glam 21 Beaded Fulani Braids. It’s more than just a protective style; it’s a full-on celebration.
It takes the beautiful, centuries-old tradition of Fulani braiding and gives it a modern, show-stopping twist with 21 perfectly placed beads. It’s heritage, but make it glam.
If you’ve been looking for a style that’s deeply meaningful yet totally head-turning, you’re in the right place. I’m breaking down everything you need to know, from the inspiration to the installation and care. Let’s get into it.
What Are Glam 21 Beaded Fulani Braids?
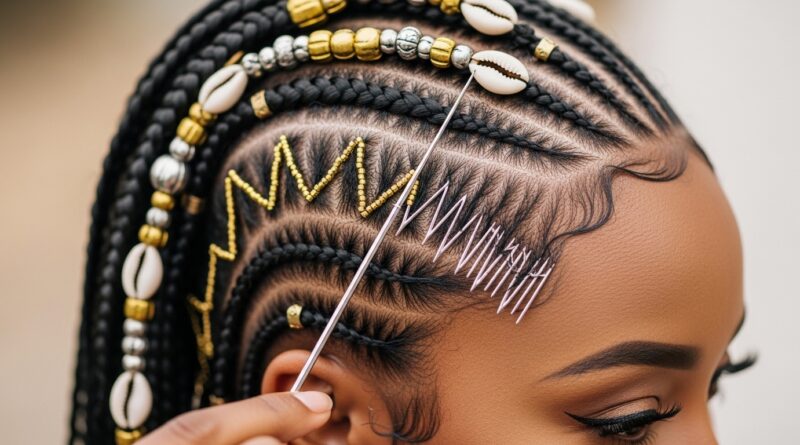
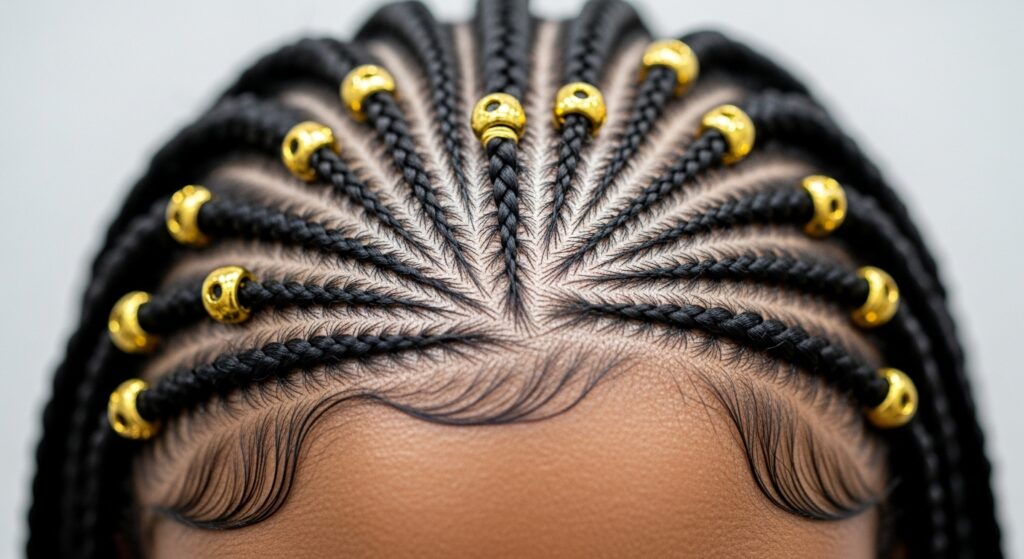
At their heart, these are cornrows inspired by the Fulani people of West Africa, traditionally featuring a central braid and intricate patterns. The “Glam 21” version elevates this by incorporating exactly 21 beads, often in gold or metallic tones, woven into the braids in a symmetrical pattern.
The number 21 isn’t random. It adds a layer of intentionality and luxury, making the style feel special and curated. It’s a beautiful example of how traditional styles are evolving and fitting perfectly into the landscape of 2026 hairstyles.
The Powerful Heritage Behind the Style
It’s crucial to understand where this beauty comes from. Fulani braids have a long history, with specific patterns and adornments signifying everything from marital status to social standing within the Fulani communities.
Wearing this style is a nod to that rich culture. The modern beadwork is a way to honor that legacy while expressing your own personal style. It’s about carrying a piece of history with you, beautifully.

Why This Style Feels So “Now”
This look hits that sweet spot between cultural appreciation and high fashion. It has that “quiet luxury” vibe—it’s not loud, but the meticulous detail speaks volumes. It’s the opposite of fast-fashion hair.
In a world of glitchy glam hair and vampire haircuts, this style stands out for its depth and authenticity. It’s a statement that you care about meaning, not just trends. It feels both timeless and incredibly current.
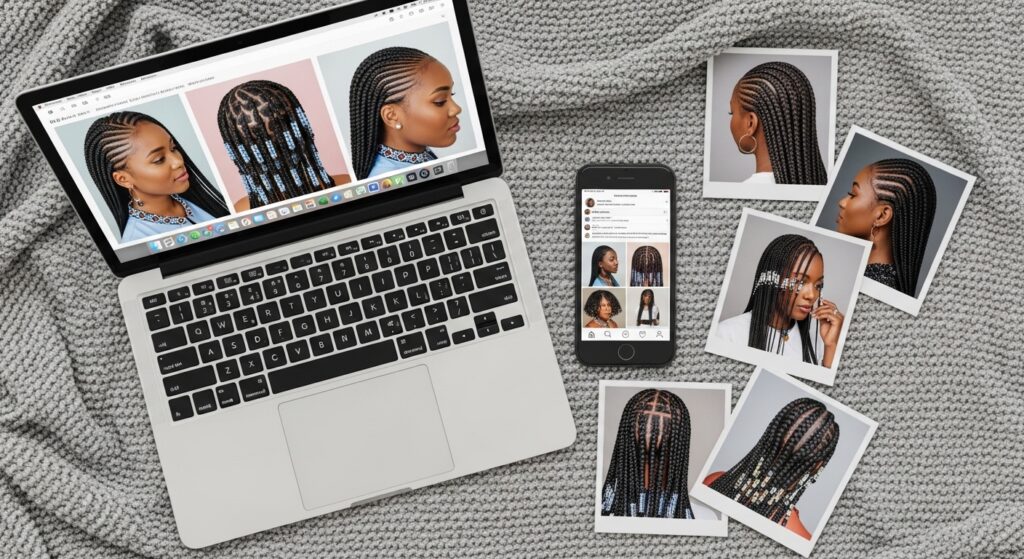
Finding Your Style Inspiration
Before your appointment, gather photos! Look for inspiration that shows the bead placement and braid pattern you love. Do you want the beads all one color, or a mix?
Think about how the style flows. Unlike an asymmetrical lob or a hime cut, this style is often symmetrical and centered, creating a powerful, balanced look. Save pics that show the style from all angles.
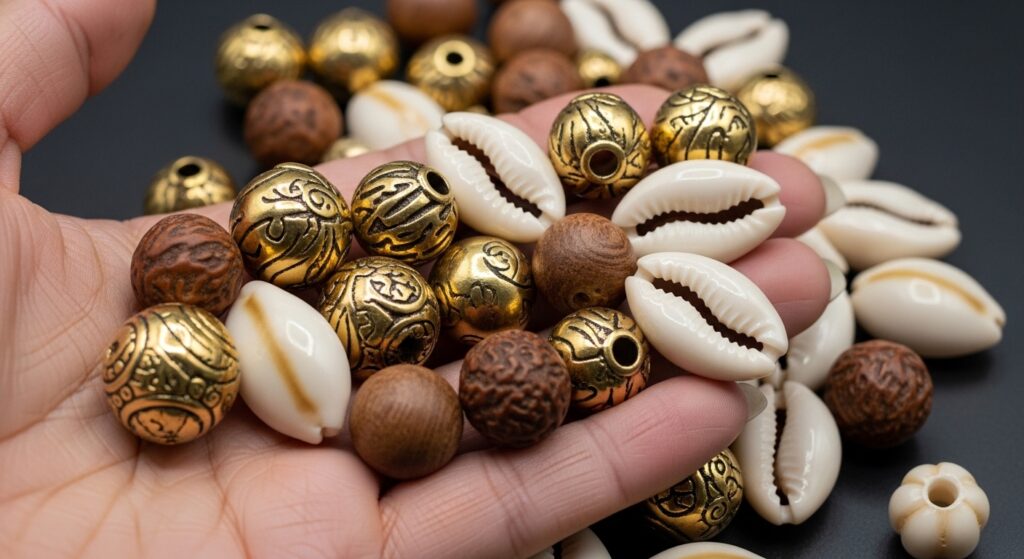
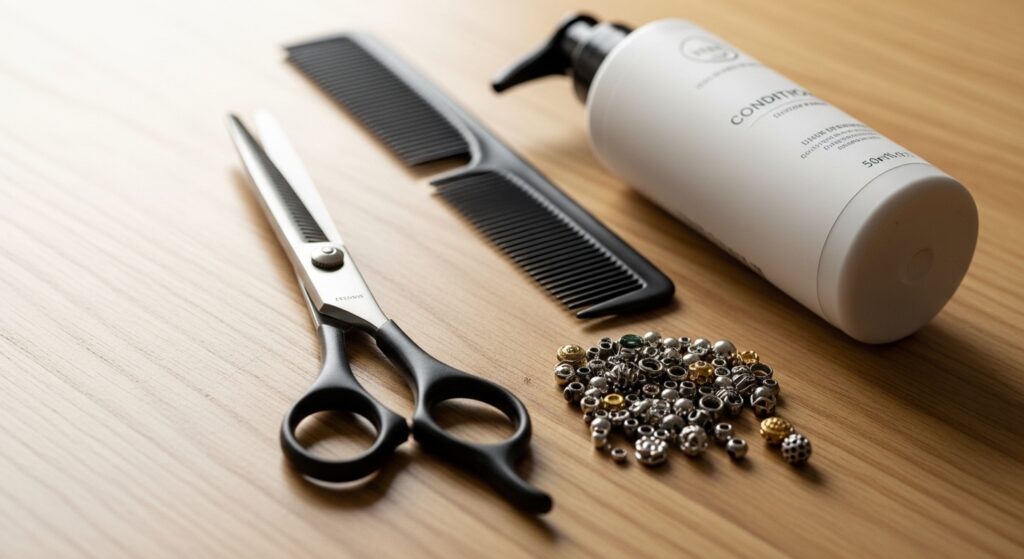
Choosing the Right Beads
The beads are the “glam” part. Gold-toned beads are classic and give that old money hair feel—understated but rich. You can also use cowrie shells, wooden beads, or even colorful acrylics for a different vibe.
- Material: Lightweight aluminum or plastic beads are best to avoid tension.
- Size: Vary sizes for interest, but ensure they have large enough holes for your braids.
- Finish: Matte, shiny, or metallic? This changes the whole look.
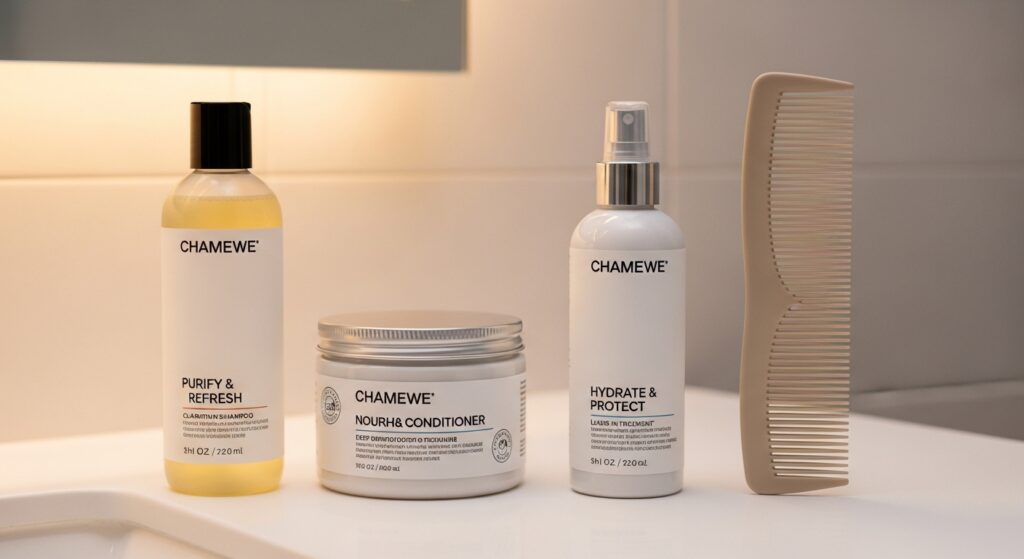
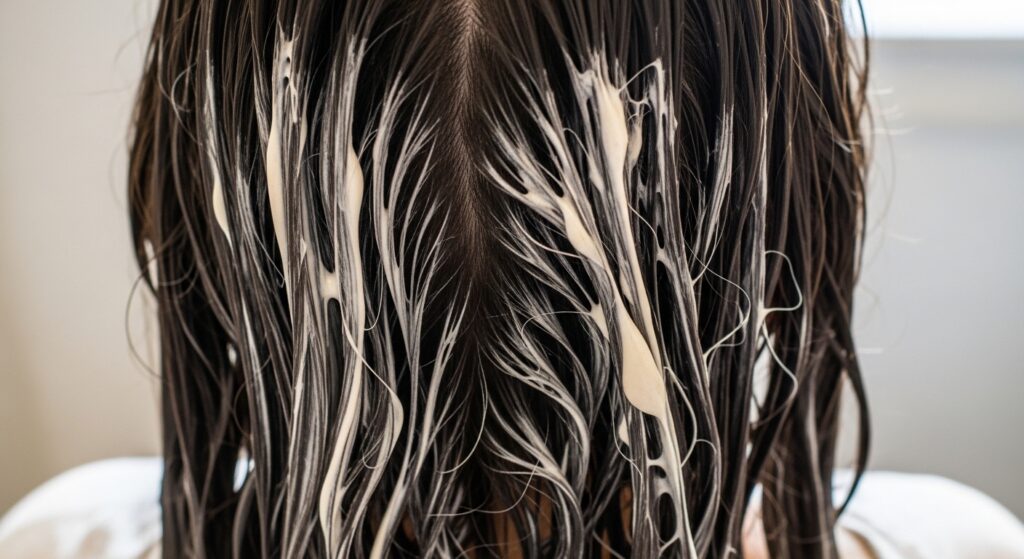
Essential Hair Prep Before Braiding
Healthy braids start with a healthy scalp and hair. Don’t skip this step! Start with a clarifying shampoo to remove any product buildup. Follow with a deep conditioner to add moisture and strength.
Detangle your hair thoroughly while it’s damp and coated in leave-in conditioner. This makes the braiding process smoother and helps prevent unnecessary breakage. Your stylist will thank you.
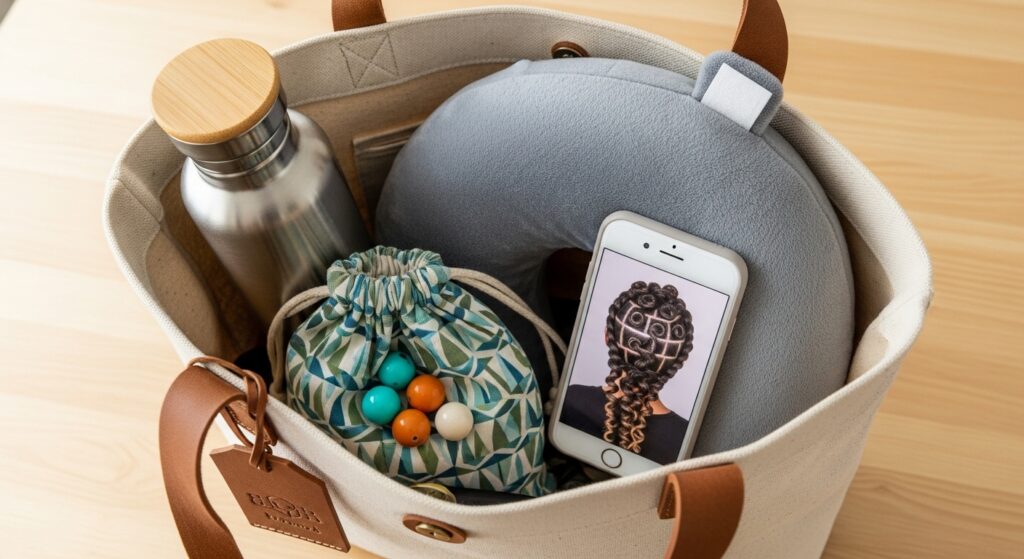
What to Bring to Your Appointment
Being prepared makes the day easier. Pack a kit with your own hair products if you have sensitivities. Bring your inspiration photos and your chosen beads if you bought them separately.
- Your beads or adornments
- Water and a snack (it’s a long sit!)
- A neck pillow for comfort
- Your own edge control or gel, if preferred
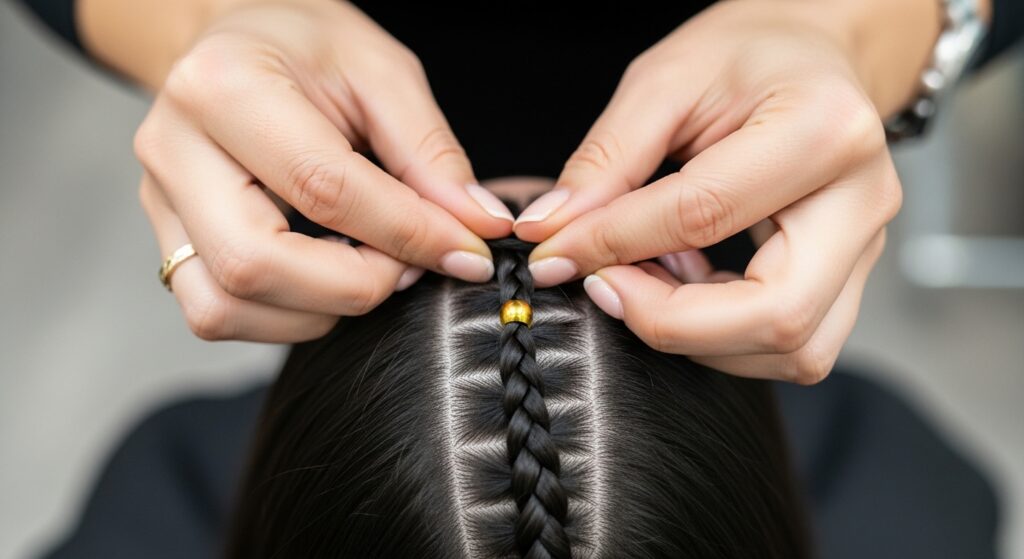
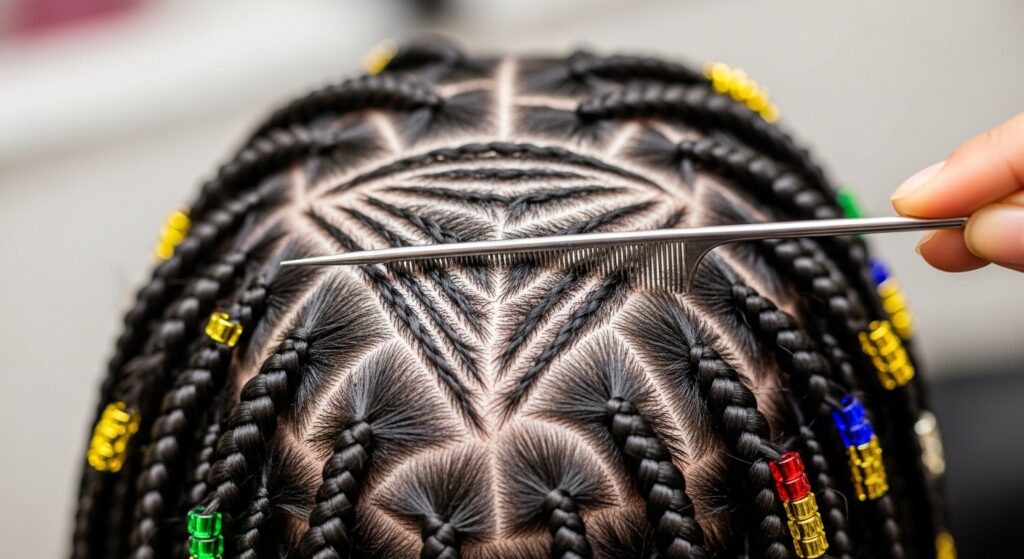
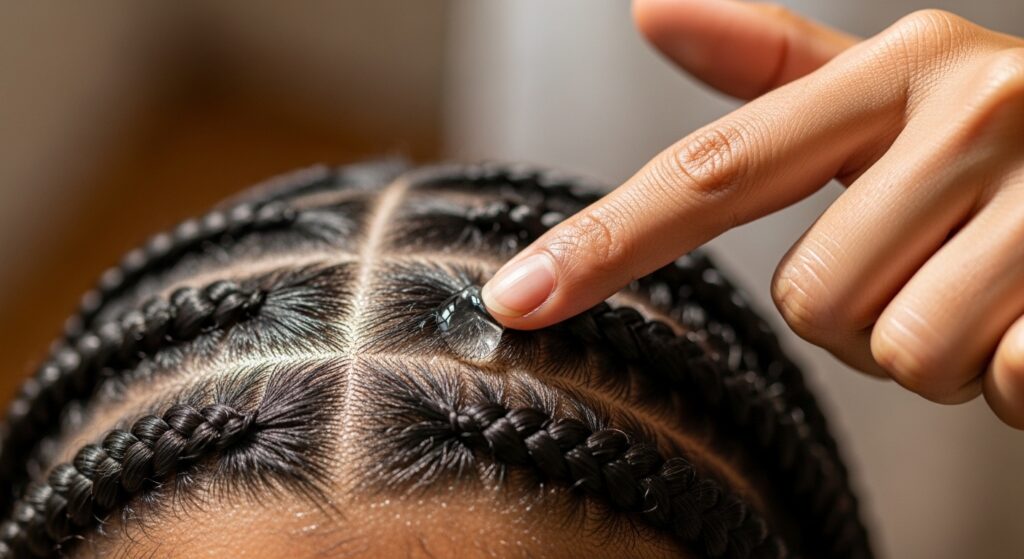
The Braiding Process Explained
Your stylist will start by sectioning your hair, usually creating a central part and then building the cornrow patterns outward. The tension should be firm but not painful—speak up if it hurts!
The beads are added as they braid, secured by folding the braid tip and threading it back through the bead. The 21 beads are typically distributed evenly, often focusing on the central and front braids for maximum impact.
Managing Discomfort & Time
This is a lengthy process, often taking 6-8 hours depending on hair density and stylist speed. Take breaks to stretch your neck and shoulders. Communicate with your stylist.
Some scalp tenderness is normal for the first day or two as your hair adjusts. But sharp pain during the install is a sign the braids are too tight. Your comfort is key to enjoying the style.
Styling Your Braids Freshly Done
Once you’re home, you might want to style them. You can wear them down for a dramatic flow, or sweep them into a low, elegant bun to highlight the bead patterns on the sides.
A simple side part can change the look entirely. Play with it! The beauty is in the versatility. This isn’t like a set quiet luxury bob; you can change its personality daily.
Your First Night with Braids
Protect your investment while you sleep. Always wrap your braids in a silk or satin scarf or use a satin pillowcase. This prevents frizz, keeps the beads from tangling, and maintains moisture.
You can also gather the braids into a loose, high ponytail on top of your head before wrapping—this is called a “pineapple” and helps preserve the volume at the roots.

Daily Maintenance Routine
Keep it simple. Lightly mist your braids and scalp with a water and leave-in conditioner mix every few days to fight dryness. Use a light oil, like jojoba, on your scalp to soothe itching.
Gently clean along your parts with a cotton pad and some witch hazel to remove buildup. The goal is freshness without disturbing the braids.

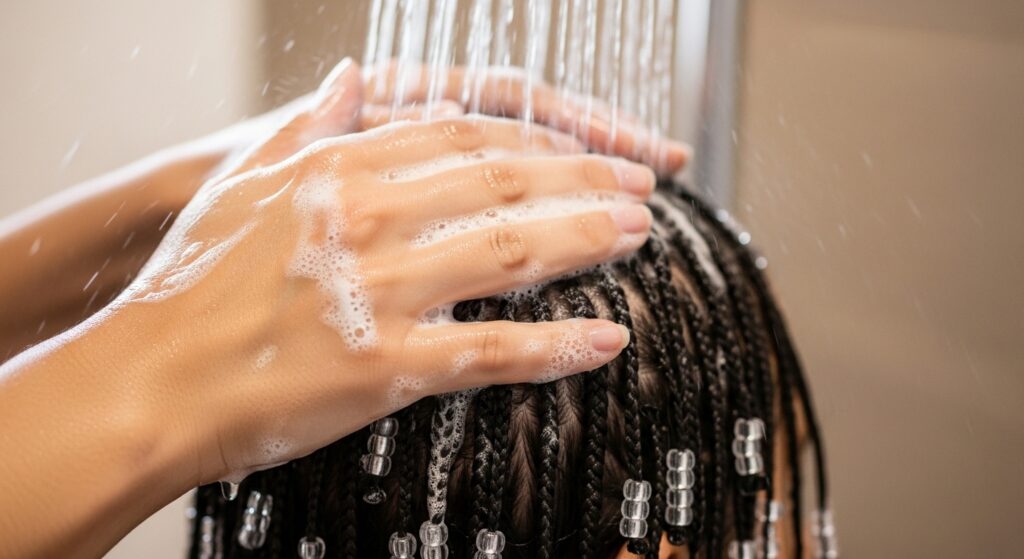
Washing Your Beaded Braids
Yes, you can and should wash them! Dilute your shampoo in water and apply it directly to your scalp, massaging with the pads of your fingers. Let the suds run down the braids.
Conditioner can be applied to the braids themselves, but avoid the roots to prevent slippage. Rinse thoroughly and squeeze out water with a microfiber towel. Air dry completely.
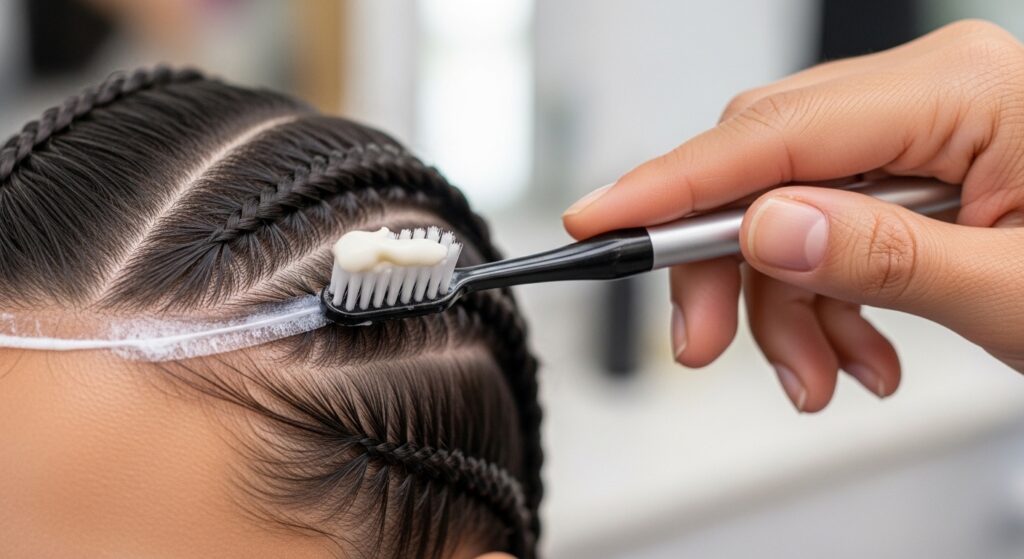
Preventing Frizz & Flyaways
A little frizz is natural, but to keep it sleek, use a tiny bit of edge control or gel on a toothbrush to smooth down your baby hairs and perimeter.
For flyaways along the braids, a light hair wax or pomade on your fingertips can be smoothed over them. Don’t overdo it—you want definition, not greasiness.
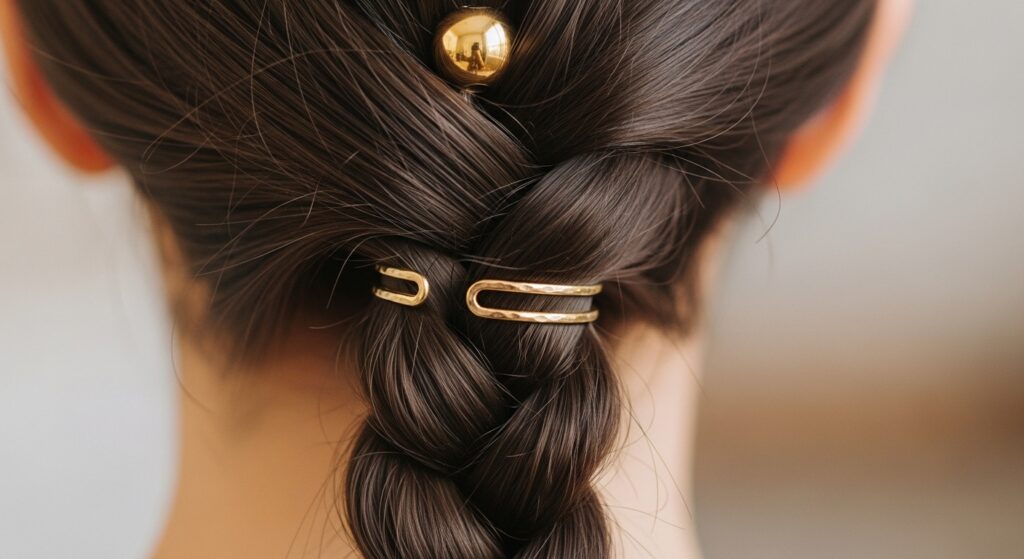
How to Accessorize Further
The beads are the star, but you can add more! Try thin, delicate gold hair cuffs on a few braids. Or, for a event, weave in some fresh flowers or pearl strands for a romantic goth hairstyles twist.
Remember, balance is key. If your beads are bold, maybe skip big earrings. Let the hair be the focal point it’s meant to be.
Switching Up Your Part
One of the easiest ways to refresh your look is to change your part. A deep side part feels dramatic and modern. A zig-zag part feels playful and can help disguise any thinning at the part line.
Use the end of a rattail comb to create a clean line. This little change can make your style feel brand new again.
Protecting Your Edges
This is non-negotiable. Be gentle when styling around your edges. Don’t pull them too tightly into updos. Massage a growth oil into your edges nightly to keep the hair follicles healthy.
If you feel constant tension on your edges from the weight of the beads, it might be time to take the style down. No hairstyle is worth losing your edges over.
When to Take Them Down
Most experts recommend keeping braids in for 6-8 weeks max. Listen to your hair. If you have significant new growth, heavy buildup, or your scalp is constantly irritated, it’s time.
Signs also include persistent odor even after washing, or if the braids are looking extremely loose and fuzzy. Don’t push it—your natural hair’s health comes first.

The Take-Down Process
- Gather Supplies: Sharp hair shears, a tail comb, conditioner, and detangling spray.
- Cut Carefully: Snip the bead off each braid first to avoid cutting your own hair.
- Unbraid Slowly: Apply conditioner to each braid as you unravel to minimize knots.
- Detangle & Cleanse: Once all braids are out, gently detangle and give your hair a thorough wash and deep condition.
Post-Braid Hair Care
Your hair will need love after being braided. Expect some shedding—this is normal hair that was already loose. Focus on moisture and protein treatments to restore strength.
Keep styles low-manipulation for a week or two. Think braid-outs, twist-outs, or simply wearing a satin bonnet. Give your scalp and hair a rest before your next big style, whether that’s an asymmetrical lob or another set of braids.
Why This Style is Worth It
Beyond the stunning looks, this style is a journey. It connects you to a powerful aesthetic history while letting you express your personal glam. It’s a protective style that truly protects, both your hair and your cultural curiosity.
In a sea of fleeting trends like the vampire haircut, this style has weight and story. It’s an experience that changes how you see and wear your hair.
So, there you have it—your complete guide to living in and loving Glam 21 Beaded Fulani Braids. It’s more than just a hairstyle; it’s a wearable piece of art that tells a story. From the careful prep to the joyful styling, every step is part of the experience.
I hope this gives you the confidence to try this beautiful look or simply appreciate the craft behind it. Remember, the best hairstyles are the ones that make you feel connected, powerful, and utterly yourself.
Save this post to Pinterest to keep this guide handy for your big braid day! And I’d love to know—are you thinking of trying this style, or do you have a favorite braided look? Let me know in the comments below!