Glam 30 Invisible Tape Extensions Layering Lengths Naturally Seamless
Okay, let’s talk about the hair dream we all share: major length and volume that looks like it grew straight out of your own head. No bulky tracks, no obvious lines, just pure, seamless glam. If you’ve ever scrolled past those perfect “old money hair” or “glam 30” looks and wondered “how?!”, I’m about to let you in on the secret.
It’s all about Invisible Tape Extensions, specifically the magic of layering different lengths. This isn’t your older sister’s one-length, heavy set. This is the 2026 approach—strategic, lightweight, and undetectable.
I’ve tested every method under the sun, and this layering technique is the game-changer for a naturally blended, move-like-your-own-hair result. It works whether you’re dreaming of a quiet luxury bob with hidden fullness or mermaid-length waves.
Stick with me, and I’ll walk you through exactly how to plan, install, and style these extensions to get that flawless, “is it her real hair?” look. It’s easier than you think!
Why “Layering Lengths” is The Ultimate Secret
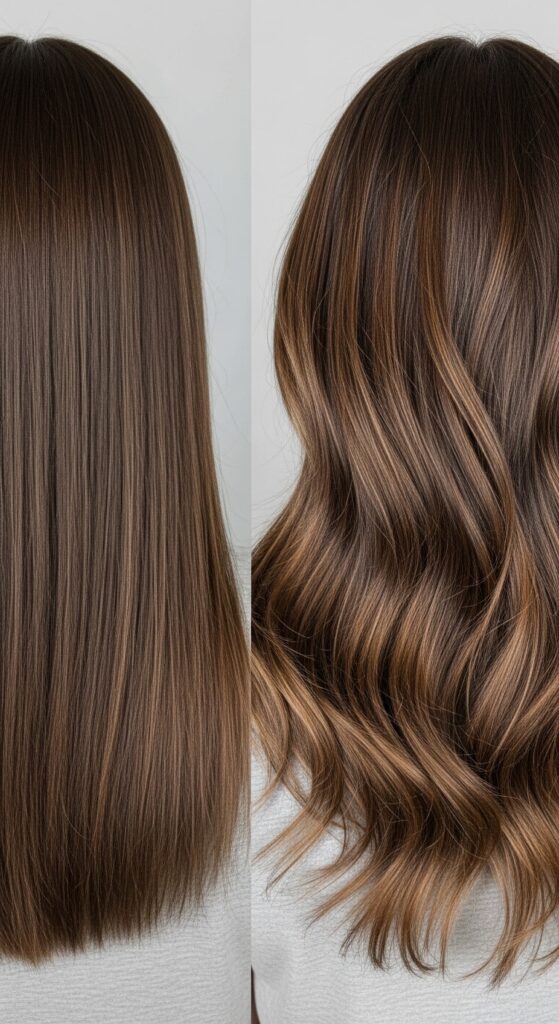
Most people get one length of extensions. That’s the first mistake. It creates a thick, blunt wall of hair that screams “extensions!” and lacks natural movement. Your own hair has shorter and longer pieces—that’s what gives it body and shape.
Layering lengths means installing tapes in varying inches within the same set. You mimic your natural growth pattern. The shorter pieces add volume and lift at the crown and mid-lengths, while the longer pieces seamlessly blend for that ultimate length.
The result? Hair that has dimension from root to tip. It moves, it swings, it feels incredibly light. This is the core technique behind every naturally seamless look you admire online.
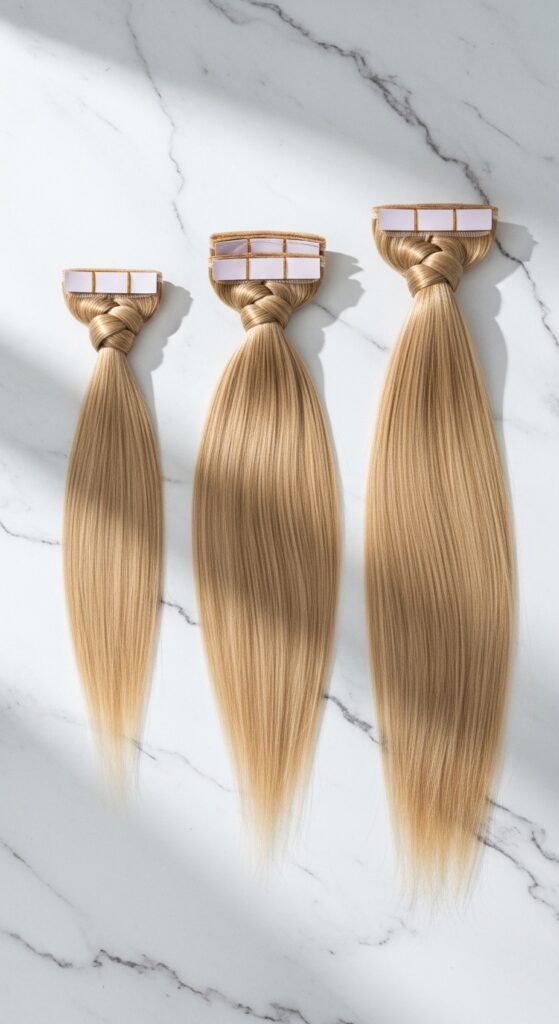
What Are “Glam 30” Invisible Tape Extensions?
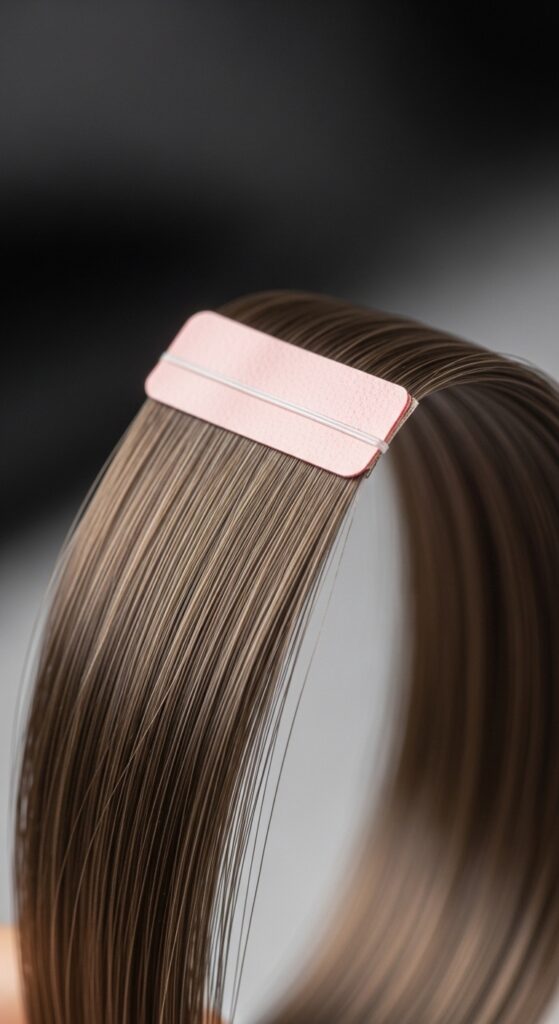
“Glam 30” usually refers to a full, luxurious set of about 30 tape-in wefts. It’s the sweet spot for most people—enough for serious volume and length without being overwhelming. “Invisible Tape” means the polyurethane tape is ultra-thin and transparent.
When applied correctly, the tape lies flat against your scalp, sandwiched between two sections of your natural hair. The weft itself is also fine and tapered at the ends. This combination is what makes them virtually undetectable to the eye and touch.
They’re the workhorse of the extension world: affordable, reusable, and the fastest to apply. For a layered set, your stylist will order your 30 wefts in a mix of, say, 18″, 20″, and 22″ lengths.
Finding Your Perfect Length Mix

This is where the custom magic happens. You don’t just pick one length. You create a recipe. Your starting point is your desired final length. Let’s say you want hair down to your collarbone for an asymmetrical lob look.
If your natural hair is at your chin, you might use a mix of 14″ and 16″ tapes. The shorter ones build the interior shape, and the longer ones create the lob line. For mermaid lengths, a mix of 20″, 22″, and 24″ is stunning.
Always consult with your stylist! They’ll assess your hair density, texture, and goal. Bringing inspiration photos is key. This tailored plan is what separates a good result from a great one.
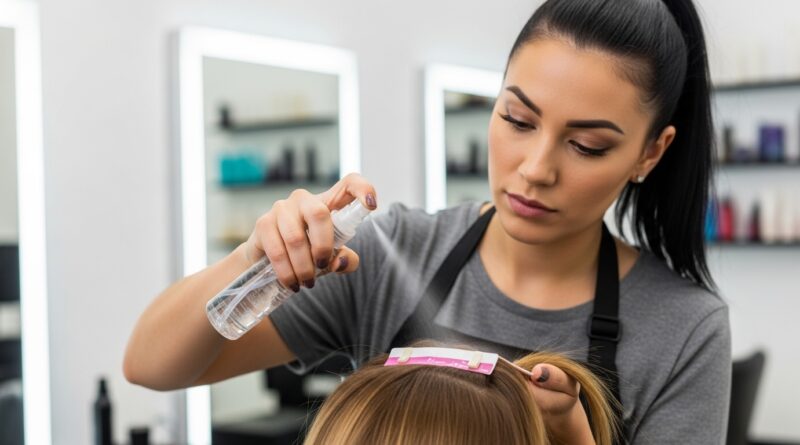
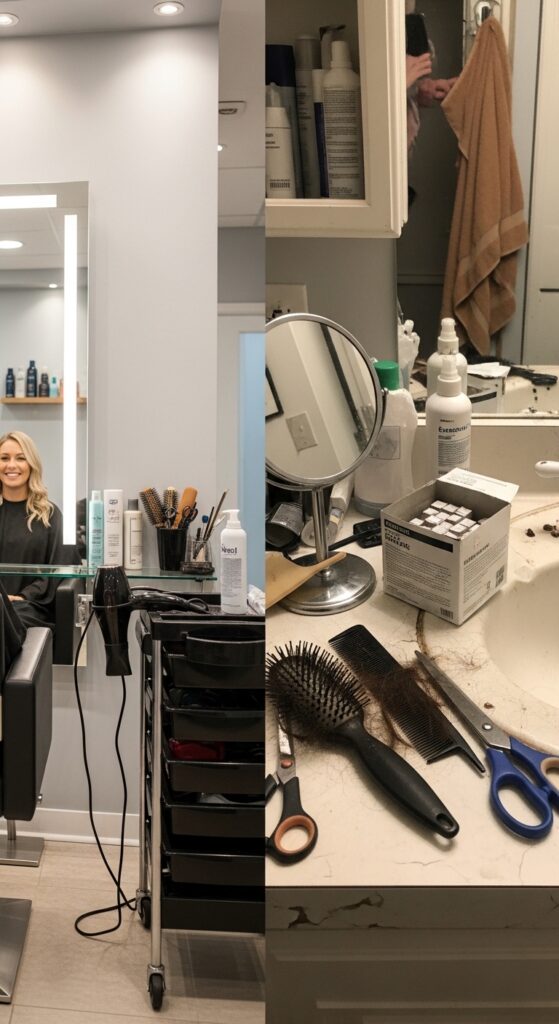
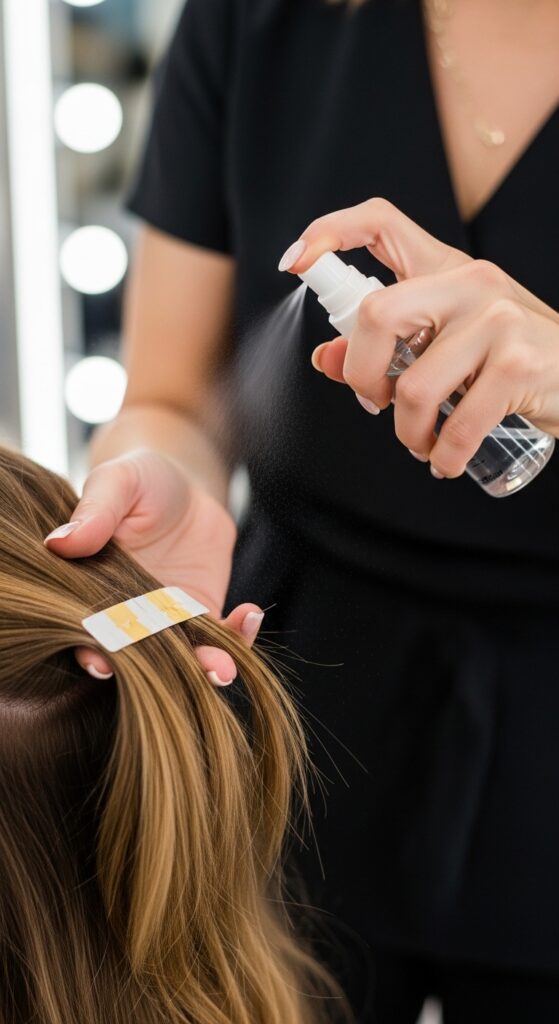
The Application: How They Get It So Seamless

A flawless install is everything. It starts with clean, product-free hair. Your stylist will section your hair horizontally, starting at the nape of your neck. They take a fine, horizontal section of your natural hair and place a tape weft directly underneath it.
Then, they sandwich it by placing another weft on top, with your natural hair in the middle. The key is placement. Shorter lengths are placed higher up (near the crown and parietal areas) to add lift.
Longer lengths are placed lower down. The tapes are pressed firmly together. This strategic placement of different lengths throughout the head is what creates that built-in, lived-in volume and seamless blend.
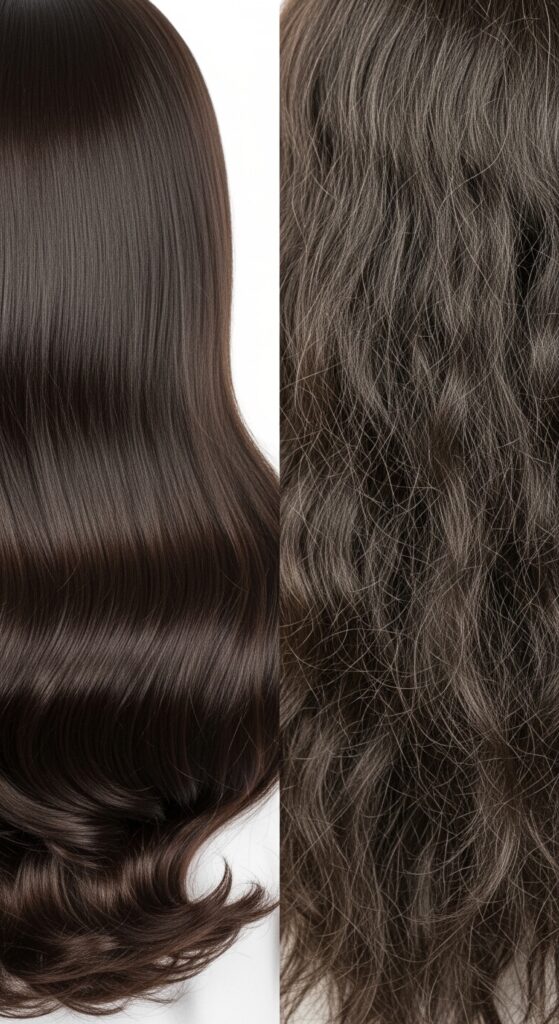
Blending With Your Natural Texture
Whether your hair is pin-straight, wavy, or curly, the extensions must match. This means getting them textured and colored to be twins with your bio hair. For straight hair, the wefts are usually left smooth.
For wavy or curly hair, a stylist will cut and texture the extension hair to match your curl pattern. They might use a razor or thinning shears to remove weight and encourage movement. This step is non-negotiable.
If your extensions are a block of smooth hair and yours is textured, they will never blend. The layering of lengths helps here too, as it breaks up any uniform line that looks “fake.”
Styling For That “I Woke Up Like This” Look

The beauty of a well-layered set is that styling becomes easy. Your goal is to treat all the hair as one. Always use a heat protectant. To create soft, blended waves, wrap large sections around a curling wand, alternating directions.
Don’t curl the very ends tightly—let them flick out softly. Then, run your fingers through the waves to break them up. This marries your natural hair with the extensions perfectly.
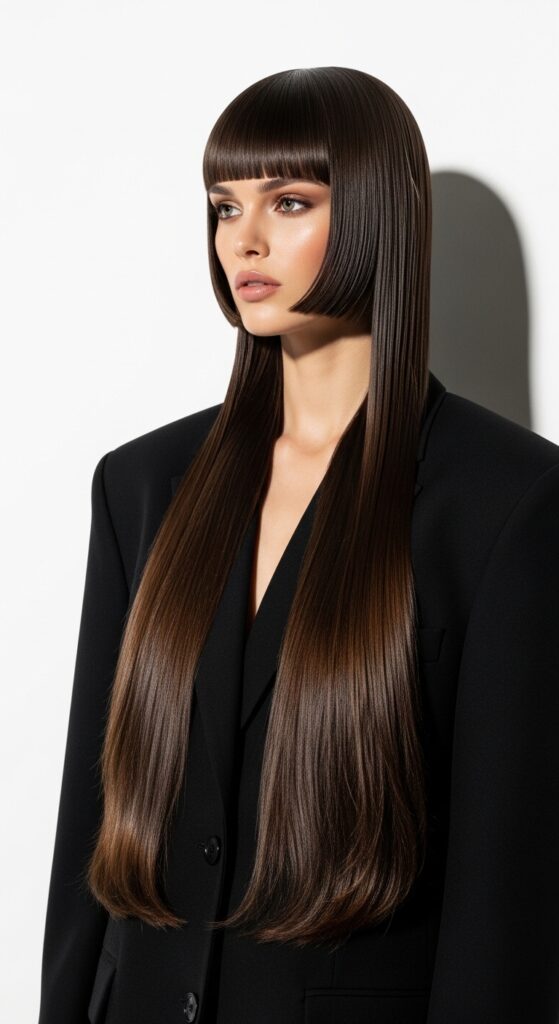
For a sleek look, a good paddle brush and blow-dryer are your best friends. The layers will give the sleek style internal body so it doesn’t fall flat. A light texturizing spray on the mid-lengths adds the final “real hair” touch.
Creating 2026 Hair Trends With Your Set
Your layered extensions are the perfect canvas for the biggest 2026 hairstyles. That quiet luxury bob? Achievable with shorter-length tapes focused on density. The asymmetrical lob is a natural fit for layered lengths.
Want to try the hime cut or a vampire haircut? The shorter front pieces can be crafted from your own hair or shorter tapes, while the dramatic back length comes from the longer wefts. It’s all about strategic placement.
Even romantic goth hairstyles or glitchy glam hair with piece-y, textured details are easier when you start with a dimensional, layered base. You have so much more hair to play with!
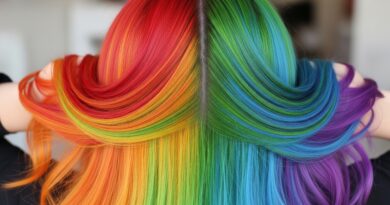
Color Melting & Dimension
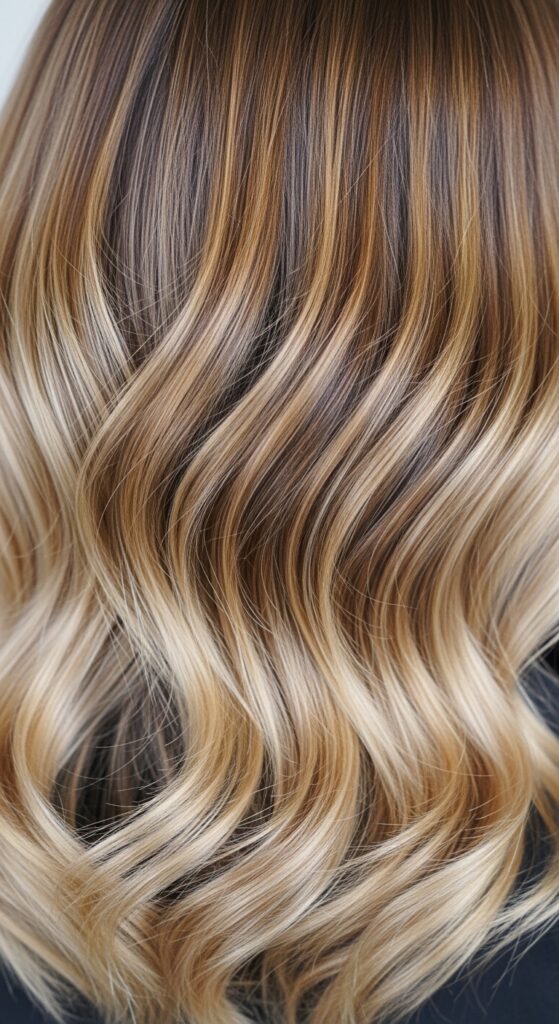
If you have highlights or balayage, your extensions need to match that dimension. Single-color extensions often look flat. The solution is to get wefts that are already pre-blended with highlights or lowlights.
Your colorist can also “color melt” the extensions once they’re in, painting color directly onto them to blend with your natural regrowth and ends. This makes the grow-out period much more graceful.
With layered lengths, this color dimension looks even more natural, as the light catches different pieces throughout the hair. It’s a step that elevates the look from “nice” to “is that really all her hair?”
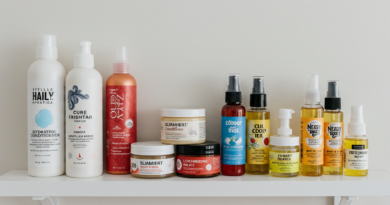
Daily Care & Maintenance Routine
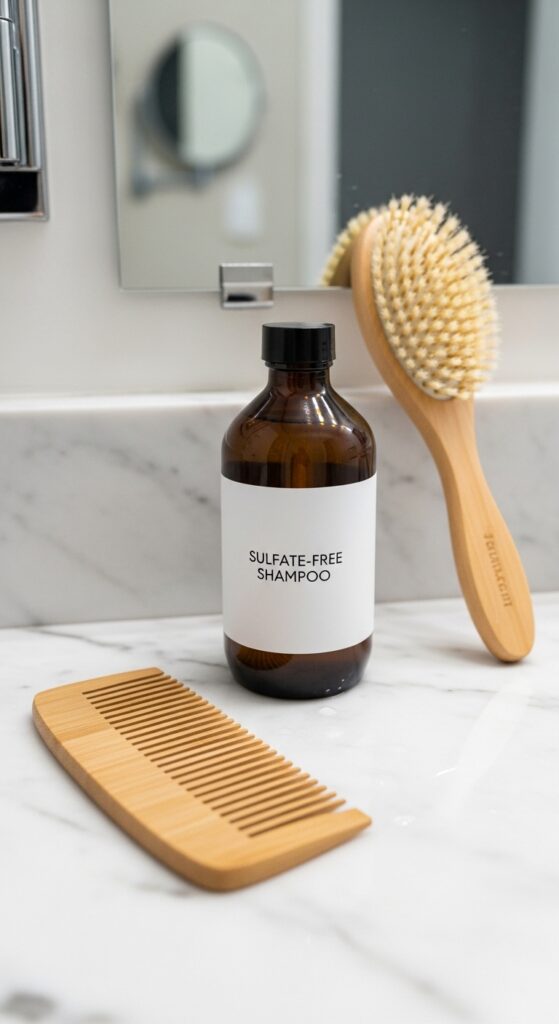
Caring for tape extensions is simple but specific. You must use sulfate-free and alcohol-free products. These keep the tape adhesive strong and the hair healthy. Wash your hair in a downward motion, avoiding the roots where the tapes are.
Condition from the mid-lengths to ends. Never sleep with wet hair—it can cause tangling. Always brush gently from the ends up, using a loop brush or a soft bristle brush designed for extensions.
This prevents tugging at the tapes. A quick, gentle brush-out morning and night keeps everything smooth and prevents matting. It becomes second nature in just a couple days.
How to Hide the Tapes at Your Part
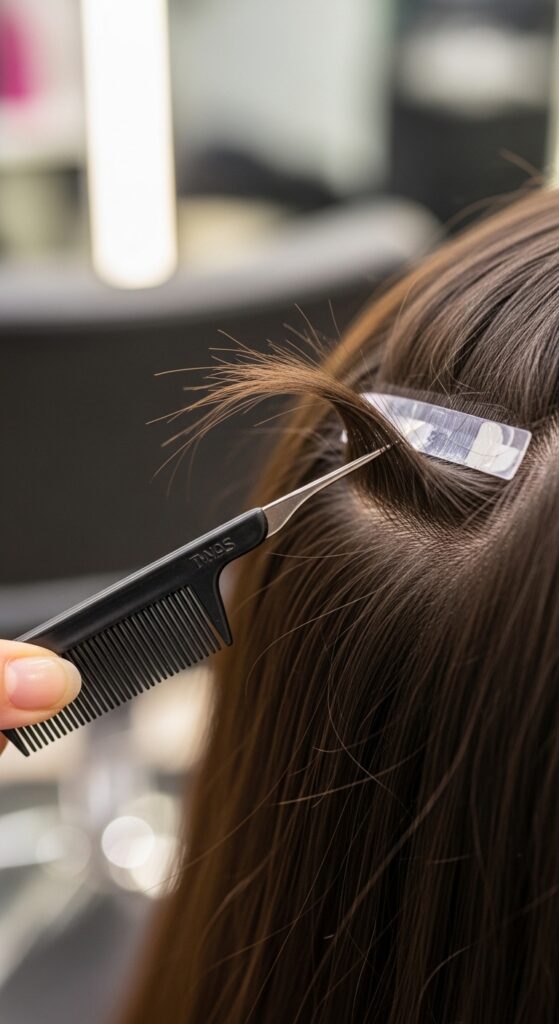
This is the number one worry, and the fix is simple. When your stylist applies the tapes, they will avoid placing them directly along your primary part line. The layered technique helps, as shorter tapes are placed further back.
When styling, after you create your part, use the tail of a comb to gently lift a very thin section of hair from the side of your part. Lay it over the area where a tape might be closer. This tiny bit of coverage is all you need.
With practice, you can do this in seconds. Also, using a root powder or spray on your part can add volume to your bio hair, providing more coverage. It’s truly a non-issue once you know the trick.
Working Out & Swimming With Tapes
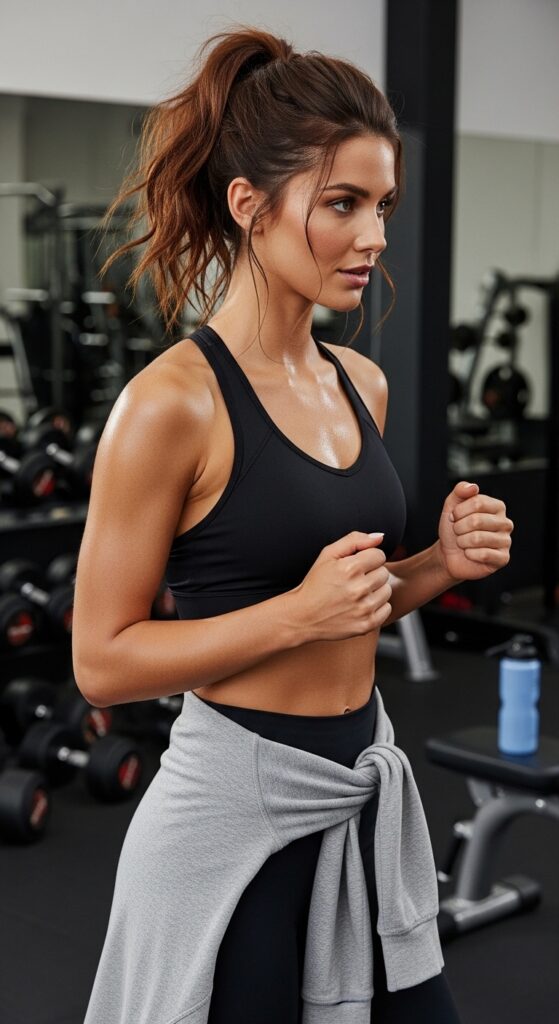
Yes, you can live your life! For workouts, a loose, mid-height ponytail or braid is best. Avoid super tight, high ponytails that put constant tension on the tapes. After sweating, rinse your scalp with water if you can, and let your hair dry fully before brushing.
For swimming, saturate your hair with clean water and a leave-in conditioner before getting in the pool or ocean. This limits how much chlorinated or saltwater your hair absorbs. Wear a cap if possible.
Afterwards, wash and condition as soon as you can. The tapes are very secure, but chlorine and salt can be drying to the hair itself, so this routine protects your investment.
When to Get Them Moved Up: The Timeline
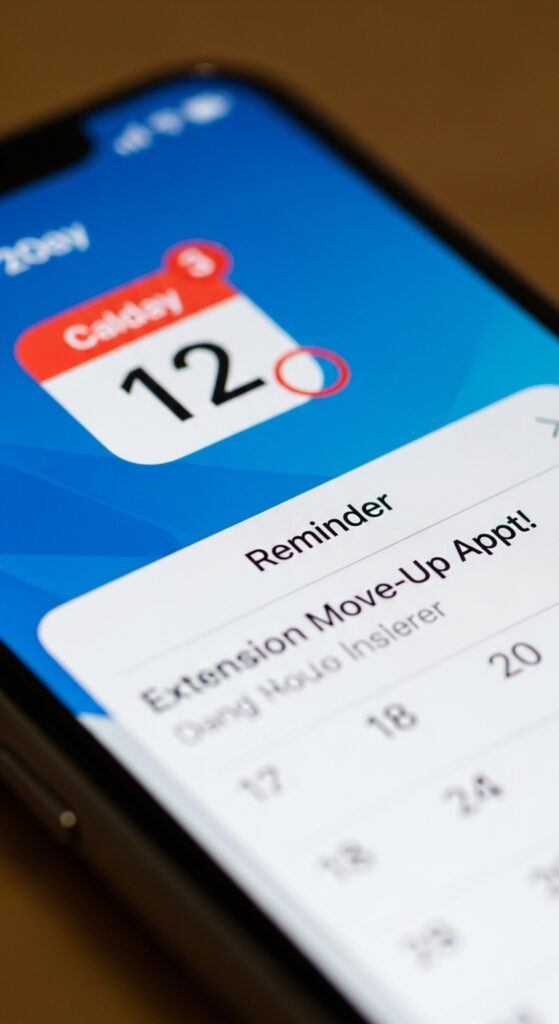
Tape extensions need to be moved up every 6-8 weeks, depending on how fast your hair grows. As your natural hair grows, the tapes will shift away from your scalp. You’ll see a small gap (about a quarter-inch).
That’s your sign it’s time for maintenance. Don’t wait longer, as the tapes can start to twist or tangling can occur. The move-up process is quick—your stylist removes the old tapes, cleans the adhesive residue, and reapplies fresh tapes closer to the root.
You keep the same hair wefts, so it’s cost-effective. Mark it in your calendar! Consistent maintenance is the key to always looking seamless and avoiding damage.
DIY vs. Professional Installation
I have to be totally honest here: application is a job for a certified professional. The precision needed for placement, tension, and that crucial layering of lengths is a skilled technique. A pro ensures the tapes lie perfectly flat and your natural hair isn’t damaged.
DIY kits are tempting, but the risk of incorrect placement, tangling, and damaging your own hair is very high. You could ruin an expensive set of hair. The cost of professional installation is worth the peace of mind and flawless result.
Think of it as an investment in the look and the health of your hair. Find a stylist who specializes in tapes and look at their portfolio. It makes all the difference.
Choosing the Right Hair Quality
Not all extension hair is created equal. You want 100% human Remy hair. This means the cuticles are intact and aligned, so the hair stays smooth, shiny, and resists tangling. It can be colored and styled just like your own hair.
Non-Remy or synthetic hair will matte, tangle, and lose its luster quickly. It’s a false economy. Investing in high-quality Remy hair means your set will last through multiple move-up appointments (usually a year or more with care).
Ask your stylist about the origin and quality. Good hair blends better, holds style longer, and feels incredible. It’s the foundation of the entire look.
Budgeting for the Look: The Real Cost
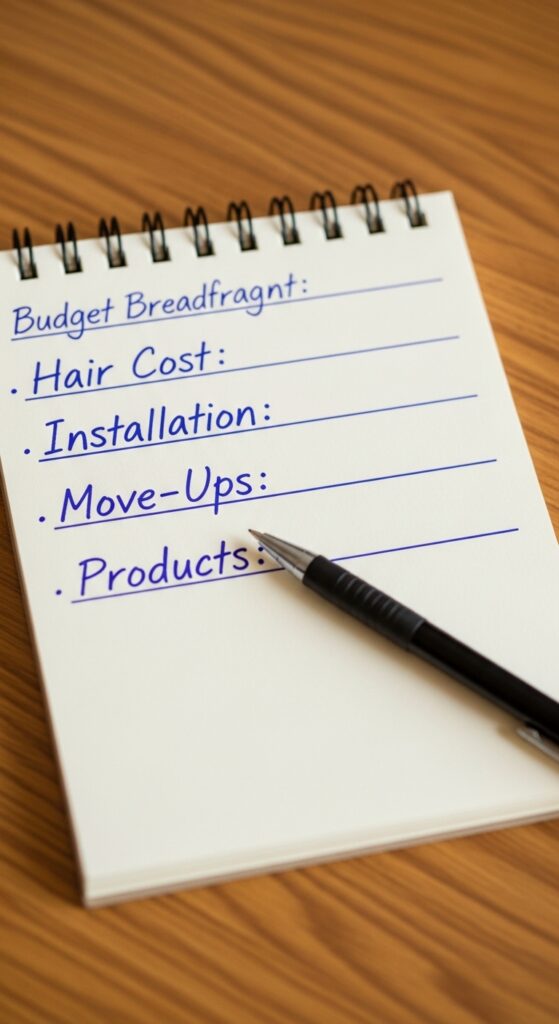
Let’s talk numbers. The cost has three parts: the hair itself, the initial installation, and the move-up appointments. A high-quality “Glam 30” set can range from $300 to $800+ for the hair. Installation might be $200-$400.
Move-ups every 6-8 weeks are typically $100-$200. You also need the right aftercare products. It’s an investment, but when you break it down per day over a year, it often makes sense.
Compared to constant salon visits for treatments or blowouts to achieve volume, many find extensions to be a worthwhile splurge for the confidence and time saved daily. Plan for it, and don’t skimp on the hair quality.
Common Problems & Easy Fixes
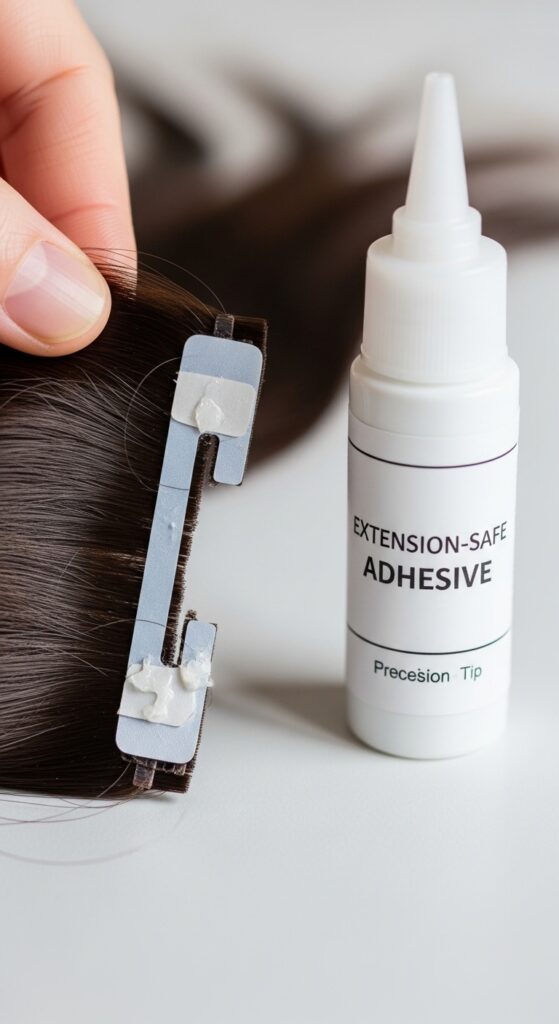
A tape feels loose? Don’t panic. Sometimes one tape can release a little early. Have a small bottle of extension tape adhesive on hand. You can carefully re-tape it yourself as a temporary fix, but see your stylist soon.
Some tangling at the nape? This is often from not brushing thoroughly or sleeping on wet hair. Be diligent with gentle brushing. Use a silk pillowcase to reduce friction.
If you experience itching, it could be from product buildup. A clarifying wash (sulfate-free!) might help. Most issues have simple solutions. Communication with your stylist is key!
Taking Them Out: The Removal Process
Never, ever pull or cut tapes out yourself. Professional removal is a must. Your stylist will use a special alcohol-based solution or oil designed to dissolve the adhesive without harming your natural hair.
They gently slide the tapes apart. The process is painless and quick. After removal, your stylist will cleanse your hair and give it a deep conditioning treatment to restore moisture.
Your natural hair will be its original length and thickness. With proper application and removal, there is no damage. You can take a break or get a fresh set applied right away.
Alternatives to Consider
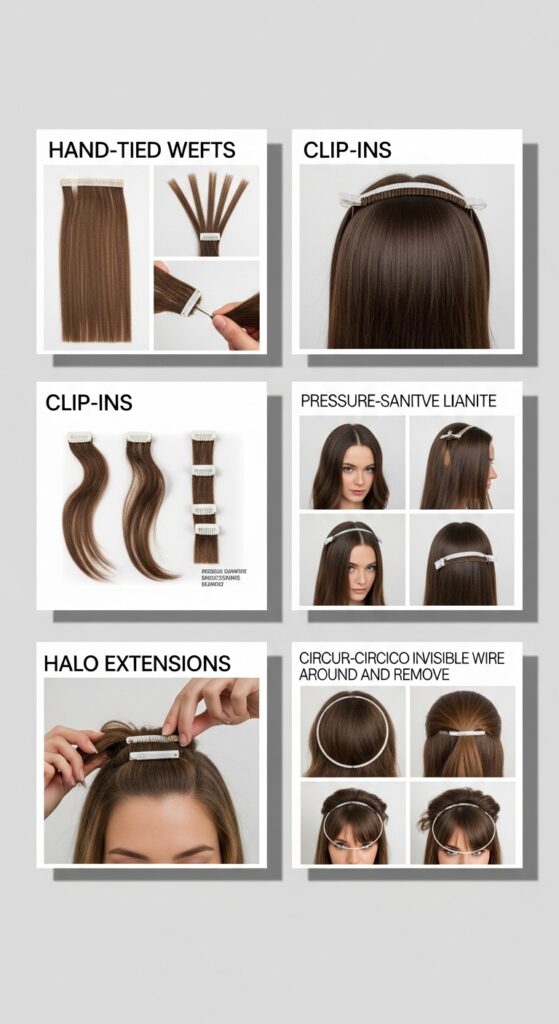
Tapes are my favorite for everyday wear, but they aren’t the only option. If you want even more flexibility, hand-tied wefts are incredible for volume and a seamless feel. They’re more expensive but lighter.
Clip-ins are perfect for occasional wear. You can layer different lengths in clip-ins too! A Halo extension is great for quick, temporary length without any attachment to your bio hair.
The best method depends on your lifestyle, budget, and how permanent you want the change. For a permanent, seamless, layered look, tapes or hand-tied wefts are the top contenders.
Your Pre-Appointment Checklist

Be prepared to get the best results. Wash your hair the night before your appointment with a clarifying shampoo to remove all product and oil. Do NOT apply any conditioner, oil, or stylers afterward.
Come with clean, dry, product-free hair. Bring 3-5 inspiration photos that show your desired length, color, and overall vibe. This helps your stylist visualize the final look.
Write down any questions you have about care, styling, or the process. Good communication sets you and your stylist up for a successful partnership and your dream hair.
My Personal Experience & Final Thoughts
I’ve worn layered tape extensions for three years now, and they completely changed my hair game. The confidence of having thick, long hair that behaves is everything. I love that I can style them in 10 minutes flat.
The