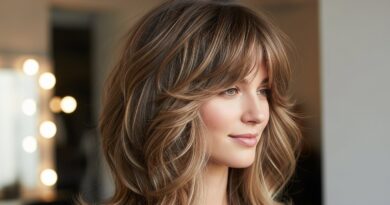
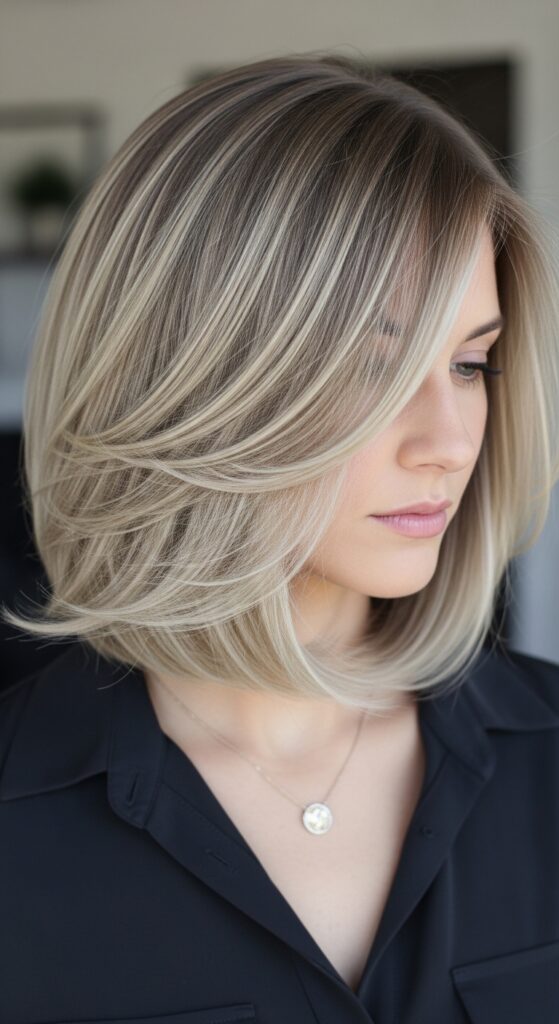
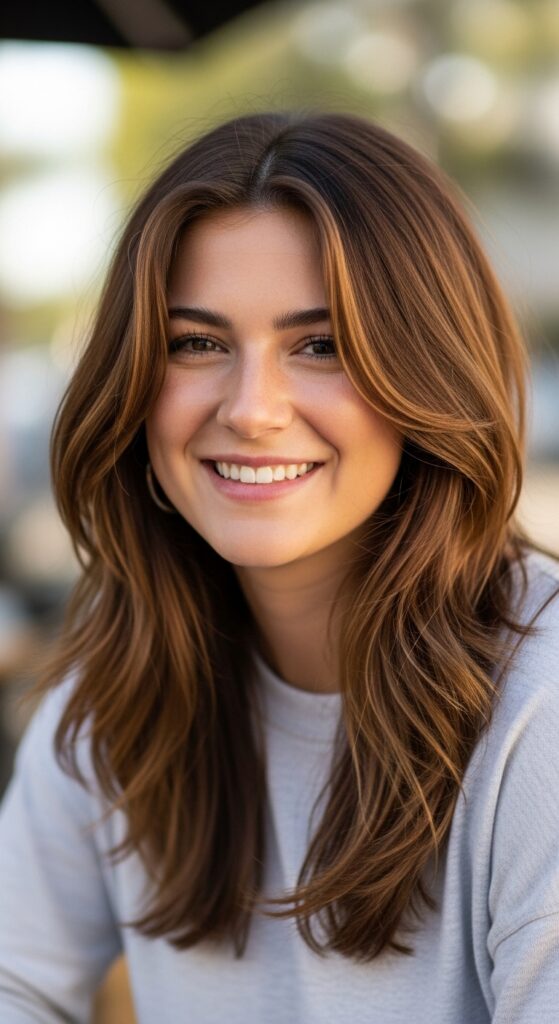
Gracefully 27 Asym Layer Graduation Softening Transitions Between Lengths
Hey you. So you’re thinking about a haircut, but not just any haircut. You want something that feels like you—grown-up, a little softer, but with that cool-girl edge that doesn’t try too hard. I get it. You’re past the dramatic chops and need a style that transitions as gracefully as you do through your day.
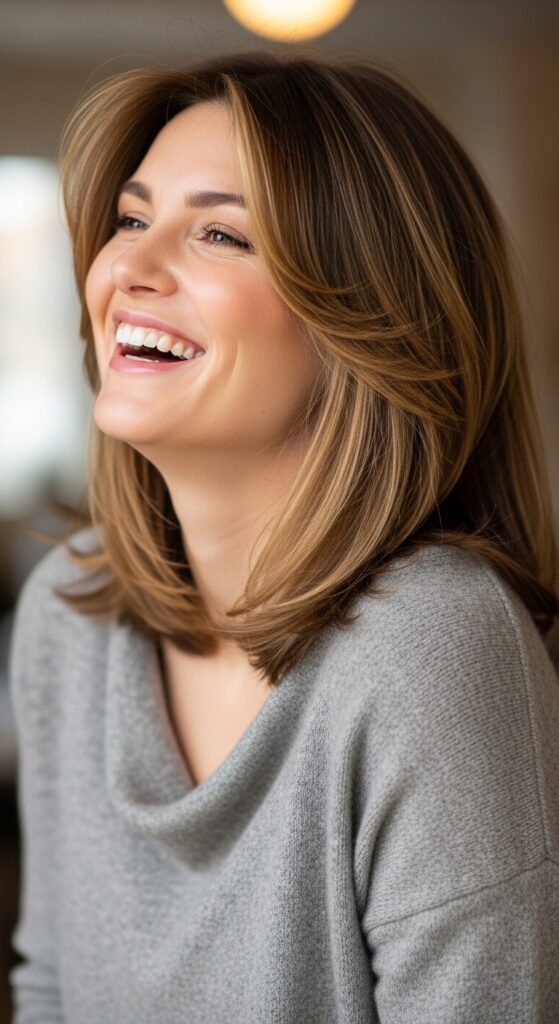
That’s where the magic of soft, graduated layers comes in. It’s the secret to looking polished without the fuss. This isn’t about a drastic change; it’s about strategic shaping.
Think of it as the “quiet luxury” approach to hair. It adds movement, softens your features, and makes styling a breeze. Whether your hair is collarbone-length or longer, this technique is your best friend.
Let’s break down exactly how to ask for it, style it, and make it your signature look. I promise it’s easier than you think.
What Are Graduated Layers, Really?
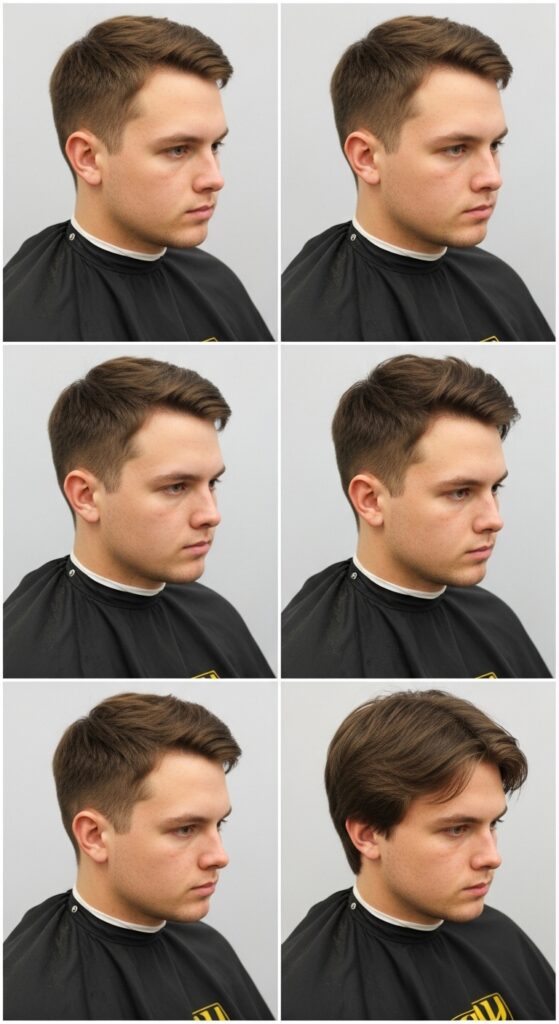
Let’s clear up the salon jargon. Graduated layers are simply layers that are cut at a slight angle. They’re shorter in the back and gradually get longer toward the front.
This technique removes bulk and creates a beautiful, cascading shape. It’s the opposite of a blunt, heavy cut. The goal is softness and flow.
For us, it’s perfect because it adds dimension without looking overdone. It’s that “I woke up like this” texture, but engineered by a pro.
Why This Cut is Perfect for Right Now
This style is having a major moment. It perfectly captures the “old money hair” vibe—effortless, healthy, and timeless. It’s not chasing a fad; it’s investing in a great shape.
It also plays beautifully into the 2026 hairstyles trend we’re seeing, which is all about softness and personalized texture. It’s romantic without being fussy, cool without being harsh.
It works with your natural texture, whether it’s straight, wavy, or curly. It’s the ultimate adaptable cut for a busy life.
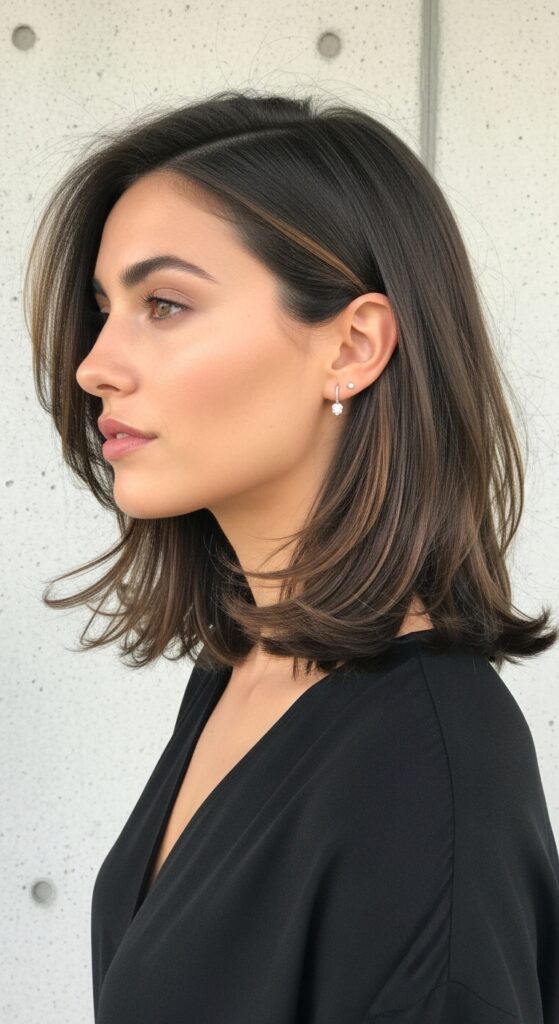
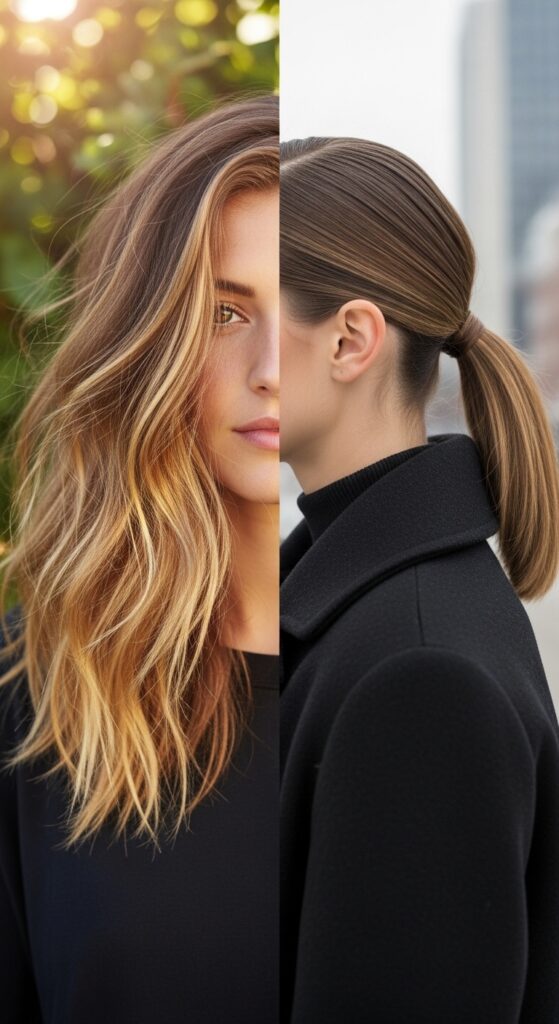
The Asymmetrical Lob: Your New Go-To
If you want a bit more edge, ask for an asymmetrical lob. This is a longer bob that’s slightly shorter on one side. It’s playful and modern.
When combined with graduated layers, it softens the asymmetry so it doesn’t feel severe. The transition between the shorter and longer sides feels organic and cool.
This is a great entry point if you’re scared of a full-on bob. It gives you that chic feel while keeping some length to play with.
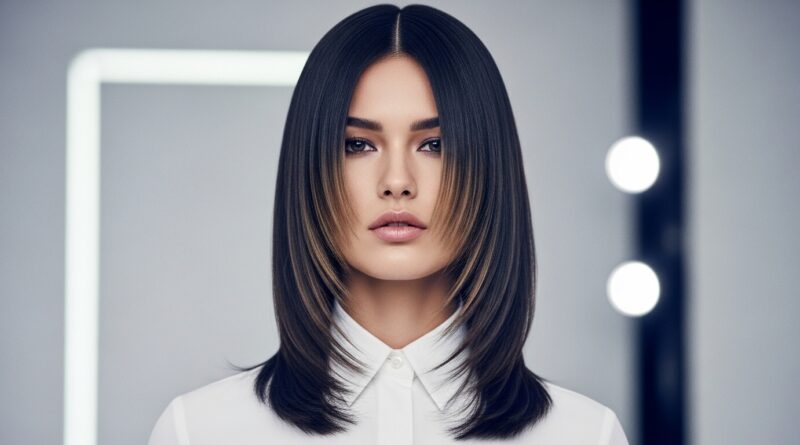
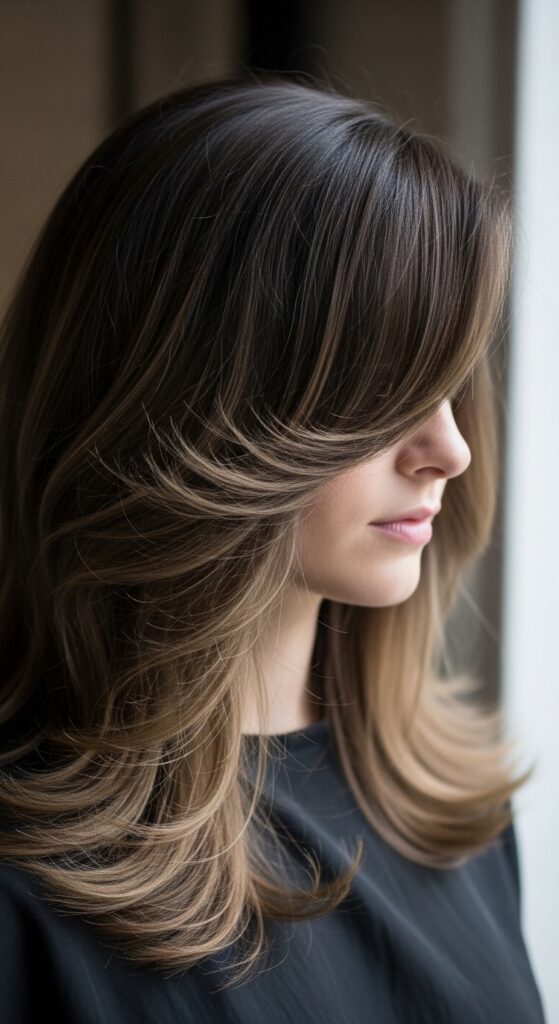
Softening the “Vampire Haircut”
The vampire haircut (think sharp, dramatic layers) is huge. But for everyday? It can be a lot. We can take the essence of it and soften it.
Ask your stylist for the interior layering and texture of that style, but with the ends point-cut and feathered. This removes any harsh lines.
You get that lived-in, romantic goth hairstyles texture without the commitment to a super-sharp, dramatic look. It’s wearable dark academia.
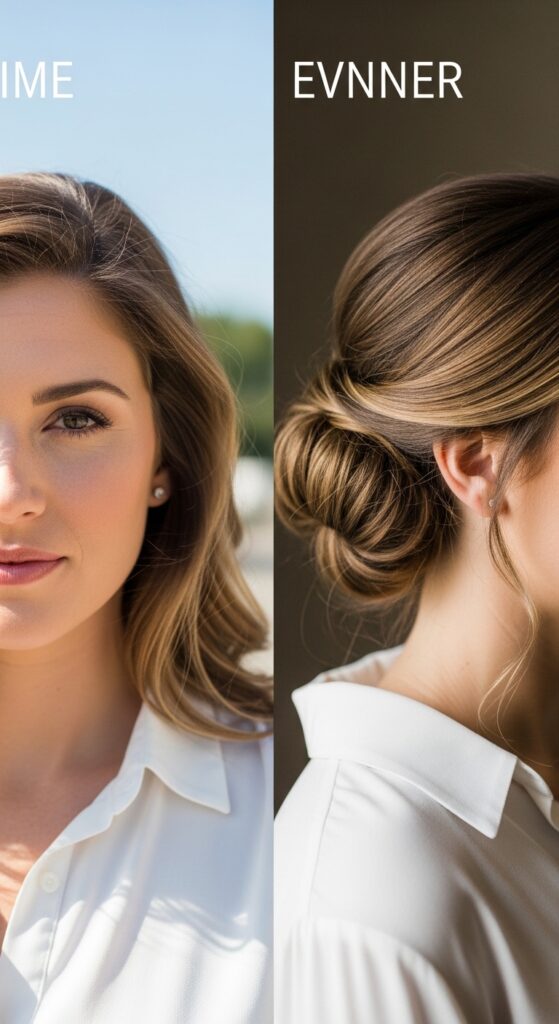
A Nod to the Hime Cut
The hime cut inspires this look’s face-framing potential. That style features very distinct, blunt front pieces. We’re doing a softened version.
Ask for longer, wispier face-framing layers that blend seamlessly into your graduation. This highlights your eyes and cheekbones beautifully.
It’s a flattering detail that makes you look refreshed and works with glasses, hats, and all your accessories.
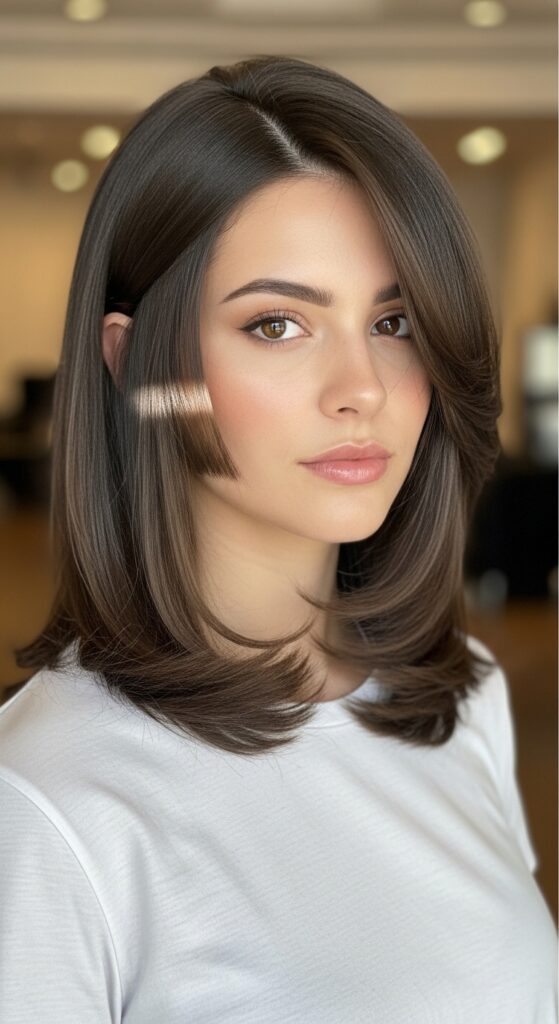
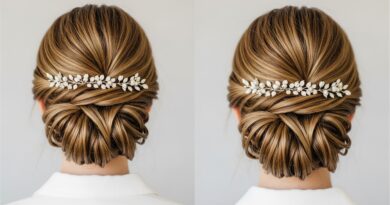
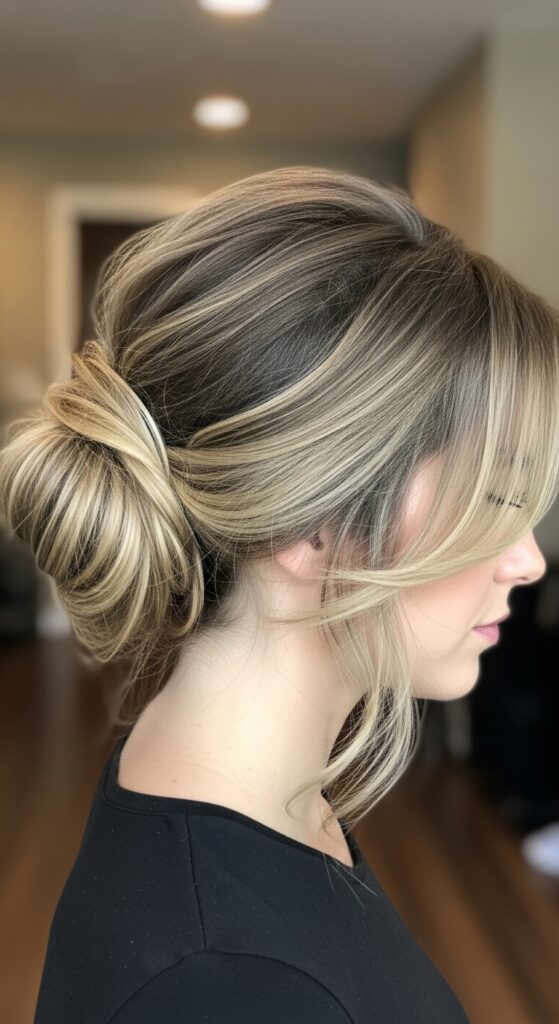
Creating the “Quiet Luxury Bob” Vibe
The quiet luxury bob is all about impeccable, understated shape. The key is in the internal graduation. The weight is removed from the inside, not just the ends.
This makes the hair swing and move with a beautiful, heavy lightness. It looks expensive because the cut does all the work, not the product.
For longer hair, this same principle applies. The interior layers create that coveted, airy volume at your crown.
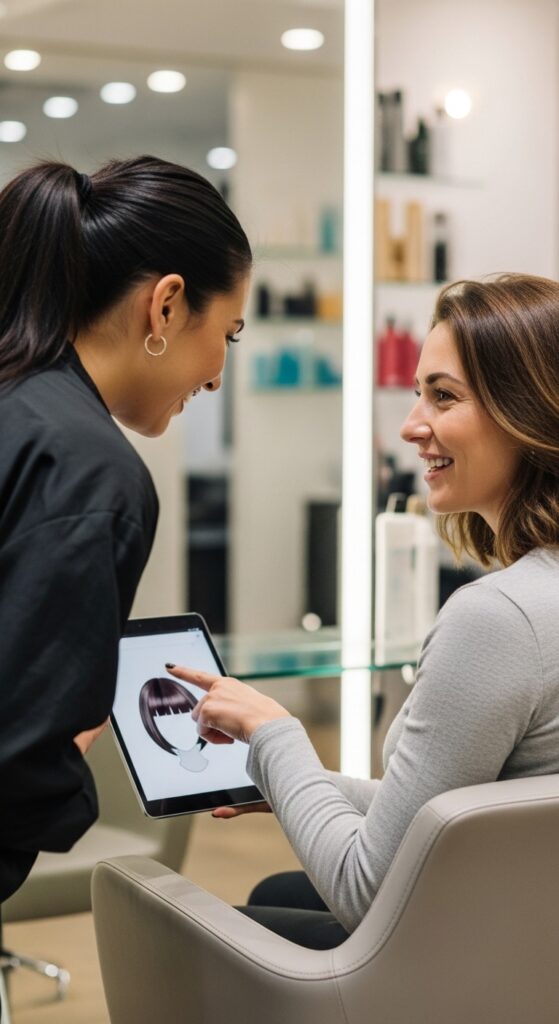
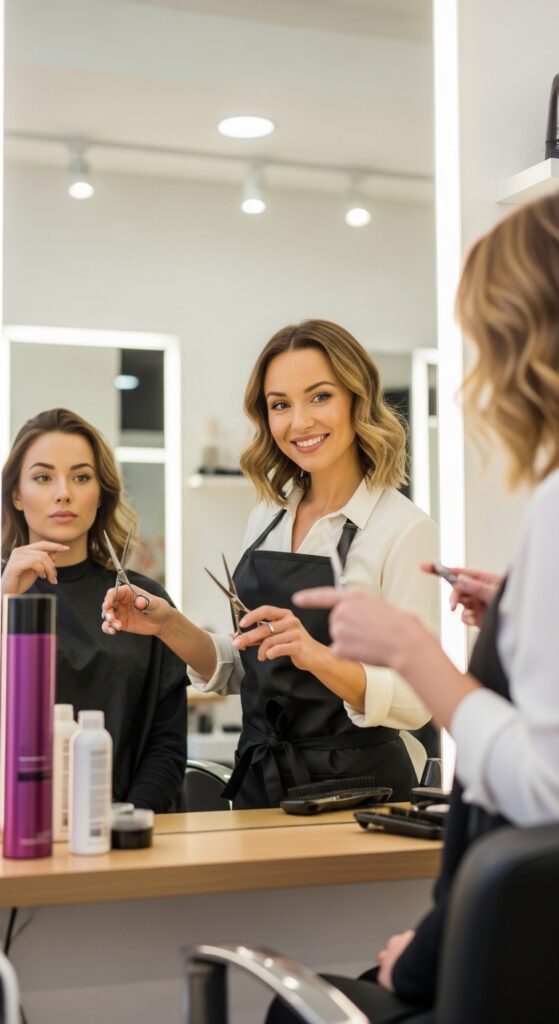
How to Describe This to Your Stylist
Walking into the salon can be nerve-wracking. Here’s your script: “I want soft, graduated layers to remove weight and add movement. I’d like the back to be slightly stacked but blended, with longer face-framing pieces.”
Bring pictures! Show them a mix of the shape you like and the soft texture you want. Say “softened” and “lived-in” a lot.
Be clear on length. Point to where you want the shortest layer in the back (e.g., at your nape) and the longest front piece (e.g., collarbone).
Daily Styling in Under 5 Minutes
This cut styles fast. For day one hair, just apply a texturizing spray or mousse to damp roots and let it air dry. Scrunch a little as it dries.
For a quick refresh, flip your head over and mist dry shampoo at the roots. Flip back and tousle. The layers will naturally fall into place.
If you need to smooth it, a quick pass with a large round brush at the roots and under-layers gives a polished blowout look in minutes.
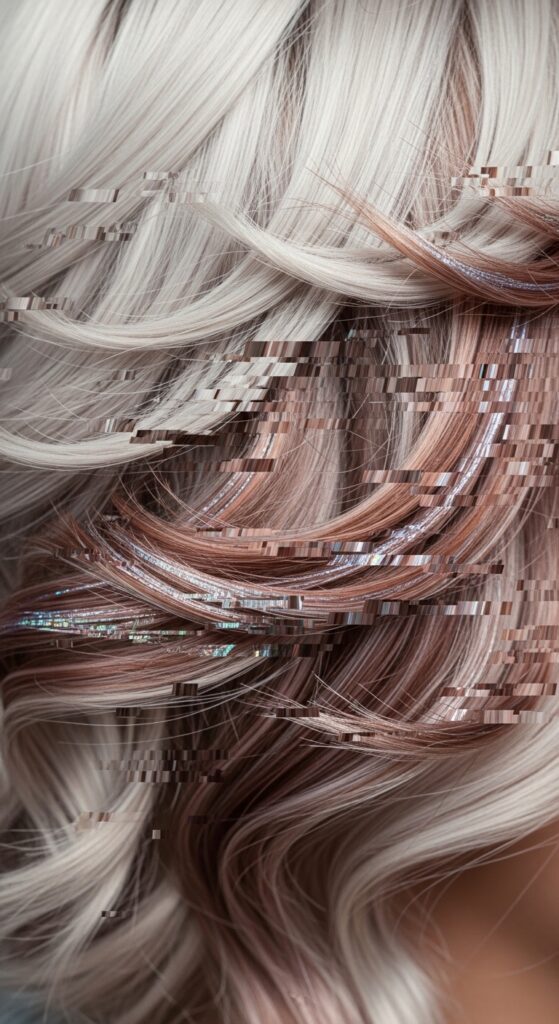
Adding “Glitchy Glam” Texture
Love the glitchy glam hair trend? It’s about imperfect, piece-y texture. You can add this easily to your graduated layers.
Take a small section of your shorter layers near your face. Wrap them around a small-barrel curling iron, alternating the direction of the curl.
Then, gently pull the curls apart with your fingers. This creates intentional, disorganized pieces that look artistic and cool.
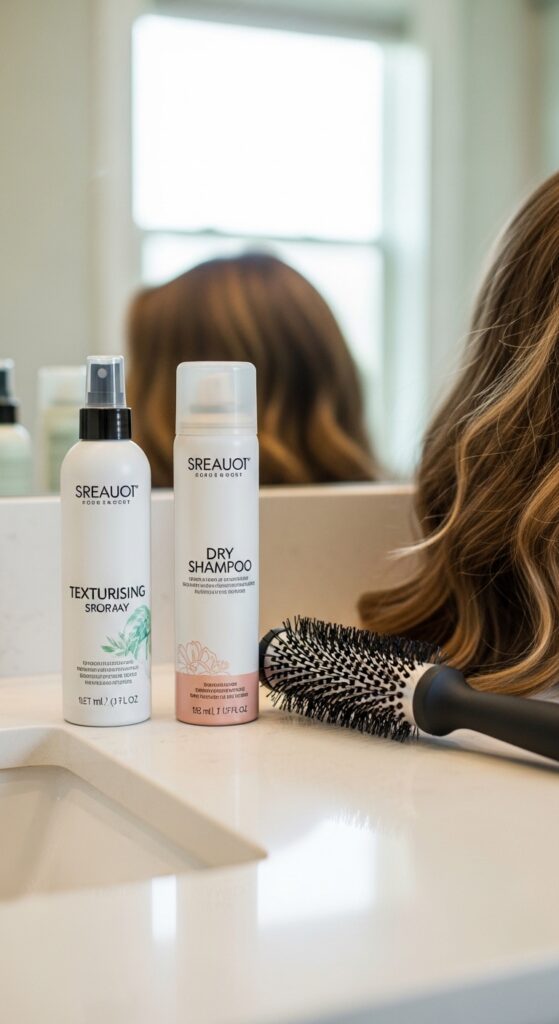
The Perfect Products for This Cut
You don’t need a cabinet full of stuff. Focus on three heroes: a volumizing mousse for roots, a light texturizing spray for ends, and a smoothing serum for flyaways.
- Mousse: Apply to towel-dried roots for lift.
- Texturizing Spray: Mist on dry ends for separation.
- Serum: A tiny drop on palms, run over the surface.
Less is more. Your cut should be the star.
Heat Styling for Maximum Swing
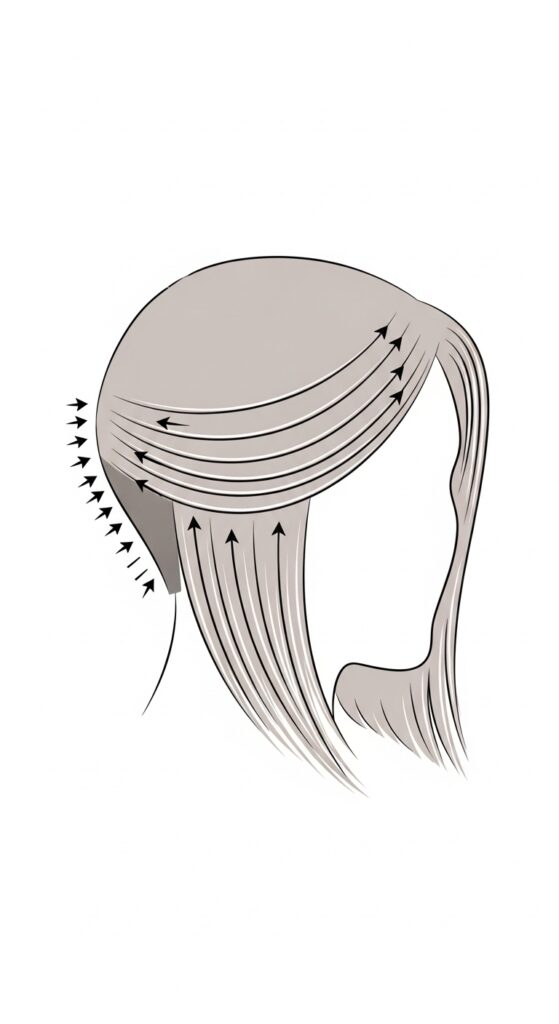
For that salon-perfect swing, use a round brush. Start with sections at the nape of your neck, rolling the brush under and blowing dry.
Work your way up to the top layers, always directing the hair slightly back and away from your face. This builds the graduated shape.
Finish with a blast of cool air to set the style. This smooths the cuticle and adds shine, making your graduation look super intentional.

Second & Third-Day Hair Magic
This cut gets better on day two and three. The natural oils and slept-on texture make the layers blend even more seamlessly.
Refresh it by spritzing a salt spray mixed with water on your mid-lengths. Braid your hair loosely overnight for soft, piece-y waves in the morning.
A high, loose ponytail also looks amazing. The shorter layers and face-framing pieces will escape beautifully, making even a lazy style look chic.
Managing the Growing-Out Phase
The best part? This cut grows out gracefully. Because the layers are graduated and blended, there’s no harsh line to grow through.
Every 12 weeks, just ask your stylist for a light trim to reshape and maintain the graduation. It’s low-maintenance in the long run.
As it grows, it will slowly morph into a beautiful, soft shag or a longer layered cut. It’s a style that evolves with you.
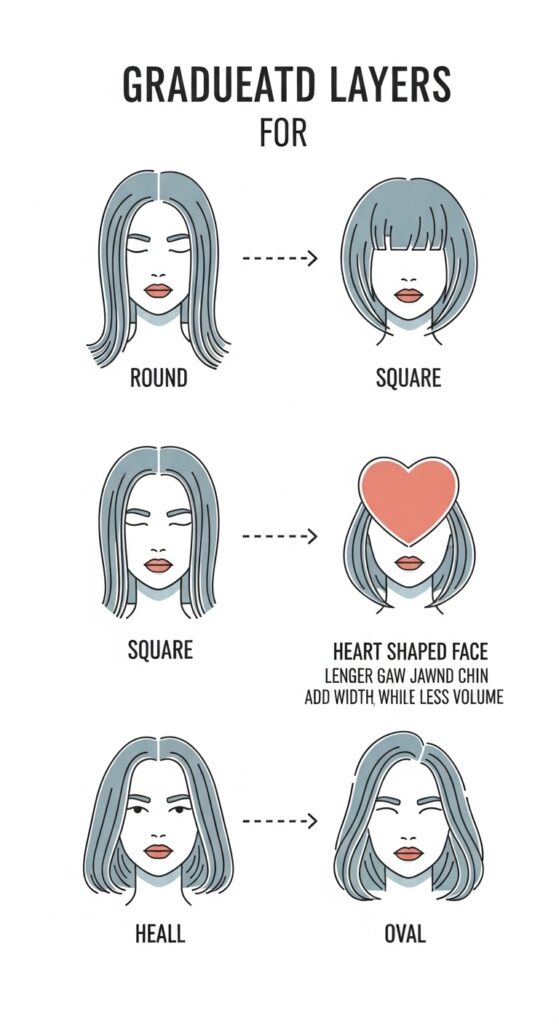
Face Shapes This Cut Flatters
This is a universally flattering technique. For round or square faces, longer face-framing layers create a lengthening illusion.
For heart-shaped or oval faces, the layers add beautiful width at the jawline, balancing your features perfectly.
The stylist customizes the graduation’s angle and the layer’s starting point to suit your bone structure. It’s a personalized fit.
Seasonal Adaptations: Summer vs. Winter
In summer, embrace the texture! Let it air dry wavy and use a sea salt spray. Pull the front pieces back with cute clips.
In winter, combat static and dryness. Use a hydrating mask weekly. A sleek, low ponytail with face-framing pieces left out looks incredibly elegant.
The cut’s versatility is its superpower. It works with hats in winter and humidity in summer.
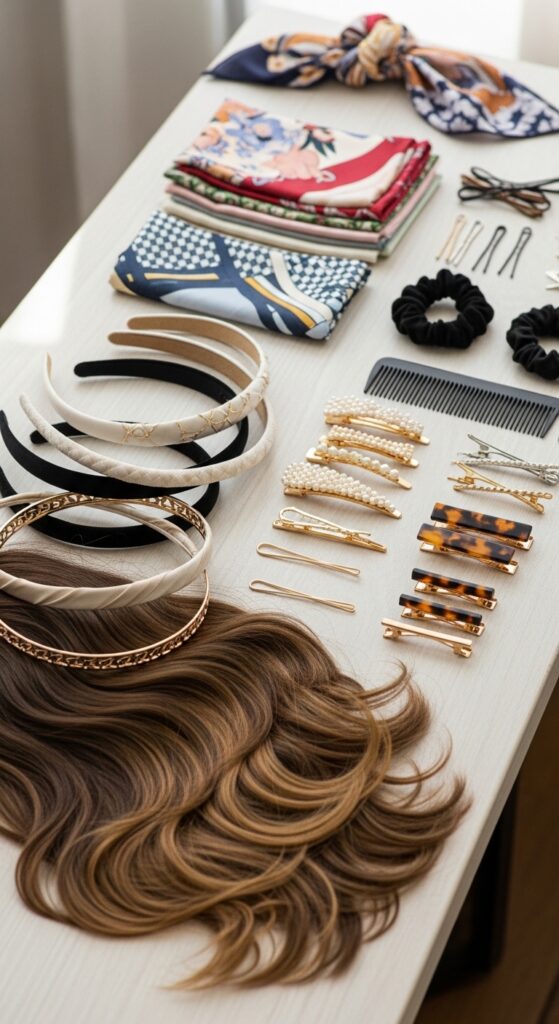
Accessorizing Your Graduated Layers
Accessories pop with this cut. Thin headbands sit perfectly without bumping into bulk. Small, delicate barrettes can pin back shorter layers.
Statement earrings are a must—with hair off your face, they get the spotlight. Silk scarves tied as headbands or in a low ponytail look fabulous.
Play up the old money hair aesthetic with classic, gold-toned clips and simple, elegant pieces.
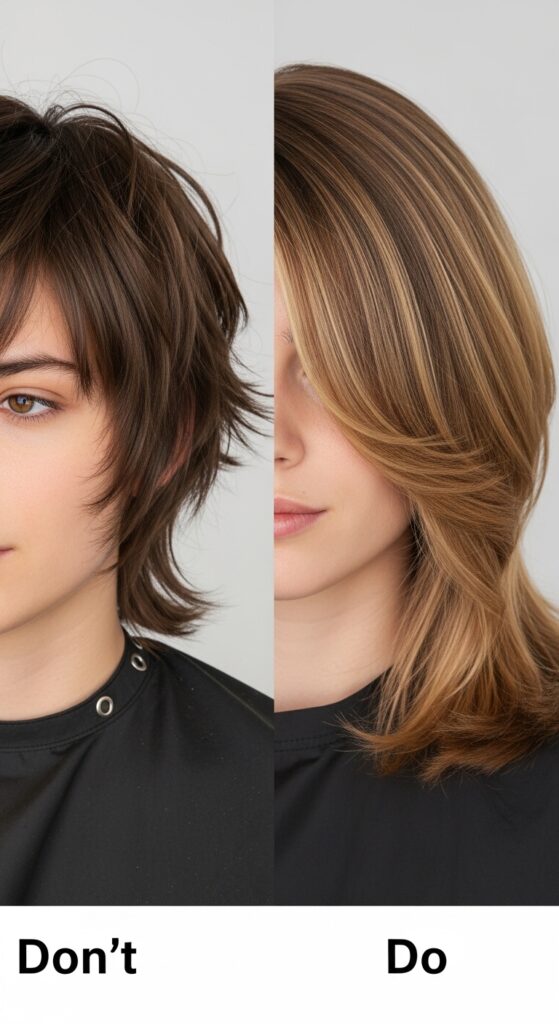
Common Mistakes to Avoid
The main mistake is cutting the layers too short or too chunky. You want them blended, not stair-stepped. Always err on the side of longer layers.
Over-thinning the ends can make hair look wispy and weak. Good graduation removes weight from the interior, not just the perimeter.
Using too much heavy product will weigh down the delicate layers you just paid for. Stick to light, airy formulas.
From Office to Evening in Seconds
This is your 60-second transformation. For evening, part your hair deeply on one side. It instantly feels more dramatic.
Take the longer front section and twist it back, securing it with a hidden bobby pin. This creates a mini “updo” effect while leaving the rest down.
Add a shine spray or a touch of glitter gel to your shorter, top layers for a glitchy glam evening vibe.
Curly & Wavy Hair Considerations
If you have curls or waves, graduation is your best friend. It removes bulk so your curls can spring up freely and uniformly.
Ask for a dry cut or a cut on styled hair so your stylist can see your natural pattern. The layers should enhance your curl, not fight it.
You’ll find your curls are more defined, bouncy, and less triangular. It’s a game-changer for curly girls wanting shape.

Finding the Right Stylist For You
Look at stylists’ Instagram portfolios. Do you see soft, blended layers? Do you see cuts that look like they grow out well? That’s your person.
Don’t be afraid to book a consultation first. Talk to them about the look. You should feel heard and confident in their plan.
A good stylist will ask about your routine, your hair’s history, and what you don’t like. It’s a partnership.
My Personal Hair Journey with This Cut
I grew out a pixie into this cut, and it saved my hair confidence. The growing-out stages were camouflaged by the soft layers.
It gave me that “I have a style” feeling without the high maintenance. I could be low-key or dress it up, which fit my life perfectly.
It’s the cut I always go back to. It feels like me—polished but real, soft but with structure. It’s the sweet spot.
Your Final Checklist Before the Chop
- Have 3-5 reference photos that show the texture and shape you love.
- Know your desired length in the back and the front.
- Be ready to describe your daily routine (e.g., “I air dry 90% of the time”).
- Trust your stylist’s advice on customization for your hair type.
- Get excited! You’re investing in a style that will make your daily life easier.
And that’s it, friend. The secret to looking and feeling put-together isn’t a closet full of new clothes—sometimes, it’s just the right haircut. One that moves with you, grows with you, and makes you feel like the best version of yourself with minimal effort.
This soft, graduated approach is truly a workhorse style. It’s the quiet background star of your look, giving you that polished, “I know what I’m doing” vibe we all crave at 27 and beyond.
I’d love to hear from you! Have you tried a cut like this? Are you booking an appointment? Tell me all about your hair journey in the comments below. And if you found this helpful, save this post to Pinterest to keep these tips handy and inspire others looking for their perfect cut.