How to Get angled hair Hair That Looks Effortless (But Isn’t)
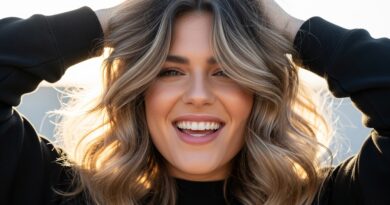
You’ve seen it everywhere: on celebrities, influencers, and that impossibly cool person at your local coffee shop. Angled hair—whether a sharp bob, a dramatic lob, or soft, face-framing layers—has an undeniable allure. It’s the epitome of chic, a style that whispers, “I woke up like this,” while simultaneously commanding attention. But here’s the secret every stylist knows: the most effortless-looking angled hair is often the product of considerable effort and precision.
This isn’t a style you can simply tousle and go. It’s a masterclass in balance, a strategic play of lines and weight that can sculpt your face, highlight your best features, and elevate your entire aesthetic. If you’re ready to embrace the angle but want to avoid the helmet-head or overly-done look, you’ve come to the right place. This guide will walk you through everything from the initial consultation to daily maintenance, revealing how to achieve that coveted, lived-in perfection.
It All Starts with The Cut: The Blueprint for Effortless Angles
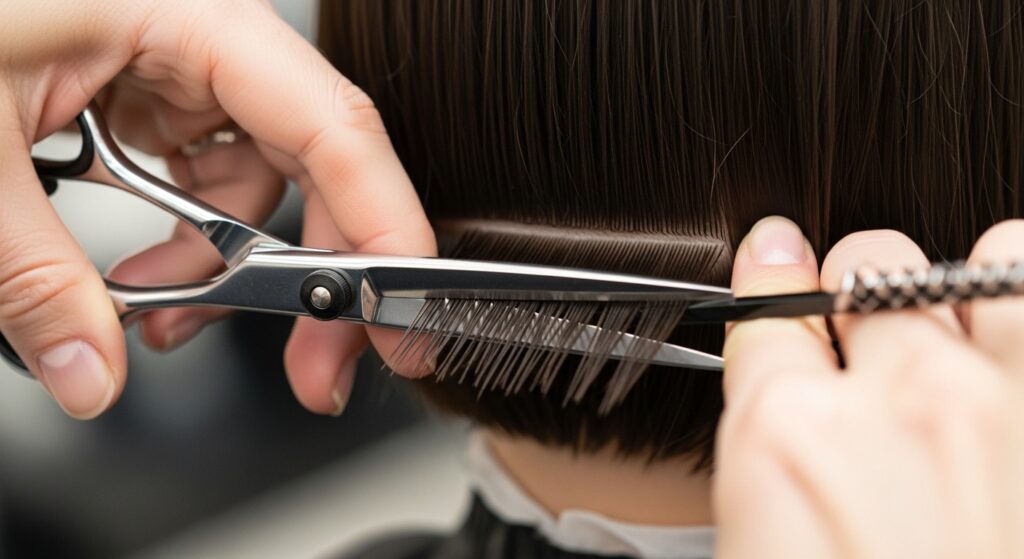
You cannot style your way into a great angled haircut. The foundation is, and always will be, the cut itself. A poorly executed angle will fight you every day, while a precision cut will almost style itself. This is where the “effortless but isn’t” mantra truly begins.
When you sit in the stylist’s chair, communication is key. Don’t just say you want “angled hair.” Bring visual references. Discuss the degree of the angle. Do you want a subtle A-line, where the back is just an inch or two shorter than the front? Or are you craving a dramatic, geometric difference? Your lifestyle is also crucial. Be honest about how much time you’re willing to spend on styling each morning. A razor cut can create a softer, more textured angle that is easier to manage, while a scissor cut offers cleaner, more defined lines.
The most important part of the consultation is the face shape analysis. A skilled stylist will use the angle to balance your features. For example, a strong angle can help soften a square jawline or add width to a heart-shaped face. The goal is to create a cut that looks like it was made for you—and only you.
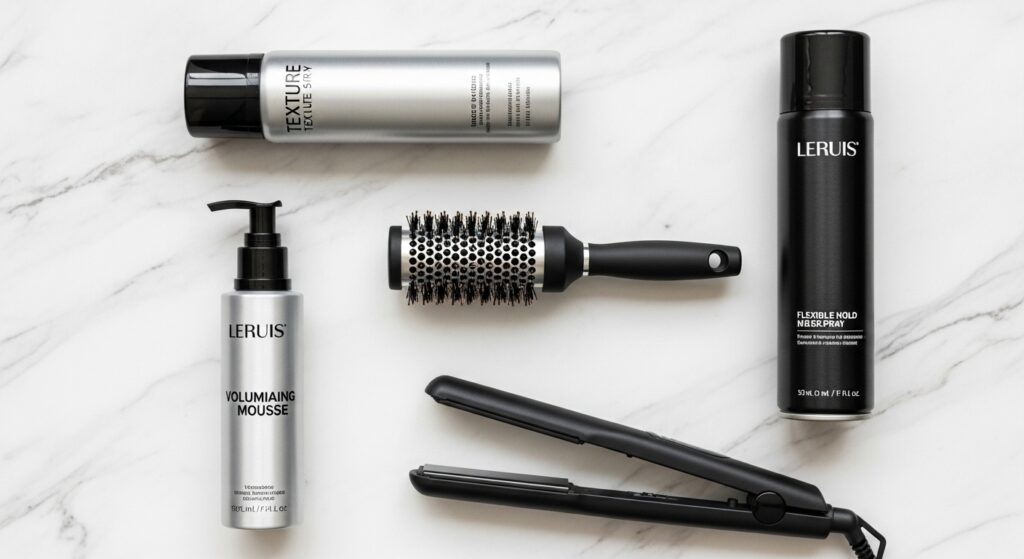
The Styling Toolkit: Your Secret Weapons for Lived-In Texture
Once you have the perfect cut, the right tools and products become your allies in creating that “I didn’t try” texture. Forget heavy, glossy gels and shellac-like hairsprays. For an effortless angled look, you need products that build texture and separation.
Essential Products:
Texture Spray: This is your holy grail. A good texture spray adds grit, volume, and a touch of hold without stiffness. It’s perfect for breaking up sleekness and creating that piecey, lived-in feel.
Volumizing Mousse: Applied at the roots to damp hair, mousse gives the hair the “oomph” it needs to hold the shape of the angle, preventing it from falling flat.
Flexible Hold Hairspray: Avoid the super-hold varieties. You want a spray that allows for movement but keeps the general shape intact. A light mist is often all you need.
Flat Iron or Curling Wand: A 1 to 1.5-inch iron is versatile for adding subtle bends or waves to disrupt a too-perfect line.
Essential Tools:
A High-Quality Round Brush: This is non-negotiable for blow-drying. A ceramic or tourmaline brush will smooth the hair while allowing you to lift the roots and curve the ends under or out, depending on your desired finish.
A Powerful Blow Dryer: A fast-drying process is key to building volume and setting the style with less heat exposure overall.
The Step-by-Step Styling Ritual for “Undone” Perfection
Now, let’s put it all together. This daily routine is where the magic happens, transforming your precision cut into a soft, touchable masterpiece.
Step 1: Prep and Protect. Start with towel-dried hair. Apply a heat protectant spray from roots to ends, followed by a golf-ball-sized amount of volumizing mousse, focusing on the roots. This duo is your first line of defense and your foundation for volume.
Step 2: The Volume-Boosting Blowout. Using your round brush and blow dryer, section your hair. As you dry each section, pull the brush downwards but lift the roots at the scalp. For the angled ends, use the brush to guide the hair, curling the very ends under to create a soft, inward bend. This technique helps emphasize the A-line shape. Don’t aim for pin-straight perfection; a little natural wave is good.
Step 3: Introduce Texture and Movement. Once your hair is 100% dry, it’s time for the texture spray. Flip your head upside down and mist the spray lightly through the mid-lengths and ends. Scrunch your hair gently with your hands. This breaks up the blowout and adds that essential grit.
Step 4: The Strategic Bend. Take your flat iron or curling wand. Instead of curling your entire head, randomly select small sections—especially around your face and at the ends—and give them a soft, loose bend. The key is inconsistency. Alternate the direction of the curls (some under, some over) to create a natural, undone wave pattern. You’re not going for curls, just breaking the line.
Step 5: The Final Touch. Run your fingers through your hair to further separate the waves. Finally, hold your flexible-hold hairspray about 10 inches away and give it one light, all-over mist to set everything in place without making it crispy.

Maintaining the Illusion: Between Salon Visits
The angled haircut’s biggest tell of being high-maintenance is when it grows out and loses its shape. To keep the illusion of effortlessness, you need a smart maintenance plan.
Regular Trims are Non-Negotiable. An angled cut requires more frequent salon visits than a blunt cut. To maintain the sharp shape and prevent the heavier front from dragging down the style, plan for a trim every 6 to 8 weeks. This doesn’t have to be a major cut—just a quick cleanup of the lines.
Master the Second (and Third) Day Hair. The beauty of a textured angled cut is that it often looks better on day two. To refresh your style, focus on the roots. Use a dry shampoo not just to absorb oil, but to add volume and texture. Spray it at the roots, let it sit for a minute, then massage it in. For the ends, a light spritz of texture spray on your hands and scrunched through the hair will revive the waves and piecey-ness.
Nighttime Care. Protect your ‘do while you sleep. Consider a loose, low braid or a silk pillowcase to prevent friction and frizz, helping you wake up with your style largely intact.

Is the Angled Look Right for You? A Final Consideration
The angled haircut is remarkably versatile, but it’s important to be realistic about the commitment. It is a statement. It requires a skilled stylist, a consistent styling routine, and a willingness to keep up with trims. If you love the idea of a cut that does the talking, that adds instant polish and edge to your look, then the effort will be well worth it.
Remember, the goal is not to look like you just left the salon. The goal is to look like you have the world’s best hair, every single day, with a seemingly casual flair. It’s a style that commands a second glance precisely because it walks the fine line between intentional design and casual nonchalance. So, book that consultation, arm yourself with the right products, and get ready to master the art of the angle. Your most effortless, yet most polished, hair day is just around the corner.