How to Get blunt wave Hair That Looks Effortless (But Isn’t)
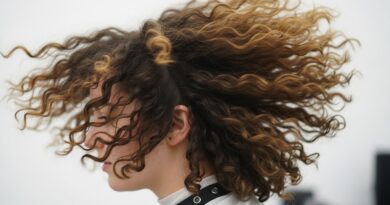
You’ve seen it everywhere: on runways, red carpets, and that one impossibly cool person you follow on Instagram. It’s the blunt wave—a hairstyle defined by its seamless, uniform S-shaped waves that start at the root and cascade down a one-length (blunt) cut. It looks like you just air-dried your hair after a dip in the ocean, but with a polished, high-fashion edge.
But here’s the secret the fashion set doesn’t want you to know: this “effortless” look is anything but. Achieving that perfect, undone-yet-sleek wave requires a specific technique and a bit of hair sorcery. The good news? You can absolutely master it. This guide will walk you through every step, from the essential haircut to the final, weightless hold, to help you create stunning blunt wave hair that will have everyone asking for your secret.
The Foundation: It All Starts With the Right Cut
You cannot create true, runway-worthy blunt waves without the proper foundation: a perfectly executed blunt cut. This isn’t just about having no layers; it’s about precision. When every hair ends at the same point, the waves created will stack uniformly, creating that iconic, cohesive ripple effect. Layers, on the other hand, break up the wave pattern, resulting in a softer, more fragmented look.
When you sit in your stylist’s chair, be specific. Ask for a true blunt cut with absolutely no texturizing or feathering at the ends. The hemline should be sharp, clean, and heavy. This weight is what allows the waves to be uniform and defined rather than frizzy or piecey. If you have long hair, this cut creates a dramatic, cascading effect. On a bob, it delivers a chic, architectural wave that’s full of movement.

Pre-Game Prep: Setting the Stage for Perfect Waves
Think of your hair as a canvas. You wouldn’t start painting on a dirty, unprepared surface, and you shouldn’t start waving without the right prep. This step is crucial for enhancing wave definition, boosting shine, and protecting your hair from heat damage.
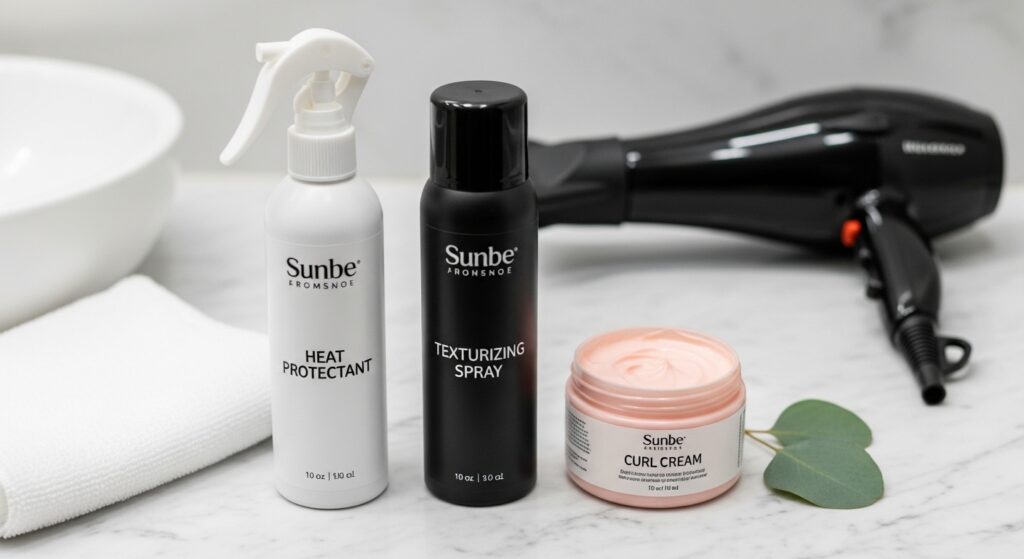
Begin with a thorough wash and conditioner. For fine hair that gets weighed down easily, use a volumizing system to add lift at the root. For thicker or coarser hair, a smoothing or moisturizing formula will help tame frizz and create a smooth base. After towel-drying, your first product application is key. Rake a heat protectant spray through your strands from root to tip. This is non-negotiable. Follow this with a light mist of a texturizing spray at the roots for grip and a small amount of a curl-enhancing cream or mousse through the mid-lengths and ends to encourage wave formation and fight humidity.
The Main Event: Your Tool Kit for Blunt Waves
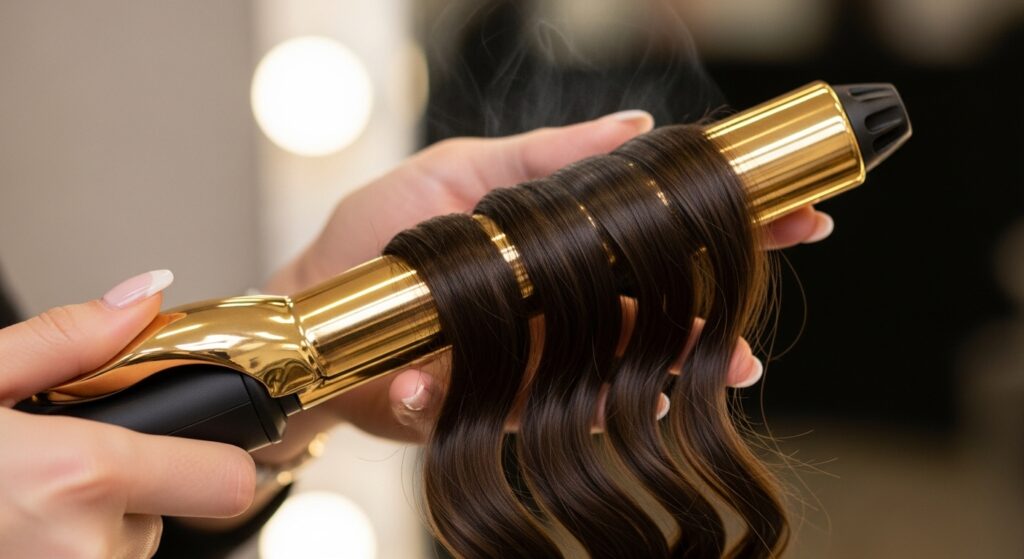
While you can create waves with various tools, one reigns supreme for this specific look: the clamp-less curling iron or wand, typically with a 1 to 1.25-inch barrel. The absence of a clamp is the secret weapon here. It allows you to wrap large sections of hair smoothly around the barrel, creating a seamless, uninterrupted wave rather than a crimped, traditional curl. A wand gives you the most control over the wave’s placement and tightness.
Why not a flat iron? While a flat iron can create waves, it often results in a more zig-zag, beachy pattern rather than the uniform, rounded S-shape of a blunt wave. The cylindrical barrel of a wand is what creates that perfect, continuous curve.
The Technique: The Step-by-Step Wave Method
This is where the magic happens. The technique is deliberate and consistent. Follow these steps closely for flawless results.
Step 1: Complete Dry. Ensure your hair is 100% dry before you start. Working with even slightly damp hair will result in frizz and waves that fall out quickly.
Step 2: Section Intelligently. Clip the top half of your hair away, starting with the bottom section. This allows you to work methodically and ensures you don’t miss any layers. Work from the nape of your neck upwards.
Step 3: The Wrap. Take a horizontal section of hair about 2-3 inches wide. The thicker the section, the looser the wave. For defined blunt waves, keep your sections moderate. Now, here’s the crucial part: wrap the hair away from your face on both sides. This creates a uniform, face-framing wave pattern. Place the wand near the roots of your section and slowly wrap the hair down and around the barrel, keeping the hair taut and the wraps slightly spaced apart. Do not overlap the hair on itself too tightly.
Step 4: The Hold. Hold the wrap for only 5-8 seconds. You do not need a long hold time. You are setting the shape, not baking it into a tight curl. Overheating will make the waves look stiff and unnatural.
Step 5: The Release. Gently unwind the hair from the barrel and do not touch it. Let the curl cool completely in its S-shape. Disturbing it while it’s hot will break the pattern and cause frizz. Continue this process, working your way up and around your head, always wrapping away from your face.

The Art of the “Undone”: Finishing Touches for Effortless Texture
Once your entire head is waved and has cooled completely, it’s time for the most important step: breaking the waves up. This is what transforms a head of perfect, but perhaps slightly rigid, curls into soft, touchable, effortless-looking waves.
Start by gently running your fingers through your hair from root to tip. Do not use a brush at this stage, as it can create a fluffy, 80s-volume effect. Once the waves are separated, turn your head upside down and give the roots a gentle shake to add volume and further break up the pattern. Flip back.
Now, assess your look. Use a tiny amount of hair oil or serum on your palms, rub them together, and then gently scrunch and smooth over the ends of your hair to add shine and tame any flyaways. If you feel any areas are too defined, you can gently twist the wave between your fingers to loosen it. The goal is a piece-y, textured, but still cohesive wave pattern.

Lock It In: Making Your Blunt Waves Last All Day (and Night)
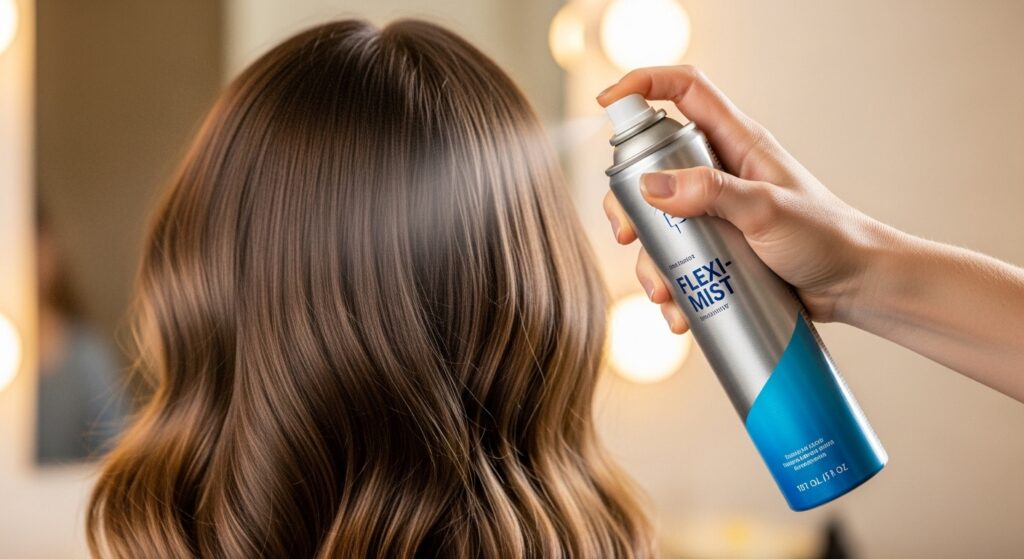
To ensure your hard work doesn’t fall flat by lunchtime, a flexible-hold hairspray is your best friend. But the application is key. Hold the can about 10-12 inches away from your head and mist it lightly over your entire style. Alternatively, for a truly “undone” feel, spray a light-hold texturizing spray onto your hands and then scrunch it into the mid-lengths. This will add grit and hold without any stiffness or crunch.
For next-day hair, don’t reach for the hot tools again. Simply refresh your waves by spritzing a mixture of water and a little leave-in conditioner through your hair. Then, twist random sections around your fingers and pin them up while you do your makeup. Let them down, and you’ll have revived, beautiful waves with zero effort.
Troubleshooting Common Blunt Wave Problems
Problem: “My waves are too tight and curly.”
Solution: Your sections were too small, your barrel was too small, or you held the wrap for too long. Use a larger barrel (1.25 inches or more), take thicker sections of hair, and reduce your hold time to 5 seconds. When breaking up the waves, be more vigorous with your fingers.
Problem: “My waves are limp and fall out quickly.”
Solution: You may have used too much heavy product, your hair wasn’t completely dry before styling, or you need a texturizing spray for grip. Ensure hair is bone-dry, use lighter products, and incorporate a texturizing spray at the root during prep.
Problem: “The waves at my crown are flat.”
Solution: When you get to the top sections of your hair, wrap the wand vertically instead of horizontally. This creates a wave that lifts away from the head, providing volume at the roots.

Embrace the Effort for the Effect
Mastering blunt wave hair is a skill, much like mastering a perfect winged eyeliner. It requires the right tools, the right preparation, and a precise technique. But once you’ve got it down, you possess the secret to one of the most coveted and chic hairstyles of the moment. It’s a look that whispers confidence and style, precisely because it’s deceptively complex. So, embrace the process, practice the wrap, and get ready to enjoy the endless compliments on your perfectly “effortless” waves.