How to Get playful twist Hair That Looks Effortless (But Isn’t)
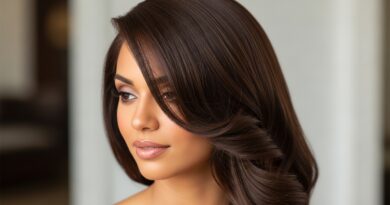
You’ve seen it everywhere: on your favorite influencer, the lead in that new binge-worthy show, and probably that impossibly cool person you walked past at the coffee shop. It’s the playful twist hairstyle—a look that whispers, “I just woke up like this,” while secretly knowing it’s a masterpiece of casual artistry. Those perfectly imperfect twists, the soft tendrils framing the face, the overall vibe of bohemian ease… it’s a hairstyle that looks like it took zero effort.
Let’s be real, though. That “effortless” look? It’s almost never effortless. The true magic lies in creating a style that appears spontaneous and free-spirited while being carefully and cleverly constructed. It’s the hair equivalent of je ne sais quoi—an undeniable charm that seems natural but is often meticulously crafted.
But what if you could be in on the secret? What if you could learn the techniques to recreate this coveted look at home? Consider this your ultimate guide. We’re pulling back the curtain to show you how to achieve those gorgeous, playful twists that look like you simply ran your fingers through your hair and ended up with a work of art. Get ready to master the art of calculated nonchalance.
The Foundation: It All Starts With the Perfect Canvas
You cannot build a beautiful house on a shaky foundation, and the same goes for twist hairstyles. The goal is soft, touchable, and defined texture—not crisp, crunchy, or frizzy hair. This begins not with the twisting itself, but with your preparation.
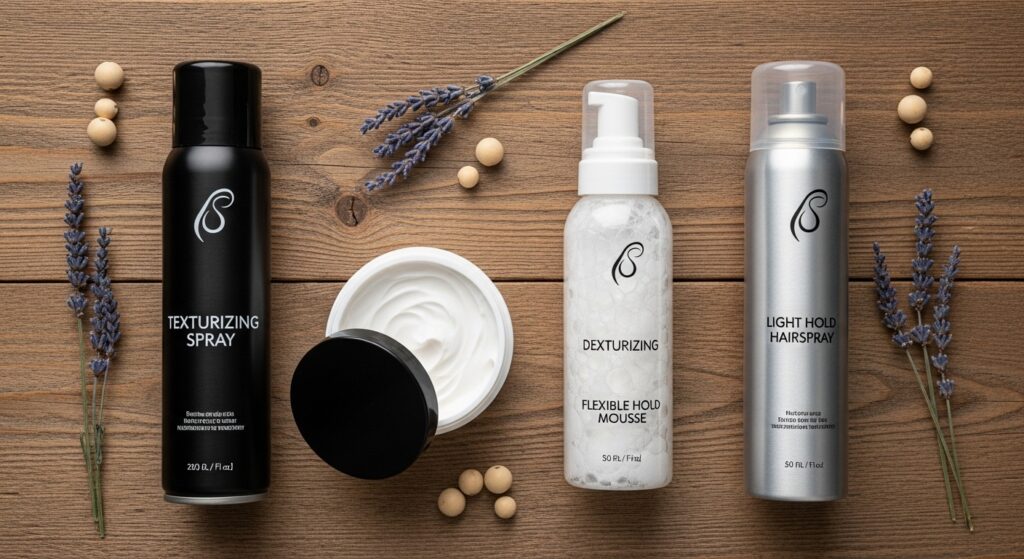
First, consider your starting point. Second or third-day hair is your best friend. The natural oils from your scalp and the slight breakdown of your previous style’s hold create the ideal texture for grip and a lived-in feel. If you’re starting with freshly washed hair, you’ll need to create that texture artificially. A light-hold texturizing spray or sea salt spray applied to damp hair and then diffused or air-dried can work wonders.
The real key, however, is in the product application before you start twisting. You need a product that provides hold without stiffness. A flexible-hold mousse, a defining cream, or a lightweight gel are excellent choices. Apply it section by section as you work to ensure even distribution. The product should enhance your hair’s natural wave pattern and provide a light tackiness that will help the twists hold their shape without feeling hard or looking greasy.
Mastering the Twist: Technique Over Strength
This is where the magic happens, and where most people go wrong. The instinct is to twist tightly, believing that a firmer twist equals a longer-lasting style. While there’s some truth to that, a tight twist is the enemy of the playful, effortless look. It can look severe, pull at your roots, and create tension.
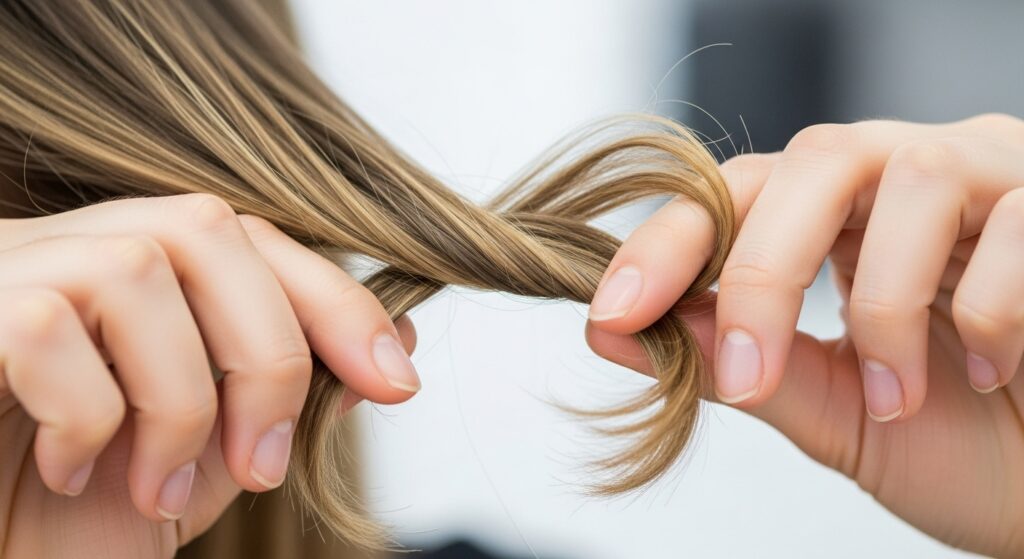
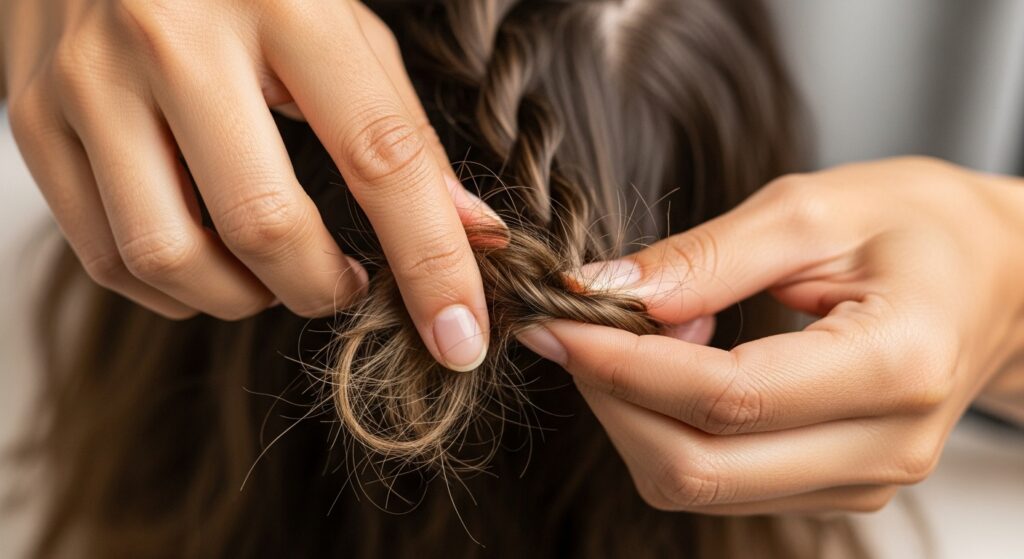
The correct technique is a gentle, consistent twirling motion. Take a section of hair—the size will depend on the final look you want (smaller for more defined, crimp-like twists; larger for a chunkier, boho feel). Begin twisting it loosely between your fingers, starting from the root and working down to the ends. The goal is not to create a rope-like structure, but to gently encourage the hair strands to coil around each other.
Here’s the pro tip: don’t twist the entire section at once. As you move down the strand, gently pull a few tiny pieces of hair out from the twist. These escaped tendrils are crucial for that “I didn’t try too hard” aesthetic. They soften the look, frame your face, and break up the uniformity of the twists. Remember, perfection is not the goal; character is.
Strategic Placement: Building Dimension and Movement
Where you place your twists will define the entire personality of your hairstyle. Simply twisting two front sections and pinning them back will give you a sweet, romantic look. But for a truly playful and modern twist, you need to think in three dimensions.
For a full head of twists, start by parting your hair as you normally would. Then, begin taking horizontal sections from the front, working your way back. As you twist each section, think about the direction. Alternate the direction of your twists—one twisted away from your face, the next towards it—to create incredible visual interest and volume at the roots.
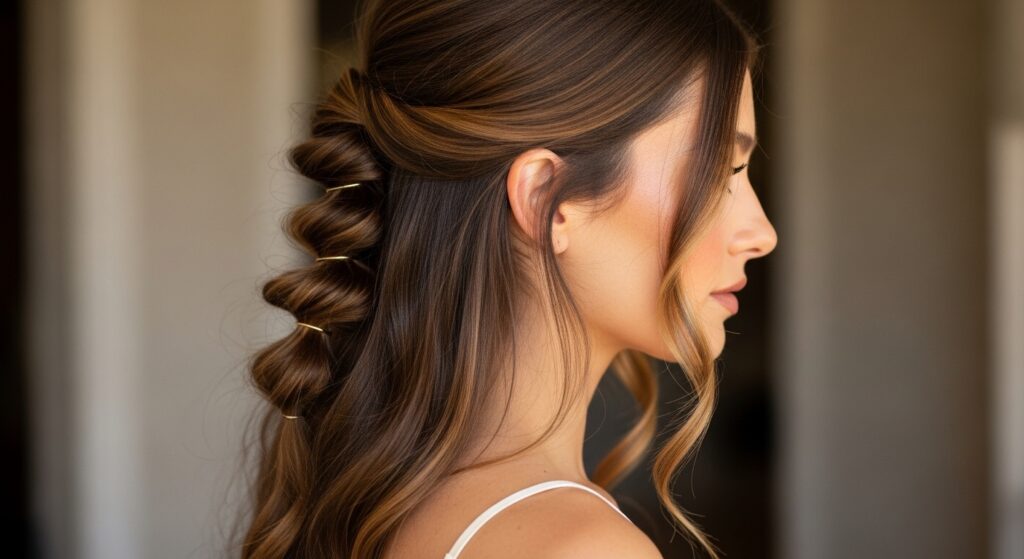
Another stunning option is the half-up, half-down twist style. This is perfect for showcasing the texture of your twists while keeping hair out of your face. Create a deep side part, then on the heavier side, take a section from your part back towards your crown, twisting as you go and incorporating more hair from the top section as you move along the hairline. Secure it at the back of your head with a discreet pin. This creates a beautiful, cascading effect that is both elegant and relaxed.
The “Effortless” Finish: The Art of Undoing
This is the most counterintuitive yet critical step. Once all your twists are in and have had a chance to set (you can even blast them with a blow-dryer on cool air to lock in the shape), it’s time to carefully dismantle your hard work. Yes, you read that correctly.
Gently begin to pull apart each twist. Use your fingertips to loosen the coil, starting from the bottom and working up. You’re not trying to comb it out completely; you’re just breaking it up to create a softer, fuller, more lived-in version of the twist. The idea is to blur the lines of each individual twist so they blend into a mass of textured, wavy hair with beautiful definition.
Next, focus on your roots. Using your fingertips, gently tease the hair at the roots around your crown and part. This isn’t about backcombing for 80s volume; it’s about lifting the hair away from the scalp to create airy, effortless volume that prevents the style from looking flat or “done.” Finally, mist a light-hold texturizing spray or a flexible-hold hairspray from a distance to set the style without making it stiff. Run your hands through your hair one last time to ensure it moves and feels soft.
Pro Tips and Troubleshooting: For When Your Hair Rebels
Even with the best techniques, sometimes hair has a mind of its own. Here’s how to handle common hurdles and elevate your twist game.
For Slippery, Straight Hair: Texture is your missing ingredient. Start by curling your hair with a large-barrel iron to create a soft wave pattern. This gives the twists something to hold onto. Using a texturizing spray on dry hair before you start is non-negotiable. You can also try braiding your hair loosely overnight; when you take it out in the morning, you’ll have the perfect textured base for twisting.
For Frizz-Prone or Curly Hair: Your natural texture is a huge advantage! Embrace it. Use a hydrating cream or curl definer instead of a mousse to combat frizz and enhance your curl pattern. Twist your hair while it’s damp and allow it to air dry or use a diffuser. When you undo the twists, you’ll be left with incredibly defined, frizz-minimized curls with a beautiful shape.
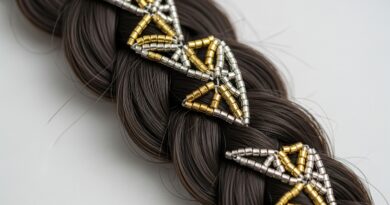
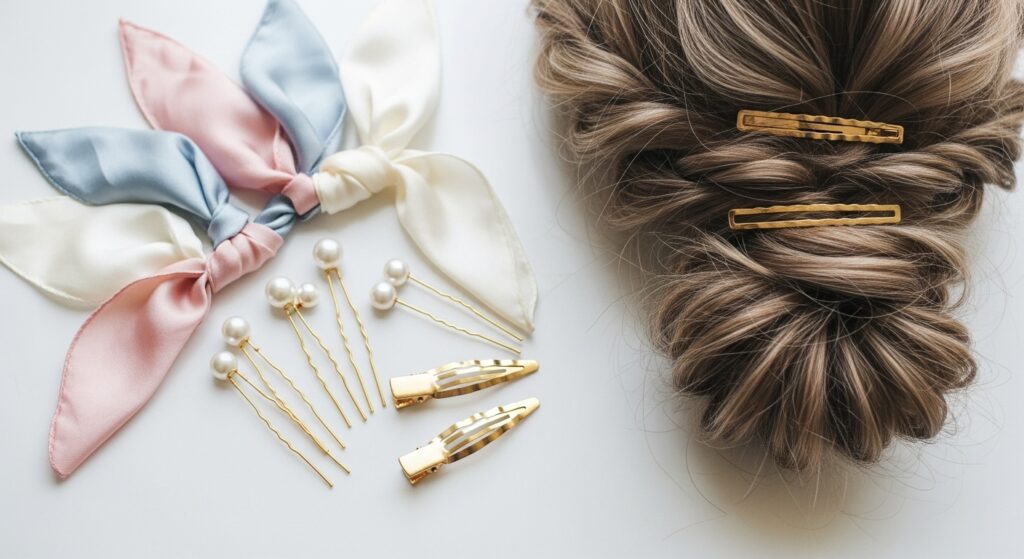
Accessorize Wisely: A few well-placed accessories can take your twists from simple to stunning. Slide a few tiny, pearl-encrusted pins into the base of a few twists, or use a minimalist gold barrette to secure a half-up section. The key is to keep it subtle and intentional, not overloaded.
Embrace the Playful Spirit
Ultimately, achieving the perfect playful twist hairstyle is a journey of practice and a shift in perspective. It’s about letting go of the pursuit of sleek, faultless perfection and instead embracing the beauty of texture, movement, and a little intentional messiness. It’s a style that celebrates the unique character of your hair, whether it’s pin-straight, wavy, or coiled.
So, the next time you see someone with that incredible, effortless twist hairstyle, you’ll know the secret. It’s not about a lack of effort, but the skillful application of it. It’s about knowing how to twist, where to place, and, most importantly, when to stop and let the hair just be. Now, go forth, create some beautiful, deceptively simple twists, and get ready to answer the question, “How did you get your hair to look so amazing?” with a playful, knowing smile.