How to Make voluminous wave Hair Look Expensive on a Budget
There’s a certain kind of hair magic in voluminous, cascading waves. It’s the kind of hair that looks effortlessly chic, red-carpet ready, and, let’s be honest, expensive. It whispers of salon appointments, high-end products, and a dedicated stylist on speed dial. But what if we told you that the secret to achieving that luxurious, head-turning wave hair isn’t locked away in a fancy bottle with a triple-digit price tag?
The truth is, expensive-looking hair is less about the cost of your products and more about the techniques you use and the health of your hair. With a few clever tricks and a shift in your routine, you can create stunning, voluminous waves that radiate luxury, all while staying firmly within your budget. Get ready to unlock the secrets to pro-level waves that look anything but cheap.
The Foundation: Healthy Hair is the Ultimate Luxury
Before we even pick up a styling tool, let’s talk foundation. The single most important factor in making any hairstyle look expensive is the health of your hair. Shiny, smooth, and well-moisturized hair will make even the simplest waves look intentional and high-end. Dry, frizzy, or damaged hair, on the other hand, can make the most intricate style look messy and unkempt.
Start with a hydrating shampoo and conditioner. You don’t need to splurge; many drugstore brands now offer salon-quality formulas with ingredients like argan oil, keratin, and hyaluronic acid. Focus the conditioner on your mid-lengths and ends, where hair is oldest and most vulnerable. Once a week, treat your hair to a deep conditioning mask. A simple DIY option is using warm coconut oil as a pre-shampoo treatment for 30 minutes – it’s a powerhouse for adding shine and combating frizz.
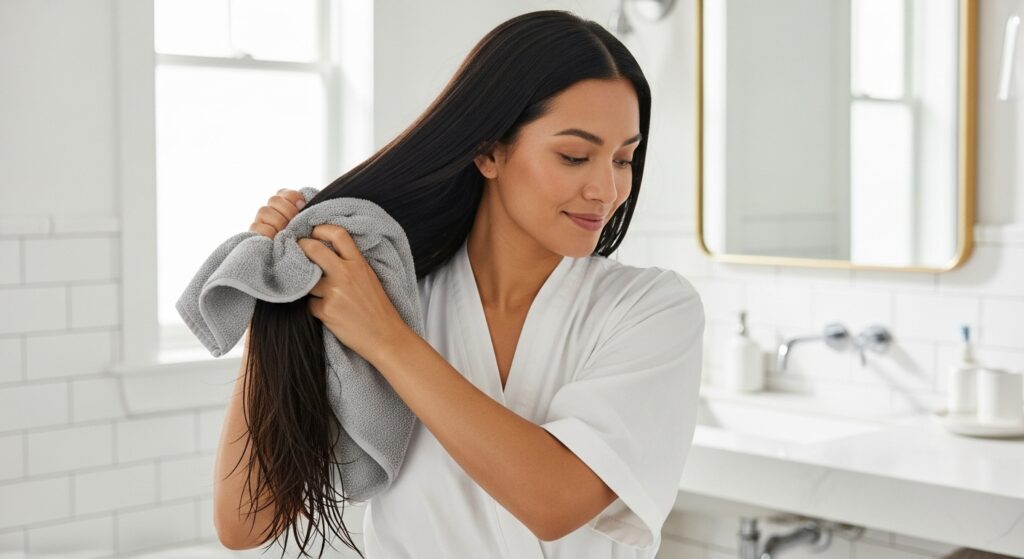
Pro Tip: When drying your hair, avoid rough towel-drying which causes frizz and breakage. Instead, gently squeeze out excess water with a microfiber towel or an old cotton t-shirt. This simple swap preserves your hair’s cuticle, leading to a smoother, shinier base for your waves.
Budget-Friendly Volumizing Secrets: Lift at the Root
Volume is the cornerstone of this look. Without lift at the roots, waves can fall flat and lose their dramatic effect. The good news is that achieving this lift doesn’t require expensive root-lifting sprays or gadgets.
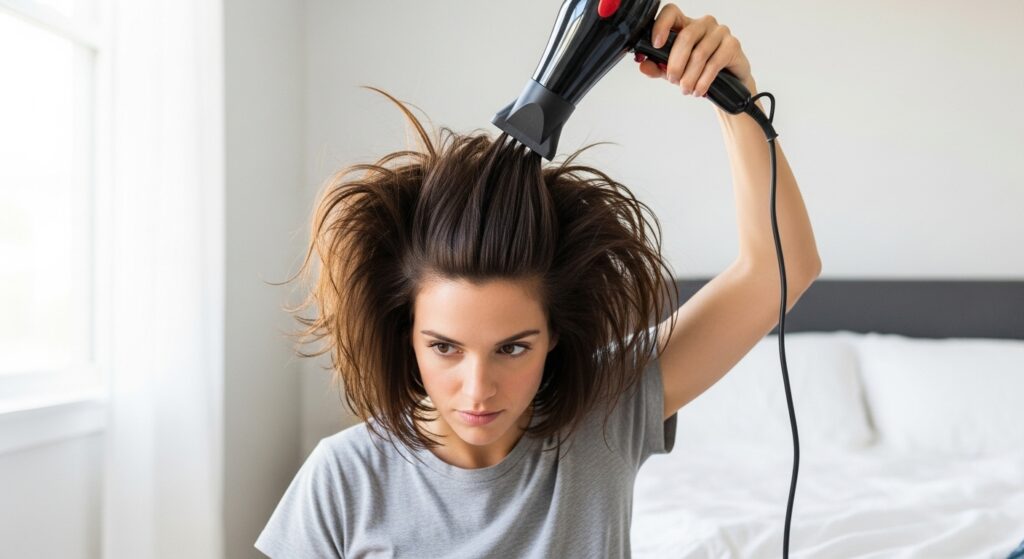
First, master the art of the upside-down blow-dry. After washing, flip your head over and blow-dry your roots on a medium heat and high speed setting until they are about 80% dry. This instantly creates incredible volume. For textured, lived-in volume, try plopping with your favorite mousse. Apply a golf-ball sized amount of a volumizing mousse to damp hair, then flip your head over and wrap it in a microfiber towel or t-shirt for 20-30 minutes. When you let it down, you’ll have natural, bouncy volume and enhanced wave patterns.
Another game-changer is changing your part. If you always wear a center part, try a deep side part. If you’re a dedicated side-parter, switch to the center while blow-drying. This tricks the hair into lifting away from the scalp, creating instant, effortless volume that lasts all day.
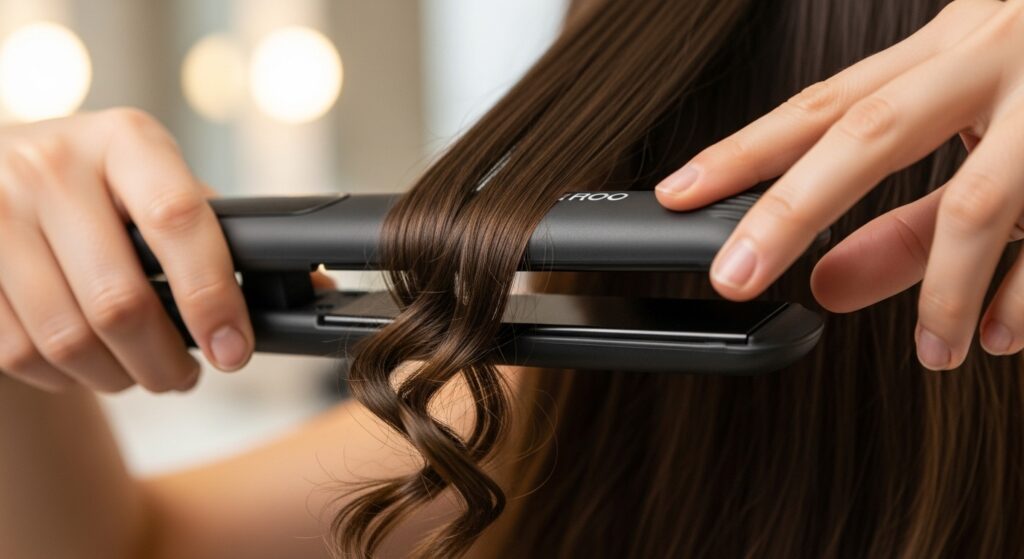
The Main Event: Creating Expensive-Looking Waves Without an Expensive Tool
Now for the fun part: creating the waves. While curling wands are popular, the secret to soft, expensive-looking waves often lies in a simpler tool: a standard 1-inch to 1.5-inch hair straightener. This tool gives you more control and creates a softer, more seamless wave than a defined curl.
Here’s the technique for flawless, straightener waves:
1. Prep and Protect: Always use a heat protectant spray. This is non-negotiable for keeping your hair healthy and shiny. Section your hair into manageable layers, starting from the nape of your neck.
2. The Clamp-and-Twist Method: Take a small section of hair (about 1-2 inches wide). Clamp the straightener near the roots, but not too close to the scalp. Then, slowly twist the straightener away from your face in a full 360-degree rotation as you glide it down the length of the hair shaft. It should be one smooth motion: clamp, twist, and glide.
3. Alternate Directions: For a natural, beachy look, alternate the direction of your waves. Twist one section away from your face, and the next section towards your face. This prevents the hair from looking too uniform and “pageant-y,” and instead gives it that effortless, “I woke up like this” vibe.
4. Don’t Forget the Front: For a truly expensive look, frame your face. Take the front sections of your hair and twist the straightener away from your face to create a soft, face-framing wave. This adds a touch of classic Hollywood glamour.
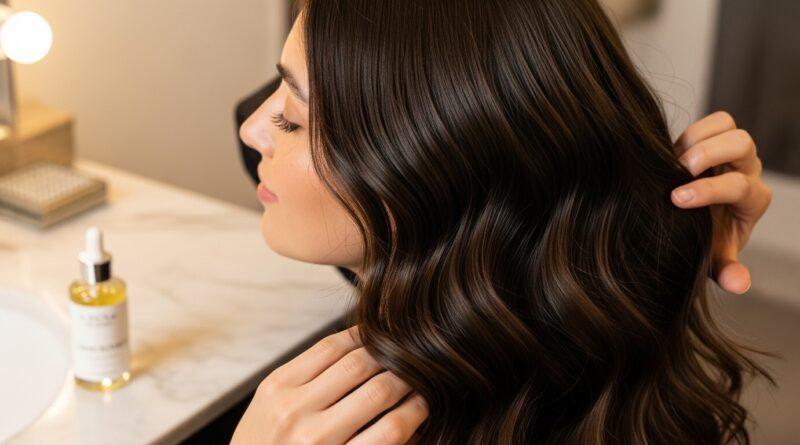
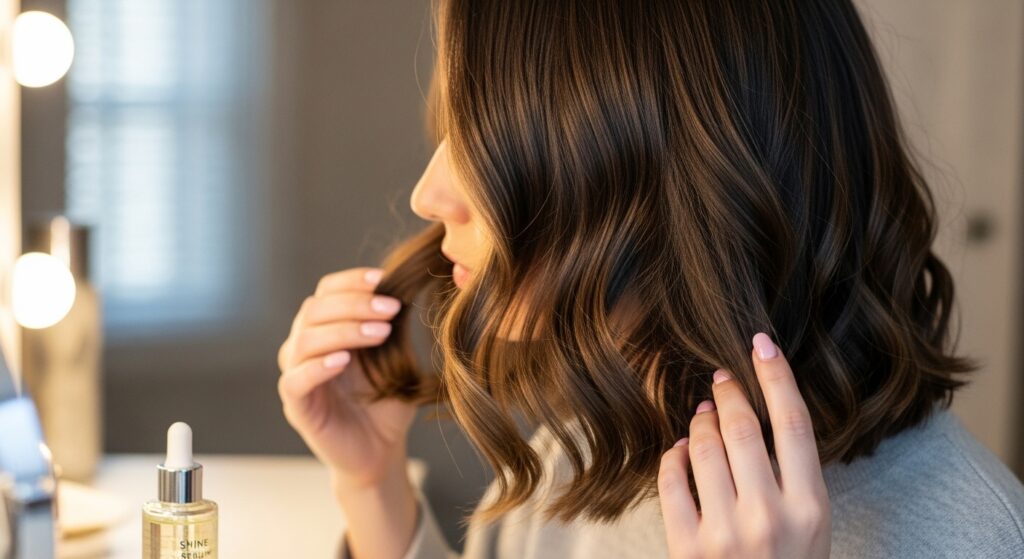
The Finishing Touches: Polishing Your Waves to Perfection
This is where the magic really happens. The difference between “nice waves” and “wow, your hair looks amazing” waves is in the finishing. Right after curling, your waves might look a bit tight and uniform. Do not touch them yet! Let the hair cool down completely. This allows the shape to “set,” making it last much longer.
Once cool, it’s time to break the waves up. Gently run your fingers through your hair from roots to ends, separating the waves. Avoid using a brush at this stage, as it can make the waves frizzy. You’re aiming for soft, separated ribbons of hair, not a head full of identical corkscrews.
Next, add a drop of shine serum or a light hair oil only to your ends. This is the ultimate trick for an expensive finish. It tames any flyaways, adds a incredible gloss, and makes the hair look and feel incredibly healthy. A little goes a very long way—you want to mimic the look of healthy hair, not greasy hair.
Finally, for hold that doesn’t look stiff, use a flexible-hold hairspray. Hold the can about 10-12 inches away from your head and mist it lightly over your entire style. This will lock in the volume and shape without creating a crispy, helmet-head effect.
Extending the Life of Your Style: The Second-Day Refresh
A truly budget-friendly beauty routine knows how to make a style last. You don’t need to start from scratch every day. On day two, your waves might be a little softer and looser, which is actually perfect for that “lived-in” luxurious look.
To revive your volume, spritz a mixture of water and a little conditioner in a spray bottle onto your roots. Flip your head over and massage your scalp with your fingertips, then tousle your roots. Flip back up and use your fingers to reshape a few of the waves that have fallen out.
For any areas that have gone flat, you can quickly re-wave them with the straightener, but this time, only do a few random sections. The goal is to blend, not re-do. Dry shampoo is also your best friend here. Not only does it absorb oil, but the texture it adds provides incredible grip and volume. Spray it at the roots before you start refreshing for an extra boost.

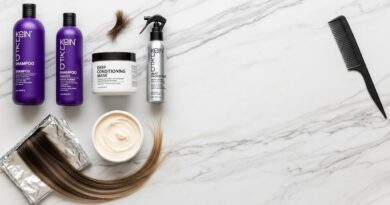
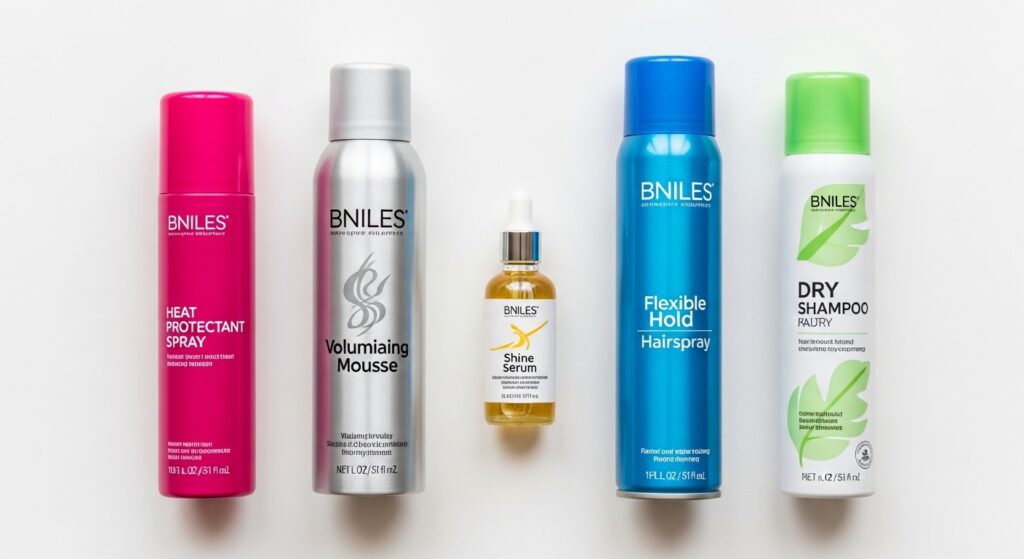
The Budget-Conscious Product Hall of Fame
You can achieve this entire look with products from your local drugstore or supermarket. Here are a few hero categories and what to look for:
Heat Protectant: A must-have. Look for any spray that explicitly says “heat protectant.” They all create a barrier between your hair and the styling tool.
Volumizing Mousse: Provides body, hold, and texture. Apply to damp roots for the best lift.
Shine Serum/Oil: The secret weapon. Look for lightweight formulas with argan or marula oil. Remember, one drop on the ends is all you need.
Flexible-Hold Hairspray: Avoid “maximum hold” which can be stiff. “Light” or “flexible” hold is perfect for this look.
Dry Shampoo: Your volume and refresh savior.
Embrace Your Luxurious, Budget-Friendly Waves
Creating expensive-looking voluminous wave hair on a budget is entirely within your reach. It’s a blend of smart technique, a focus on hair health, and a few strategic, affordable products. The true luxury isn’t in the price tag, but in the confidence that comes from knowing how to work with your own hair to create a show-stopping style. So put these tips into practice, embrace the process, and get ready to turn heads with your stunning, voluminous waves that look like they cost a fortune, but were cleverly created on a budget.