How to Perfect blunt look Hair Without a Trip to the Salon
There’s something undeniably chic about a sharp, precise blunt haircut. It’s a statement of confidence, a testament to healthy hair, and a style that never truly goes out of fashion. But maintaining that razor-sharp line often feels like a constant cycle of expensive salon appointments. What if we told you that you could capture that salon-fresh perfection without ever leaving your house?
Mastering the art of the at-home blunt cut is entirely possible. It requires patience, the right tools, and a methodical approach, but the payoff is immense: gorgeous, healthy-looking hair and a serious boost to your self-reliance. This comprehensive guide will walk you through every single step, from prepping your hair to putting the final, polished touches on your masterpiece. Get ready to become your own favorite hairstylist.
Gathering Your Arsenal: The Right Tools for a Sharp Finish
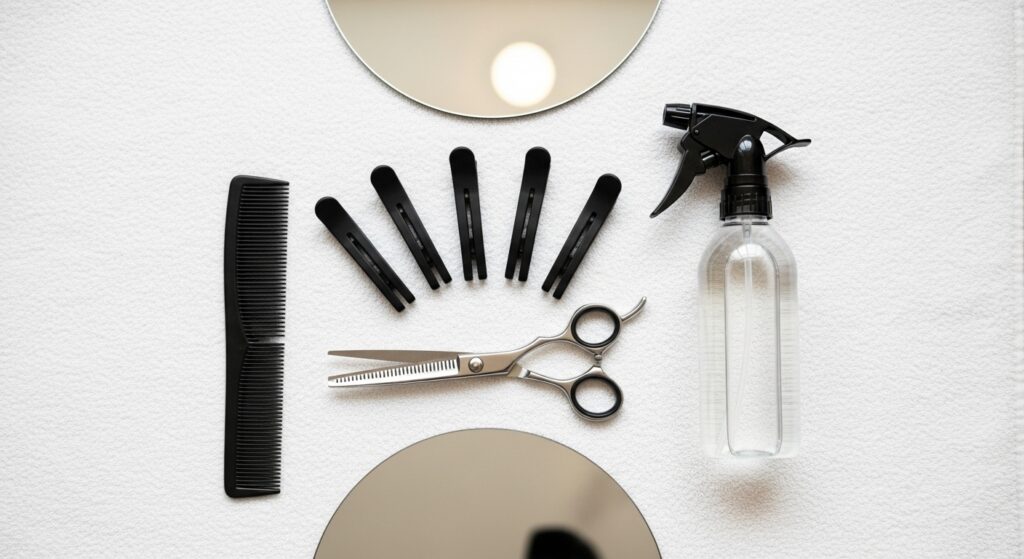
You cannot build a house without a hammer, and you cannot achieve a perfect blunt cut without the proper tools. Using the wrong equipment is the fastest way to a choppy, uneven disaster. Before you even think about making that first snip, ensure you have these essentials ready.
Professional Hair Shears: This is non-negotiable. Do not, under any circumstances, use kitchen scissors, craft scissors, or any blade not designed for hair. Kitchen scissors are designed to crush and tear, leading to split ends and a frayed finish. Professional shears are sharp enough to create a clean, precise cut that seals the hair shaft. This is your most important investment.
Fine-Tooth Comb: A sturdy, fine-tooth comb is crucial for creating clean sections and guiding your hair. It allows for maximum control and helps you see the line you are about to cut with absolute clarity.
Hair Clips: You will be working in small, manageable sections. Good, strong sectioning clips will keep the rest of your hair out of the way, preventing accidental cuts and ensuring symmetry.
Two Mirrors: A primary mirror (your bathroom mirror) and a handheld mirror are essential for checking the back of your head. This is the only way to ensure your line is straight and even from every angle.
Spray Bottle with Water: Hair should be damp, not soaking wet, for the most precise cut. Damp hair clings together, making it easier to see your guide and create a clean, unified line.
The Foundation: Prepping Your Hair for the Perfect Cut
Preparation is 90% of the battle. How you prep your hair will directly influence the final outcome. Start with hair that is freshly washed and conditioned. Avoid heavy products like gels or creams, as they can weigh hair down and create an inaccurate representation of its natural fall.
Gently towel-dry your hair to remove excess moisture. You’re aiming for a damp, cool feel—think about an hour after a shower. Use your wide-tooth comb to detangle thoroughly, working from the ends up to the roots to prevent breakage. Any knots or tangles will disrupt your sectioning and lead to an uneven cut.
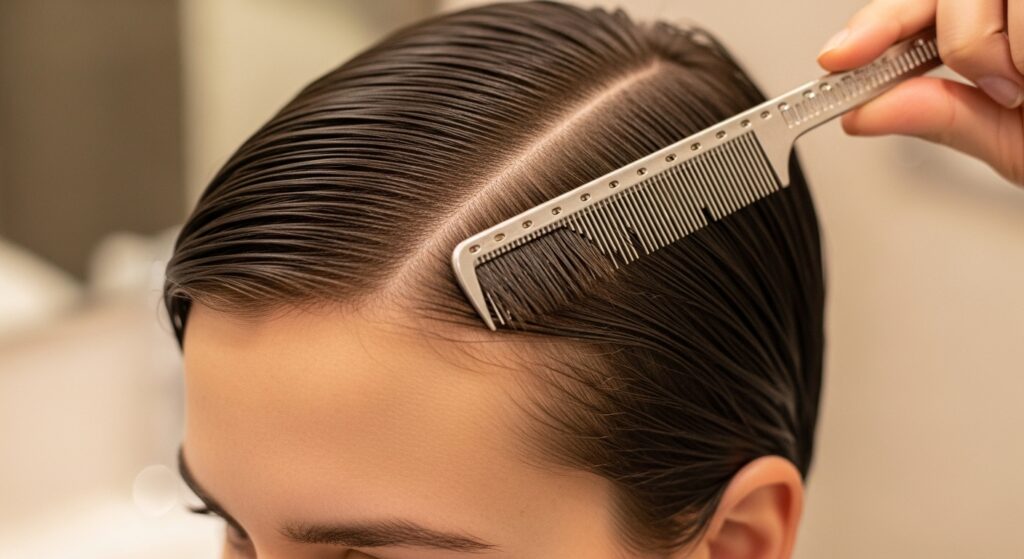
Once detangled, part your hair exactly how you normally wear it. This is critical because your hair falls differently based on its part. Cutting it with a different part will result in an uneven style once you go back to your usual look.
The Step-by-Step Guide to Cutting a Blunt Line
Take a deep breath. The key here is to go slow. You can always cut more hair, but you can’t put it back on. We will be using the “guide and follow” method, which is the most reliable technique for a DIY blunt cut.
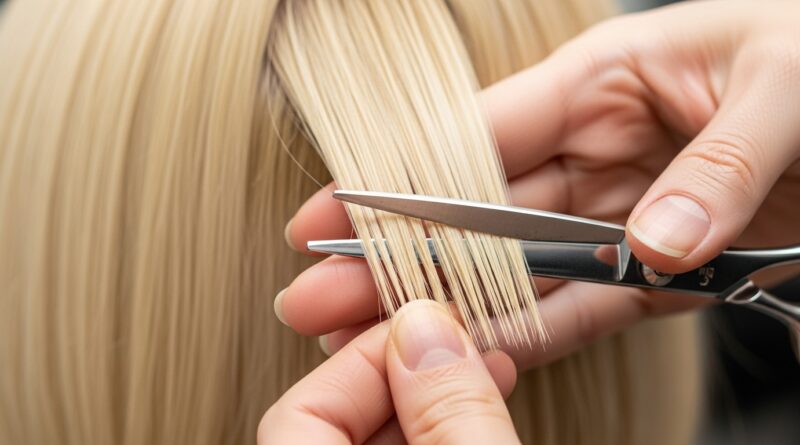
Step 1: Create Your First Guide Section. Start with the front. Take a one-inch horizontal section from the very front of your hair, just above your temples. Comb this section straight down and smooth it between your fingers. This will be your guide—every other section you cut will be matched to this one.
Step 2: Find Your Length and Make the First Cut. Decide on your desired length. Hold the guide section taut between your fingers, pointing straight down. Position your fingers at the exact length you want, ensuring your fingers are perfectly level. With your shears pointing straight across (not angled), carefully cut the hair below your fingers. Remember: cut a little longer than your goal length initially. You can always trim more to perfect the line at the end.
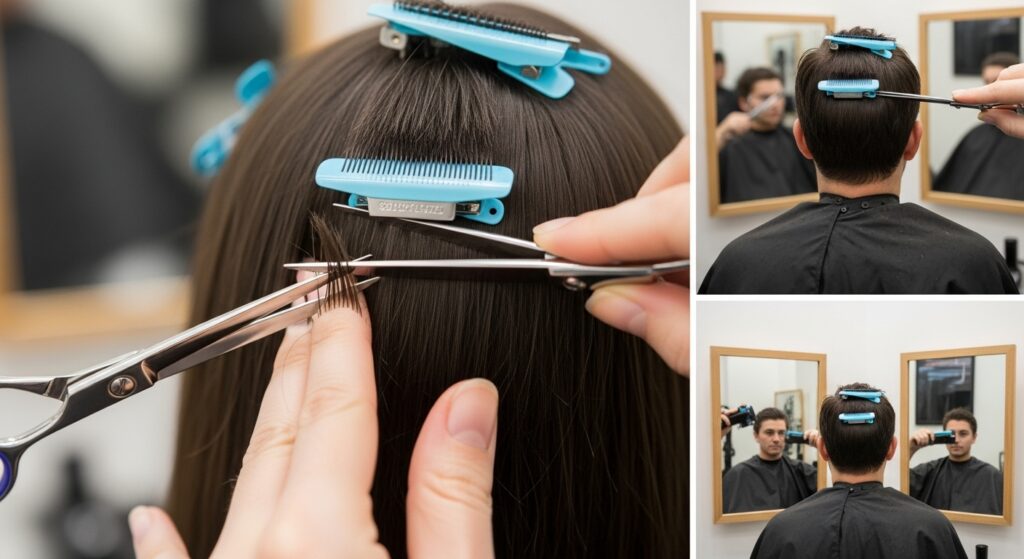
Step 3: Work Your Way Back. Now, clip the rest of your hair out of the way. Take another horizontal section directly behind your guide section. Comb it down smoothly. The goal is to let the previously cut hair fall on top of this new section, creating a visible line to follow. Match your new cut exactly to the length of the guide hair lying on top of it. Continue this process, section by section, moving from the front of your head to the nape of your neck on one side.
Step 4: Repeat on the Other Side. Once one side is done, unclip the other side. Repeat the entire process, using the hair from the already-cut front section as your new guide. This ensures both sides are perfectly symmetrical.
Step 5: The Final Check and Blend. Once all sections are cut, let your hair down. Stand in front of your primary mirror and use your handheld mirror to carefully inspect the back. Look for any stray longer hairs that escaped your sections. Gently pull these strays straight down and carefully snip them to match the established line. Do not cut into the main body of hair; just catch the outliers.
Pro Stylist Tips for a Flawless, Salon-Worthy Result
These little nuances are what separate a good haircut from a great one. Incorporating these professional tips will elevate your DIY effort to a whole new level.
Point Cutting is Your Secret Weapon. Instead of cutting straight across, turn your shears vertically and make tiny, upward snips into the ends of your hair. This softens the line just enough to prevent a harsh, “chopped” look, while still maintaining the blunt effect. It adds movement and texture without sacrificing the overall shape.
Always Cut on Dry Hair for Final Tweaks. After your initial cut on damp hair, blow-dry your hair straight. You will almost always see a few uneven spots or hairs that are longer than others when it’s dry. This is the time for your final, precise adjustments. Snip these dry hairs individually for the absolute sharpest finish.
The Importance of Good Posture. Stand up straight and keep your shoulders level while cutting. Do not tilt your head. Your hair needs to fall with gravity as it naturally does for the cut to be even when you’re moving around in the real world.

Aftercare: Maintaining Your Masterpiece
Your beautiful new cut deserves to be maintained. The right aftercare will keep it looking fresh for weeks longer.
Regular Trims: To maintain that sharp line, plan on trimming your hair every 8-10 weeks. This prevents the ends from fraying and the shape from losing its integrity.
Invest in a Good Heat Protectant: If you use hot tools, a heat protectant spray is mandatory. It forms a barrier around your hair, preventing the ends from becoming dry and split, which is the enemy of a clean blunt line.
Nourish Your Ends: The ends of your hair are the oldest and most fragile. Use a lightweight hair oil or serum on just the ends daily to add shine, prevent frizz, and protect them from environmental damage.