How to Perfect classic bun Hair Without a Trip to the Salon
The classic bun. It’s the hairstyle that has graced the heads of ballerinas, brides, and busy professionals for centuries. It’s elegant, timeless, and incredibly versatile. Yet, for something that looks so simple, achieving that perfectly sleek, polished, and effortless bun can feel like a task best left to salon professionals. How do they get it so smooth? So secure? So… perfect?
What if you could replicate that salon-quality look in the comfort of your own bathroom, using tools you already own? The secret isn’t magic—it’s technique. This comprehensive guide will walk you through every step, from preparation to the final pin, to help you master the art of the classic bun. Get ready to say goodbye to flyaways, lopsided shapes, and the frustration that often comes with DIY up-dos. Your perfect, salon-worthy bun is just a few paragraphs away.
Why the Classic Bun is Your New Go-To Hairstyle
Before we dive into the how, let’s appreciate the why. The classic bun isn’t just a pretty up-do; it’s a powerhouse hairstyle with a multitude of benefits. First and foremost, it’s incredibly chic and appropriate for almost any occasion. A sleek, low bun can convey professionalism in the boardroom, while a slightly messier, textured version is perfect for a casual brunch or a day out running errands.
Beyond its aesthetic appeal, it’s a practical savior. On days when your hair is less than cooperative, or you simply don’t have the time or energy to style it, the bun is your best friend. It tames unruly locks, keeps hair off your face and neck on hot days, and is the ultimate solution for second (or third) day hair. It’s a protective style that minimizes breakage from brushing and environmental factors. In short, mastering the classic bun means you always have a reliable, elegant hairstyle in your arsenal, ready to deploy at a moment’s notice.

The Essential Toolkit for a Flawless Bun
You don’t need a salon’s worth of equipment to create a beautiful bun, but having the right few items will make all the difference. Trying to create this style with the wrong tools is like trying to paint a masterpiece with a worn-out brush—it leads to frustration and subpar results. Here’s what you should gather before you begin:
A Fine-Tooth Comb: This is non-negotiable for creating that sleek, smooth base. A wide-tooth comb is great for detangling, but for banishing bumps and flyaways, a fine-tooth comb is your best weapon.
Quality Hair Elastics: Avoid thick, bulky elastics that can be seen and create a ridge. Opt for thin, fabric-covered or coil hair ties that grip well without snagging or breaking your hair.
Bobby Pins (Lots of Them!): Don’t be shy. You’ll need more than you think. Choose bobby pins that match your hair color for a seamless look. For thicker hair, consider using the stronger, “duo” style pins.
Hair Spray or Light-Hold Gel: A light-hold hairspray is perfect for taming flyaways without making your hair look stiff or crunchy. A tiny bit of gel applied to a toothbrush can work wonders on the baby hairs around your hairline.
Texture Spray (Optional but Helpful): If your hair is very silky or slippery, a light texture spray can give it some grit, making the bun easier to shape and secure.
A Hair Donut or Sock Bun (Optional): For a perfectly round, full bun, a bun form is a game-changer. We’ll cover how to use both the professional donut and a DIY sock bun.

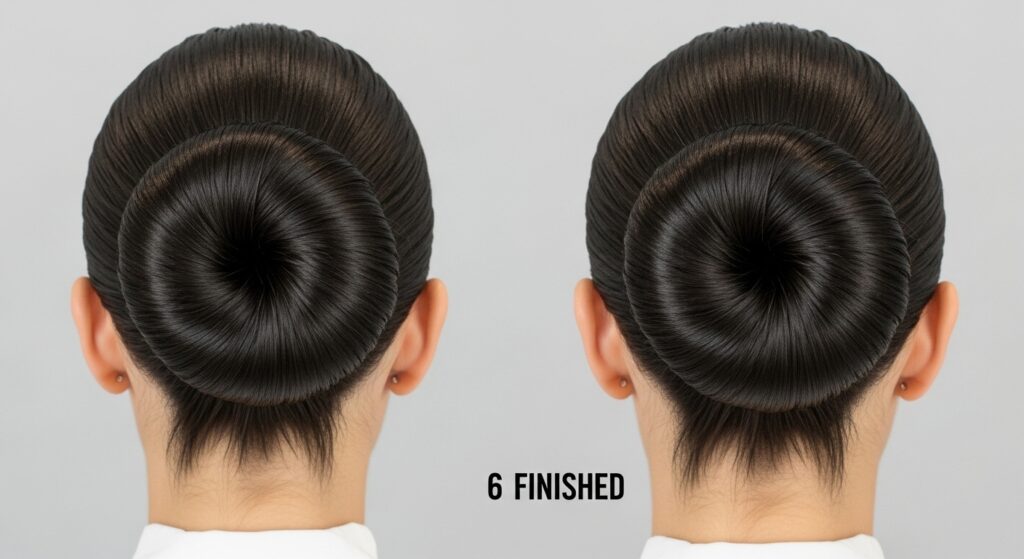
Step-by-Step: Crafting the Perfect Sleek Classic Bun
Now for the main event. Follow these steps meticulously, and you’ll be stunned by the professional-looking result.
Step 1: Start with the Right Base
Your bun is only as good as its foundation. Begin with day-old hair or hair that has been lightly texturized with dry shampoo. Hair that is too clean and silky can be harder to work with. If you must start with freshly washed hair, use a texture spray to add some grip. Brush your hair thoroughly to remove any tangles.
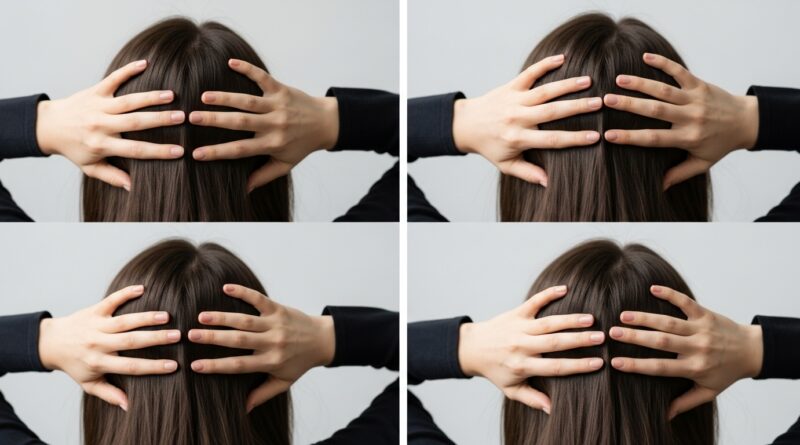
Step 2: Create a Smooth Ponytail
This is the most critical step for a sleek look. Decide where you want your bun—low at the nape of your neck, at the crown of your head, or somewhere in between. Using your fine-tooth comb, gather your hair into a ponytail. As you comb the hair back, use your other hand to smooth down any bumps. Pro Tip: Instead of pulling the hair straight back, tilt your head forward and gather the hair from the crown down to the nape. This technique helps to naturally smooth the hair at the crown.
Secure the ponytail with a thin elastic. For an even sleeker look, you can create a “loop-through”: only pull the hair partially through the elastic on the final wrap, leaving the ends out. This creates a smaller, neater base for your bun and hides the elastic.
Step 3: Twist and Wrap
Now, take the ponytail and twist it tightly in one direction—clockwise or counter-clockwise, it doesn’t matter, just be consistent. As you twist, the hair will naturally begin to coil around itself. Continue twisting until the entire length of the ponytail is a tight, coiled rope.
Now, begin wrapping this twisted rope around the base of the ponytail. Keep it tight and close to the base. As you wrap, the bun will form. Make sure the ends of your hair are tucked neatly underneath the bun.
Step 4: Secure with Bobby Pins
This is where most DIY buns fall apart—literally. The key is to secure the bun from the inside out. Take a bobby pin and open it. Slide it into the base of the bun, going through the bun and into the hair on your scalp underneath, then slide it back out through the bun. The “U” shape of the pin should be facing downwards, gripping the scalp hair and the bun. Do not simply slide the pin over the outside of the bun; this offers very little hold.
Use 3-4 pins this way, spacing them evenly around the bun. Focus on securing the areas where the wrapped hair ends, as these are the most likely to come loose. For extra security, criss-cross pins over each other.
Step 5: The Final Polish
Take a step back and look at your bun in the mirror. Are there any flyaways or loose pieces? Use a small amount of hairspray on a toothbrush or a clean mascara wand to gently slick them down. For a super high-shine finish, a tiny drop of hair serum or even hand cream rubbed between your palms and smoothed lightly over the surface can work wonders. Give the entire style a light mist of hairspray from a distance to lock everything in place without creating stiffness.
Pro Tips and Troubleshooting Common Bun Problems
Even with the best instructions, sometimes things go awry. Here’s how to solve the most common bun dilemmas.
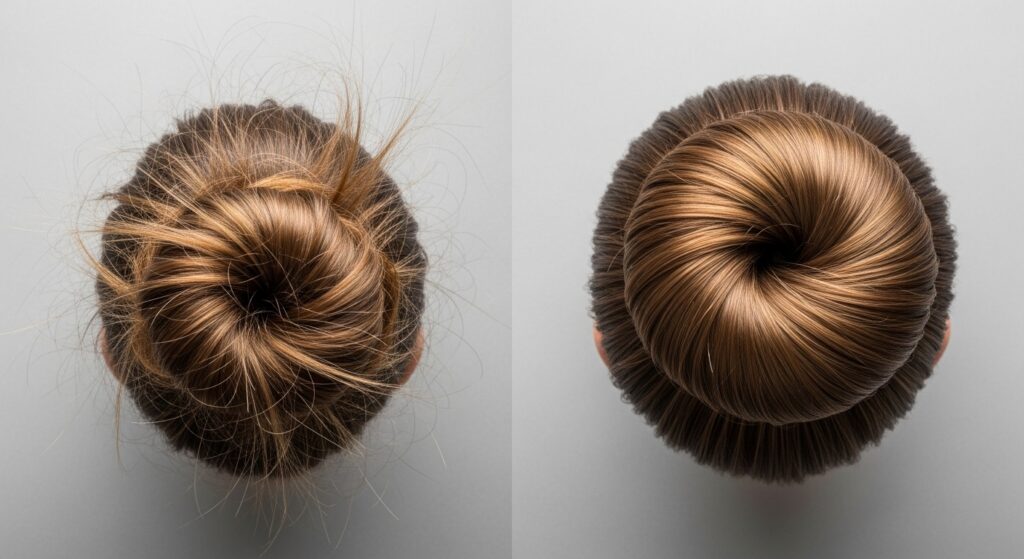
Problem: The Bun is Lopsided or Sagging.
Solution: This usually means the initial ponytail wasn’t secure enough or the pins aren’t providing enough support. Take it down and start over, ensuring the ponytail elastic is very tight. When pinning, make sure you are anchoring deeply into the hair underneath. For very heavy hair, use more, stronger pins.
Problem: Flyaways and Baby Hairs Won’t Behave.
Solution: This is a universal struggle. The toothbrush trick is your best friend here. Spray a light-hold hairspray directly onto the toothbrush and gently brush the flyaways flat. For a truly glued-down look, some stylists use a tiny bit of clear brow gel or even a dab of water mixed with gel.
Problem: You Can See the Hair Elastic.
Solution: This is where the “loop-through” method mentioned in Step 2 shines. If you didn’t use it, you can take a small section of hair from underneath the bun, wrap it around the base to conceal the elastic, and secure it with a discreet bobby pin.
Problem: The Bun Looks Thin or Sparse.
Solution: Gently pull gently at the sides of the bun after it’s pinned to loosen it slightly and create more volume. Teasing the ponytail slightly before twisting and wrapping can also add bulk. For an instant fix, use a bun donut.
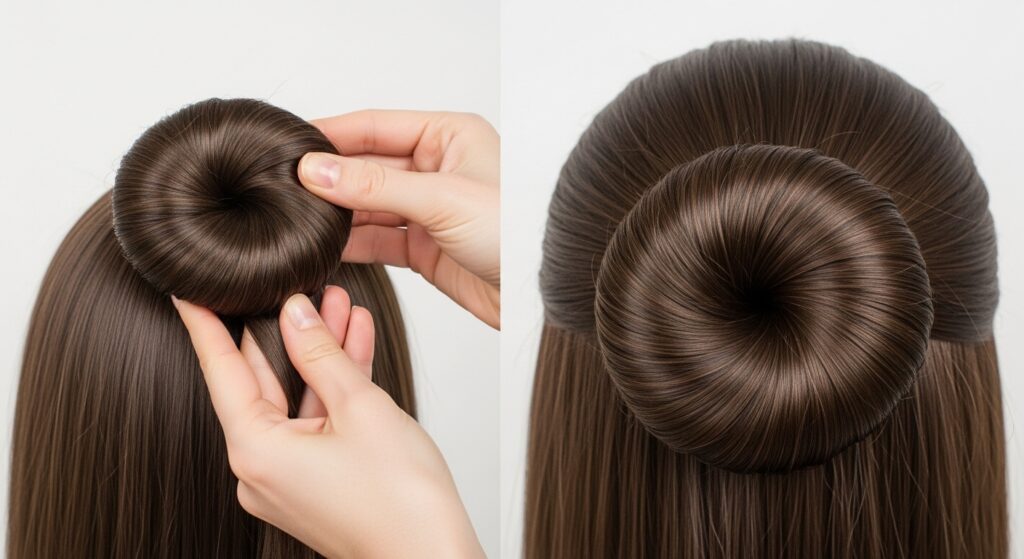
Bonus: The Foolproof Hair Donut Bun
If you want a perfectly round, voluminous bun every single time with minimal effort, the hair donut (or bun maker) is your secret weapon. The technique is slightly different but just as easy.
Start by creating a high or low ponytail and sliding the donut over it, down to the base. Then, spread your hair evenly over the donut so it completely covers it. Next, take a thin hair elastic and secure the ends of your hair over the donut, creating a small mini-ponytail on top of the bun form. Now, tuck the remaining loose ends underneath the donut and start wrapping them around the base. Finally, use bobby pins to secure the hair wrapped around the base, pinning through the hair and into the donut. Fluff and adjust the bun to cover any visible parts of the donut, and you’re done!
Embrace Your Inner Stylist
Mastering the classic bun is a skill that pays dividends in time, confidence, and style. It might take a few attempts to get it exactly right, but don’t get discouraged. Each try brings you closer to that flawless, salon-perfect finish. With this guide, you have all the knowledge and secrets once held by professional stylists right at your fingertips.