How to Perfect layered hairstyle Hair Without a Trip to the Salon
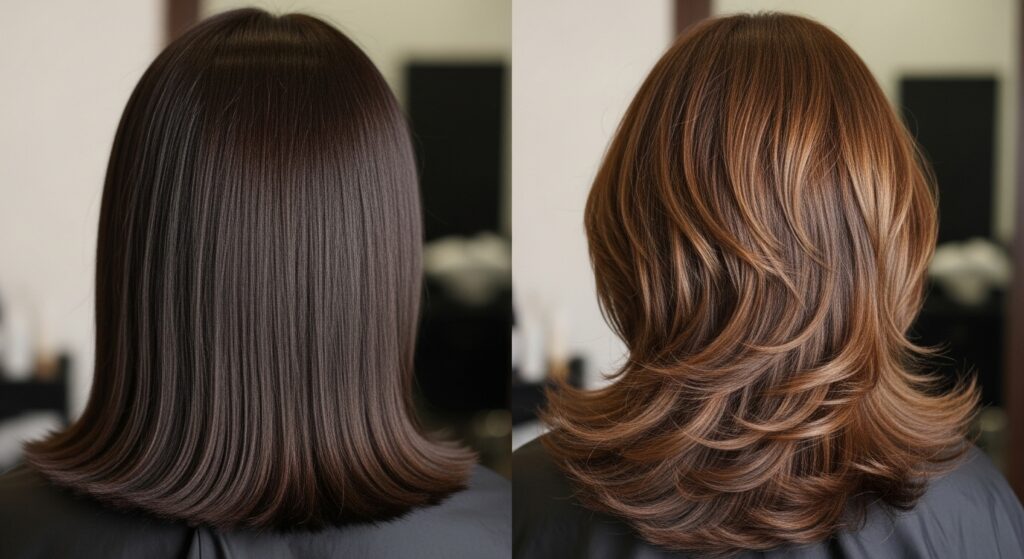
Have you ever stared longingly at a photo of a celebrity with a bouncy, voluminous, and perfectly textured layered haircut, only to sigh at the thought of the salon bill and the upkeep? That dream of hair that moves with life and body doesn’t have to remain a fantasy. Layered hairstyles are renowned for their ability to add dimension, reduce bulk, and frame the face beautifully. But the idea of maintaining them can feel daunting.
What if we told you that the secret to a perfect layered ‘do isn’t locked inside an expensive salon? With the right guidance, a bit of courage, and some key techniques, you can learn how to cut, style, and maintain stunning layers all by yourself. This comprehensive guide is designed to demystify the process, offering professional tips and step-by-step instructions to help you achieve a salon-quality layered hairstyle from the comfort of your own bathroom. Get ready to unlock a new level of hair confidence and say goodbye to flat, lifeless locks.
Understanding the Magic of Layers
Before you even pick up a pair of scissors, it’s crucial to understand what layers are and why they work. At its core, layering involves cutting hair at different lengths throughout your style. Unlike a blunt cut where all the ends fall at the same point, layers create movement and shape. This technique removes weight from specific areas, allowing shorter pieces to fall on top of longer ones, which results in that coveted volume and bounce.
Layers can be tailored to suit every face shape and hair type. For those with fine hair, light layers can create an illusion of thickness and fullness. If you have thick, heavy hair, layers can remove bulk and make your mane more manageable. They can also be strategically placed to accentuate your cheekbones, soften a strong jawline, or draw attention to your eyes. Understanding this foundational principle is the first step toward a successful DIY layered cut.
Gathering Your At-Home Salon Toolkit
Preparation is everything. Using the right tools is non-negotiable if you want a professional-looking result. Kitchen scissors or old, dull shears will only lead to split ends and a jagged, uneven finish. Here’s what you’ll need to assemble before you begin:
Hair Cutting Shears: This is your most important tool. Professional hair shears are sharp and designed to create a clean cut without damaging the hair shaft. Do not use craft or paper scissors.
Fine-Tooth Comb: Essential for creating clean, precise sections and for guiding your hair as you cut.
Hair Clips (Sectioning Clips): These will help you manage your hair by dividing it into workable sections, ensuring you don’t get overwhelmed or miss spots.
Two Mirrors: One for the front and one hand mirror to check the back of your head. This is critical for maintaining balance.
Spray Bottle with Water: It’s best to cut hair when it’s damp (not soaking wet) for better control and accuracy.
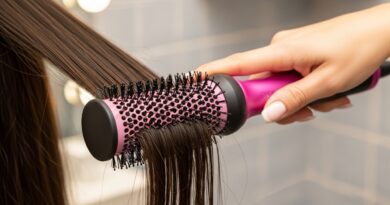
Professional-Level Hairdryer and a Round Brush: For styling your masterpiece afterwards. A good dryer with a concentrator nozzle and a high-quality round brush are key for creating smoothness and bounce.

The Step-by-Step Guide to Cutting Your Own Layers
Warning: Start conservatively. You can always cut more hair off, but you can’t put it back on. It’s always better to take off less than you think you should in the first pass.
Step 1: Start with Clean, Damp Hair
Wash and condition your hair as usual. Gently towel-dry it until it’s damp throughout. Damp hair is easier to control and cut evenly, unlike dry hair, which can spring up and result in shorter-than-intended layers.
Step 2: Section Your Hair Like a Pro
Part your hair down the middle. Then, create a horizontal part from the top of one ear to the top of the other ear. Clip the top section up. You now have two main sections: the crown (top) and the bottom. Further divide the top section into two parts, left and right, and clip them separately. This systematic approach prevents mistakes.
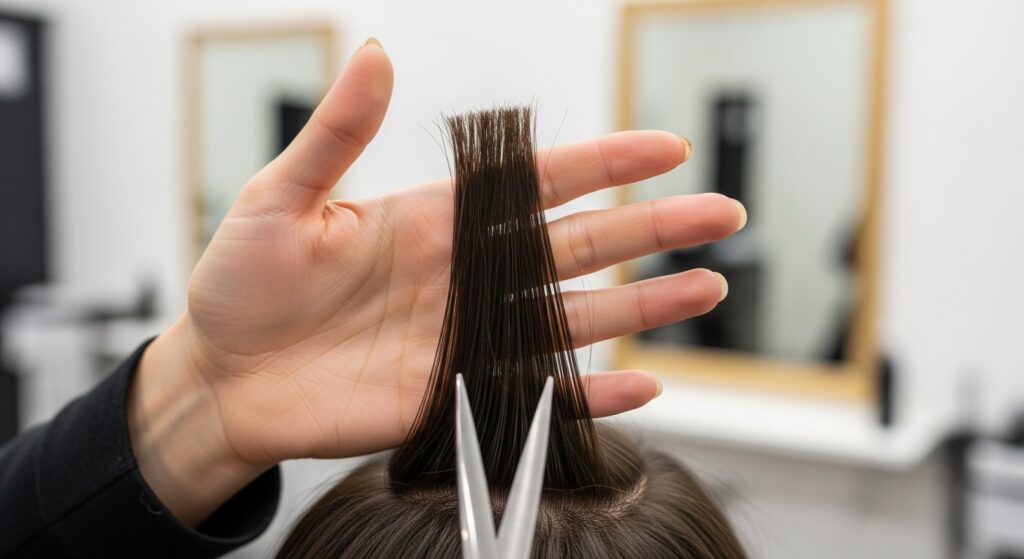
Step 3: Establish Your Guide (The Most Important Step)
This is where many DIY efforts go wrong. Unclip the very back section of your bottom layer (the hair at your nape). Decide on the length you want for the longest layer of your hair and make a small, precise cut to establish your guide. Every subsequent cut will be measured against this first piece of hair, so take your time and get it right.
Step 4: Cut the Bottom Layers
Working with the bottom section, take small, horizontal subsections of hair. Comb them down straight, and using your initial guide, cut them to the same length. Continue this process all the way around the back and sides until the entire bottom section is one even length. This forms the foundation of your haircut.
Step 5: Create the Face-Framing Layers
Unclip one of the top front sections. To create soft, face-framing layers, take a vertical subsection from the front. Pull it forward in front of your face, holding it between your fingers at a point where you want the shortest layer to fall (e.g., chin-length). Point your fingers slightly downward toward your chin and cut. This technique, known as point cutting, creates a soft, feathered edge rather than a harsh line. Use this first piece as your guide for the other side to ensure symmetry.
Step 6: Build the Crown Layers
Now, move to the crown area. Unclip the top sections. Taking vertical subsections, pull the hair straight up from your head. The length you cut here will determine the volume at the crown. Look at the length of the hair you’ve already cut as a reference. A good rule is to cut about an inch or two shorter than your guide, depending on how much layering you want. Cut each subsection to match, always checking for balance.
Step 7: Blend and Check for Balance
Once all sections are cut, let your hair down and comb it through. Use your mirrors to carefully check the back and sides. Look for any obvious uneven spots or harsh lines. To blend, you can use a point-cutting technique (cutting into the ends of the hair with the tips of your shears at an angle) to soften the transition between layers. Do this sparingly.
Mastering the Art of Styling Your New Layers
The cut is only half the battle. Styling is what truly brings your new layers to life. The goal is to enhance the dimension and movement you’ve just created.
Blow-Drying for Volume: Start by applying a heat protectant and a volumizing mousse or spray to damp hair. Using your round brush and dryer, begin at the roots. Lift the roots at the crown with the brush, directing the heat downward to smooth the cuticle. For maximum bounce, roll the ends of your hair under or over with the round brush as you dry. The concentrator nozzle on your dryer is your best friend for directing airflow precisely.
Creating Texture and Separation: Once your hair is dry, you can use a curling iron or a flat iron to add more defined waves or bends. Don’t curl the entire strand uniformly. Instead, curl different sections in alternating directions and leave the ends out for a more modern, lived-in texture. After curling, run your fingers through your hair to break up the curls and let the layers fall naturally.
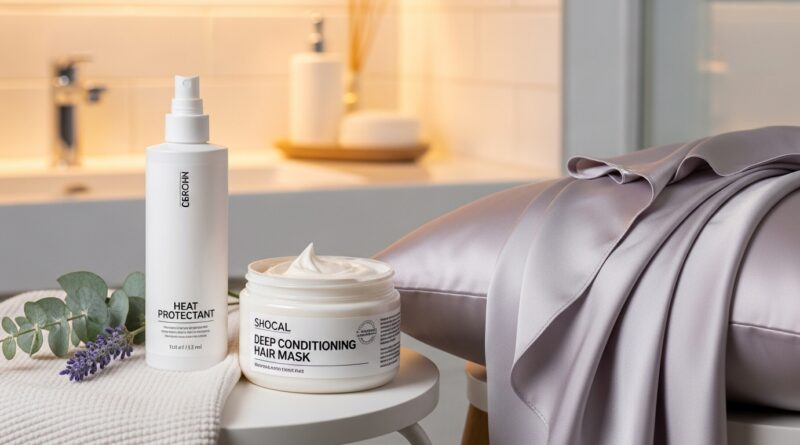
The Power of Products: A light-hold texturizing spray or sea salt spray is perfect for defining layers without weighing them down. Spray it onto the mid-lengths and ends, then scrunch your hair gently with your hands. For flyaways, a drop of serum or hair oil applied only to the ends can add shine and polish.

Maintaining Your Layered Masterpiece Between Cuts
To keep your layered haircut looking fresh, a little maintenance goes a long way.
Regular Trims: Even if you’re doing it yourself, plan for a minor trim every 6-8 weeks. This doesn’t have to be a full re-cut; just dusting the ends and reshaping a few layers will prevent split ends and maintain the shape.
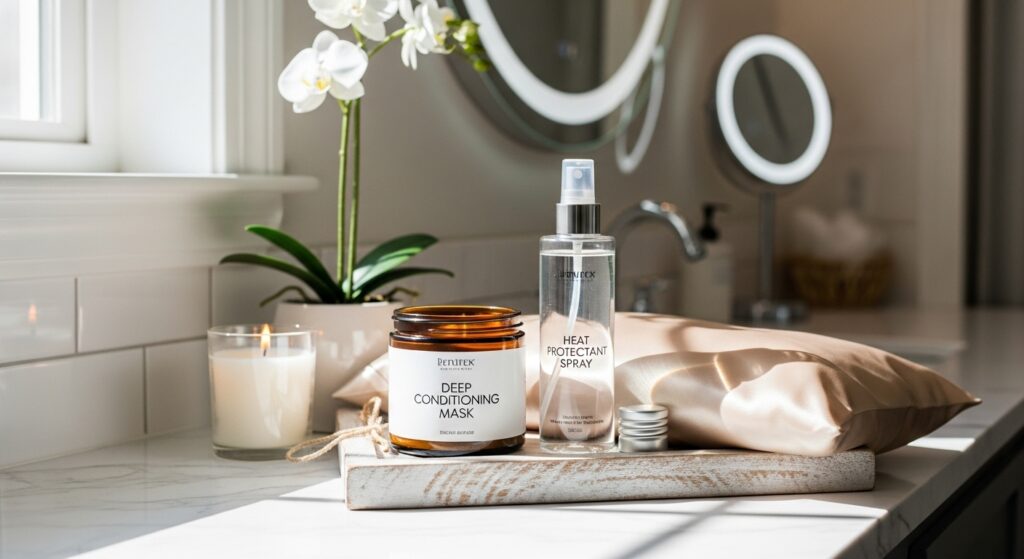
Healthy Hair Habits: Layers look best on healthy hair. Use a deep conditioning treatment once a week. Minimize heat styling when possible, and when you do use heat, always use a protectant. Sleep on a silk or satin pillowcase to reduce friction and prevent breakage, which can make layers look frayed.
Refresh Your Style: On non-wash days, revive your layers with a spritz of dry shampoo at the roots for volume and a bit of texturizing spray on the ends to redefine the separation and movement.
Conclusion: Embrace Your Inner Stylist
Mastering a layered hairstyle at home is an empowering skill that saves you time and money while giving you complete control over your look. It requires patience, the right tools, and a trust in the process. Remember, hair grows back, and every small imperfection is a learning opportunity on your journey to becoming your own best stylist.
So, embrace the challenge. With this guide in hand, you have everything you need to break free from salon dependency and create a dynamic, voluminous, and perfectly layered hairstyle that turns heads. Your salon-worthy hair is waiting to be unleashed—and you hold the shears.