How to Perfect soft cut Hair Without a Trip to the Salon
Have you ever stared longingly at a picture of a celebrity with those effortlessly chic, soft, face-framing layers and wondered, “I could never achieve that at home?” The thought of taking scissors to your own hair is daunting, often conjuring images of lopsided bangs and drastic, regrettable chops. But what if we told you that the secret to that coveted, salon-soft cut is not only possible to achieve in your own bathroom but also surprisingly simple?
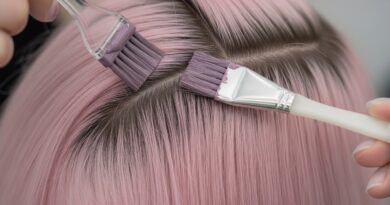
The “soft cut” is more than just a haircut; it’s a technique. It focuses on creating movement, texture, and softness rather than harsh, blunt lines. This makes it incredibly forgiving for at-home stylists. By embracing this method, you can skip the salon appointment, save a significant amount of money, and learn a valuable skill that empowers you to maintain your hair’s health and style on your own terms. This comprehensive guide will walk you through every step, from choosing the right tools to executing the final, flawless snips.

Understanding the “Soft Cut” Philosophy
Before we pick up any scissors, it’s crucial to understand what we’re aiming for. A traditional blunt cut creates a solid, heavy line at the ends of the hair. A soft cut, on the other hand, is all about disintegration. It uses point cutting, slide cutting, and texturizing techniques to remove weight and create feathered, seamless ends that blend beautifully into the rest of your hair.
This technique is ideal for adding volume to fine hair, reducing bulk in thick hair, and creating a lived-in, low-maintenance look that grows out gracefully. The goal is not perfection in symmetry, but perfection in movement and texture. By focusing on softness, we eliminate the risk of those harsh, unmistakably “home-done” lines that are so difficult to fix.

Gathering Your At-Home Salon Toolkit
You cannot win a battle without the right weapons, and the same goes for haircutting. Using the proper tools is non-negotiable for a successful soft cut. Dull kitchen scissors or office scissors will crush and damage your hair shafts, leading to split ends and a frayed, unhealthy look.
Here’s what you absolutely need:
Professional Hair Shears: This is your most important investment. Look for a pair of sharp, 5.5 to 6-inch shears. They don’t have to be exorbitantly expensive, but they must be designed for cutting hair.
Fine-Tooth Comb: A metal or high-quality plastic comb is essential for creating clean, precise sections.
Hair Clips: You will need several clips to section your hair neatly. This keeps everything organized and manageable.
Water Spray Bottle: Your hair should be damp, not soaking wet, for most of this process. A spray bottle gives you perfect control.
Two Mirrors: One for the front and one hand mirror to check the back of your head. This is critical for ensuring balance.
Optional but highly recommended: Texturizing or thinning shears. These are fantastic for advanced softening and blending, especially if you have very thick hair.

Preparation is Everything: Washing and Sectioning
Start with clean hair. Wash and condition your hair as you normally would, but avoid heavy styling products that can weigh it down or make it slippery. Once out of the shower, gently towel-dry your hair until it is uniformly damp. It should not be dripping wet, as this can cause the hair to stretch and lead to inaccurate cutting.
Now, let’s section your hair. This is the most organizational part of the process and the key to an even cut. Begin by using the end of your comb to create a part from the center of your forehead straight back to your nape. Then, create a second part from the top of one ear, over the crown of your head, to the top of the other ear. You should now have three sections: the front left, front right, and the back. Clip the two front sections away, leaving the back section down.
Divide the back section horizontally into two more parts, clipping the top half up. You will work from the bottom up, which is the golden rule of haircutting.

The Step-by-Step Soft Cutting Technique
Now for the main event. Take a deep breath. Remember, we are cutting for softness, not for a precise length. We are going to use a technique called point cutting. Instead of cutting straight across, you will point the tips of your shears into the ends of your hair and make small, vertical snips. This creates a textured, broken edge that is the very essence of the soft cut.
Step 1: The Guide in the Back
Unclip the very bottom section at the nape of your neck. Comb it straight down. Decide on the length you want. Remember, it’s easier to cut more later than to fix a cut that’s too short. Take a small, horizontal subsection from this bottom layer. This will be your guide. Using your shears, point cut into the ends to establish your initial length and softness. Do not cut straight across.
Step 2: Working Up the Back
Now, take another horizontal subsection directly above the first one. Comb it down, and using the previously cut hair as your length guide, point cut into the ends to match the softness and length. Continue this process, working your way up the back of your head, until the entire back section is complete. Always use the hair from the previously cut section as your guide to maintain consistency.
Step 3: Bringing in the Sides
Unclip one of the front sections. This hair will be brought back to meet the guide you’ve already established in the back. Comb the side section straight down, and then gently pull it back towards the center of your head, aligning it with the hair at the back. You should see a smooth, continuous line. Carefully point cut into the ends, following the soft line you’ve created in the back. Repeat on the other side.
Step 4: Face-Framing and Final Softening
This is where the magic happens. Look at the front sections. To create soft, face-framing layers, take a vertical subsection from the front (like a curtain bang section). Hold it out and away from your face at a 45-degree angle. Point cut into the ends, starting a bit shorter near your face and gradually blending it into the longer length. This creates a beautiful, gradual layer that frames your features softly. Do this on both sides, checking for balance in the mirror.

Blending and Texturizing for a Pro Finish
Once all sections are cut, it’s time to blend everything together for a seamless finish. Let your hair down and comb it through. Look in the mirror from the front, sides, and use your hand mirror to check the back. Are there any spots that look a little heavy or thick?
This is where texturizing shears can be your best friend. Use them sparingly! Take very small sections from areas that feel bulky—typically around the crown or the ends—and make one or two snips with the texturizing shears about an inch or two from the ends. This removes internal weight without altering the length, enhancing the soft, airy feel of the cut. If you don’t have texturizing shears, you can use your regular shears to do a slide cutting technique: gently open the shears, place a section of hair inside, and then slide them down the shaft while gently closing and opening them to remove weight.

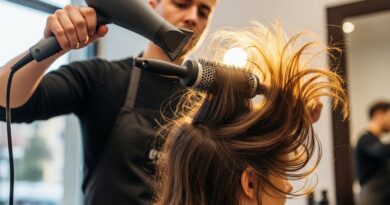
Drying and Styling Your Masterpiece
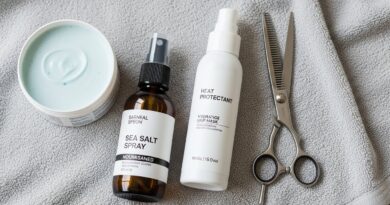
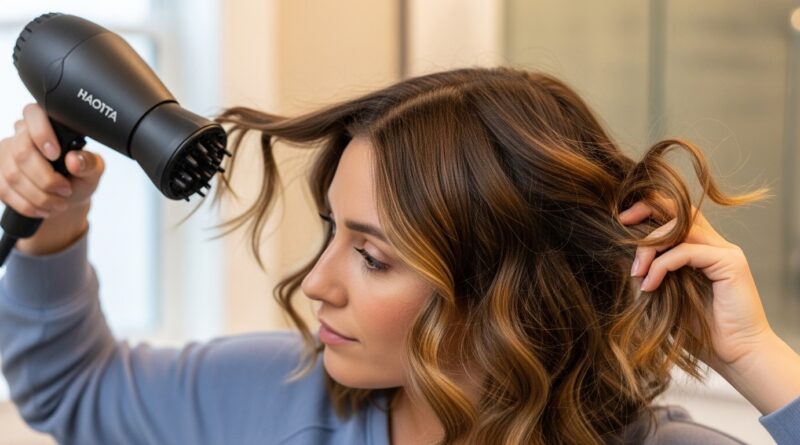
How you dry your hair will finalize the look of your soft cut. Avoid rough, circular towel drying. Instead, gently scrunch your hair with a microfiber towel or an old t-shirt to absorb excess water. If you’re using a blow dryer, attach a diffuser. This attachment is a game-changer for textured cuts as it disperses the air flow, enhancing natural waves and curls and preventing frizz.
Apply a volumizing mousse or a texturizing spray to damp hair. Flip your head upside down and dry on a low heat setting, scrunching your hair upwards with your hands as you go. This will build incredible volume and encourage the soft layers to separate and fall naturally. Once about 90% dry, flip your head back up, and use your fingers to gently arrange your hair. You’ll see the layers fall into a perfectly imperfect, salon-worthy style.

Maintenance and Final Words of Encouragement
The beauty of a soft cut is its longevity. Because the lines are not blunt, it grows out beautifully and doesn’t require frequent trims. You can easily maintain this cut by giving it a quick soft-pointing trim every 8-12 weeks to keep the ends fresh and healthy.
Congratulations! You have just successfully given yourself a professional-looking soft cut hairstyle. You’ve not only saved time and money but have also gained the confidence and skill to take control of your personal style. Hair is a form of self-expression, and there is something incredibly empowering about being the artist of your own look. So embrace the softness, enjoy the movement, and wear your beautiful, self-styled hair with pride.