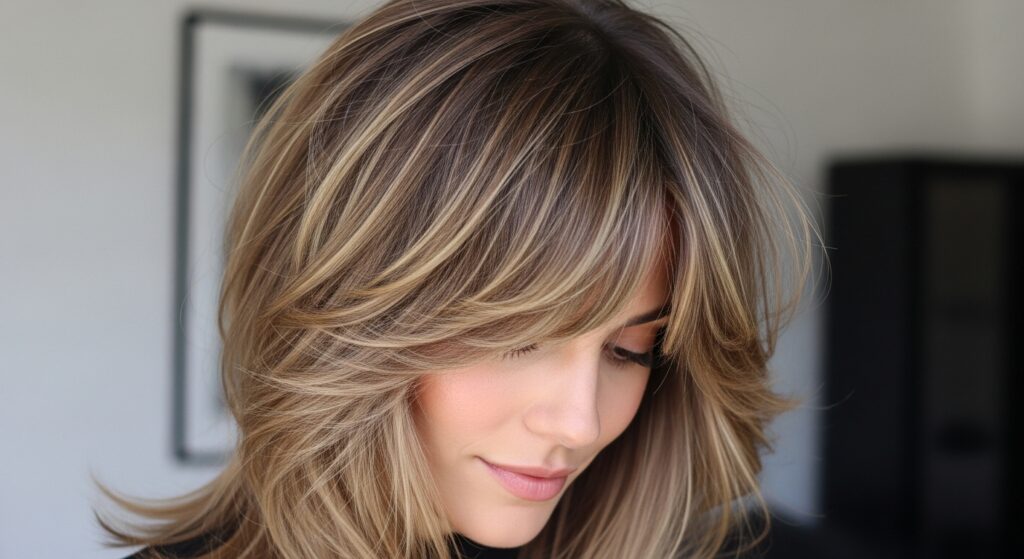
How to Perfect voluminous shag Hair Without a Trip to the Salon
Remember the shag? That iconic, rock-and-roll haircut synonymous with effortless cool and a devil-may-care attitude? Well, it’s back, and it’s bigger, better, and more voluminous than ever. The modern shag is a masterclass in texture, a deliberate disarray that frames the face and injects instant personality into your look. But the thought of achieving such a technically layered cut can send anyone running to the salon—and the accompanying bill.
What if we told you that the shag’s signature “lived-in” charm is actually its greatest at-home advantage? This isn’t a precision bob; it’s a cut that thrives on individuality and a slightly imperfect, hand-cut feel. With the right guidance, a dash of courage, and a few key tools, you can absolutely master the art of the voluminous shag from the comfort of your own bathroom. This guide will walk you through every step, from prepping your tools to executing those face-framing layers and, most importantly, styling them for maximum, head-turning volume.
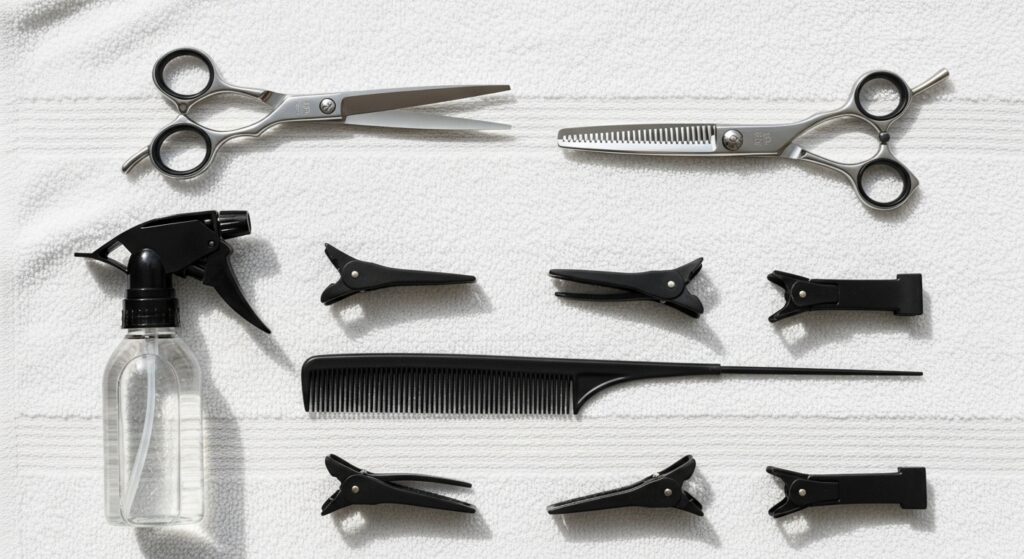
Gathering Your Arsenal: The Right Tools for the Job
Before you make a single snip, preparation is paramount. Using the correct tools isn’t just a recommendation; it’s the difference between a shaggy masterpiece and a hair mishap. Kitchen scissors are strictly forbidden—they will crush your hair fibers and lead to split ends, destroying the very texture you’re trying to create.
Here’s your essential at-home shag kit:
Hair Cutting Shears: Invest in a proper pair of sharp hairdressing shears. They don’t need to be professional-grade, but they must be designed for cutting hair to ensure a clean, sharp line.
Texturizing/Thinning Shears: This is the secret weapon of the shag. These shears have teeth on one blade and are used to remove bulk and create soft, blended ends without creating harsh lines. They are crucial for achieving that feathery, effortless texture.
Fine-Tooth Comb & Clips: A fine-tooth comb is essential for creating clean, precise sections. Clips (sectioning clips are ideal) will keep the rest of your hair out of the way while you work on one area.
Water Spray Bottle: Your hair should be damp, not soaking wet, for the initial cut. A spray bottle gives you perfect control.
Two Mirrors: One for the front view and one handheld mirror to check the back and sides. This is non-negotiable for ensuring balance.
The Foundation: Mastering the All-Important Shape
The voluminous shag is built on a foundation of strong, well-placed layers. The goal is to create a shape that is shorter at the crown and around the face, cascading down to longer lengths at the back. This is what generates that incredible lift and volume at the roots.
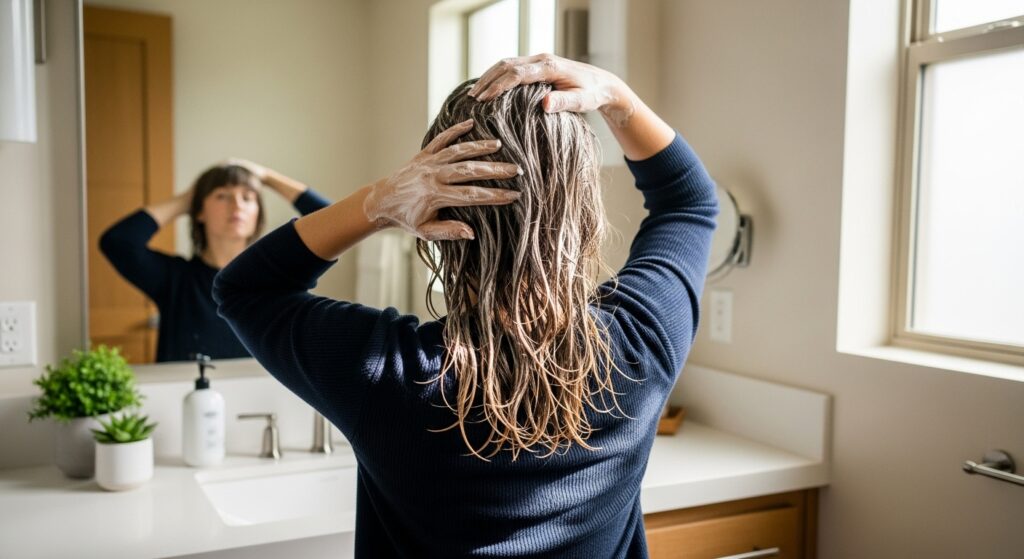
Start with clean, damp hair. Comb it through thoroughly to remove any tangles. Part your hair as you normally wear it. Now, we’ll create the guide for our shortest layers. Take a horizontal section of hair from the very top of your head, from about the middle of your eyebrows back to the crown. Clip the rest of the hair below this section out of the way.
This top section is your guide section. Decide how short you want your shortest layers to be. A good starting point is chin-length or slightly shorter, but you can adjust to your comfort level. Hold this section straight up, perpendicular to your head, and make a clean, horizontal cut. Do not cut this section too short too soon; you can always take more off later. This first snip sets the stage for everything else.

Carving the Layers: Building Texture and Movement
With your guide section established, it’s time to build the rest of the layers. Release another horizontal section of hair directly below the first one. Comb it straight up, aligning it with your guide section. The ends of this new section should match the length of the guide you just cut. This technique, called over-direction, is what builds the layered shape.
Continue this process, working your way down the back and sides of your head, always pulling each section straight up to the guide and cutting to match the length. As you move down towards your nape, the layers will naturally get longer. The hair at the very bottom (your baseline) can be left longer and trimmed to your desired overall length, whether it’s a short, medium, or long shag.
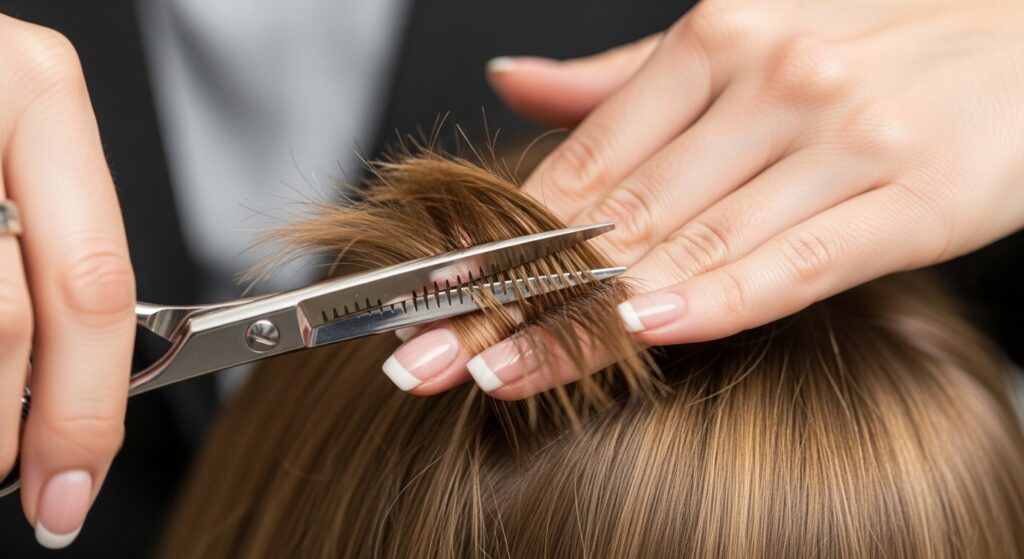
Once the main layers are in place, it’s time for the texturizing shears. This is where the magic happens. Instead of cutting straight across, use the texturizing shears to point-cut into the ends of your hair. Hold the shears vertically and make small, upward snips into the ends of your layers. This breaks up any harsh lines, creates a feathered effect, and removes weight to encourage volume. Focus on the mid-lengths and ends, avoiding the roots.
Framing the Face: The Signature Shag Bangs and Curtain Layers
No shag is complete without its signature face-framing pieces. This is what gives the cut its personality and eye-catching shape. For a classic shag, we’re aiming for curtain bangs and wispy pieces that blend seamlessly into the rest of the layers.
To create your face-framing layers, part your hair down the middle. Take a triangular section of hair from the front, with the point of the triangle at the top of your head and the base along your hairline. Isolate this section.
Hold this triangular section straight out in front of you. You’re going to connect the length of your shortest top layers to the front. Using your guide from the top as a reference, point-cut this section to create a soft, cascading effect. The center should be the shortest, gradually getting longer towards the sides. Remember, you can always cut more, so start conservatively. The goal is wispy, piece-y layers that frame your cheeks and jawline, not a heavy, solid fringe.
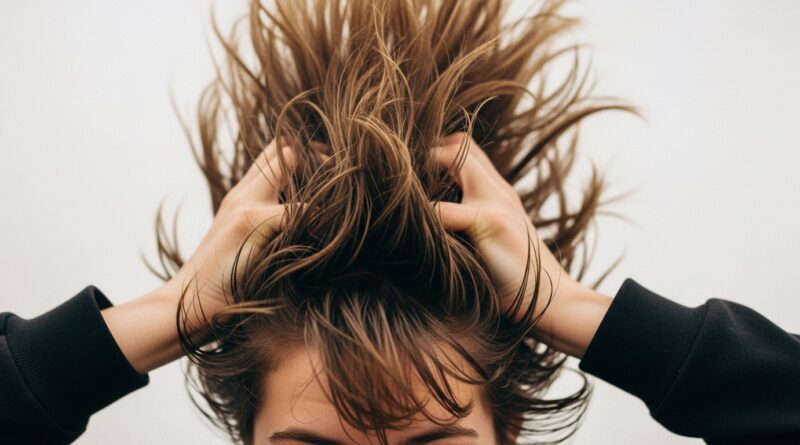
The Art of Styling: Unleashing the Volume
The cut is only half the battle. Styling is what unlocks the true voluminous potential of your shag. This cut is designed to be textured and piece-y, so embrace products and techniques that enhance that.
Start with a volumizing mousse or root-lifting spray applied to damp hair, focusing on the roots. Flip your head upside down and blow-dry your hair until it’s about 80% dry. This simple act instantly creates lift at the crown. For defined texture and waves, use a small-barreled curling iron or a wand. Don’t curl your hair uniformly; instead, take random sections and wrap them around the barrel, alternating the direction of the curls. Leave the ends out for a more undone, modern look.
Once all your hair is curled, do not brush it out. This is a common mistake. Instead, use your fingers to gently rake through and separate the curls. Then, flip your head over again and gently scrunch the roots with your fingertips to add even more volume. Finish with a light-hold texturizing spray, spritzed from a distance and scrunched in, to define those piece-y ends and hold the style without making it stiff or crunchy.
Maintaining Your Masterpiece: Between “Trims”
One of the beautiful things about a shag is that it grows out gracefully. However, to maintain its shape and prevent it from looking bulky, there are a few things you can do. Use a deep conditioning treatment once a week to keep the ends healthy, as textured hair can be more prone to dryness.
When you feel the layers are starting to lose their definition, you can do a quick maintenance refresh. Focus on the face-framing layers and the very ends with your texturizing shears, point-cutting to re-blend any grown-out, heavy sections. Avoid cutting any significant length unless you’re confident.
Your styling routine is your best maintenance tool. Consistently using volumizing and texturizing products will keep your shag looking fresh and intentional every single day, long after your initial at-home cut.
Embrace the Imperfectly Perfect Shag
Mastering the voluminous shag at home is an empowering journey. It’s about embracing a cut that is as unique as you are, one that doesn’t demand perfection but celebrates texture, movement, and personal expression. Remember, the most iconic shags throughout history have always had a touch of rebellion and a lived-in feel. So, take a deep breath, trust the process, and don’t be afraid to make it your own. With this guide, your shears, and a bit of rock-and-roll spirit, you’re not just saving a trip to the salon—you’re crafting a signature look that is unmistakably, voluminously you.