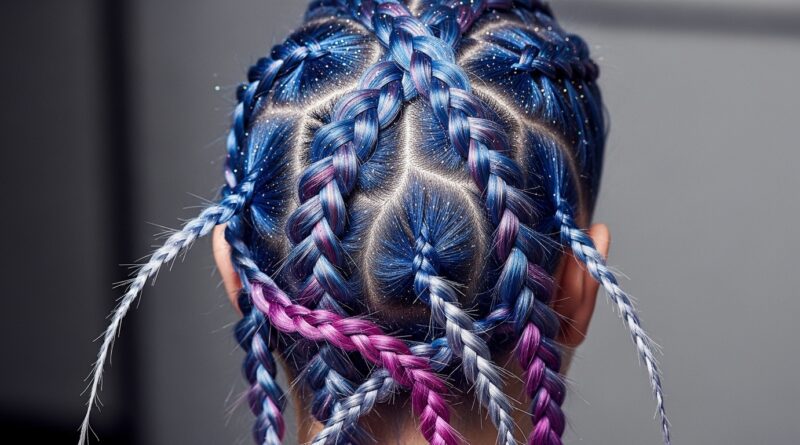
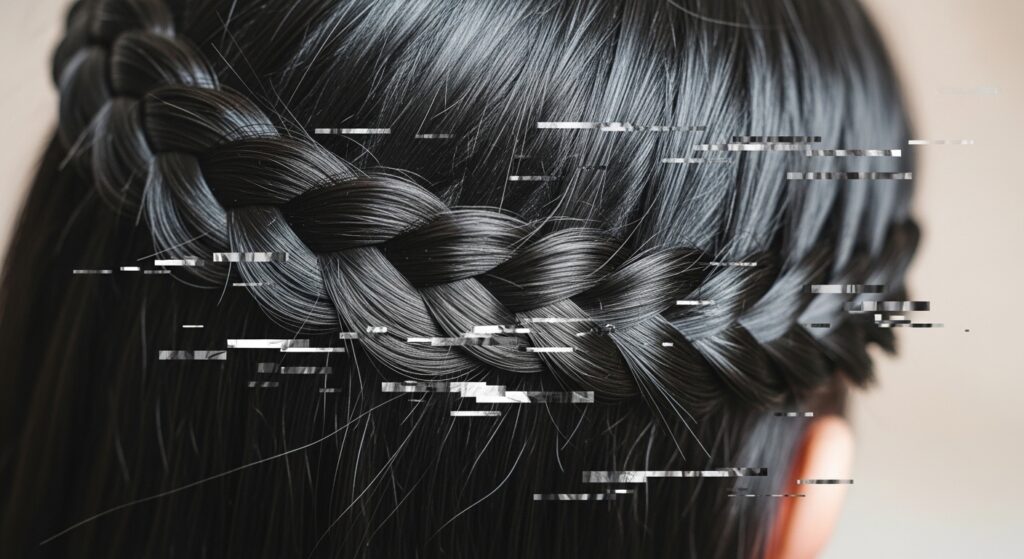
Lock 13 Waterfall French Combos Merging Techniques for Stunning Effect
Okay, let’s be real. The name “Lock 13 Waterfall French Combos” sounds like a secret hairstylist code, doesn’t it? I saw it trending and my first thought was, “That sounds complicated.” But after digging in, I got so excited.
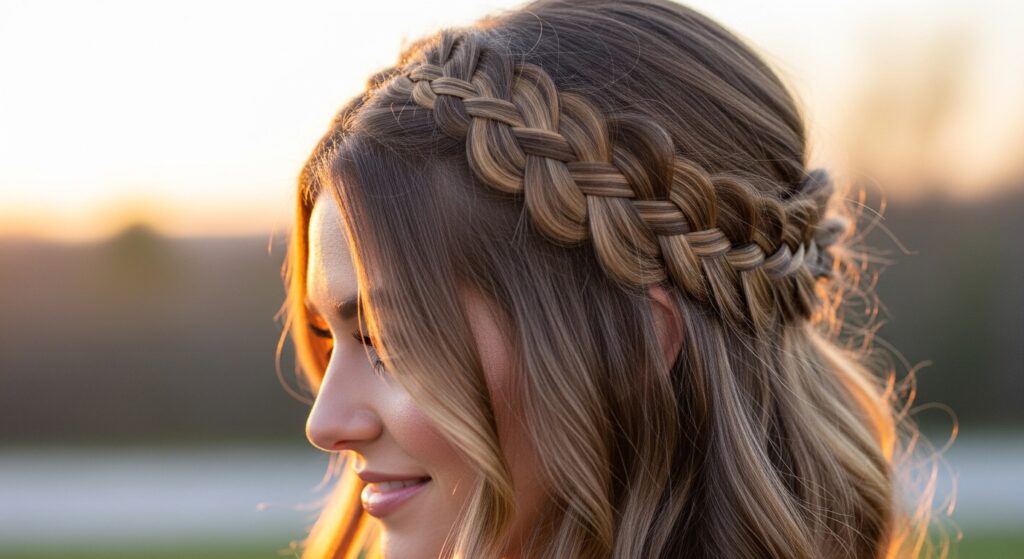
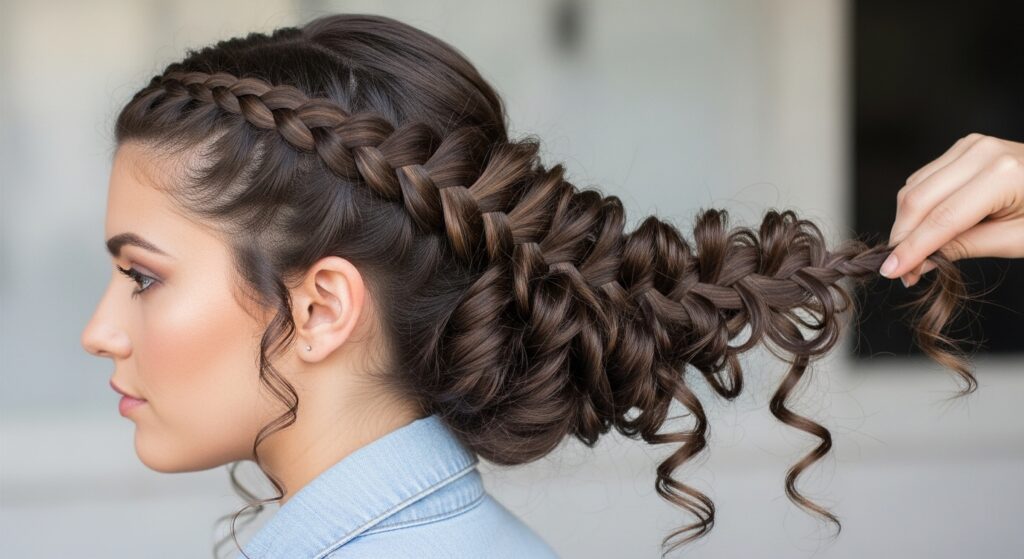
It’s not a single look. It’s a brilliant technique mash-up. We’re taking the structure of a French braid and merging it with the soft, cascading release of a waterfall braid.
The result is a hairstyle that’s both intricate and effortlessly romantic. It gives you that perfect balance of polished and undone. Best part? Once you get the basic merge down, you can adapt it for literally any hair vibe you’re feeling this season.
Think of this as your ultimate technique toolkit. I’m breaking it all down into simple, scannable steps. You’ll be able to create stunning, head-turning looks that are way easier than they look. Let’s get into it.
What Exactly Are We Merging Here?
To master the combo, you need to know what each technique brings to the party. A French braid is all about gathering hair as you go, creating a tight, incorporated plait from the crown down.
A waterfall braid is its more relaxed, romantic cousin. You pick up new hair from the top, but you drop the bottom strand to create a cascading, “waterfall” effect. It’s softer and often sits like a crown.
The “Lock 13” part? That’s just a cool, technical term for the specific point where you switch from one technique to the other. It’s the moment of merger that creates the magic.
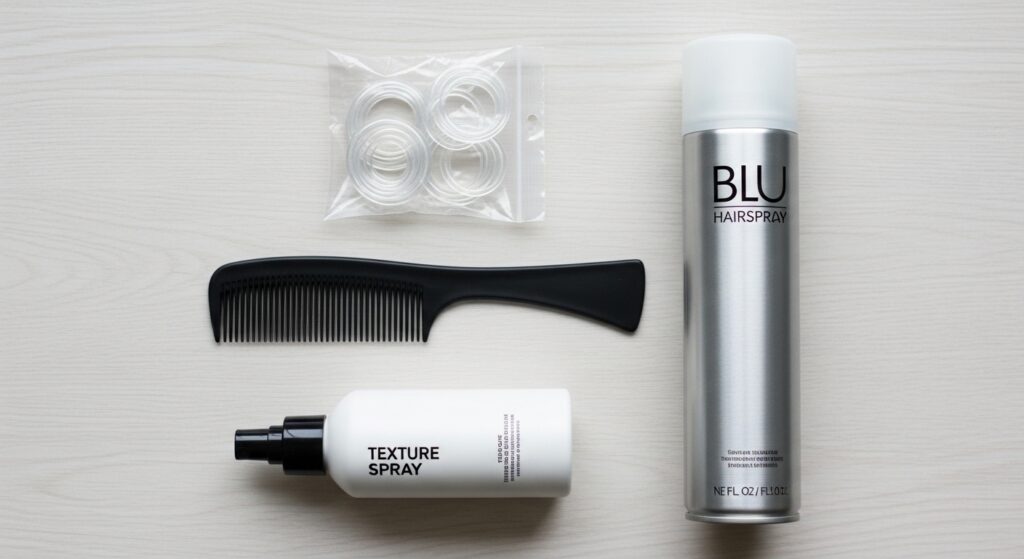
Gather Your Tools (You Don’t Need Much)
You can absolutely do this with just your hands and some hair. But a few simple tools will make your life—and your hairstyle—much better.
- A fine-tooth comb for clean sections.
- Strong-hold hairspray (a must for flyaways).
- Small, clear elastics to secure ends discreetly.
- Texture spray or dry shampoo for better grip.
That’s it! No fancy gadgets needed. The real tool is your understanding of the steps, which we’re covering next.
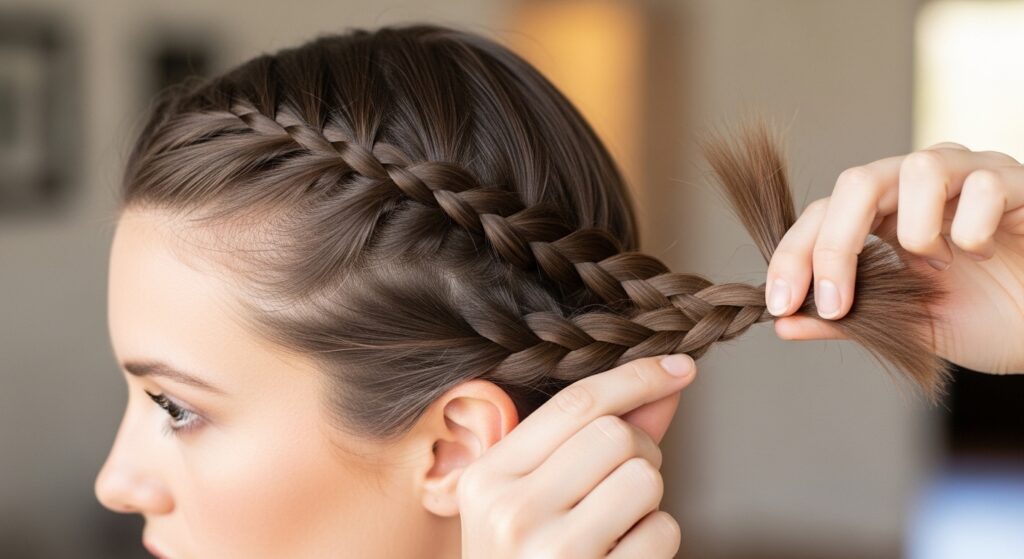
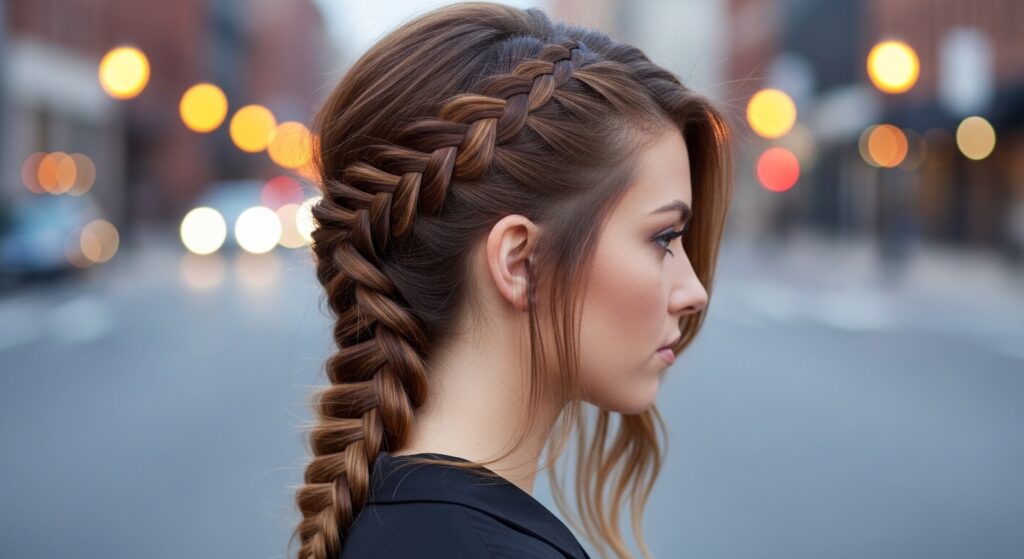
Step 1: The Foundational French Braid Start
Begin with a deep side part or a center part, depending on your look. Take a generous section at the front, near your part. Divide it into three equal strands.
Now, do two classic French braid stitches. That means crossing the right strand under the middle, then the left under the new middle, each time picking up a thin section of new hair from your scalp and adding it to the strand before you cross it.
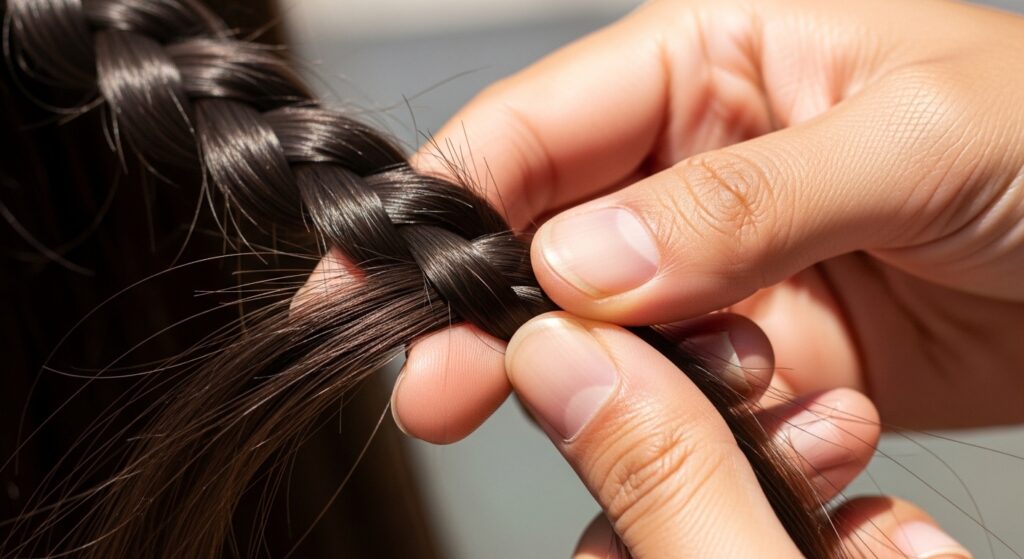
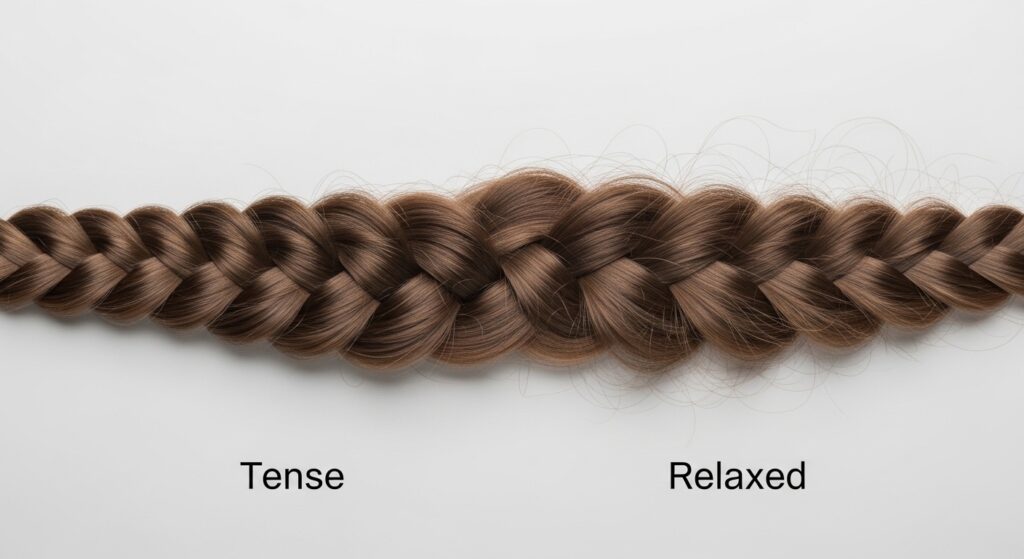
This creates a secure, anchored base. You’re essentially building the “spine” of the style. Keep the tension firm but not tight. We want elegance, not a headache.
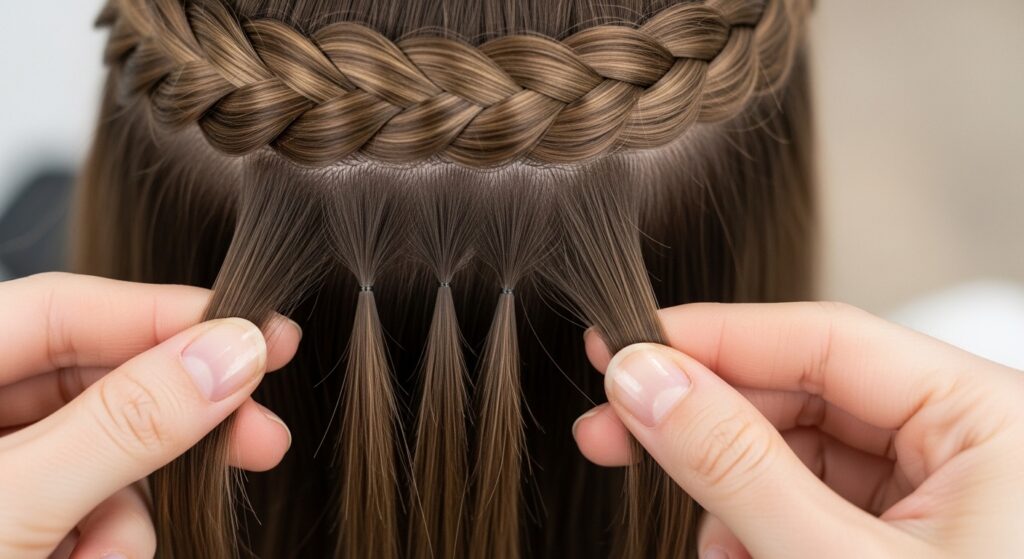
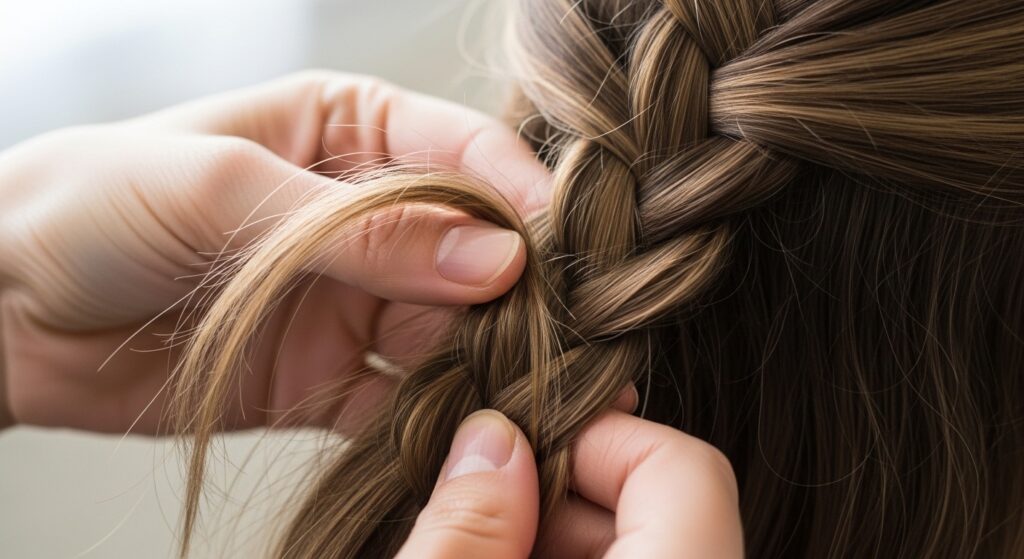
Step 2: The Pivot to Waterfall
This is the “Lock 13” moment. After your two French stitches, you’ll prepare to drop a strand. As you go to cross the next strand (let’s say it’s the right side), do NOT pick up new hair from your scalp.
Instead, simply cross that right strand under the middle. Now, here’s the key: the bottom strand (the left one) is the one you let go. Let it fall down to join the rest of your loose hair.
Immediately replace that dropped strand with a new, fresh section of hair from the top of your head. You’ve just pivoted into waterfall technique. The braid now has a released, cascading piece.
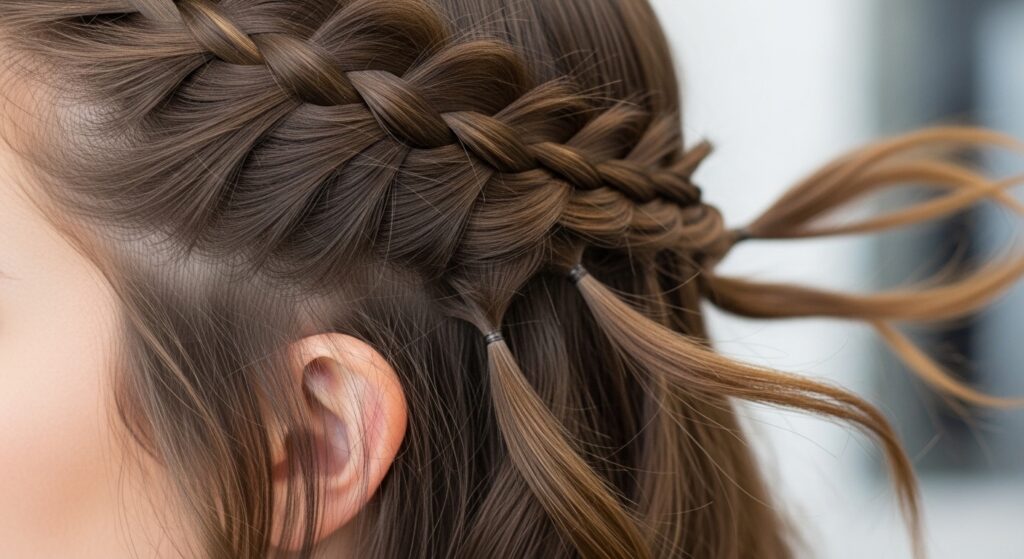
Step 3: Continue the Waterfall Flow
Now you’re in waterfall mode. Continue braiding along your hairline. Always pick up a new top section to add to the braid, and always drop the bottom strand to cascade down.
Keep the sections neat and consistent. The size of the sections you pick up will determine how delicate or bold the look is. Smaller sections = more intricate detail.
Work your way back until you’re just above the ear. This creates a beautiful, frame-the-face effect that’s perfect for so many 2026 hairstyles we’re seeing, from old money hair to more romantic looks.
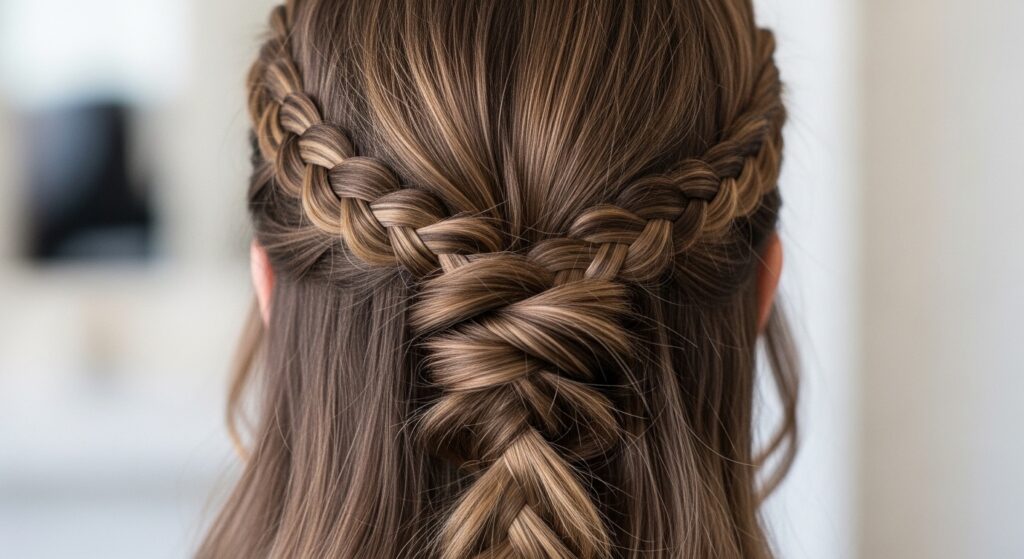
Step 4: Lock It Back Into a French Braid
To finish the look securely, you need to lock the braid back in. After a few waterfall stitches, you’ll switch back. When you go to pick up your next top section, also grab a small amount of hair from the loose, cascading sections below.
Incorporate them together into your braiding strand. Do this for the next two stitches. Now, all the hair is gathered back in.
Finish the rest of the braid as a simple three-strand plait all the way down. Secure the end with a clear elastic. This merge ensures the style stays put all day.
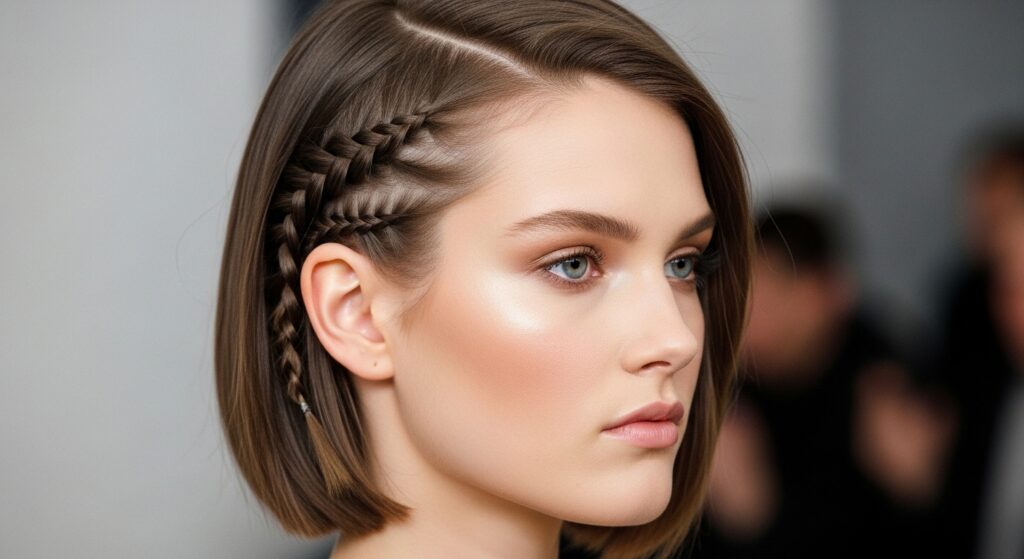
Adaptation 1: The Quiet Luxury Bob Version
Have a chic, blunt bob? This technique is gorgeous on shorter hair. Start the French braid very close to your part, just at the front. You may only get 1-2 French stitches before you pivot to waterfall.
Do only 2-3 waterfall releases. Then, immediately lock it back in and continue the braid as a tiny, baby braid along your hairline, or simply tuck and pin the end behind your ear.
It gives that perfectly imperfect, “I woke up like this” elegance that defines the quiet luxury bob. It’s polished without trying too hard.
Adaptation 2: Asymmetrical Lob Drama
An asymmetrical lob is all about dynamic shape. Amplify it with this braid. Start the braid very high on the heavier, longer side of your lob.
Create a longer, more dramatic waterfall section that follows the curve of your longer layers. Let it cascade over your shoulder.
On the shorter side, you can do a mini mirror version or just leave it sleek. The contrast between the intricate braid and the sharp cut is absolutely stunning.
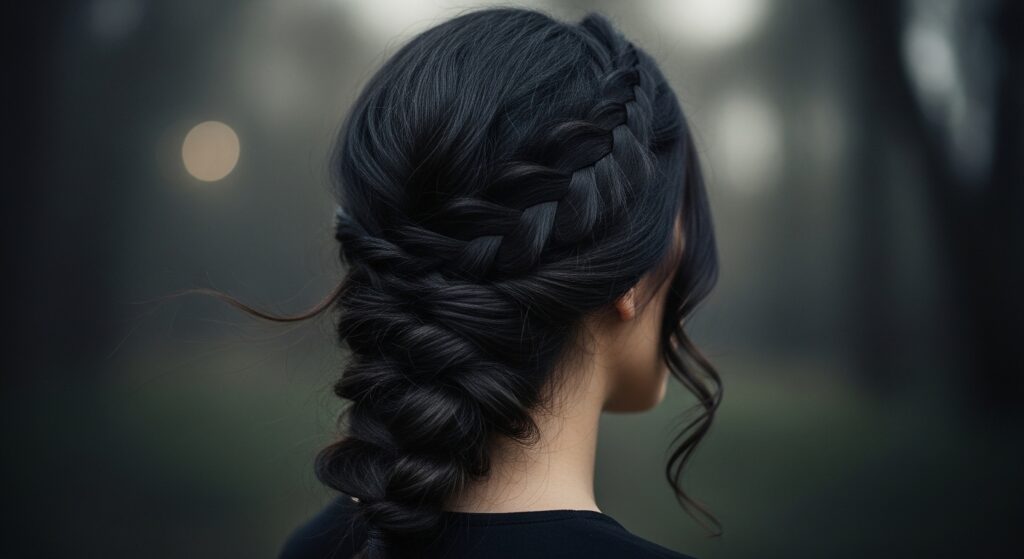
Adaptation 3: Romantic Goth & Vampire Haircut Vibes
For romantic goth hairstyles or a sharp vampire haircut, this braid adds the perfect soft-hard contrast. Start with deep, dark hair or add temporary color streaks.
Keep the braid a bit messier. Pull out a few face-framing pieces before you start. After braiding, gently tug on the edges of the braid to pancake it—make it wider and looser for a more undone, ethereal feel.
Pair it with deep lip color and sleek straight hair elsewhere. It’s elegant but with a dark romance edge.
Adaptation 4: Hime Cut Meets Princess Braids
The hime cut, with its dramatic front locks and blunt bang layers, is a statement. Use this braid to incorporate those long front pieces beautifully.
Start the braid just behind one of your hime (princess) locks. As you do the waterfall releases, allow the front lock to blend into the cascading strands.
It seamlessly connects the dramatic front pieces to the rest of your hair, creating a cohesive, regal look that’s straight out of a modern fairy tale.

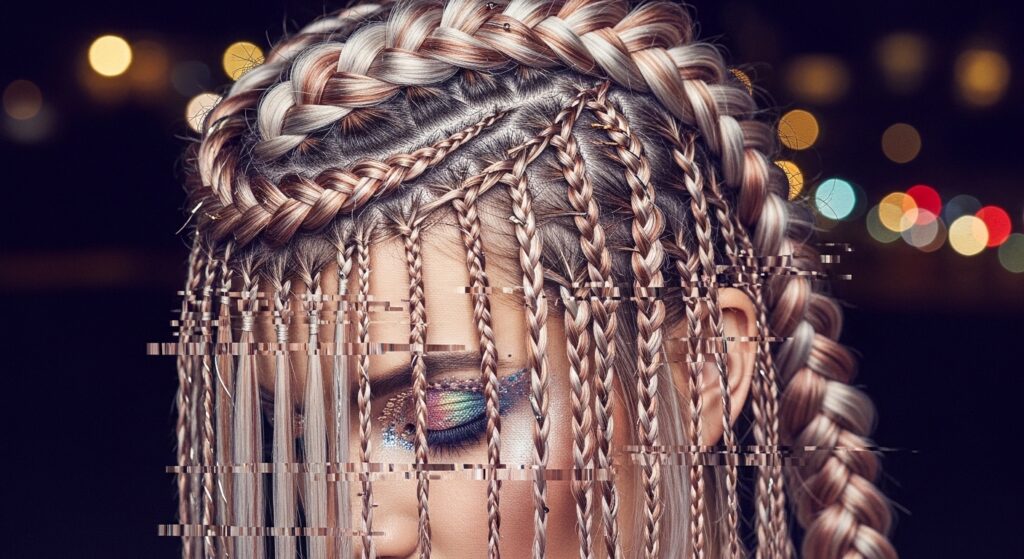
Adaptation 5: Glitchy Glam Hair Texture
Glitchy glam hair is all about intentional texture and disruption. Create this by alternating your technique randomly. Do one French stitch, then two waterfall releases, then jump back to French.
Or, braid with wet hair for a super sleek look, then once dry, carefully unravel *only* every other waterfall release section to create “glitch” gaps.
Spray with a high-shine gloss for a wet look finish. It’s a cool, editorial take on the trend.
Pro Tip 1: Mastering Tension for That “Effortless” Look
The biggest secret isn’t the pattern—it’s the tension. Pull too tight, and it looks severe. Too loose, and it falls apart. Aim for a “guided” feel.
Your hands should control the sections, but not yank them. When you drop a waterfall strand, let it fall naturally; don’t flick it out. A slightly looser braid is always more romantic and modern.
Practice makes perfect. Do it while watching TV a few times to get the muscle memory down without the pressure.
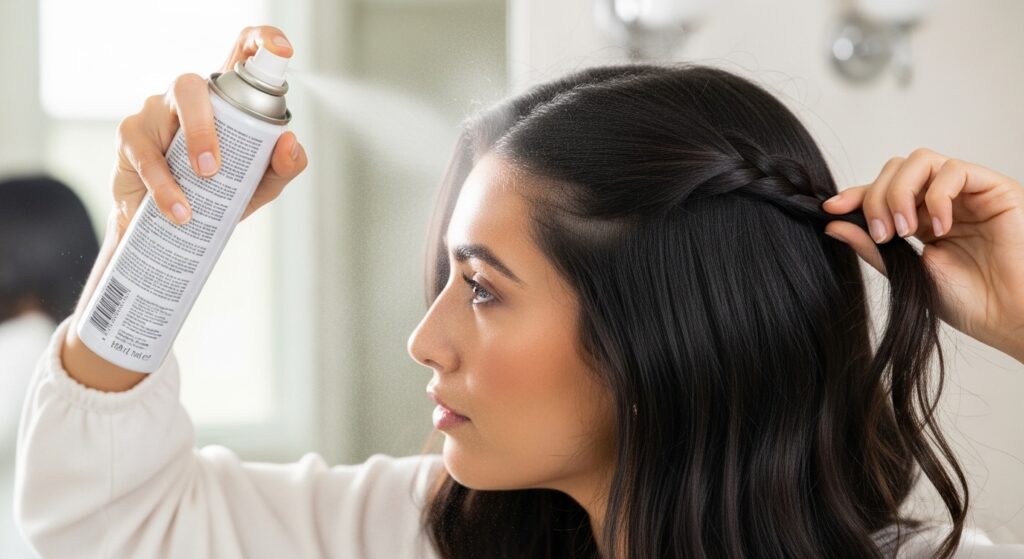
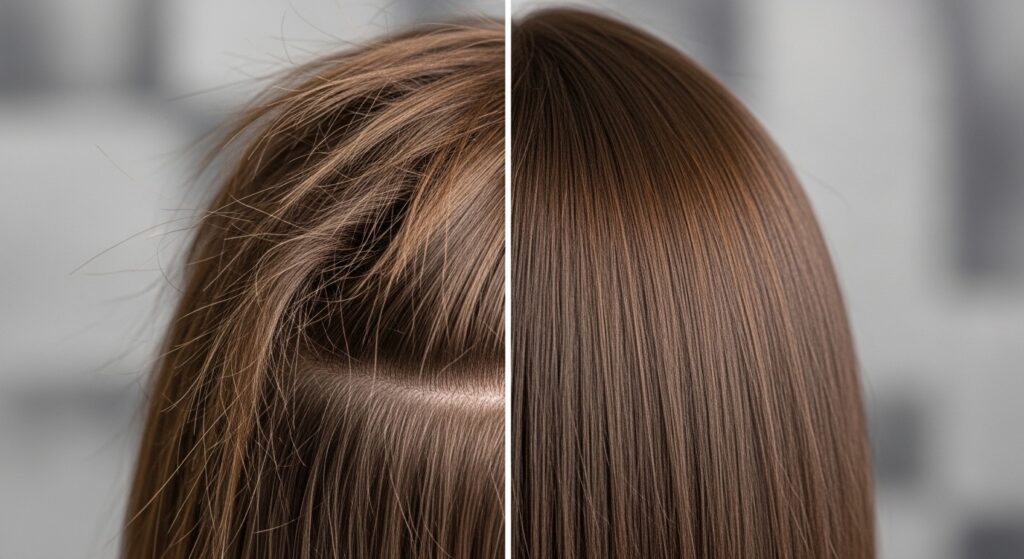
Pro Tip 2: The Power of Texture Spray
If your hair is freshly washed and slippery, this braid will be frustrating. Texture is your best friend. Before you start, spray a light texturizing spray or dry shampoo at your roots and along the hairline.
This gives the hair grit and grip, making it easier to hold sections and keep the braid from sliding. It also adds volume, making the braid look fuller and more pronounced.
It’s the single biggest hack for making any intricate braid last all day and night.
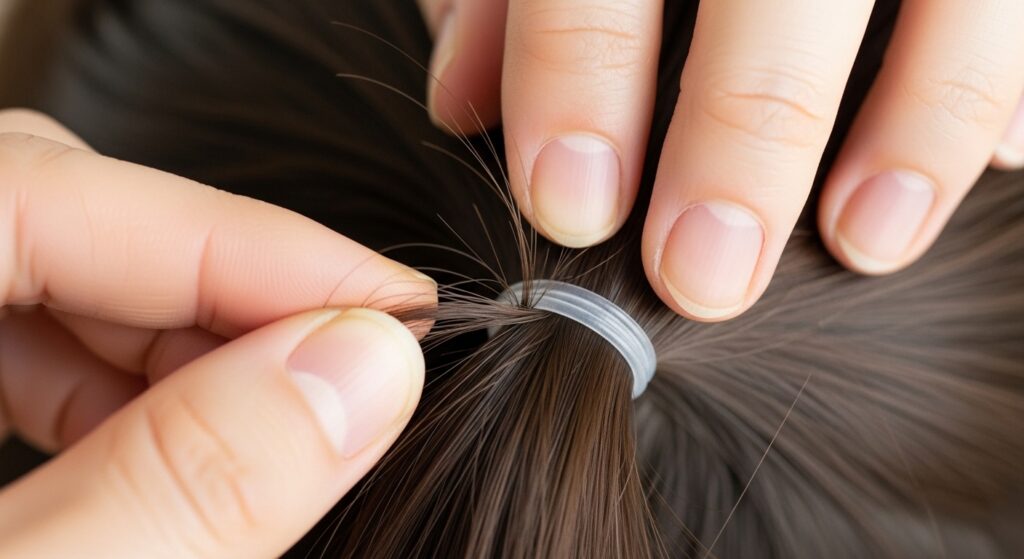
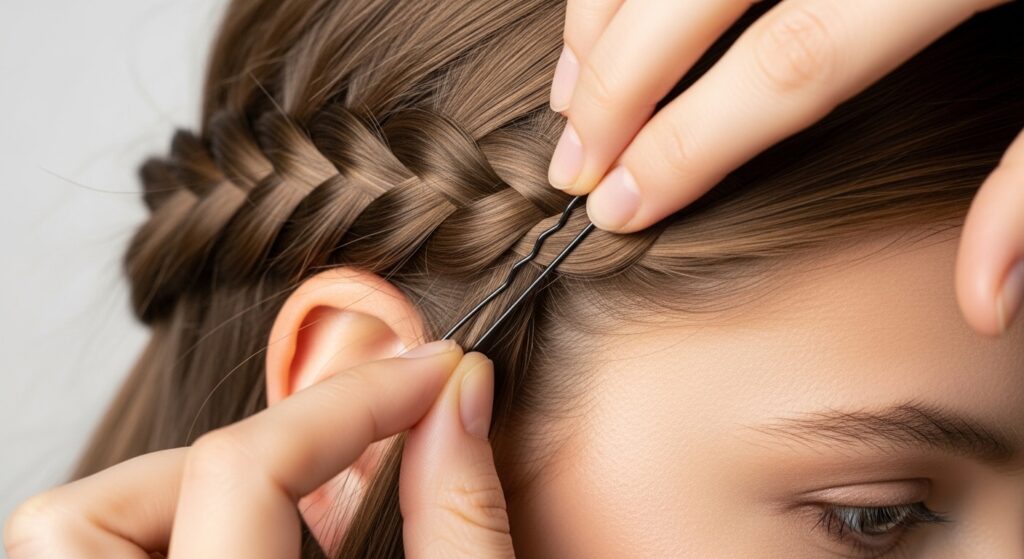
Pro Tip 3: Hiding the Clear Elastic
That clear elastic is necessary, but it can look cheap if it’s obvious. Once you’ve secured the end of your braid, take a tiny strand of hair from the loose tail.
Wrap it tightly around the elastic, covering it completely. Tuck the very end of that wrapping strand back into the elastic with a bobby pin.
This creates a seamless, “magic” finish where the braid just seems to melt into your hair. It’s a tiny detail with a huge impact.
Styling Idea 1: Half-Up Crown Goddess
This is my go-to for summer weddings or brunch. Create the Lock 13 combo along one side of your head, from temple to the back of your crown.
When you finish the braid, instead of letting it hang, pull it across the back of your head like a headband. Pin it securely under the hair on the opposite side.
Leave the rest of your hair down in soft waves. It’s an instant half-up style that looks incredibly complex, but you now know the simple secret.
Styling Idea 2: Fully Braided Boho Headband
Want more drama? Create the combo braid on both sides of your head. Start each at the temple and braid back towards the crown.
When you finish each braid, bring them to the back of your head. Twist them together gently and pin them in place.
This creates a full, beautiful braided headband effect. It keeps hair completely off your face and is perfect for hot days or workouts with major style.
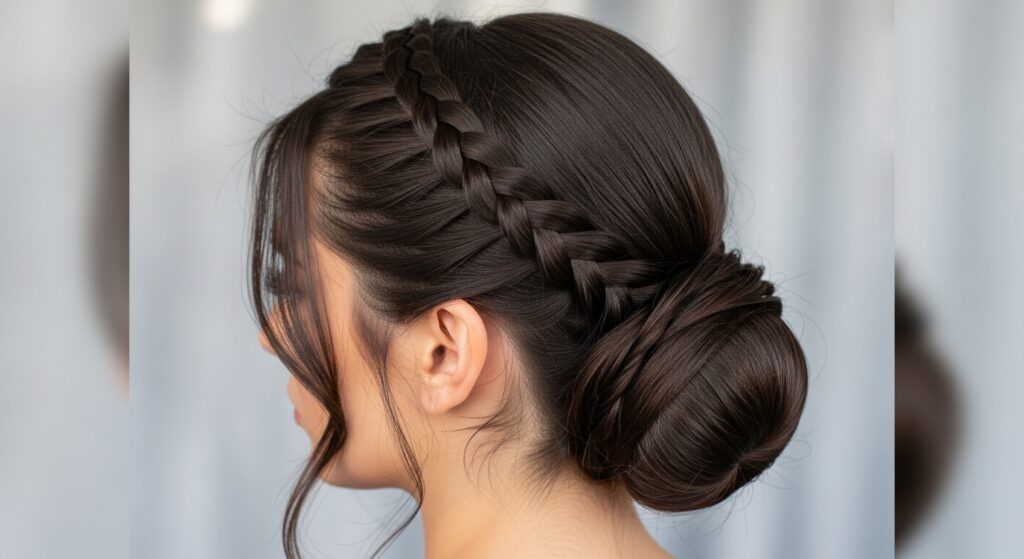
Styling Idea 3: The Elegant Low Bun Anchor
Use this braid as a stunning anchor for a low bun. Create one Lock 13 combo along your hairline, ending just above your ear. Gather all your hair, including the braid, into a low ponytail.
Create a simple, messy bun or a sleek twist. The braid becomes a gorgeous, detailed element snaking into the bun.
It transforms a basic updo into something special for the office or a dinner date. It screams old money hair in the best way.
What To Do If Your Hair Is Slippery or Thin
Fine or silky hair can struggle to hold this braid. Don’t give up! First, always use texture spray. Second, try braiding on day-two or day-three hair for natural grip.
You can also make the sections *slightly* smaller for more hold points. Finally, after you’re done, use a few tiny, hidden bobby pins to secure the braid to your scalp at key points, especially after the waterfall sections.
No one will see them, and they’ll keep everything perfectly in place.
What To Do If Your Hair Is Very Thick or Curly
Thick, curly, or coily hair is gorgeous for this! It creates amazing volume. The key is to work with slightly stretched or damp-styled hair for easier sectioning, or to braid on blown-out hair.
Make your sections larger and more defined so the pattern is visible. Don’t be afraid to really “pancake” or pull the braid apart once finished to showcase its fullness.
The texture will make the waterfall effect look incredible and very bold.
Common Mistakes & How to Fix Them Fast
- Mistake: The braid looks lumpy. Fix: Your sections aren’t clean. Comb each new pickup section smoothly before adding it in.
- Mistake: The waterfall strands get tangled. Fix: Drop them cleanly and don’t braid too tightly above them.
- Mistake: It unravels. Fix: You didn’t lock it back to a French braid securely. Ensure you’re grabbing from the loose hair when you switch back.
Most issues are solved with cleaner sections and practicing the pivot point.
How to Practice Without the Pressure
Don’t try this for the first time before a big event. Practice on a lazy Sunday. Sit in front of your favorite show and just run through the steps on dry, unwashed hair.
Don’t even look in a mirror for the first few tries. Feel the strands. Get the rhythm of pick-up, cross, drop. The muscle memory is what matters.
Once your hands understand the dance, looking in the mirror and making it pretty is the easy part. Be patient with yourself!
Final Thoughts From My Chair
Honestly, learning this merge felt like unlocking a hairstyle superpower. It looks so fancy, but it’s just two simple techniques having a conversation on your head.
The beauty is in its versatility. With this one method, you can create looks that fit the quiet luxury aesthetic, add romance to a goth vibe, or add detail to a sharp modern cut.
It’s a testament to how playing with foundations can lead to the most stunning, personalized effects. That’s what makes hair so fun.
So, there you have it—your complete guide to turning a confusing trend name into a go-to hairstyle in your back pocket. I hope you feel empowered to try it, play with it, and make it your own.
Remember, the first try might be messy, and that’s totally okay. Hair is meant to be played with. The goal is to have fun and feel beautiful in the process.
Save this post to Pinterest to keep this guide handy for your next practice session! And I’d love to know—which adaptation are you most excited to try? Are you a quiet luxury bob girlie or leaning into the romantic goth vibes? Tell me in the comments below!