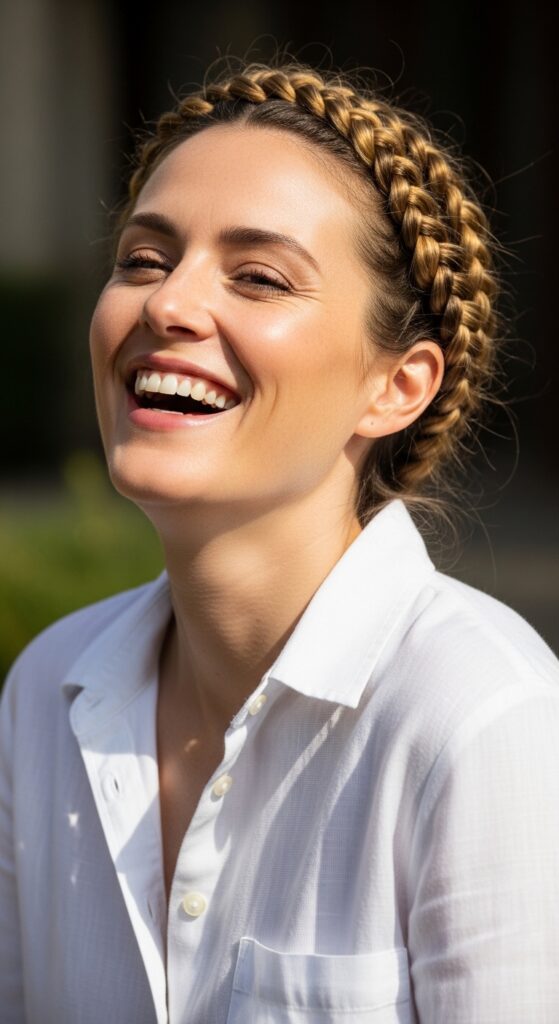
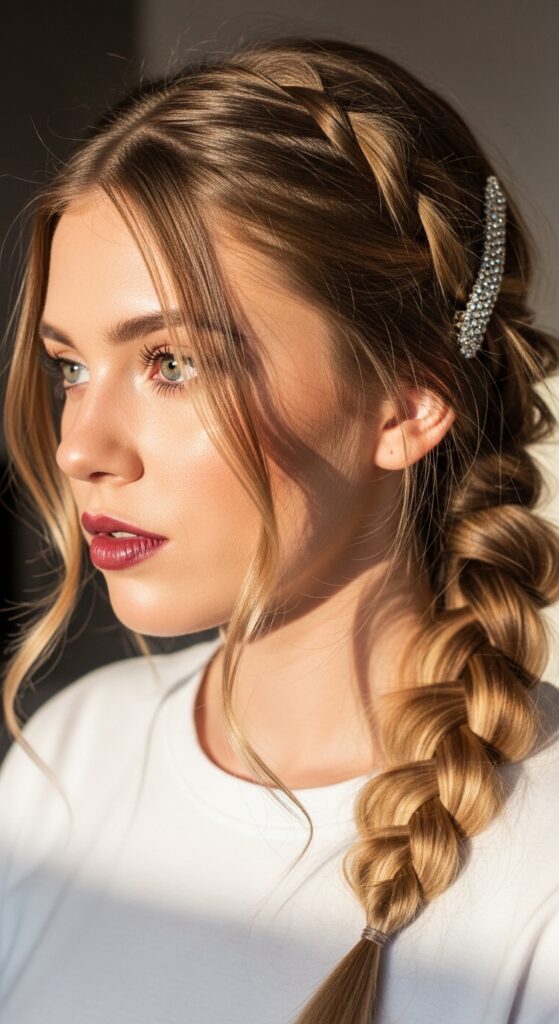
Milkmaid Braids: The Romantic Updo You’ve Been Sleeping On
Okay, let’s be real. How many times have you scrolled through your feed, seen a gorgeous, intricate-looking braided updo, and immediately thought, “Nope, not for me. I don’t have the skills or the time”? I’ve been there a hundred times. But what if I told you there’s one romantic style that’s secretly the easiest thing ever?
I’m talking about milkmaid braids. This isn’t some fussy, tight updo. It’s soft, it’s forgiving, and it gives off major cottagecore-meets-old-money hair vibes without any of the stress. It’s the perfect blend of effort and effortlessness.
If you can make two simple braids (or even twist them!), you can absolutely do this. It works on day-old hair, it hides greasy roots, and it looks like you tried way harder than you actually did. Let’s dive in and I’ll show you exactly how to get this look in minutes.
What Are Milkmaid Braids, Exactly?
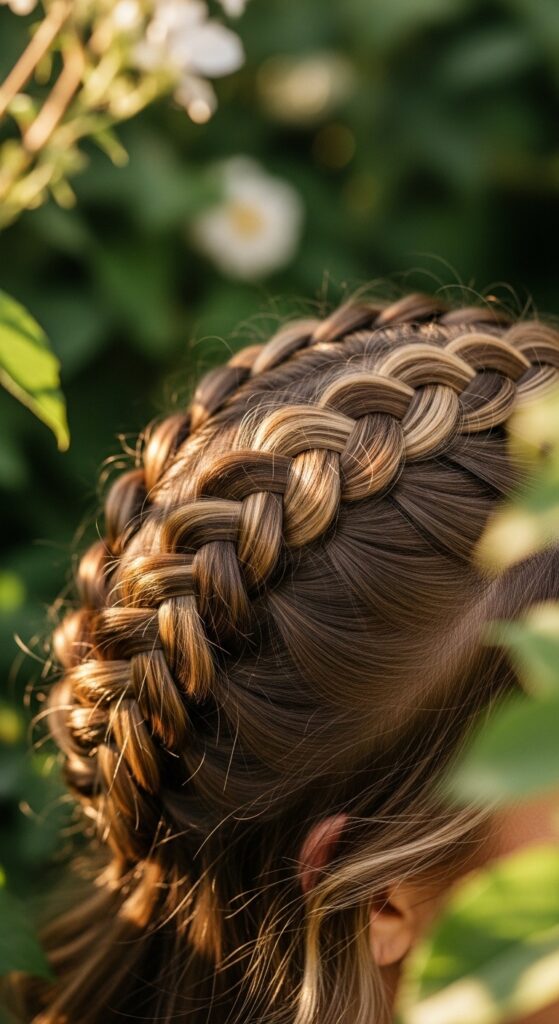
At its core, the milkmaid braid is just two braids (usually Dutch or regular three-strand) that are wrapped around your head like a crown and pinned in place. The magic is in the soft, loose finish. It’s not a sleek, perfect crown braid.
Think of it as the laid-back, romantic cousin of more structured updos. It has this beautiful, vintage feel that works for a farmer’s market trip just as well as a summer wedding. It’s a timeless style that keeps popping up in every trend cycle for a reason.
Why This Style is a Total Game-Changer
First, it’s a savior for second or third-day hair. The texture from dry shampoo or natural oils actually helps the style hold better and look more lived-in and soft. It’s the ultimate “I woke up like this” updo.
Second, it’s incredibly versatile. You can make it look sweet and rustic, or elegant and romantic with a few tweaks. Plus, it keeps your hair completely off your neck on hot days. Once you master the basic method, it becomes a 5-minute hairstyle.
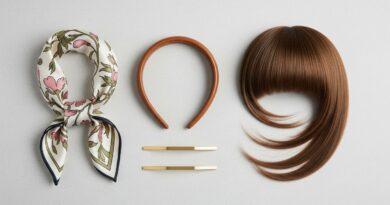
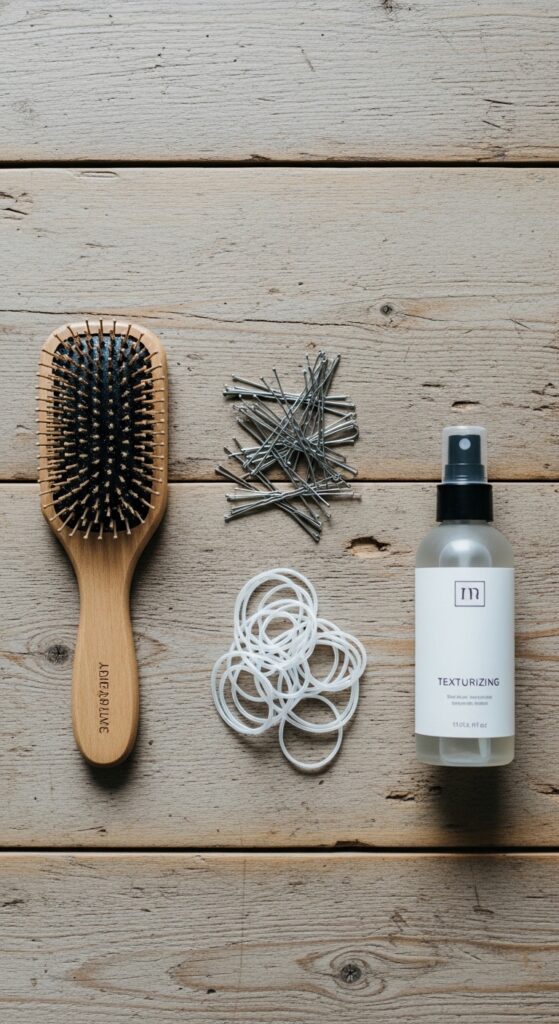
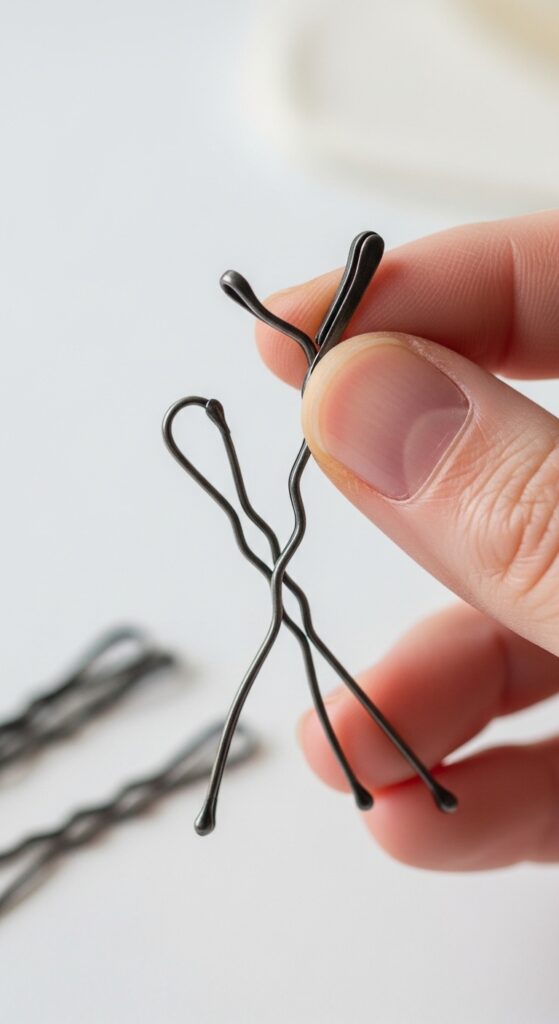
The Tools You’ll Need (It’s a Short List!)
- A fine-tooth comb or brush for sectioning
- Clear elastic bands (the kind that don’t snag)
- Bobby pins that match your hair color (lots of them!)
- Light-hold hairspray or texturizing spray
- Optional: A few small, clear elastics for securing the wrap
That’s seriously it. You don’t need any fancy gadgets or products. The goal is to work with your hair’s natural texture, not fight against it.
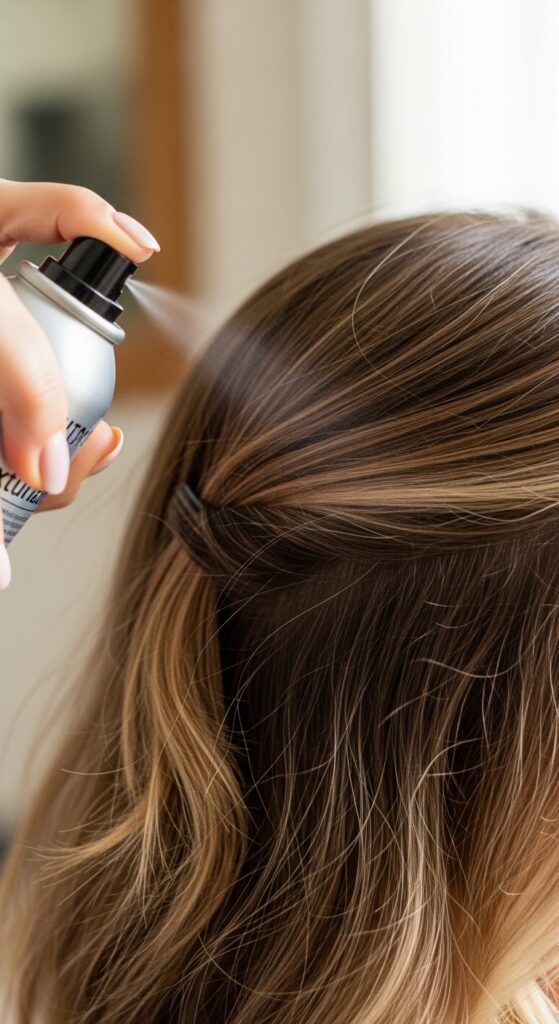
Step 1: Start with the Right Texture
This style works best on hair that isn’t freshly washed. If your hair is too silky, the braids might slip. I recommend using a dry shampoo or a light texturizing spray at your roots to add some grit and hold.
If your hair is very fine or slippery, you can also lightly braid it before bed to create natural wave and texture. The braids will hold their shape much better when you re-braid them in the morning.
Step 2: Create Your Two Sections
Part your hair down the middle, from your forehead to the nape of your neck. You want two equal sections. Don’t worry about making it perfectly straight—a slightly imperfect part adds to the soft, romantic feel.
Secure one side with a clip or loose elastic so it’s out of the way while you work on the first braid. This keeps things manageable and prevents the sections from getting mixed up.
Step 3: Braid Each Side (Choose Your Method)
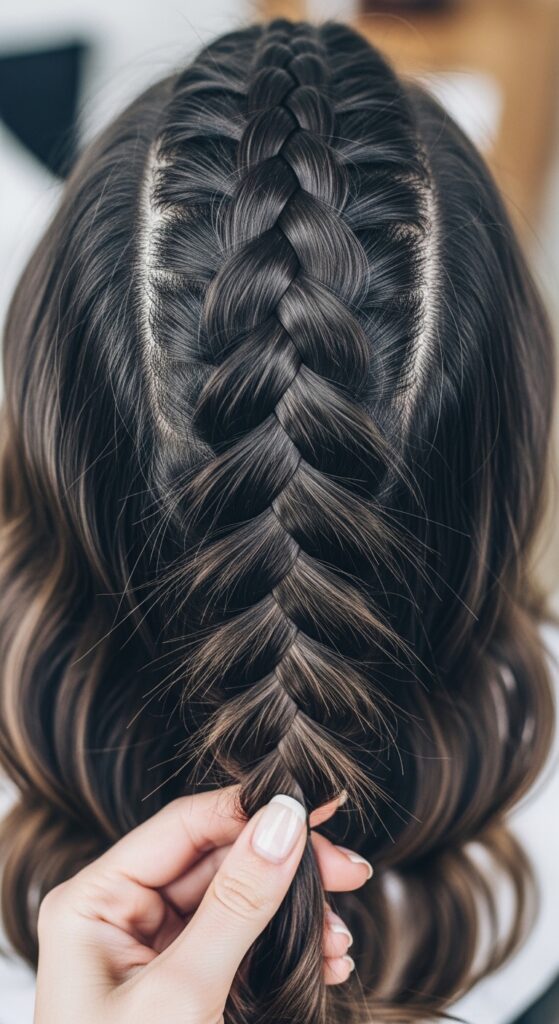
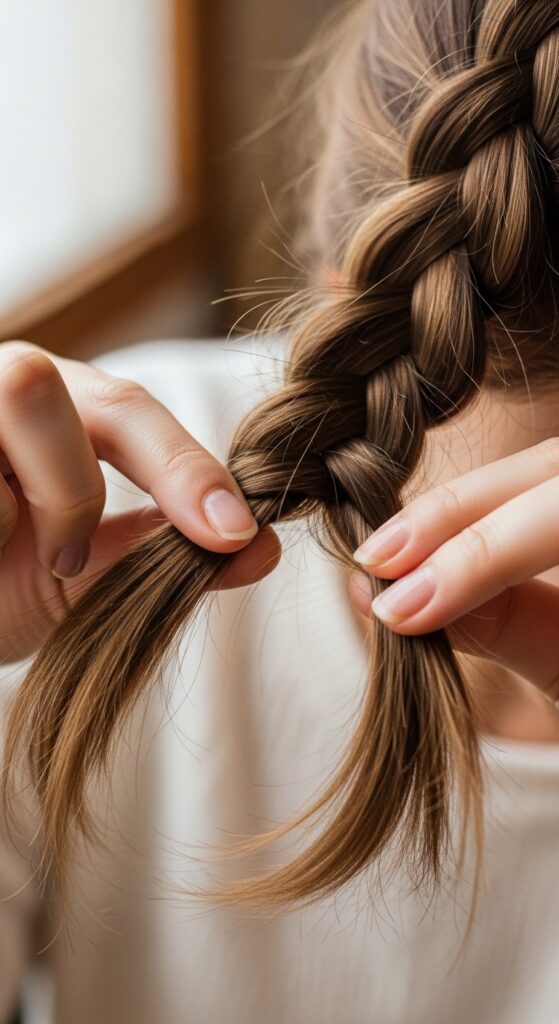
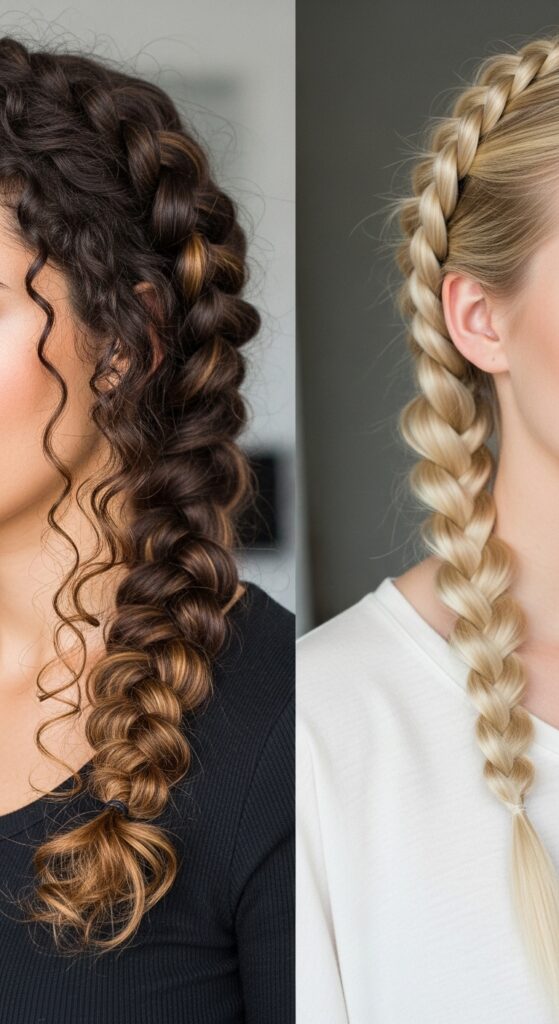
Now, braid each section. You have options here! A regular three-strand braid is the easiest. For more volume and a “popped out” look, try a Dutch braid (which is just an inside-out French braid).
Keep the braids a little loose as you go. Don’t pull them tight. You want that soft, malleable texture. Secure the end of each braid with a clear elastic.
Step 4: The Secret to a Soft, Full Look
Once both braids are done, this is the most important step. Gently pull on the outer loops of each braid to pancake or fluff them out. Start from the top of the braid and work your way down.
This makes the braid look wider, fuller, and much more romantic. It also helps hide any unevenness in your braiding. Don’t be shy here—really pull it out to get that soft, voluminous effect.
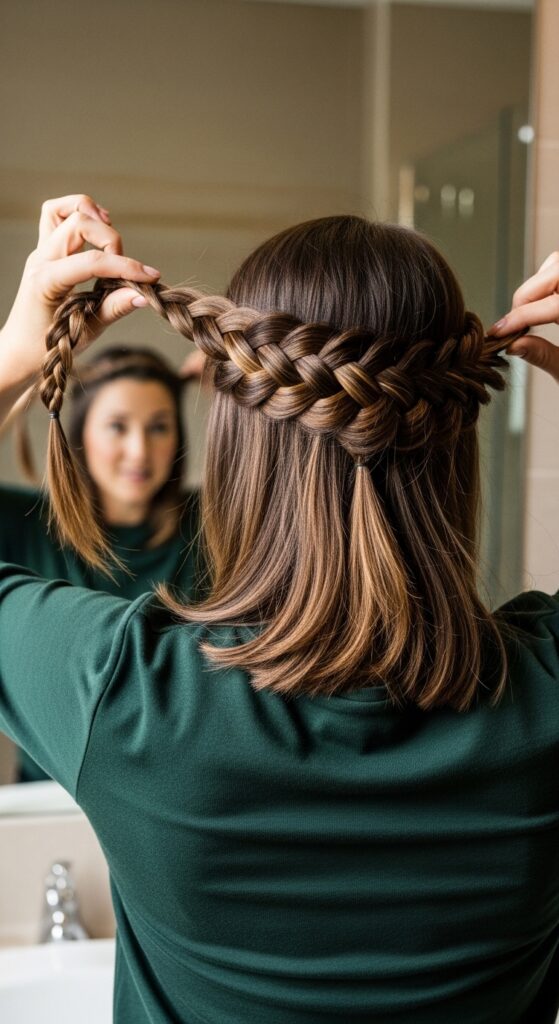
Step 5: Positioning the First Braid
Take one braid and bring it up and across the top of your head, like a headband. Place it where it feels natural and looks good to you. I usually start just above my ear and drape it over my crown.
Don’t pin it yet! Just lay it there to see the placement. The end of the braid should tuck behind the opposite ear. Make sure it sits flat and comfortable against your head.
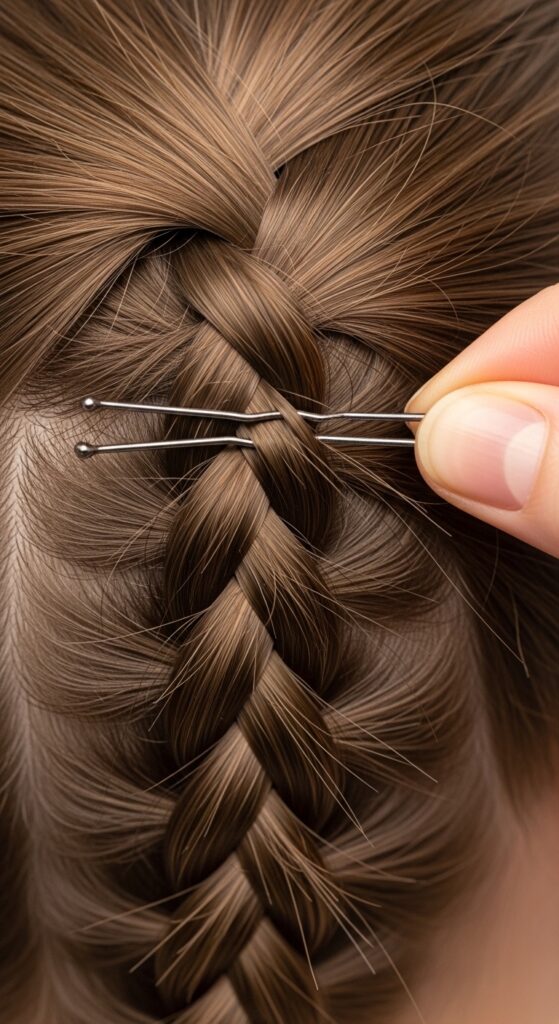
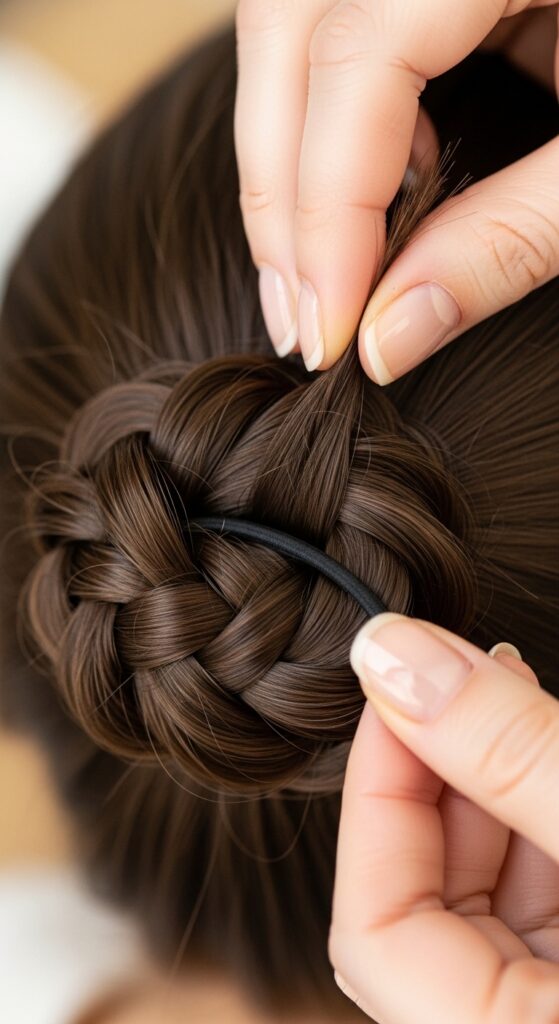
Step 6: Secure It with Bobby Pins
Now, use your bobby pins to secure the braid. Slide the pins in vertically or criss-crossed, catching both the braid and the hair underneath. Use more pins than you think you need, especially at the start and end of the braid.
The goal is security, but you want the pins to be hidden under the braid. If a piece pops loose, don’t stress—it just adds to the effortless vibe. A few wispies are your friend.
Step 7: Wrap and Secure the Second Braid
Take the second braid and bring it up to meet the first. You’ll wrap it around your head, just behind the first braid, so they sit parallel like a double crown. Tuck the end of this braid under the tail of the first braid.
This creates a beautiful, woven look. Again, pin it securely along the entire length, making sure to also pin the two braids together where they meet at the ends to lock everything in place.
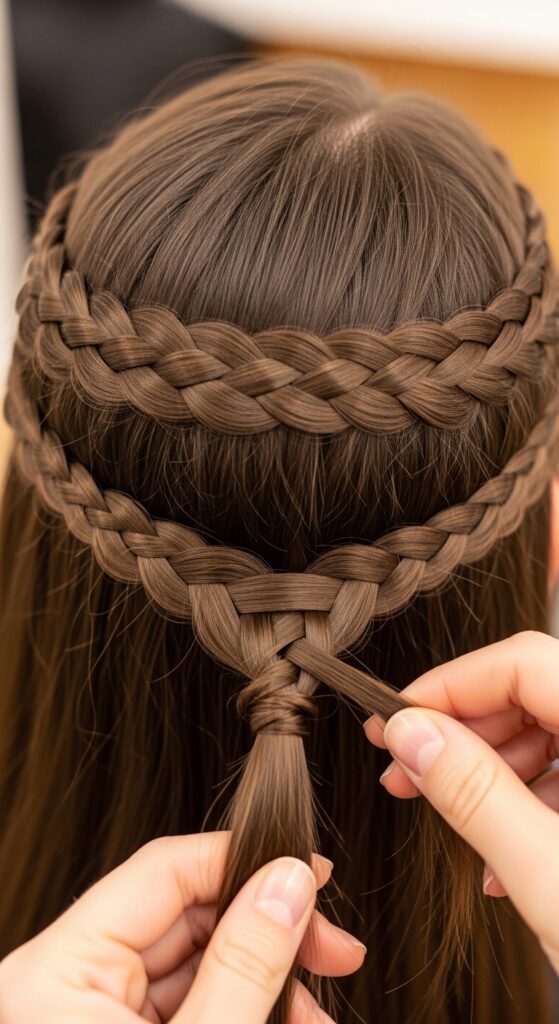
Step 8: Tuck & Hide the Ends
Those elastic bands at the ends of your braids need to disappear. Carefully tuck the ends under the wrapped braids, using bobby pins to secure them flat against your head. You can also gently pull a few tiny hairs out of the elastic to camouflage it.
If the elastics are clear and tight, sometimes you can just leave them. But for the cleanest finish, tucking is the way to go. It makes the style look seamless and intentional.
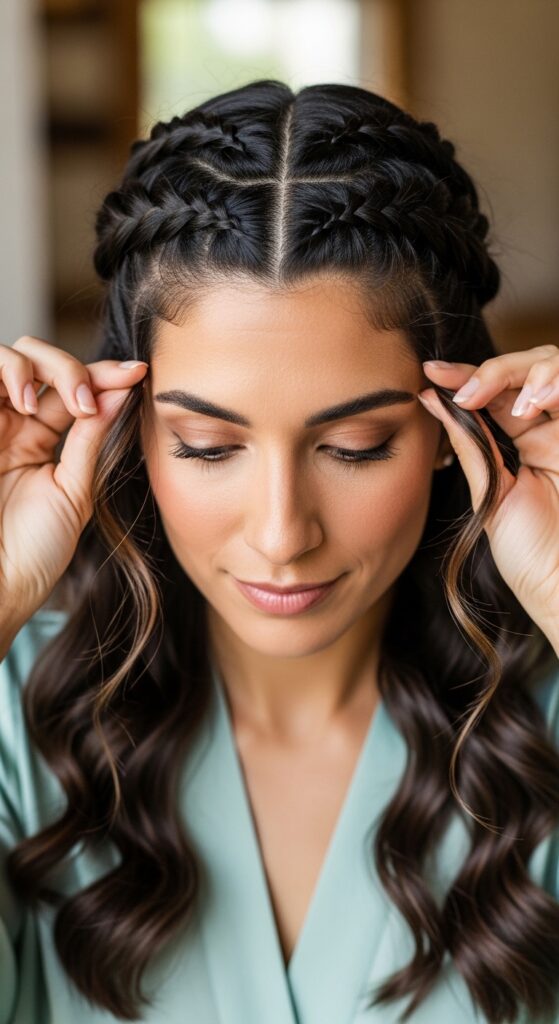
Step 9: The Final Fluff & Fix
Stand back and look in the mirror. Gently pull out a few more small pieces around your face—at your temples, by your ears, maybe a few baby hairs on your forehead. This softens the entire look.
Give everything a light mist with a flexible-hold hairspray. Not to make it stiff, but just to lock in the softness and control any major flyaways. You’re done!
Pro Tip: For Super Slippery Hair
If your hair just won’t hold a braid, try this trick. Before you start, braid your hair slightly damp and let it dry completely. Then, take the braids out. You’ll have perfect, textured waves.
Now, re-braid those waves. The texture will give the new braids so much more to grip onto. You can also lightly backcomb the sections before braiding for extra hold at the roots.
How to Make It Feel “Old Money Hair”
The old money hair aesthetic is all about looking polished but unfussy. To get that with milkmaid braids, keep it incredibly soft and low-shine. Avoid any gel or sleek products.
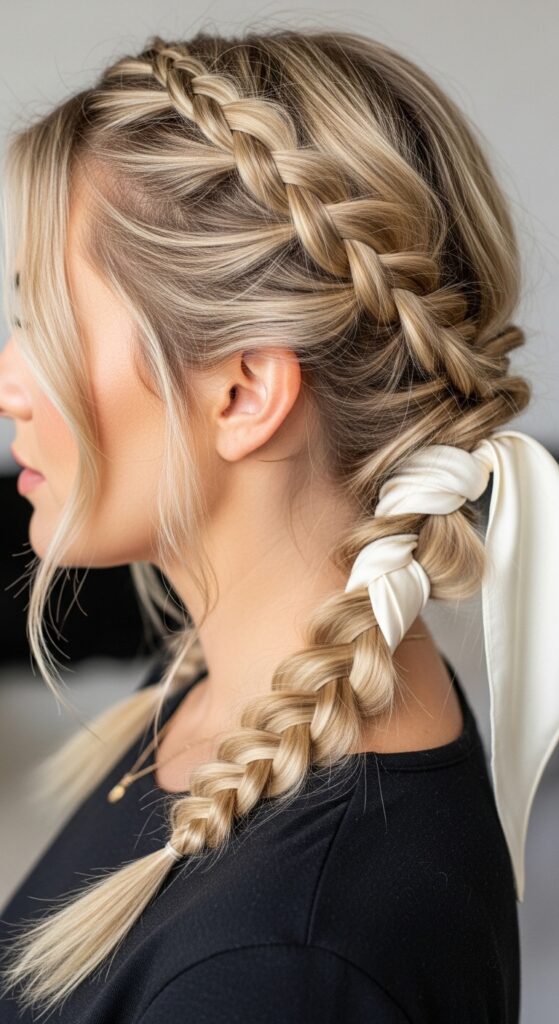
Incorporate a silk scarf into the braids, or use a single, elegant pearl-encrusted pin to secure the wrap. The key is one subtle, quality accessory that whispers luxury rather than shouting it.
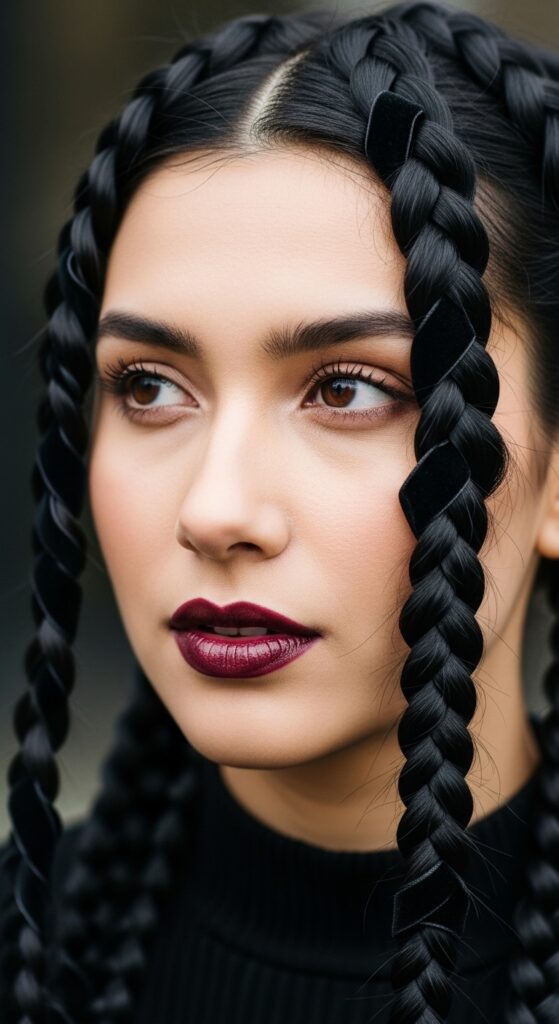
Want a Romantic Goth Twist?
This is where milkmaid braids meet romantic goth hairstyles. Start with deep, dark hair color. After fluffing the braids, weave in a single strand of black velvet ribbon or a delicate chain.
Pull out more dramatic, wispy pieces around the face. Finish with a slightly darker lip and you’ve transformed a sweet style into something beautifully moody and perfect for a vampire haircut aesthetic.
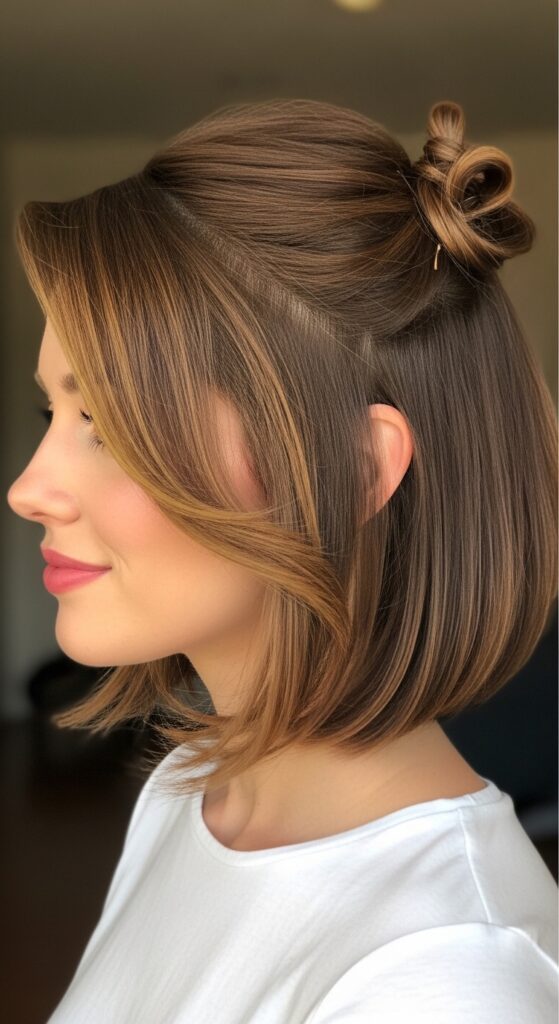
Milkmaid Braids for Short Hair & Bobs
Yes, you can do this with shorter hair! If you have a quiet luxury bob or an asymmetrical lob, you’ll make smaller, chunkier braids or even simple twists. They might not wrap all the way around.
Just pin them as far as they go, creating a half-crown effect at the top of your head. It’s a gorgeous way to add a romantic touch to a chic, short cut. The contrast is stunning.
Accessorize Your Braids Like a Pro
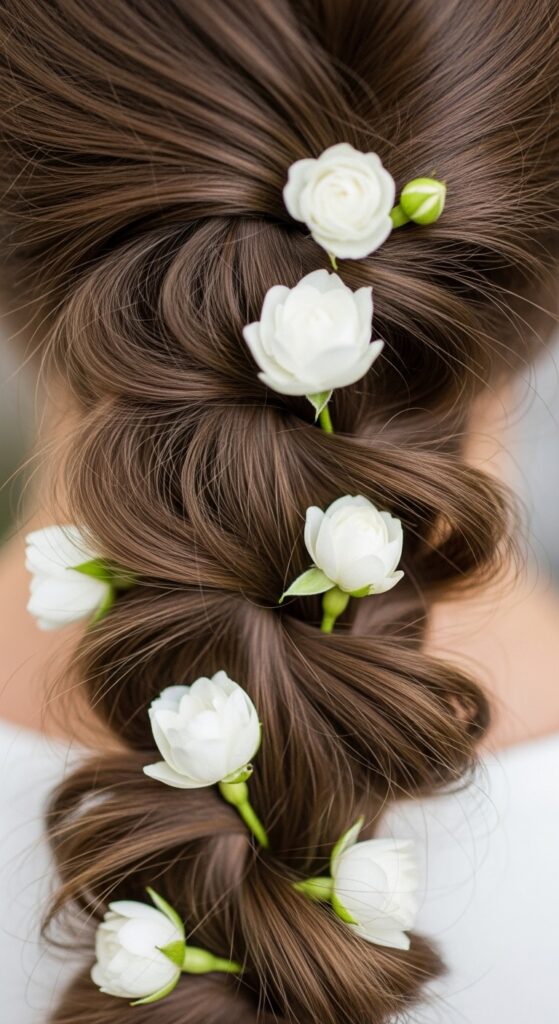
- Fresh Flowers: For a festival or wedding, tuck in small sprigs of baby’s breath or a single gardenia.
- Delicate Chains: Weave a fine gold chain through the braids before wrapping.
- Scrunchies & Ribbons: Use a fancy scrunchie to tie the end of your braid before wrapping, letting it peek out.
Accessories instantly elevate the style and make it feel special for any occasion.
Common Problems & Quick Fixes
Problem: Braids feel too tight and give you a headache.
Fix: Braid much looser from the start and fluff them out more aggressively.
Problem: Pins keep slipping out.
Fix: Make sure you’re pinning into your actual hair under the braid, and criss-cross the pins for a stronger hold. Texturizing spray is your best friend here.
From Day to Night in 2 Minutes
Got your milkmaid braids in for the day but need an evening look? Carefully pull out a few more pieces around your face to make it messier and more dramatic. Add a bold lip color.
You can also gently pull the entire crown section a little looser and higher for more volume. Swap a simple pin for a sparkly hair clip. Instant glam upgrade.
Why It’s More Than Just a Trend
While it fits perfectly with 2026 hairstyles predictions leaning into romantic and nostalgic shapes, this style has been around for centuries. That’s how you know it’s a classic.
It transcends trends like glitchy glam hair or a hime cut because it’s fundamentally about simplicity and romance. It’s a hairstyle that makes you feel beautiful and put-together without being restrictive.

Your Hair Type & This Style
Curly/Wavy Hair: You will absolutely rock this! Your natural texture will create the most beautiful, voluminous, romantic braids. Embrace it.
Fine/Straight Hair: Texture is your key. Use that dry shampoo and don’t be afraid to backcomb lightly at the roots. The “pancaking” step is crucial for you to create the illusion of thickness.
My Final Piece of Advice
Don’t aim for perfection. The first time you try this, it might feel awkward. The pins might poke. That’s okay. Your second try will be twice as fast and look twice as good.
The charm of milkmaid braids is in their soft, lived-in, slightly imperfect beauty. It’s a hairstyle with a soul. So take a deep breath, grab your pins, and give it a go.
So there you have it—your complete guide to nailing the romantic, easy updo you didn’t know you needed in your life. I promise, once you get the hang of it, this will become your go-to for hot days, bad hair days, and every day you want to feel a little extra special.
It’s the kind of style that makes you feel both put-together and free, which is a feeling I think we’re all chasing. It’s proof that the most beautiful looks are often the simplest ones to create.
Save this post to Pinterest so you always have the steps handy! And I’d love to know—will you be trying milkmaid braids this week? Tag me if you do! Let me know in the comments what your biggest hair win has been lately.