Money Piece at Home: DIY Face-Framing Highlights
Have you been scrolling through Instagram, captivated by those bright, face-framing highlights that seem to instantly lift and illuminate every complexion? That, my friend, is the magic of the money piece. Once a well-kept secret of the salon, this iconic highlighting technique has taken the beauty world by storm for its ability to deliver maximum impact with a surprisingly focused approach. The best part? You don’t need a professional appointment to get the look.
With a little know-how and the right tools, you can master the art of DIY money piece highlights from the comfort of your bathroom. This comprehensive guide will walk you through every single step, from choosing the perfect shade for your skin tone to the precise application that makes all the difference. Get ready to frame your face, brighten your features, and unlock a radiant, salon-quality look without the salon price tag.
What Exactly is the “Money Piece” Hair Trend?
Before we dive into the DIY process, let’s clarify what we’re aiming for. The money piece isn’t a full head of highlights. Instead, it’s a strategic coloring technique where two deliberately placed, brighter sections of hair at the very front of your hairline are lightened. These sections frame your face, much like a painter adding a final, bright stroke to the center of a canvas to draw the eye.
The trend originated in the 90s (think early Christina Aguilera and *Clueless*-era Alicia Silverstone) and has made a massive comeback with a more modern, nuanced execution. Today’s money piece is softer, often blended more seamlessly with the base color, but its core purpose remains the same: to create a bright, eye-opening effect that enhances your natural features and makes your complexion pop. It’s called the “money piece” because it’s the single most impactful highlight you can get—where you get the most bang for your buck.

Why You’ll Love a DIY Money Piece
Embarking on a DIY hair color project can be daunting, but the money piece is uniquely suited for at-home experimentation. Here’s why:
Focused Application: Unlike all-over color or a full head of highlights, you are only working on a small, manageable section of hair. This significantly reduces the margin for error and makes the process less overwhelming.
Cost-Effective Glow-Up: Salon visits for dimensional color can be expensive. A box of lightener and a tube of toner is a fraction of the cost, allowing you to achieve a high-fashion look on a budget.
Low Commitment: If you decide the look isn’t for you, it’s much easier to blend or grow out two face-framing pieces than it is to correct an entire head of hair. It’s the perfect way to test the waters of a brighter shade.
Customizable Impact: You are in complete control. You can go for a subtle, sun-kissed effect or a bold, platinum statement. The level of drama is entirely up to you.

Gathering Your At-Home Salon Toolkit
Preparation is the key to a successful DIY color session. Having everything you need within arm’s reach will make the process smooth and stress-free. Here’s your essential checklist:
Lightening Kit or Bleach: This is non-negotiable. Unless you have very light blonde hair already, you will need a lightener to lift your natural pigment. Choose a reputable brand’s bleaching kit, which often comes with developer powder. Alternatively, purchase a cream lightener and a separate bottle of 20-volume developer for a controlled lift.
Toner (Crucial!): Lightened hair often reveals underlying warm or brassy tones (yellow or orange). Toner is a demi-permanent color that neutralizes these unwanted tones to achieve a clean, ashy, beige, or pearl blonde. This step is what separates a professional-looking result from a brassy one.
Application Tools: A tint brush and a small non-metal mixing bowl will give you the precision you need. Avoid the clunky bottles that come in some kits.
Hair Clips: You’ll need these to section your hair and keep the non-colored parts out of the way.
Highlighting Foils or Plastic Wrap: Foils help to process the lightener evenly and prevent it from drying out. They also stop the bleach from touching and staining the rest of your hair.
Gloves: Always protect your hands! Bleach is harsh on the skin.
An Old Towel and T-Shirt: Things can get messy. Protect your clothes and surroundings.
A Timer: Do not guess the processing time. Precision is everything.

Choosing the Perfect Shade for Your Skin Tone
The goal of the money piece is to brighten and flatter, so selecting the right tone is paramount. Your perfect shade should complement your skin’s undertones.
For Cool Undertones (pink, red, or bluish hints): If silver jewelry flatters you more than gold, you likely have cool undertones. Opt for money pieces in icy platinum, pearl, silver, or ash blonde. These cool, ashy tones will neutralize redness in the skin and create a stunning, high-contrast effect.
For Warm Undertones (yellow, peachy, or golden hints): If gold jewelry makes your skin glow, you have warm undertones. Embrace them with money pieces in honey, caramel, golden blonde, or strawberry blonde. These warm hues will enhance your natural glow and look seamlessly sun-kissed.
For Neutral Undertones: You have the best of both worlds! You can pull off almost any shade. Consider a beige or neutral sandy blonde for a universally flattering look, or feel free to experiment with either warm or cool tones based on your personal preference.
For Deeper Skin Tones: A money piece can look absolutely breathtaking. Rich, warm tones like caramel, amber, copper, or honey are incredibly flattering. For a bolder look, consider a burgundy or rose gold tone for a truly unique and vibrant frame.

The Step-by-Step DIY Application Process
Take a deep breath. You’ve got your tools, you’ve chosen your shade, and now it’s time to create. Follow these steps carefully for a flawless application.
Step 1: The Strand Test. This is your safety net. Mix a small amount of lightener and apply it to a single, hidden strand of hair (from the section you plan to lighten). Process it for the recommended time and rinse. This will show you exactly how your hair will react to the product and how long it truly takes to reach your desired level of lightness.
Step 2: Section Your Hair. Start with dry, unwashed hair (the natural oils will protect your scalp). Use a tail comb to create a part down the middle of your head. Then, create your “money piece” section. Isolate a two-inch-wide section of hair on either side of your part, starting at the root and going all the way back to about your ears. Clip the rest of your hair securely out of the way.
Step 3: Mix Your Lightener. Follow the instructions on your lightening kit precisely. Mix only the amount you think you’ll need in your non-metal bowl. The consistency should be like thick yogurt.
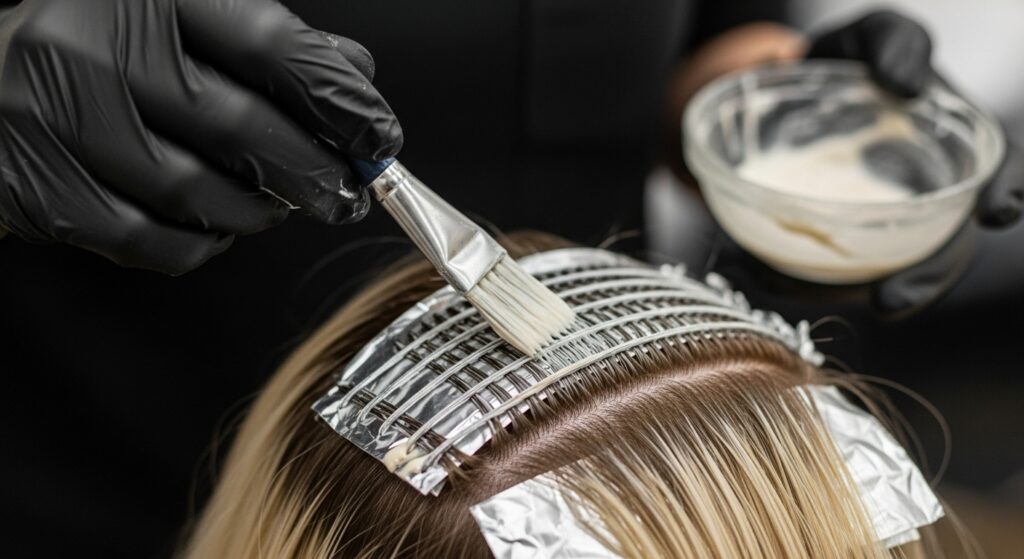
Step 4: Apply the Lightener. Wearing your gloves, use your tint brush to apply the lightener to one of the isolated sections. Start about a quarter-inch from your scalp (to prevent a hot root) and saturate the hair evenly down to the ends. Once the length is covered, you can go back and gently apply a tiny amount to the very root area. Place this section onto a pre-cut piece of foil. Repeat on the other side.
Step 5: Process and Check. Set your timer for the minimum time recommended on your lightening kit. Check your hair every 5-10 minutes. You are aiming for a pale yellow color (like the inside of a banana peel). It does not need to be white—the toner will take care of that. Do not exceed the maximum processing time.
Step 6: Rinse and Shampoo. Once you’ve reached the desired pale yellow, carefully rinse the lightener out of the two sections with lukewarm water, keeping the foils in place to contain the mess. Then, remove the foils and shampoo only the lightened sections to ensure all the lightener is removed.
Step 7: Tone to Perfection. This is the magic step. Mix your toner according to its instructions. Apply it evenly to the lightened sections, ensuring every strand is coated. Process for the time stated on the toner’s package (usually 10-20 minutes).
Step 8: The Final Rinse and Condition. Rinse the toner out completely with cool water. Then, apply a rich conditioner or hair mask to the entire length of your hair, focusing on the newly lightened pieces which will be more porous. Rinse again.
Aftercare: Keeping Your Money Piece Vibrant and Healthy
Your beautiful new highlights need a little TLC to stay bright and your hair needs to stay healthy. Bleaching is a chemical process, so a proper aftercare routine is essential.
Purple Shampoo is Your Best Friend: Invest in a good purple or blue shampoo. Use it once a week (or as needed) to neutralize any brassy, yellow tones that may develop over time. Leave it on for 3-5 minutes for a deeper tone correction.
Deep Condition Regularly: Lightened hair is more prone to dryness and damage. Use a deep conditioning mask or hair treatment at least once a week to restore moisture, strength, and shine.
Heat Protectant is Non-Negotiable: Before using any hot tools like blow dryers, straighteners, or curling irons, always spray a heat protectant on your hair. This creates a barrier that minimizes heat damage.
Turn Down the Heat: When you do style, use the lowest effective heat setting. When rinsing your hair, use cool water to help seal the hair cuticle and boost shine.
Trim Frequently: Regular trims every 6-8 weeks will prevent split ends from traveling up the hair shaft and keep your money piece looking fresh and healthy.

Embrace Your Inner Colorist
Creating a money piece at home is an empowering and creative process. It allows you to take control of your look and achieve a major style transformation with confidence. By following this detailed guide, you have all the knowledge you need to avoid common pitfalls and create a stunning, face-framing highlight that looks like it came from a top salon.
Remember, hair color is an art, and a little practice makes perfect. So, gather your supplies, put on your favorite playlist, and get ready to unveil a brighter, more radiant you. Your signature money piece is waiting to be discovered.